How to operate a Landmann professional grill, a comprehensive guide to mastering your outdoor cooking experience. This guide delves into everything from setup and lighting to advanced techniques and safety precautions, ensuring you achieve exceptional results every time.
This guide covers the entire process, from initial setup to advanced grilling techniques, ensuring you can confidently use your Landmann Professional Grill to prepare delicious meals. It details various models, pre-cooking preparations, lighting and maintenance, cooking techniques, safety precautions, cleaning and maintenance, troubleshooting, and advanced tips. You’ll find detailed instructions and essential information to maximize your grilling experience.
Introduction to the Landmann Professional Grill
The Landmann Professional Grill series offers a range of high-performance outdoor cooking solutions for discerning grill enthusiasts. Known for their robust construction, versatile features, and exceptional heat distribution, these grills cater to both casual gatherings and large-scale events. They provide a reliable and consistent cooking experience, making them popular choices for outdoor chefs.This detailed exploration will delve into the key features, available models, assembly procedures, and comparative analysis of the Landmann Professional Grill series, equipping you with the knowledge to choose the perfect model for your needs.
Landmann Professional Grill Models and Features
The Landmann Professional Grill series boasts a variety of models, each tailored to specific needs and capacities. Understanding the differences in features, dimensions, and price points is crucial for selecting the right grill. Various sizes and configurations cater to diverse user requirements.
- The Landmann Professional series includes models like the 1200, 1500, and 2000, each with unique specifications. The variations typically involve differences in cooking surface area, burner configurations, and included accessories. For example, the 2000 model may include a built-in warming rack, while the 1200 may focus on portability.
- The models vary in size, from compact units ideal for smaller gatherings to larger models accommodating multiple cooks and large-scale events. The cooking surface area and the number of burners are important factors to consider.
- The construction materials, such as the frame and cooking grates, also contribute to the grill’s durability and heat retention.
General Assembly Procedure
Following the manufacturer’s instructions is crucial for safe and proper assembly. A detailed manual is included with each grill, providing a step-by-step guide to ensure the grill is set up correctly and safely. Carefully read and follow all instructions provided.
- Thoroughly inspect all components for damage before assembly. Any damage should be reported to the seller immediately.
- Refer to the assembly diagram provided in the manual for step-by-step instructions. The diagram will clearly show the order and connection of each part.
- Ensure all bolts and nuts are securely tightened according to the specifications in the manual. Over-tightening can damage components.
- Connect the gas supply to the grill according to the manufacturer’s instructions. Safety is paramount. Never connect or disconnect the gas supply while the grill is in use.
Comparison of Landmann Professional Grill Models
A comparative analysis of the models provides a clearer understanding of the features, dimensions, and price points of each option.
| Model | Dimensions (LxWxH) | Cooking Surface Area | Features | Price (Estimated) |
|---|---|---|---|---|
| Landmann Professional 1200 | 120cm x 60cm x 85cm | 60cm x 40cm | Two burners, side burner, warming rack | $800-$900 |
| Landmann Professional 1500 | 150cm x 70cm x 90cm | 80cm x 50cm | Three burners, side burner, warming rack, rotisserie kit | $1000-$1200 |
| Landmann Professional 2000 | 200cm x 80cm x 100cm | 100cm x 60cm | Four burners, side burner, warming rack, rotisserie kit, built-in smoker box | $1500-$1800 |
Note: Prices are estimates and may vary depending on retailer and promotions. Features and dimensions may differ slightly from the actual models. Always check with the manufacturer for the most up-to-date information.
Pre-Cooking Preparations
Mastering the Landmann Professional Grill hinges on meticulous pre-cooking preparations. Proper preparation ensures optimal performance, consistent results, and a safe grilling experience. This section details the essential steps for preparing the grill for various culinary creations.A well-maintained grill is a crucial element for a successful cookout. This section details the equipment, cleaning, and preparation steps to achieve consistent results and ensure the grill’s longevity.
These practices will not only enhance the grilling experience but also prevent potential issues and ensure the safety of the user.
Essential Tools and Equipment
The Landmann Professional Grill, while robust, benefits from supplementary tools for enhanced performance. A good selection of utensils and accessories can dramatically improve the cooking experience. Essential tools include tongs, spatulas, a meat thermometer, and a brush for cleaning the grates. These tools contribute to efficient food handling and safe grilling practices.
Grilling Area Preparation
Preparing the grilling area is critical for various food types. Proper surface preparation guarantees even heat distribution and prevents sticking. For optimal performance, ensure the grill grates are clean and properly oiled before commencing cooking. Thoroughly cleaning the grates with a wire brush or scraper removes any debris from previous uses. Subsequently, apply a thin layer of oil to the grates.
Cleaning and Maintenance
Regular cleaning and maintenance are vital for maintaining the grill’s performance and longevity. Cleaning the grill before each use removes any remnants from previous cookouts, preventing food particles from sticking and maintaining the grill’s optimal performance. Thorough cleaning with a brush or scraper ensures even heat distribution and prevents food from sticking. After each use, allow the grill to cool completely before cleaning.
Step-by-Step Guide for Preparing the Grill
A structured approach to preparing the grill enhances the cooking experience. Different types of cooking demand varying degrees of preparation. The following steps offer a comprehensive guide for preparing the grill for various culinary creations:
- Inspect the grill for any damage or obstructions.
- Clean the grill grates thoroughly using a wire brush or scraper to remove any residue from previous cooking sessions.
- Apply a thin layer of oil to the grill grates, ensuring even coverage.
- Preheat the grill to the desired temperature, typically 350-450 degrees Fahrenheit, depending on the type of food being cooked.
- Monitor the grill’s temperature to maintain consistent heat.
Essential Grilling Accessories
A range of accessories enhances the Landmann Professional Grill’s versatility. These accessories expand the grill’s capabilities for diverse cooking needs. Essential accessories include:
- Grill brush: For cleaning and maintaining the grates.
- Tongs and spatulas: For handling food safely and efficiently.
- Meat thermometer: For ensuring food is cooked to the correct internal temperature.
- Grill basket: For cooking vegetables or seafood.
- Grill spatula: For flipping and turning food items.
- Charcoal/propane: For fuel.
- Grill cover: For protecting the grill from the elements.
Lighting and Maintaining the Grill

Mastering the Landmann Professional Grill involves more than just placing food on the grates. Crucial to achieving consistent, delicious results is understanding the intricacies of lighting and maintaining the ideal cooking temperature. This section delves into the nuances of ignition, temperature regulation, and airflow management, ensuring your grilling experience is optimized for success.Effective grilling hinges on maintaining a stable temperature throughout the cooking process.
Fluctuations in heat can lead to unevenly cooked food, impacting both taste and texture. Precise control over the grill’s heat output is paramount, and this section provides a comprehensive guide to achieving this.
Charcoal Lighting Methods
Proper charcoal lighting is crucial for establishing a stable cooking temperature. Different methods offer varying degrees of control and efficiency. A crucial factor in successful charcoal lighting is achieving a consistent, even heat distribution across the grill grates.
- The Chimney Method: This method involves stacking charcoal briquettes in a chimney starter. The heat from the bottom of the chimney slowly ignites the charcoal, producing a consistent, controlled burn. This method promotes even heating and minimizes flare-ups.
- The Direct Method: Using a lighter or matches, directly ignite the charcoal briquettes. While potentially faster, this method requires more vigilance to avoid flare-ups and achieve an even temperature distribution across the grill grates.
Propane Ignition
Propane grills offer a quicker and more straightforward ignition process. However, maintaining a consistent temperature demands attention to gas valve adjustments.
- Gas Valve Adjustment: The propane gas valve controls the amount of gas flowing to the burner. Adjusting this valve allows for precise control of the flame’s intensity and, consequently, the grill’s temperature.
- Flame Distribution: The design of the burner system significantly impacts the distribution of heat. Understanding how the burner disperses heat is essential for consistent cooking temperatures across the grill surface.
Maintaining Consistent Temperature
Maintaining a stable temperature is vital for achieving perfectly cooked food. Factors like wind, heat loss, and the type of food being cooked can impact the grill’s temperature.
- Airflow Management: Proper airflow is critical for a stable temperature. The grill’s vents allow you to regulate airflow, influencing the intensity of the heat source. Adjusting these vents allows for fine-tuning of the temperature.
- Temperature Monitoring: Using a reliable thermometer, monitor the grill’s temperature throughout the cooking process. Regular checks enable you to adjust the heat source as needed to maintain the desired temperature range.
- Adding Fuel: Adding more charcoal or propane as needed to compensate for heat loss is essential. The frequency of fuel additions depends on the cooking method and the type of food being prepared.
Troubleshooting Lighting and Temperature Issues
Troubleshooting common issues related to lighting and temperature control is crucial for successful grilling. Understanding the potential problems and their solutions allows for swift corrective action.
- Charcoal Not Lighting: Insufficient air circulation or damp charcoal are common causes. Ensure proper air circulation and use dry charcoal briquettes.
- Temperature Fluctuations: Incorrect airflow management or heat loss from the grill are possible reasons. Adjusting vents and covering the grill to minimize heat loss are effective solutions.
- Propane Not Igniting: A faulty igniter or a blocked gas line are possible causes. Check the igniter and ensure the gas line is unobstructed.
Airflow Management
Proper airflow management is paramount for maintaining consistent temperatures and optimizing cooking outcomes. Adjusting vents allows for precise control of heat distribution and intensity.
- Vent Adjustment: Adjusting the vents on the grill allows for precise regulation of airflow. This control over airflow enables fine-tuning of the heat intensity.
- Impact on Heat Distribution: Airflow directly impacts how heat is distributed across the grill grates. Understanding this relationship enables better control over cooking outcomes.
Temperature and Airflow Regulation
Precise temperature and airflow regulation are critical for successful grilling. This involves understanding the interaction between these factors and the grill’s design.
- Precise Adjustment: The precise adjustment of vents and fuel sources is key to achieving consistent temperatures. This process ensures consistent heat distribution.
- Maintaining Stability: Consistent adjustments to airflow and fuel supply maintain a stable cooking environment, crucial for perfectly cooked food.
Cooking Techniques
Mastering the Landmann Professional Grill involves understanding and employing various cooking techniques. Different methods allow you to achieve diverse culinary results, from perfectly seared steaks to tender vegetables. By employing both direct and indirect heat, you can control the cooking process and ensure even doneness. This section delves into these techniques, offering practical guidance on using your grill for a variety of food types.
Direct Heat Grilling
Direct heat grilling involves placing food directly over the heat source. This method is ideal for searing and quickly cooking foods, such as steaks, burgers, and vegetables. The intense heat creates characteristic grill marks and develops a flavorful crust. Proper temperature control is crucial to avoid burning food before it’s cooked through.
Indirect Heat Grilling
Indirect heat grilling involves cooking food away from the direct heat source. This method is suitable for cooking larger cuts of meat, poultry, and even whole fish. It allows for slower cooking, ensuring even doneness and preventing burning. Indirect heat is also perfect for maintaining food at a specific temperature, such as when preparing a slow-cooked pork shoulder or a roasted chicken.
Using the Grill for Different Food Types
The Landmann Professional Grill is versatile and can be used for various food types. This section provides a general guideline on how to use the grill for meats, vegetables, and seafood.
- Meats: Steaks, chops, and burgers benefit from direct heat to achieve a flavorful sear. Larger cuts of meat, such as roasts and whole chickens, are best cooked indirectly to ensure even cooking. Controlling the temperature is vital to avoid overcooking or undercooking.
- Vegetables: Many vegetables, such as bell peppers, onions, and zucchini, can be grilled directly. Their tenderness and caramelization are enhanced by direct heat. The cooking time will vary based on the vegetable type and desired doneness.
- Seafood: Seafood, including fish fillets and shrimp, can be grilled using both direct and indirect heat. Direct heat is often used for searing, while indirect heat helps cook the fish more thoroughly. Always be mindful of the cooking time, as seafood cooks quickly and can easily become overcooked.
Optimal Cooking Times and Temperatures
Achieving the perfect results requires careful attention to cooking times and temperatures. The cooking time and temperature depend on the food type, thickness, and desired doneness. Always use a meat thermometer to ensure accurate internal temperatures for meats.
| Food Type | Cooking Technique | Approximate Cooking Time (minutes) | Temperature (°C) |
|---|---|---|---|
| Steaks (1.5 inch thick) | Direct | 3-5 per side | 200-230 |
| Chicken Breast (1 inch thick) | Direct/Indirect | 15-20 | 180-210 |
| Vegetables (e.g., Peppers, Onions) | Direct | 5-10 | 200-230 |
| Fish Fillets (0.5 inch thick) | Direct | 3-5 per side | 200-230 |
Achieving Perfect Grill Marks
Achieving perfect grill marks on various meats is a key element of grilling success. Several factors influence the quality of grill marks.
- Preheating: The grill should be preheated to the appropriate temperature before placing the food on it.
- Oil Application: Oiling the meat before grilling helps prevent sticking and promotes even browning.
- Cooking Direction: Avoid moving the food too much during the searing process. This helps develop consistent grill marks.
- Thickness: The thickness of the meat significantly impacts the cooking time and the development of grill marks.
Safety Precautions
Safe grilling is paramount. Proper handling and awareness of potential hazards are crucial for enjoyable and accident-free experiences. This section details essential safety precautions to ensure a secure and responsible grilling session.
Potential Safety Hazards
Several potential hazards can arise when operating a Landmann Professional Grill. These include burns from the hot grill surface, fire hazards if not properly maintained, and injuries from improper handling of the grill or its components. Gas leaks from improperly connected or damaged gas lines are also a serious concern. Ensuring proper ventilation is vital to avoid carbon monoxide buildup.
Emergency Procedures
A pre-emptive approach to potential issues is key. Knowing how to respond to emergencies is critical for minimizing damage and ensuring the safety of yourself and others. Having a clear action plan is crucial.
- Fire: If a fire starts, immediately disconnect the gas supply to the grill. Use a fire extinguisher rated for Class B fires (flammable liquids and gases) if available and appropriate. If the fire is large or uncontrollable, evacuate the area and call emergency services immediately.
- Gas Leak: If you suspect a gas leak, immediately evacuate the area and call emergency services. Do not attempt to light the grill or use any open flame near the grill. Ensure all ignition sources are turned off.
- Burns: If someone suffers a burn, immediately cool the affected area with cool running water for at least 10-20 minutes. Seek medical attention if necessary. Avoid using ice or applying ointments directly to the burn.
Safe Handling and Storage
Proper handling and storage of the grill are essential for preventing accidents. Ensure the grill is stored in a safe and accessible location, away from flammable materials. Always ensure the grill is completely cooled before storing it.
- Handling: Use appropriate lifting equipment to avoid injury. The grill is heavy. Handle it with care, and avoid lifting it alone. Be sure to place the grill on a stable, level surface.
- Storage: Store the grill in a dry, well-ventilated area, away from direct sunlight and flammable materials. Ensure the grill is completely cooled before storing.
- Cleaning: Clean the grill thoroughly after each use. Remove any grease or food residue, and ensure the grill grates are properly cleaned. This is crucial to prevent grease fires.
Safety Equipment
Using appropriate safety equipment can significantly reduce the risk of injury. This includes using heat-resistant gloves and mitts when handling the grill and its components.
- Heat-Resistant Gloves and Mitts: Always wear appropriate heat-resistant gloves or mitts when handling hot surfaces. This protects your hands and reduces the risk of burns. Ensure the gloves are suitable for the temperature of the grill.
- Eye Protection: Wear eye protection, such as safety glasses or goggles, when working around the grill. This safeguards your eyes from sparks, hot grease, or other potential hazards.
Safety Checklist
A comprehensive checklist can help ensure a safe grilling experience. This checklist Artikels critical steps to follow before, during, and after each grilling session.
| Step | Action |
|---|---|
| Before Grilling | Inspect gas connections for leaks. Ensure adequate ventilation. Check the grill for damage. Wear appropriate safety gear. |
| During Grilling | Maintain proper ventilation. Keep a safe distance from the grill. Never leave the grill unattended. Use appropriate tools. Monitor the grill’s temperature. |
| After Grilling | Allow the grill to cool completely. Clean and store the grill properly. Dispose of any waste properly. |
Cleaning and Maintenance
Proper cleaning and maintenance are crucial for the longevity and optimal performance of your Landmann Professional grill. Regular upkeep ensures the grill remains in excellent working condition, prevents premature wear and tear, and maximizes its lifespan. By following these steps, you can enjoy consistent grilling success and minimize the risk of potential issues.
Post-Cooking Cleaning Procedures
Maintaining a clean grill after each use is vital to prevent the build-up of food residues, grease, and grime. This build-up can lead to unpleasant odors, potential fire hazards, and ultimately, a decline in the grill’s performance. Regular cleaning keeps the grill in pristine condition and ensures it continues to function efficiently.
- Cooking Grates: Immediately after use, while the grates are still warm, use a grill brush to remove any loose food particles. A scraper or spatula can be used to remove any stubborn bits. For more stubborn residue, soak the grates in a solution of warm water and mild dish soap for 15-30 minutes. Rinse thoroughly with clean water and dry completely before storing.
This prevents rust and ensures the grates remain in good condition.
- Burners: Remove any excess grease or debris from the burner grates. Use a wire brush or scraper to carefully clean the burner components, ensuring no obstructions or blockages are present. Avoid using harsh chemicals or abrasive materials, as this can damage the burner components. After cleaning, rinse with water and dry completely.
- Exterior Components: Wipe down the exterior of the grill with a damp cloth to remove any spills or food residue. Use a mild dish soap and water solution, if needed. For stubborn stains, use a non-abrasive cleaner. Ensure all components are completely dry before storing.
Importance of Regular Maintenance
Regular maintenance, beyond immediate post-cooking cleaning, is essential for prolonged grill performance. This includes routine checks and cleaning to prevent build-up of grease, grime, and debris, thereby maintaining the grill’s efficiency and safety.
- Frequency: Clean the grates and burners after each use. Thoroughly clean the entire grill, including the exterior, at least once a month. Perform a more comprehensive deep clean, including inspecting all components for damage or wear, every three to six months.
- Inspecting for Damage: Periodically inspect the grill for any signs of damage, such as warped grates, loose connections, or cracks in the casing. Promptly address any identified issues to prevent further deterioration and potential hazards.
- Grease Management: Regular cleaning of the grease tray and ensuring the proper disposal of grease are important steps to maintain a safe and efficient grilling experience. This prevents the buildup of grease and reduces the risk of fire hazards.
Storing the Grill
Proper storage is essential for maintaining the condition of your Landmann Professional grill.
- Thorough Drying: Ensure that all parts of the grill, including the cooking grates, burners, and exterior components, are completely dry before storing. Moisture can lead to rust and other issues.
- Covering: Cover the grill with a suitable grill cover when not in use. This protects it from the elements and prevents the build-up of debris and dust.
- Secure Storage: Store the grill in a safe, dry location. Avoid storing it near flammable materials or areas prone to extreme temperature fluctuations.
Handling Different Stains and Residues
Various stains and residues may accumulate on the grill over time. Knowing how to address them effectively ensures the grill’s continued cleanliness and longevity.
- Burnt Food: For stubborn burnt food residues, use a grill brush or scraper to remove as much as possible. A solution of warm water and dish soap can be applied to the affected areas for a period of time to loosen the residue before scrubbing. Be careful not to damage the grill surface with abrasive materials.
- Grease Stains: Grease stains can be treated with a mild dish soap and water solution. For more persistent stains, a non-abrasive grill cleaner can be applied. Always follow the manufacturer’s instructions for the cleaner.
- Rust Prevention: Regular cleaning and drying are essential for preventing rust. If rust appears, treat it with a suitable rust remover following the product instructions. Addressing rust early helps maintain the grill’s integrity.
Troubleshooting Guide: How To Operate A Landmann Professional Grill
Maintaining optimal performance of your Landmann Professional Grill requires understanding potential issues and their solutions. This guide provides a comprehensive troubleshooting section, outlining common problems and their corresponding remedies, empowering you to efficiently resolve any issues that may arise during operation.Proper diagnosis and timely intervention are crucial to preventing further complications and ensuring a safe and enjoyable grilling experience.
This troubleshooting section aims to equip you with the knowledge necessary to address any minor issues effectively.
Common Grill Problems and Solutions, How to operate a landmann professional grill
Troubleshooting common issues promptly ensures a smooth and efficient grilling experience. This section provides a structured approach to identifying and resolving potential problems.
| Problem | Possible Cause | Solution |
|---|---|---|
| Grill won’t light | Faulty igniter, obstructed gas flow, low gas supply | Check the igniter for damage. Ensure the gas supply line is clear and the gas tank is full. If the problem persists, consult a qualified technician. |
| Uneven cooking | Incorrect heat distribution, uneven charcoal placement, improper airflow | Adjust the airflow vents to ensure proper air circulation. Distribute the charcoal evenly on the grill grate. Ensure the heat source is evenly spread across the cooking surface. |
| Charring food | High heat setting, inadequate airflow, food placed too close to heat source | Reduce the heat setting. Adjust airflow vents to regulate the heat. Position food at an appropriate distance from the heat source to prevent burning. |
| Gas leaks | Damaged gas lines, loose connections | Immediately shut off the gas supply. Do not attempt to fix the leak yourself. Contact a qualified gas technician for inspection and repair. Safety is paramount. |
Simple Grill Repairs
Addressing minor issues yourself can save time and money. This section details simple repairs within your capabilities.
- Cleaning the Igniter: A dirty igniter can prevent proper ignition. Clean the igniter with a wire brush or a small, stiff brush to remove any debris or buildup. Ensure the igniter is clean and sparking before attempting to light the grill.
- Checking Gas Supply: Verify the gas tank is full and the gas supply line is securely connected. Ensure there are no obstructions or kinks in the line.
- Adjusting Airflow Vents: Adjusting airflow vents can significantly impact the cooking process. Experiment with different vent positions to find the optimal balance for the desired cooking temperature and ensure proper air circulation.
Step-by-Step Procedure for Fixing Common Issues
A systematic approach to resolving problems is essential. This section provides step-by-step guidance.
- Identify the Problem: Carefully observe the issue. Is the grill not lighting? Is the cooking uneven? Note the specific problem.
- Check the Obvious: Inspect the gas supply, igniter, and airflow vents for any visible obstructions or issues. Ensure the gas tank is full.
- Apply Solutions: Refer to the troubleshooting table for possible causes and solutions. Implement the suggested solutions.
- Test and Verify: After implementing the solution, test the grill to confirm if the issue has been resolved. Continue to monitor the grill’s operation to prevent recurrence of the issue.
Advanced Grilling Tips
Elevating your grilling experience from basic to exceptional involves mastering advanced techniques. This section delves into sophisticated methods for achieving exquisite results, from searing meats to crafting flavorful marinades and rubs. Understanding the nuances of cooking different ingredients and optimizing your Landmann Professional Grill will significantly enhance your culinary creations.
Mastering the Sear
Achieving a perfect sear, characterized by a crispy, caramelized exterior, is crucial for flavorful grilled food. High heat and precise timing are key. A well-maintained grill, preheated to the optimal temperature for the specific food, is essential for a consistent and successful sear. The right sear temperature varies depending on the food type and thickness. Thicker cuts require longer searing times and higher temperatures.
Using a meat thermometer is vital to ensure internal doneness while maintaining a perfect sear.
Cooking Methods for Different Foods
Different cooking methods optimize the flavor and texture of various ingredients. Meats, vegetables, and seafood react differently to heat, requiring tailored approaches.
- Meats: Achieving the desired doneness for various meats demands careful attention to thickness and cooking time. Thicker cuts, such as steaks, require longer grilling times and higher temperatures to develop a deep sear. Thin cuts, like chicken breasts, cook more quickly and need lower temperatures to prevent overcooking. Understanding the internal temperature requirements of different meats ensures the food is cooked safely and to the desired level of doneness.
Use a meat thermometer to achieve optimal results.
- Vegetables: Vegetables are best grilled at medium-high temperatures. They should be seasoned and prepped in advance to prevent sticking and maintain moisture. Consider the natural sweetness and tenderness of each vegetable to decide on optimal grilling time.
- Seafood: Seafood, like fish and shrimp, requires a shorter grilling time to prevent overcooking. Use medium-low heat to maintain moisture and prevent the fish from becoming dry. Proper preparation, including seasoning and correct cooking time, are vital for ensuring a delicious and tender result.
Crafting Flavor Profiles with Marinades and Rubs
Marinades and rubs are essential tools for adding depth and complexity to grilled dishes. They impart distinct flavors and enhance the natural tastes of the food.
- Marinades: Marinades are flavorful mixtures that infuse the food with moisture and flavor. They can be acidic, sweet, or savory, and they work by tenderizing and adding taste to the meat or other ingredients.
- Rubs: Rubs are mixtures of spices, herbs, and seasonings that coat the food to add depth and a rich, complex flavor profile. Experiment with various combinations to create unique flavor profiles.
The Importance of High-Quality Ingredients
High-quality ingredients are the foundation of exceptional grilling. Using fresh, high-quality produce and meats will significantly impact the final dish’s flavor and texture. Fresh, flavorful ingredients contribute to a more satisfying culinary experience.
Achieving a Perfect Sear
Achieving a perfect sear requires a precise combination of technique, temperature, and timing. The key to a perfect sear is to maintain high heat and control the cooking time. A hot grill ensures that the exterior of the food cooks quickly, forming a desirable sear. This is especially important for meats like steak and fish, where a well-developed crust is essential for enhancing flavor.
Illustrative Examples
Mastering the Landmann Professional Grill involves understanding how to prepare and cook various foods effectively. This section provides practical examples to enhance your grilling experience, from juicy steaks to vibrant vegetables and flavorful chicken. These detailed instructions will help you achieve perfect results every time.
Steak Preparation and Cooking
Preparing a delicious steak involves careful attention to pre-cooking steps and grilling techniques. A properly seasoned and rested steak yields the best results.
- Preparation: Select a high-quality steak, ensuring it is at room temperature. Pat it dry with paper towels. Season generously with salt, pepper, and any preferred steak seasoning. Allow the steak to rest for at least 15 minutes before grilling.
- Grilling: Preheat the grill to medium-high heat. Place the steak on the preheated grill grates. Sear the steak for 2-3 minutes per side for medium-rare, adjusting cooking time according to your desired doneness. Use a meat thermometer to ensure the internal temperature reaches the target level. For medium, the internal temperature should reach 130-135°F (54-57°C).
For medium-well, it should reach 140-145°F (60-63°C).
- Resting: Remove the steak from the grill and let it rest for 5-10 minutes before slicing. This allows the juices to redistribute throughout the steak, resulting in a more tender and flavorful final product.
Grilled Vegetable Recipe
Grilled vegetables offer a healthy and flavorful alternative to traditional side dishes. This recipe emphasizes simple preparation and highlighting the natural flavors of the ingredients.
- Ingredients: Choose a variety of colorful vegetables like bell peppers (red, yellow, orange), zucchini, onions, cherry tomatoes, and mushrooms. Season with herbs like oregano, thyme, and rosemary, and a drizzle of olive oil.
- Preparation: Slice or chop the vegetables into uniform pieces for even cooking. Toss the vegetables with olive oil, salt, pepper, and your chosen herbs.
- Grilling: Preheat the grill to medium heat. Place the vegetables in a single layer on the grill grates. Grill for 5-7 minutes, turning occasionally, until tender and slightly charred.
Chicken Grilling Guide
Grilling chicken offers a delicious and versatile way to prepare this popular protein. The key is to avoid overcooking, which can lead to dryness.
- Preparation: Marinate the chicken pieces in a mixture of your preferred marinade for at least 30 minutes. This enhances flavor and tenderness.
- Grilling: Preheat the grill to medium-high heat. Place the marinated chicken pieces on the grill grates. Grill for 10-15 minutes, turning occasionally, until the internal temperature reaches 165°F (74°C).
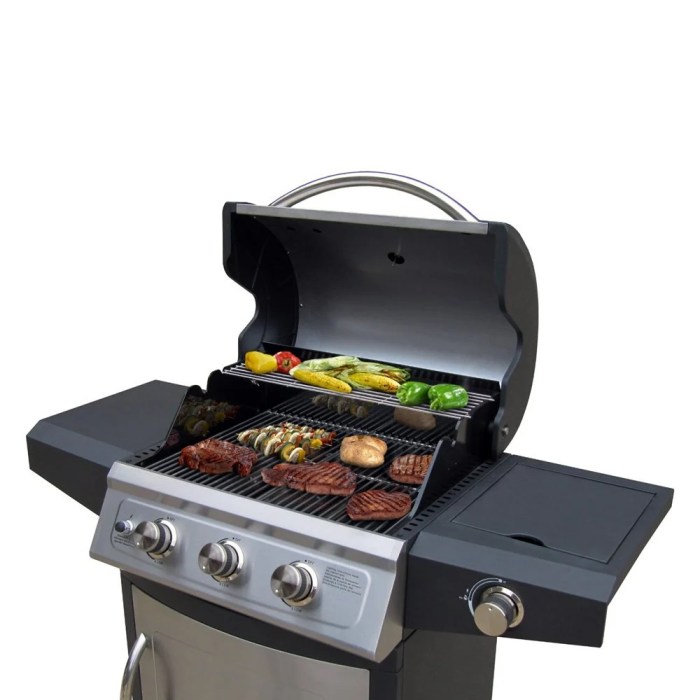
Image Description of a Maintained Grill
The image shows a clean Landmann Professional Grill, with the grates free of food residue and the cooking surface appearing smooth and shiny. The burners are evenly spaced and free of debris. The grill lid is closed, indicating proper storage and protection from the elements. The overall appearance suggests regular cleaning and maintenance, ensuring optimal performance and safety.
Visual Guide to Grilling Techniques
A visual guide to various grilling techniques would include images demonstrating direct heat grilling, indirect heat grilling, searing, and smoking. These methods are key to achieving different cooking results, from perfectly seared steaks to smoky barbeque ribs.
Ending Remarks
In conclusion, mastering a Landmann Professional Grill involves understanding its various models, meticulous pre-cooking preparations, safe lighting and maintenance, diverse cooking techniques, and necessary safety precautions. This comprehensive guide provides a clear path to grilling excellence, ensuring you can confidently and safely enjoy delicious meals outdoors. Proper cleaning and maintenance will also extend the life of your grill. From beginner to expert, this guide is your ultimate resource for grilling success.
Quick FAQs
What are the essential grilling tools and accessories for a Landmann Professional Grill?
Essential tools include tongs, spatulas, a meat thermometer, and various grilling accessories depending on your specific model. Always check your grill’s user manual for recommended accessories.
How do I adjust the airflow for optimal temperature control?
Airflow adjustment is crucial for consistent temperature control. Refer to your grill’s instruction manual for specific adjustment methods and locations. Proper airflow management prevents flare-ups and uneven cooking.
What are common safety precautions to take when using a Landmann Professional Grill?
Always keep a safe distance from the grill, use appropriate safety equipment (e.g., oven mitts), and supervise children closely. Never leave the grill unattended while it’s operating. Keep flammable materials away from the grill.
What should I do if my Landmann Professional Grill catches fire?
Immediately turn off the gas supply (if applicable), and contact your local fire department. Never attempt to extinguish the fire yourself unless it’s a very small, contained fire.
