How to remove a slow blow fuse unveils a crucial skill for electrical safety, enabling you to navigate the intricacies of electrical systems with confidence and precision. Understanding the nuances between slow blow and standard fuses is key, as each serves a unique purpose within the intricate network of power distribution. This guide will meticulously detail the steps to remove a slow blow fuse, ensuring safety and a thorough understanding of the process.
From identifying the specific fuse to meticulously following safety precautions, this comprehensive guide illuminates the path to safe electrical work. It delves into the reasons behind fuse failures and overloads, offering solutions and insights for preventing future issues. A step-by-step approach and helpful visual aids provide a clear and accessible understanding, empowering you to handle electrical components with care and confidence.
Introduction to Slow Blow Fuses
Slow blow fuses are a specialized type of fuse designed to provide enhanced protection for electrical circuits. They differ from standard fuses in their response to transient overcurrents, a crucial characteristic for safeguarding equipment and systems from damage. This difference in response allows for the safe passage of momentary surges in current, preventing the premature tripping of the circuit under normal operating conditions.The fundamental purpose of a slow blow fuse is to protect electrical equipment from sustained overcurrents while allowing for the passage of inrush currents or temporary overloads.
This characteristic distinguishes them from standard fuses, which are more sensitive to short-term overloads.
Slow Blow Fuse Characteristics
Slow blow fuses are engineered to withstand temporary overloads, like those experienced during motor starting or inrush currents. This characteristic distinguishes them from standard fuses, which are more sensitive to short-term overloads. They are typically employed in applications where momentary surges in current are expected, preventing false tripping.
Comparison of Slow Blow and Standard Fuses
The following table provides a comparative analysis of slow blow and standard fuses, highlighting their key differences.
| Fuse Type | Melting Point | Protection Characteristics |
|---|---|---|
| Slow Blow | Higher melting point, allowing for sustained overcurrent for a limited time. | Designed to tolerate temporary overloads and inrush currents. Excellent for applications with high inrush currents, like motor starting. |
| Standard | Lower melting point, designed to trip quickly for short-duration overcurrents. | More sensitive to short-term overloads and rapid overcurrents. Effective for protecting against short circuits and fault conditions. |
Applications of Slow Blow Fuses
Slow blow fuses are frequently utilized in electrical systems where temporary overloads are common. Examples include:
- Motor Starting Circuits: Motors often draw a high inrush current during startup. Slow blow fuses allow this inrush current to pass without interrupting the circuit, protecting the motor from damage.
- Inductive Loads: Inductive loads, such as transformers and solenoids, exhibit transient overcurrents. Slow blow fuses are essential for preventing false tripping due to these momentary surges.
- Welding Equipment: Welding machines often experience high inrush currents during operation. Slow blow fuses protect the welding equipment by allowing these transient overcurrents to pass without interruption.
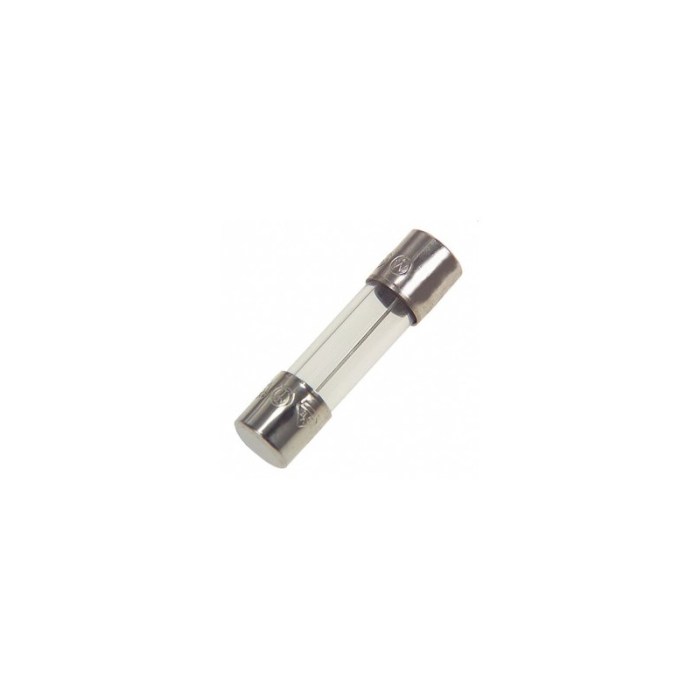
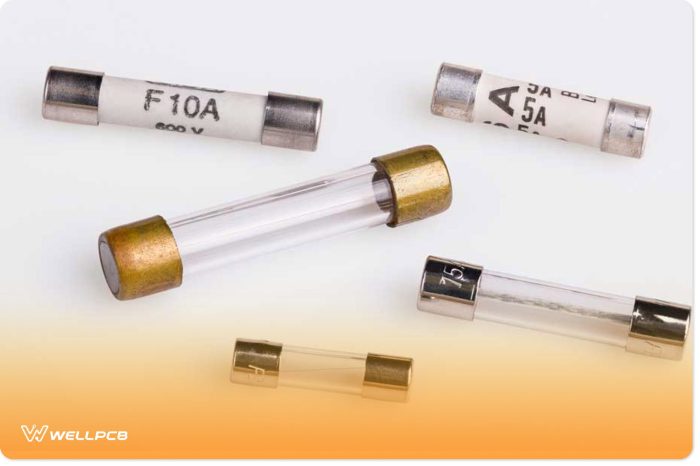
Identifying the Slow Blow Fuse
Slow blow fuses, crucial components in electrical systems, are designed to protect circuits from surges and short-term overloads. Distinguishing them from other fuse types is essential for proper circuit maintenance and troubleshooting. This section details the visual characteristics and markings to accurately identify a slow blow fuse.Visual identification relies on specific physical characteristics that differentiate them from other fuse types.
Careful observation and understanding of these features is paramount for safe and effective electrical work.
Visual Distinguishing Characteristics
Slow blow fuses exhibit unique physical traits compared to their counterparts. These distinctive features are crucial for reliable identification. A notable difference is often found in the fuse’s body shape and construction. The fuse body often has a distinct, slightly longer, and thicker construction compared to other types of fuses. This difference in physical form allows for the fuse to handle higher current surges for a longer duration.
Fuse Markings and Amperage Rating
Accurate determination of the amperage rating is essential for proper circuit protection. Manufacturers typically mark the fuse with its amperage rating. These markings are often embossed or printed directly onto the fuse body. This allows for easy identification of the current capacity.
Examples of Slow Blow Fuse Types and Amperage Ratings
| Fuse Type | Amperage Rating (Amps) |
|---|---|
| Automotive Slow Blow Fuse | 15, 20, 30 |
| Electrical Panel Slow Blow Fuse | 10, 15, 20, 25, 30, 35, 40, 50 |
| Industrial Slow Blow Fuse | 100, 125, 150, 200 |
| Specialty Slow Blow Fuse | Various, depending on application (e.g., 6A, 8A, 12A, 16A) |
The table above provides a concise overview of common slow blow fuse types and their corresponding amperage ratings. These are examples, and a wide range of amperage ratings is available depending on the specific application.
Safety Precautions Before Removal
Safe handling of electrical components is paramount to prevent accidents and ensure personal safety. Failure to adhere to proper safety procedures can lead to severe electrical shocks, burns, or other injuries. These precautions are crucial, regardless of the experience level of the individual performing the task.Adherence to safety protocols is essential for minimizing risks associated with electrical work.
This section details the critical safety steps to take before removing a slow-blow fuse, emphasizing the importance of isolating the circuit and using appropriate safety equipment.
Power Supply Disconnection
Correctly disconnecting the power supply is the first and most crucial step in any electrical work. Failure to do so can result in dangerous electrical shocks. Turning off the power to the circuit ensures that no current flows through the component being handled, significantly reducing the risk of electric shock. This step must be verified using a voltage tester or multimeter before proceeding.
For example, if working on a household circuit, locate the circuit breaker associated with that circuit and switch it to the OFF position.
Circuit Isolation
Proper isolation of the circuit is a critical safety measure. After turning off the power supply, further steps are needed to ensure the circuit is completely isolated. This often involves opening the relevant breaker panel and ensuring no voltage is present on the conductors connected to the fuse. Using a voltage tester is highly recommended to confirm the circuit’s isolation and ensure no residual voltage remains.
This confirmation minimizes the risk of accidental electric shock during the removal process.
Safety Equipment
Appropriate safety equipment is essential for mitigating risks during electrical work. Using the correct safety equipment is critical to minimize the risk of electric shock and injury. A comprehensive safety kit should include the following:
- Insulated Gloves: These gloves provide electrical insulation, preventing electric shock by creating a barrier between the user and the live electrical components.
- Safety Glasses or Face Shield: Protecting the eyes and face from potential sparks, debris, or accidental contact with the fuse or surrounding components is crucial. Safety glasses or a face shield should be worn at all times.
- Voltage Tester/Multimeter: A voltage tester or multimeter is indispensable for verifying the absence of voltage in the circuit. This confirmation is crucial before handling any electrical component to prevent electric shock. Regularly checking for zero voltage is critical in ensuring safety.
- Work Area Safety: The work area should be clear of obstructions and hazards. Ensure the environment is safe to prevent slips, trips, or falls, which can increase the risk of injury. A non-slip mat should be used, if appropriate. This precaution is especially critical in damp or wet environments.
Removing the Slow Blow Fuse: How To Remove A Slow Blow Fuse
Safe and correct removal of a slow blow fuse is crucial to prevent potential damage to electrical circuits and personal injury. Improper techniques can lead to arcing, short circuits, or component failure. This section details the proper procedure for removing a slow blow fuse, outlining necessary tools, and emphasizing safety precautions.
Tools Required
Proper tools are essential for safe and efficient fuse removal. Failure to use appropriate tools can lead to damage to the fuse holder or surrounding components. The primary tool required is typically a non-conductive fuse puller. Additional tools may be required depending on the specific fuse type and location. These tools may include insulated needle-nose pliers, screwdrivers, or a non-conductive, insulated tool specifically designed for fuse extraction.
Ensure all tools are in good working order and free of any potential damage that could compromise their insulating properties.
Procedure for Removal
A step-by-step procedure is presented below for the safe removal of a slow blow fuse. Adherence to this procedure minimizes the risk of electric shock and component damage.
| Step | Description | Image Description | Potential Issues |
|---|---|---|---|
| 1 | Preparation: Ensure the power to the circuit is switched off. Verify that the power is completely disconnected at the breaker or main switch. This step is critical for safety. Confirm the power is off using a voltage tester. | A hand holding a voltage tester near a switch with the switch in the off position. The voltage tester displays zero volts. | Failure to disconnect the power can lead to electric shock or damage to the circuit. Misinterpreting the voltage readings can lead to errors. |
| 2 | Identify the Fuse: Locate the slow blow fuse within the fuse holder. Note its amperage rating for future reference. Visual inspection of the fuse’s physical condition (e.g., discoloration, physical damage) is necessary to assess its condition. | A close-up view of a fuse holder, highlighting the slow blow fuse with its amperage rating clearly visible. | Incorrect identification of the fuse type or amperage rating can result in incorrect replacement. |
| 3 | Use the Fuse Puller: Carefully grasp the fuse holder’s terminals using the non-conductive fuse puller. Ensure the puller’s tips are securely positioned to avoid slippage and damage to the fuse. | A person using a non-conductive fuse puller to extract a fuse from a fuse holder. The puller is positioned correctly on the fuse holder’s terminals. | Using incorrect tools or improperly applying the puller can damage the fuse holder or the fuse itself. |
| 4 | Extraction: Gently and steadily pull the fuse from the holder. Avoid twisting or jerking the fuse, as this can damage the fuse’s internal components. | The person is pulling the fuse from the fuse holder using the fuse puller. The fuse is being extracted straight out. | Forceful extraction can cause the fuse to break or damage the fuse holder. |
| 5 | Verification: Inspect the extracted fuse for any signs of damage, such as melted or broken elements. Document the condition for record-keeping and to assist in determining the cause of circuit issues. | The extracted fuse is being inspected for damage, such as melted or broken elements. | Ignoring any visible damage can lead to repeated circuit problems. |
Troubleshooting Fuse Issues
Proper fuse operation is critical for electrical safety and system integrity. Understanding potential causes for fuse failure or slow response is essential for preventative maintenance and efficient troubleshooting. A thorough examination of the circuit and associated components is crucial for accurate diagnosis and appropriate corrective action.Identifying the root cause of a faulty or slow-acting fuse can prevent further damage to equipment and potential hazards.
This involves examining the electrical load, circuit integrity, and component functionality within the system. A systematic approach to troubleshooting will guide the user towards a reliable resolution.
Potential Causes of Fuse Failure or Slow Response
Several factors can contribute to a fuse’s failure or sluggish performance. These include excessive current draw, inadequate wiring, and issues with the circuit components themselves. A fuse’s slow response can indicate a gradual increase in load, potentially masking an underlying problem.
Common Issues Related to Slow Blow Fuses
Slow blow fuses are designed to handle momentary surges in current, but prolonged or excessive overloads can still cause them to fail. Short circuits, a direct connection between two points with different potentials, represent a significant threat, leading to rapid and potentially damaging current flow. The fuse’s function is to protect the circuit from these damaging effects.
Identifying the Cause of a Blown Slow Blow Fuse
A systematic approach to fuse issue diagnosis is essential. Initial steps include inspecting the fuse for physical damage, checking for loose connections in the circuit, and verifying the circuit’s load requirements. The extent of the damage can vary depending on the severity of the overload or short circuit. Furthermore, an understanding of the circuit’s design and the typical operating conditions is crucial.
Table of Common Fuse Problems and Solutions
| Problem | Possible Causes | Solutions |
|---|---|---|
| Fuse frequently blows | Overloading of the circuit, faulty wiring, damaged components, incorrect fuse type. | Reduce the load on the circuit, check and repair wiring, replace damaged components, ensure correct fuse type is used. |
| Fuse slowly blows | Gradual increase in load, inadequate wiring, overheating components, intermittent short circuits. | Reduce load, improve wiring capacity, identify and repair overheating components, investigate for intermittent short circuits. |
| Fuse does not blow when it should | Incorrect fuse type, insufficient amperage rating, damaged fuse, underlying short circuit. | Use the correct amperage rating fuse, check for underlying faults in the circuit, inspect the fuse for damage, and consider further testing to ensure proper operation. |
| Fuse blows immediately | Short circuit, excessive current spike, damaged wiring, or a component failure. | Isolate and repair the short circuit, identify and rectify the cause of the excessive current spike, check and repair damaged wiring, and replace any faulty components. |
Replacing the Slow Blow Fuse
Proper replacement of a slow blow fuse is crucial for maintaining the safety and functionality of electrical circuits. Incorrect replacement can lead to circuit overload, potential fire hazards, and equipment damage. Adherence to the correct procedure and selection of the correct amperage rating is paramount.
Selecting the Correct Replacement Fuse
The correct amperage rating is paramount for the safety and reliability of the circuit. Selecting a fuse with an amperage rating lower than the original will not protect the circuit from overload, potentially damaging connected equipment. Conversely, a fuse with a higher rating will not provide adequate protection against fault conditions. The amperage rating should precisely match the original slow blow fuse.
Consult the circuit’s specifications or the device’s manual for the correct amperage rating.
Replacement Procedure, How to remove a slow blow fuse
This section details a step-by-step guide for replacing a slow blow fuse. Prioritize safety by ensuring the power to the circuit is disconnected before any work is performed.
- Power Disconnection: Disconnect the power supply to the circuit containing the faulty fuse. This is crucial to prevent electrical shock and equipment damage.
- Fuse Identification: Carefully examine the old fuse to determine its amperage rating and type (slow blow). Note these details for the replacement.
- Replacement Fuse Acquisition: Acquire a replacement fuse with the exact same amperage rating and type (slow blow) as the original. Purchasing from a reputable supplier is essential for quality and safety.
- Fuse Removal: Carefully remove the old fuse from its holder, using appropriate tools if necessary. Take care not to damage the fuse holder.
- Fuse Installation: Insert the new fuse into the fuse holder, ensuring proper alignment. Confirm that the fuse is securely seated in the holder.
- Power Reconnection: Reconnect the power supply to the circuit. Ensure the power is connected correctly and the fuse is securely installed. Verify there are no loose connections.
Comparison Table: Old and New Fuses
A clear comparison of the old and new fuses aids in confirming the correct replacement.
| Characteristic | Old Fuse | New Fuse |
|---|---|---|
| Amperage Rating (Amps) | 15 A | 15 A |
| Fuse Type | Slow Blow | Slow Blow |
| Manufacturer | ABC Electronics | XYZ Components |
Understanding Circuit Overloads
Circuit overloads are a significant cause of fuse failures. Understanding the factors contributing to these overloads is crucial for preventing damage to electrical equipment and ensuring safety. This section will detail the nature of circuit overloads, the conditions that can lead to them, the symptoms they present, and preventive measures to mitigate their occurrence.Circuit overloads occur when the electrical current flowing through a circuit exceeds its designed capacity.
This excess current can result in overheating of wires, components, and potentially fire hazards. The slow-blow fuse, designed to protect against such conditions, is a critical safety device.
Conditions Leading to Circuit Overloads
Excessive current flow is the defining characteristic of a circuit overload. Several factors can contribute to this condition. Improperly sized wiring, insufficient gauge for the electrical load, or the use of inadequate circuit breakers are common causes. Adding too many electrical devices to a single circuit, exceeding the circuit’s rating, or using appliances with high power requirements can also lead to an overload.
Additionally, faulty or damaged electrical components, like a motor with a short circuit, can significantly increase the current drawn, potentially causing an overload. Finally, surges in voltage can also overwhelm a circuit, leading to overloads.
Symptoms of an Overloaded Circuit
Several signs can indicate an overloaded circuit. These include unusual dimming or flickering of lights, a noticeable increase in the heat emanating from electrical outlets or wires, a buzzing or hissing sound from electrical components, or the circuit breaker tripping. In extreme cases, a blown fuse or a complete circuit failure may occur. A gradual increase in the symptoms often precedes a complete failure, providing an early warning signal.
Recognizing these symptoms is crucial for timely intervention.
Preventing Circuit Overloads
Proactive measures are essential for preventing circuit overloads. Firstly, ensuring proper circuit sizing is paramount. Consult electrical codes and standards to determine the appropriate wire gauge and circuit breaker rating for the intended electrical load. Secondly, avoid overloading circuits by carefully considering the combined power consumption of all devices connected. Using power strips to distribute the load across multiple circuits can help prevent overloading.
Finally, maintaining the integrity of electrical components, including regular inspections and prompt repairs, is vital to avoid component failures that can cause circuit overloads.
Importance of Proper Wiring and Circuit Sizing
Proper wiring and circuit sizing are fundamental to preventing circuit overloads. Using wires of insufficient gauge for the intended load can cause excessive resistance, leading to overheating and potential fire hazards. Similarly, a circuit breaker or fuse with a rating below the required load can trigger a dangerous surge or lead to a complete failure. Adhering to electrical codes and standards, and consulting with a qualified electrician when necessary, is critical for ensuring safety and preventing damage.
Additional Considerations and Maintenance
Proper selection, regular inspection, and meticulous maintenance of slow-blow fuses are crucial for ensuring the safety and longevity of electrical systems. These factors significantly impact the reliability and performance of circuits, preventing potential damage from overloads and short circuits. Careful consideration of these elements is essential for maintaining a safe and efficient electrical infrastructure.
Choosing the Right Slow Blow Fuse
Selecting the appropriate slow-blow fuse for a specific application is paramount. Factors such as the circuit’s voltage rating and the expected current draw must be meticulously considered. Overestimating the amperage rating can lead to inadequate protection, while underestimating it can result in frequent fuse replacements. A fuse rated for a lower amperage than the circuit’s maximum load will be ineffective, potentially leading to component damage or fire.
Conversely, a fuse rated for a significantly higher amperage than the expected load provides unnecessary protection and may not accurately reflect the circuit’s actual load capacity.
Importance of Regular Fuse Checks
Regular inspections of slow-blow fuses are critical for maintaining circuit integrity and preventing electrical hazards. A visually damaged or discolored fuse may indicate internal deterioration and reduced capacity. Fuses should be visually inspected for any physical damage, such as cracks, discoloration, or melting. In addition to visual inspection, regular testing of the fuse’s ability to interrupt current flow should be conducted.
This ensures the fuse’s ability to protect the circuit effectively.
Maintaining Electrical Safety
Maintaining electrical safety in circuits incorporating slow-blow fuses necessitates adhering to established safety protocols. Avoid forceful insertion or removal of fuses to prevent damage to the fuse terminals or the fuse holder. Ensure that the fuse is the correct type and rating for the circuit. Use only fuses specified by the equipment manufacturer, as using an incorrect type can compromise safety.
Fuses should be replaced immediately if they exhibit any signs of damage. If a fuse frequently blows, it suggests an underlying issue within the circuit. Addressing this issue through troubleshooting can prevent further problems.
Fuse Type Selection Table
| Electrical Component | Voltage Rating (V) | Amperage Rating (A) | Fuse Type |
|---|---|---|---|
| Household lighting circuits | 120 V | 15 A | Slow-blow fuse |
| Small appliance circuits | 120 V | 10 A | Slow-blow fuse |
| Power tool circuits | 120 V | 15 A – 20 A | Slow-blow fuse |
| Motor circuits | 240 V | 10 A – 30 A | Slow-blow fuse |
| Electronic equipment | 5 V – 240 V | 0.1 A – 10 A | Slow-blow fuse or fast-acting fuse (depending on the specific component) |
The table above provides a general guideline for selecting appropriate fuse types. Specific requirements may vary depending on the equipment’s design and operating conditions. Always consult the manufacturer’s specifications for detailed fuse recommendations.
Epilogue
In conclusion, safely removing a slow blow fuse is a skill built on knowledge and meticulous attention to detail. By understanding the nuances of fuse types, adhering to safety protocols, and troubleshooting potential issues, you gain mastery over electrical systems. This guide empowers you to confidently handle electrical tasks, ensuring a safer and more efficient electrical environment. Remember, safety should always be paramount.
Helpful Answers
What are the common causes of a slow blow fuse blowing?
Overloads, short circuits, and prolonged exposure to high temperatures are common culprits. Overloading a circuit beyond its rated capacity can cause a slow blow fuse to blow. A short circuit, which is a direct connection between two points in a circuit, can also cause excessive current flow and trigger the fuse.
How do I know if I need a slow blow fuse instead of a standard fuse?
Slow blow fuses are designed to handle momentary surges in current, making them suitable for applications with high inrush currents. Standard fuses, on the other hand, are designed to protect against continuous overloads. The specific application, and the electrical system it’s connected to, will determine the appropriate fuse type.
What safety equipment should I use when handling electrical components?
Always wear insulated gloves and safety glasses. Ensure the area is well-lit and clear of obstructions. Turn off the power supply to the circuit before any work is done. Never touch exposed wires or components when the power is on. Follow all local safety regulations.
