How to fix a AC turn handle valve effectively and safely is presented in this comprehensive guide. Understanding the various types of valves, identifying potential issues, and executing proper troubleshooting procedures are crucial for maintaining optimal air conditioning system performance. This guide covers a range of aspects, from basic identification to advanced repair techniques, and emphasizes safety throughout the process.
This guide provides a step-by-step approach to diagnosing and resolving problems with AC turn handle valves. It details the necessary tools, materials, and safety precautions to ensure a successful and secure repair. From initial inspection to final verification, the process is clearly Artikeld to help technicians and homeowners alike.
Introduction to AC Turn Handle Valves: How To Fix A Ac Turn Handle Valve
Air conditioning (AC) turn handle valves are essential components in HVAC systems, regulating the flow of refrigerants and other fluids. These valves, typically operated by a handwheel, are crucial for precise control of airflow and temperature in various applications. Their reliable performance ensures optimal system efficiency and longevity.These valves play a critical role in maintaining the desired temperature and pressure within the AC system.
Proper operation of these valves directly impacts the overall efficiency and effectiveness of the cooling or heating process. They are strategically placed throughout the system to control the flow of refrigerants and other media, ensuring precise and controlled operation.
Types of AC Turn Handle Valves
AC turn handle valves encompass several types, each with specific characteristics and applications. Common types include ball valves and globe valves, which differ in their internal mechanisms and flow characteristics. These valves are carefully selected based on the specific needs of the system.
Purpose and Function in AC Systems
Turn handle valves regulate the flow of refrigerants, oils, and other working fluids within an AC system. This precise control is essential for maintaining the desired temperature and pressure within the system. The valves’ function is analogous to a faucet, allowing for the adjustment of the flow rate and ensuring optimal system performance.
Materials of Construction
AC turn handle valves are constructed from various materials, each chosen for its suitability in the specific application. Common materials include brass, bronze, and stainless steel. The selection of material depends on the operating conditions, including the fluid being handled, temperature, and pressure. Corrosion resistance and durability are paramount for long-term system reliability.
Applications in HVAC Systems
These valves are used in a variety of HVAC applications, including air conditioning, refrigeration, and heating systems. They are used to control the flow of refrigerants to different parts of the system, enabling precise temperature regulation. Their adaptability makes them vital components in diverse HVAC settings.
Table of AC Turn Handle Valve Characteristics
| Valve Type | Material | Typical Application | Common Sizes |
|---|---|---|---|
| Ball Valve | Brass, Stainless Steel | Shutoff and flow control in various AC lines | 1/4″ to 2″ |
| Globe Valve | Bronze, Stainless Steel | Fine flow regulation in AC systems, especially for precise temperature control | 1/2″ to 4″ |
| Angle Valve | Brass, Bronze | Used where a change in direction of flow is required | 1/2″ to 2″ |
Identifying the Problem
Troubleshooting an AC turn handle valve often begins with recognizing the symptoms. Understanding the tell-tale signs of a malfunctioning valve can significantly narrow down the potential causes and speed up the repair process. Careful observation and accurate diagnosis are crucial for effective and efficient solutions.
Common Signs of Malfunction
The most noticeable signs of a faulty AC turn handle valve include reduced cooling capacity, uneven temperature distribution, and unusual noises. These symptoms can range from subtle hints to more pronounced issues. Sometimes, a valve that’s only partially malfunctioning might exhibit intermittent problems. For example, a cooling system might work adequately for a few hours but then show reduced output.
Potential Causes of Valve Malfunction
Several factors can contribute to a malfunctioning AC turn handle valve. These factors can include issues with the valve itself, problems with the connected components, or even environmental factors. For example, prolonged exposure to extreme temperatures or corrosive substances can degrade the valve’s internal mechanisms over time.
Possible Issues
- Leaks: Leaks in the valve can lead to a loss of refrigerant, which directly impacts the system’s cooling efficiency. This might manifest as a gradual decrease in cooling or an audible hissing sound. A leak can be caused by damaged seals, worn-out components, or improper installation.
- Sticking: A sticking valve can prevent the proper flow of refrigerant. This will cause uneven temperature distribution, potentially resulting in warmer air in some areas of the room. This is often accompanied by difficulty in turning the handle.
- Damaged Parts: Internal components like the valve stem, O-rings, or the valve body itself might be damaged. These internal damages often manifest as inconsistent airflow or complete loss of airflow. Physical damage, such as a collision, or a gradual wearing of the parts due to prolonged use, can be the cause.
Troubleshooting Table, How to fix a ac turn handle valve
| Symptom | Potential Cause | Troubleshooting Steps |
|---|---|---|
| Reduced cooling capacity | Refrigerant leak, sticking valve, damaged valve components | Check for leaks using a refrigerant leak detector, inspect the valve for signs of damage, ensure the valve can rotate freely. |
| Uneven temperature distribution | Sticking valve, obstruction in the valve path, refrigerant leak | Check for obstructions in the valve path, inspect the valve for signs of damage, monitor the refrigerant level. |
| Unusual noises (e.g., hissing, clicking) | Refrigerant leak, damaged valve components, worn-out seals | Locate the source of the noise using a refrigerant leak detector, check for damage to the valve body and seals, verify proper valve operation. |
| Difficulty turning the handle | Sticking valve, debris in the valve mechanism, or external forces on the valve | Inspect the valve mechanism for debris, ensure no external forces are hindering the valve rotation, check the valve for signs of binding. |
Troubleshooting Procedures
Troubleshooting a malfunctioning AC turn handle valve requires a systematic approach. Proper diagnosis ensures efficient repairs and prevents further damage to the system. This section Artikels the steps to identify the cause of the issue, from checking for leaks to isolating the valve safely.
Initial Assessment
Thorough visual inspection is crucial. Look for obvious signs of damage, such as cracks, leaks, or corrosion on the valve body or connections. Examine the wiring for any loose connections or frayed wires. These initial observations can often point to the source of the problem and guide further diagnostic steps. A detailed examination of the valve’s operating mechanism, such as the handle’s movement and the responsiveness of the system, is equally important.
Leak Detection and Connection Checks
Leak detection is a vital part of troubleshooting. Inspect all connections, including the valve to the refrigerant lines and the electrical connections. Use a soapy water solution or a specialized leak detector to pinpoint any leaks. A gentle application of soapy water around the connections can reveal air bubbles, which indicate the presence of a leak. Ensure all connections are tight and secure to prevent leaks and maintain system integrity.
Proper connections are paramount for the efficient operation of the AC system.
Diagnostic Tools
A variety of tools can aid in the troubleshooting process. Pressure gauges are essential for measuring refrigerant pressure within the system. This helps in determining if the pressure readings fall within the acceptable range for the specific AC unit. Leak detectors are also important tools to detect refrigerant leaks accurately. These tools assist in quickly identifying the exact location of leaks, preventing extensive and time-consuming searches.
A multimeter can be used to check the electrical components for proper operation. Additionally, a wrench set, appropriate for the valve’s size and type, is necessary for disassembling and reassembling parts.
Safety Precautions
Safety is paramount during any troubleshooting procedure. Before starting any work on the AC system, always disconnect the power supply to prevent electrical shock hazards. Use appropriate personal protective equipment (PPE), such as safety glasses and gloves, to protect yourself from potential hazards. Ensure the area is well-ventilated to prevent the accumulation of refrigerant vapors. Refrigerant is hazardous and should be handled with care.
Isolating the Valve
Safely isolating the valve from the AC system is critical for preventing refrigerant leaks and potential hazards. This is achieved by shutting off the power supply to the system and disconnecting the refrigerant lines that connect to the valve. Proper isolation procedures prevent accidents and protect both the technician and the environment.
Troubleshooting Steps
| Troubleshooting Step | Expected Result | Next Steps |
|---|---|---|
| Inspect valve for visible damage or leaks. | No visible damage or leaks. | Proceed to pressure gauge readings. |
| Inspect connections for tightness and leaks. | All connections are tight and no leaks detected. | Check electrical connections for proper operation. |
| Check pressure readings using pressure gauge. | Pressure readings fall within the acceptable range. | Check valve operation by turning the handle. |
| Check pressure readings using pressure gauge. | Pressure readings are outside the acceptable range. | Locate and repair any leaks. Re-check pressure. |
| Check electrical connections for proper operation. | Electrical connections are operational. | Check valve operation by turning the handle. |
| Check valve operation by turning the handle. | Valve operates smoothly and system functions normally. | System is operational. |
| Check valve operation by turning the handle. | Valve does not operate or operates erratically. | Disassemble valve and inspect for internal issues. |
Repairing the Valve
Fixing a faulty AC turn handle valve often involves a blend of careful disassembly, inspection, and sometimes, replacement. This section delves into the practical steps for repairing or replacing a damaged valve, emphasizing the importance of precision and safety throughout the process. Proper techniques ensure the valve functions correctly and avoids further complications.Effective repair of the AC turn handle valve necessitates a methodical approach.
Incorrect procedures can lead to further damage or ineffective repairs, potentially causing a cascade of problems and requiring additional, more extensive repairs down the line. Following the detailed steps Artikeld below minimizes these risks.
Tools and Supplies
Before starting any repair, gather the necessary tools and supplies. This proactive step minimizes disruptions and ensures a smooth repair process.
- Screwdrivers (Phillips and flathead): Used for disassembling the valve assembly and securing components.
- Pliers (needle-nose and slip-joint): Essential for handling small parts and tightening connections.
- Wrench set (appropriate size): Required for disconnecting and connecting pipes and fittings.
- Valve seals (matching the valve type): Critical for ensuring proper sealing and preventing leaks.
- Pipe sealant (thread sealant): Used to ensure a watertight connection between pipes and fittings.
- Gloves: Protect your hands from potential contamination and sharp edges.
- Safety glasses: Prevent debris or fluids from entering your eyes.
- Cleaning solvent: Remove old sealant or debris for a clean repair.
Valve Replacement Procedures
Proper valve replacement procedures are crucial for ensuring the system’s longevity and efficiency. Improper installation can lead to leaks, reduced airflow, or premature failure of the system.
- Shut off the AC system completely. This prevents any accidental flow of refrigerant or other fluids, ensuring a safe working environment.
- Carefully disconnect the valve from the refrigerant lines. This requires using the correct tools and following the appropriate procedures to avoid damaging the lines or the valve.
- Inspect the old valve for any signs of damage. Identifying the root cause of the malfunction will inform the best repair approach.
- Install new valve seals. Ensure that they are properly aligned and seated to prevent leaks. Using the correct sealant is crucial for watertight connections.
- Reconnect the valve to the refrigerant lines. Ensure a secure connection and proper alignment.
- Verify the valve functions correctly. This ensures the valve opens and closes properly, maintaining the desired cooling effect.
Repairing Minor Damage
Minor damage to the valve, such as loose connections or damaged seals, can often be repaired rather than replaced. This approach is more cost-effective and time-efficient in many cases.
- Tightening connections: Using the appropriate wrench, tighten loose connections to prevent leaks.
- Replacing seals: Replacing worn or damaged seals is critical for preventing leaks. Using the correct seal type ensures a good seal and maintains system efficiency.
Replacing the Entire Valve Assembly
Sometimes, the valve assembly requires a complete replacement. This section details the steps involved.
| Step | Procedure | Necessary Tools |
|---|---|---|
| 1 | Disconnect the old valve from the refrigerant lines. | Wrench set, pliers |
| 2 | Remove any securing screws or clips holding the valve in place. | Screwdrivers |
| 3 | Carefully remove the old valve assembly. | Pliers, wrench set |
| 4 | Install the new valve assembly, ensuring correct orientation. | Screwdrivers, wrench set |
| 5 | Reconnect the refrigerant lines to the new valve. | Wrench set, pliers |
| 6 | Verify the system is functioning correctly and leak-free. | Pressure gauge, visual inspection |
Maintenance and Prevention
Proactive maintenance is crucial for extending the lifespan of your AC turn handle valve and preventing costly repairs. Regular checks and lubrication can significantly reduce the likelihood of failure, saving you time and money in the long run. This section details preventative maintenance procedures and emphasizes the importance of consistent upkeep.
Preventative Maintenance Procedures
Proper maintenance involves a combination of visual inspections and scheduled lubrication. This routine approach helps detect potential problems early, allowing for timely intervention before they escalate into major issues. Regularly inspecting your valve ensures that any damage or wear is identified before it leads to complete failure.
Importance of Regular Inspection and Lubrication
Regular inspection is vital for early detection of wear and tear. Early detection allows for prompt repairs, avoiding more significant and expensive repairs down the line. Lubrication is equally important as it reduces friction and prevents components from seizing. Proper lubrication maintains smooth operation and extends the valve’s lifespan, reducing the likelihood of sticking or failure.
Potential Long-Term Consequences of Neglecting Valve Maintenance
Neglecting maintenance can lead to a cascade of problems. Initial signs of wear might be subtle, but they can quickly progress to significant issues like leaks, sticking valves, or complete failure. A neglected valve can result in reduced airflow, increased energy consumption, and potentially damaged equipment. For example, a leaking valve can lead to refrigerant loss, necessitating expensive refills and potentially causing environmental damage.
Further, a seized valve may lead to compressor damage due to the inability of the system to regulate pressure.
Best Practices to Prevent Valve Failure
A comprehensive approach to valve maintenance involves adhering to a strict schedule, using high-quality lubricants, and understanding the specific needs of your system. A detailed inspection checklist is crucial to ensure that every component is carefully examined. By consistently performing preventative maintenance, you can effectively mitigate the risks of valve failure.
- Regularly inspect for leaks or damage.
- Lubricate all moving parts as recommended by the manufacturer.
- Maintain accurate records of maintenance activities.
- Store spare parts and lubricants in a secure location.
- Ensure proper ventilation in the area to avoid dust accumulation.
Maintenance Schedules Based on Usage Frequency
The frequency of maintenance should be tailored to the usage frequency of the AC system. A system used extensively will require more frequent checks than one used sparingly. For instance, a commercial AC system running 24/7 will benefit from a weekly inspection and monthly lubrication, while a residential unit used intermittently might only need quarterly inspections and semi-annual lubrication.
- High-Frequency Usage: Weekly inspections and monthly lubrication are recommended for systems operating continuously.
- Medium-Frequency Usage: Bi-weekly inspections and bi-monthly lubrication are suitable for systems used regularly but not continuously.
- Low-Frequency Usage: Monthly inspections and quarterly lubrication are adequate for systems used infrequently.
Comparison of Maintenance Strategies
The effectiveness of different maintenance strategies can be evaluated based on their impact on the valve’s lifespan, efficiency, and the risk of failure. A well-maintained valve will operate smoothly, consuming less energy and reducing the likelihood of system breakdowns.
| Maintenance Strategy | Frequency | Effectiveness | Cost |
|---|---|---|---|
| Weekly Inspections/Monthly Lubrication | High | Excellent | Higher |
| Bi-weekly Inspections/Bi-monthly Lubrication | Medium | Good | Moderate |
| Monthly Inspections/Quarterly Lubrication | Low | Fair | Lower |
Safety Considerations
Working with AC turn handle valves, especially those involving compressed air or refrigerants, requires meticulous attention to safety protocols. Neglecting these precautions can lead to serious injuries or equipment damage. Understanding the potential hazards and implementing the correct safety measures is paramount for a safe and successful repair or maintenance procedure.Proper safety precautions are essential when working with AC turn handle valves.
These valves, while seemingly simple, can present hidden dangers if not handled correctly. This section details crucial safety considerations to prevent accidents and ensure the well-being of yourself and those around you.
Essential Safety Gear
Safety gear plays a critical role in protecting against potential hazards. Wearing appropriate safety equipment significantly reduces the risk of injuries like cuts, eye damage, and inhalation of harmful substances.
- Gloves provide protection against cuts, abrasions, and contact with harsh chemicals or refrigerants. Thick, durable work gloves are recommended.
- Safety glasses or goggles are vital to shield your eyes from flying debris, refrigerant droplets, or other potential contaminants.
- Closed-toe shoes offer protection for your feet, preventing injuries from dropped tools or other hazards.
Safe Handling of Compressed Air and Refrigerants
Compressed air and refrigerants, while often used in AC systems, can be hazardous. Incorrect handling can lead to inhalation risks, burns, and other injuries.
- Always ensure proper ventilation when working with compressed air to prevent inhalation of dust or other contaminants carried by the air stream. Work in a well-ventilated area, or use respirators as needed.
- Never work with refrigerants without appropriate personal protective equipment (PPE). Refrigerants can cause severe skin irritation and respiratory problems. Ensure the area is well-ventilated and use a proper respirator if needed.
- Use caution when handling pressurized containers. Ensure the container is securely fastened and any leaks are identified and addressed before use. Never attempt to open or repair a pressurized container that is damaged or shows signs of leakage.
Potential Hazards and Precautions
Improper handling of AC turn handle valves can lead to a range of hazards. A comprehensive understanding of these hazards and the corresponding safety precautions is crucial for accident prevention.
| Potential Safety Hazard | Safety Precautions |
|---|---|
| Cuts from sharp edges on the valve | Wear gloves and eye protection. Inspect the valve for sharp edges before handling. |
| Inhalation of refrigerant vapors | Work in a well-ventilated area. Use respirators if necessary. Do not attempt repairs if leaks are present. |
| Compressed air injury | Use appropriate safety glasses and ear protection. Ensure the air pressure is adequately regulated. Avoid pointing the air hose at yourself or others. |
| Burns from hot components | Allow components to cool down before handling. Use insulated tools where necessary. |
| Electrical shock | Ensure the power is disconnected from the system before working on any electrical components. Use proper lockout/tagout procedures. |
Emergency Procedures
Accidents can happen despite best efforts. Knowing the steps to take in case of an accident can minimize the severity of the consequences.
- Immediately stop work if an accident occurs. Assess the situation and prioritize the safety of yourself and others.
- Report any injuries or near-miss incidents to the appropriate personnel. Record the details of the event for future reference and improvement of safety procedures.
- Follow emergency procedures Artikeld in your workplace safety protocols. Seek medical attention if necessary.
Diagrams and Illustrations
Understanding the structure and components of an AC turn handle valve is crucial for effective troubleshooting and repair. Visual representations make it easier to identify potential problems and guide you through the repair process. This section provides detailed diagrams and illustrations for various valve types, focusing on ball valves, to help you visualize the parts and their functions.
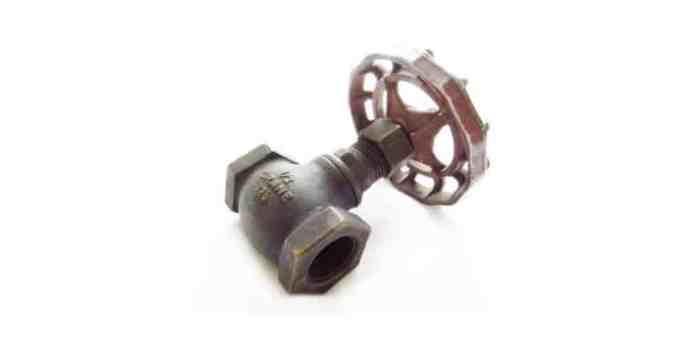
Typical AC Turn Handle Valve
A typical AC turn handle valve, often used in HVAC systems, consists of a housing, a valve body, a valve stem, a turn handle, and a sealing mechanism. The housing provides structural support, the valve body contains the internal components, the valve stem connects the handle to the internal mechanism, the turn handle controls the flow of air, and the sealing mechanism ensures the air is properly directed.
The precise design can vary depending on the manufacturer and specific application.
Ball Valve Diagram
Ball valves are a common type used in AC systems due to their simplicity and effectiveness.
| Component | Description | Function |
|---|---|---|
| Valve Body | The main housing of the valve. | Provides structure and contains internal parts. |
| Ball | A spherical component that controls the flow. | Rotates to open or close the flow passage. |
| Valve Stem | Connects the handle to the ball. | Transmits the rotational motion of the handle to the ball. |
| Turn Handle | The external component for operating the valve. | Allows for manual control of the flow. |
| Seals | Rings that ensure a tight seal between the ball and the valve body. | Prevent leakage and maintain pressure. |
Note: The diagram would visually depict these components within the valve body. The ball would be centrally located, and the stem and handle would connect to the ball.
Properly Installed Valve Image
A properly installed AC turn handle valve is securely fastened and aligned. The connections should be tight and leak-free, ensuring the valve functions as intended without undue stress on the connections. The handle should turn smoothly, indicating proper alignment and functioning of the valve components.
Repair and Replacement Steps – Illustrations
Visual representations of repair and replacement steps are crucial. The images would demonstrate the process in a sequential manner, showing the correct procedures.
- Step 1: Turn off the power supply to the AC unit to prevent electric shock. Disconnect the supply lines from the valve.
- Step 2: Carefully remove the old valve. Use the appropriate tools to avoid damaging the components. Pay close attention to the connections and any special markings.
- Step 3: Inspect the new valve for any damage or defects before installation.
- Step 4: Install the new valve, ensuring all connections are properly made. Tighten all connections without over-tightening. Use a wrench appropriate for the size of the fittings.
- Step 5: Reconnect the supply lines to the new valve.
- Step 6: Turn the power back on and check for leaks. Listen for any unusual sounds.
Installation Procedure – Illustrations
Images would demonstrate the proper installation of the new valve, including connecting the supply lines. These illustrations should show the correct placement of the valve, the use of appropriate fittings, and the correct tightening procedures. Specifics like the use of Teflon tape or pipe sealant will be included in the images.
- Images would show a clear sequence of steps in connecting the supply lines to the valve, highlighting the importance of proper alignment and sealing.
Summary
In conclusion, addressing AC turn handle valve issues involves a systematic approach that combines diagnosis, repair, and preventive maintenance. By following the Artikeld procedures and prioritizing safety, you can effectively maintain your air conditioning system’s functionality and longevity. This guide serves as a valuable resource for anyone working with or around these critical components.
Commonly Asked Questions
What are the common signs of a malfunctioning AC turn handle valve?
Common signs include leaks, the valve handle not turning smoothly, or a noticeable decrease in air conditioning output.
What tools are typically needed for troubleshooting AC turn handle valves?
Pressure gauges, leak detectors, and adjustable wrenches are common tools needed for diagnosis and repair.
How important is safety when working on AC turn handle valves?
Safety is paramount. Proper personal protective equipment (PPE) and adherence to safety procedures are crucial to prevent accidents and injuries.
What are some preventative maintenance steps for AC turn handle valves?
Regular inspections, lubrication of moving parts, and ensuring proper connections are critical preventative maintenance measures.
