How to save cantaloupe seeds is a crucial skill for any passionate gardener. Unlock the secrets to preserving your favorite cantaloupe varieties, ensuring a bountiful harvest year after year. This comprehensive guide details every step, from selecting the perfect fruit to storing your precious seeds for future planting.
Imagine the thrill of cultivating your own unique cantaloupe, each one a testament to your careful seed saving. This guide provides a step-by-step process, from initial harvesting to final storage, enabling you to nurture the next generation of delicious cantaloupes.
Introduction to Cantaloupe Seed Saving
Preserving the legacy of your favorite cantaloupe, a sweet and succulent summer treat, is easier than you might imagine. Saving your own seeds allows you to cultivate precisely the varieties you adore, creating a personal touch in your garden. Imagine the joy of harvesting fruits with flavors uniquely yours, a testament to your horticultural prowess. This meticulous process, while potentially a little like a seed-saving symphony, is remarkably rewarding.A crucial element in the cantaloupe seed-saving endeavor is understanding the process of harvesting and selecting the right seeds.
A good harvest begins with a discerning eye and a gentle hand.
Harvesting and Seed Selection
To ensure the quality of your cantaloupe seeds, careful selection is paramount. Choose fruits that exhibit the desired characteristics of your preferred variety. Look for ripeness indicators, such as a deep orange color, a fragrant aroma, and a soft, yielding flesh. A plump, well-formed cantaloupe is more likely to yield robust seeds.
Preparing Seeds for Planting
Proper seed preparation is key to germination success. After carefully extracting the seeds from the pulp, thoroughly clean them to remove any remnants of flesh or other debris. Soaking the seeds in water overnight can be a beneficial step to soften the seed coat, potentially aiding in faster germination.
Best Time of Year for Saving Cantaloupe Seeds
The optimal time for saving cantaloupe seeds aligns with the peak ripening season for the fruit. The best period for harvesting and saving seeds typically coincides with the end of summer or the start of early fall. This timeframe ensures the seeds are fully developed and mature, maximizing their chances of successful germination in the following season. A good rule of thumb is to harvest your cantaloupes when they are at their ripest and fully colored.
Seed Harvesting and Selection
Selecting the perfect cantaloupe for seed saving is akin to choosing the crème de la crème of a gourmet fruit platter. Ripe cantaloupes boast a sweet aroma, a pleasingly yielding flesh, and a vibrant, sometimes slightly orange-tinted, rind. A firm but not hard exterior is a good indication of ripeness, and a gentle pressure should yield slightly. Avoid cantaloupes that are overly soft, as they may be past their prime, or overly hard, which suggests they are still developing.
Identifying Ripe Cantaloupes
Determining the ripeness of a cantaloupe for seed saving is crucial for obtaining high-quality seeds. Look for a sweet aroma emanating from the fruit. The rind should have a firm texture, not overly soft or hard. A gentle press should reveal a slight give, indicating ripeness. Avoid cantaloupes with any signs of decay or damage, as these could compromise the quality of the seeds.
A ripe cantaloupe is a testament to the beauty and bounty of nature, a worthy candidate for seed preservation.
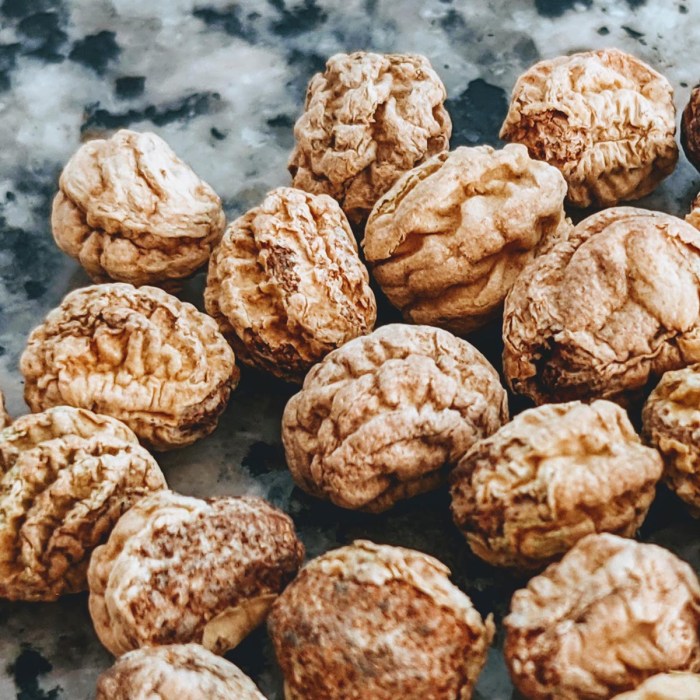
Distinguishing Good Seeds from Bad
Not all seeds are created equal, especially in the world of cantaloupe. Inspecting the seeds for defects is a critical step in ensuring the viability of your seed stock. Good seeds should be plump, firm, and free of any visible damage, discoloration, or deformities. Avoid seeds that are shriveled, cracked, or show signs of decay. The presence of these characteristics could indicate issues with the seed’s ability to germinate and grow into a healthy plant.
A good seed is a promise of a bountiful harvest, a miniature miracle waiting to happen.
Safe Seed Removal
Carefully removing the seeds from the cantaloupe is essential to maintain their viability and prevent contamination. First, cut the cantaloupe in half lengthwise. Using a spoon, gently scoop out the fleshy pulp, which contains the seeds. Ensure you’re working with clean tools to avoid introducing any harmful microorganisms. Rinse the seeds under cool running water to remove any residual pulp or debris.
Once clean, spread the seeds out on a clean surface to dry. This step is critical for maintaining the seeds’ viability, a process as vital as the seed selection itself.
Comparison of Seed Harvesting Methods
| Method | Description | Pros | Cons |
|---|---|---|---|
| Manual | Using a spoon or knife to extract seeds from the pulp. | Gentle and allows for careful inspection of each seed. | Time-consuming for larger quantities. |
| Mechanical | Using a food processor or similar appliance to separate seeds from the pulp. | Faster than manual extraction for large quantities. | May damage some seeds and potentially introduce contamination. |
The table above highlights the contrasting advantages and disadvantages of manual versus mechanical seed harvesting methods. The best approach depends on the scale of the project. Manual harvesting, while slower, offers greater control over the quality of the extracted seeds. Mechanical methods, on the other hand, are more efficient for large-scale seed harvesting but carry a risk of damage.
The ideal approach is a well-considered blend of both methods.
Preparing the Seeds for Planting
A successful harvest of cantaloupe seeds hinges on meticulous preparation. Proper cleaning, drying, and storage ensure the seeds retain viability for future plantings. This crucial step guarantees a bountiful return from your labor of love.
Cleaning the Seeds
After carefully extracting the seeds from the pulp, the first step involves removing any remaining flesh or sticky residue. A gentle rinse in a fine-mesh sieve is often sufficient. Avoid excessive scrubbing, as this can damage the seed coat and reduce germination rates. For particularly stubborn residue, a light soak in a mild solution of water and a pinch of baking soda can be helpful.
Subsequent rinsing ensures a clean seed free of any contaminants.
Drying the Seeds
Thorough drying is paramount to prevent mold and mildew, ensuring the seeds remain viable for a longer period. Direct exposure to sunlight in a well-ventilated area is a common and effective method. A paper towel or a clean cloth can be used to gently blot excess moisture from the seeds before placing them in a well-ventilated location. Alternately, a dehydrator set to a low temperature can accelerate the process.
A crucial aspect is to avoid overcrowding the drying surface to ensure even and rapid drying.
Storing the Seeds
The ideal storage conditions for cantaloupe seeds will preserve their viability for future planting. Storing seeds in airtight containers, such as glass jars or resealable plastic bags, is an excellent practice. Labeling the containers with the date of harvest and variety ensures easy identification and tracking. Properly labeled containers can prevent confusion during future seed sowing.
Storage Methods and Effectiveness
Several methods for storing seeds exist, each with varying degrees of effectiveness. A cool, dark, and dry location, such as a pantry or a cool cellar, is ideal for storing seeds. The temperature range of 35-45°F (2-7°C) is generally recommended for optimal seed longevity. Storing seeds in the refrigerator or freezer can also be effective, though the freezing process can sometimes reduce viability over time.
Freezing is not always the best choice, and the time-sensitivity is higher than other options. Consider the length of time you want to store your seeds when making your decision.
| Storage Method | Effectiveness | Considerations |
|---|---|---|
| Cool, dark, dry location (pantry, cellar) | High | Ideal for long-term storage |
| Refrigerator | Moderate | Suitable for shorter-term storage |
| Freezer | Low | May reduce viability over time |
Germination and Planting
A crucial step in the cantaloupe seed-saving journey is the germination and subsequent planting of your precious seed treasures. This phase, often fraught with anticipation and a touch of horticultural anxiety, is where your careful selection and seed preparation truly come into play. Proper soil preparation, planting techniques, and environmental conditions will determine the success of your future cantaloupe harvest.Successful germination hinges on providing the ideal conditions for the tiny seedlings to emerge from their dormant state.
The goal is to create a nurturing environment where the seeds can sprout strong and healthy, ready to face the challenges of their future growth. The careful preparation of soil and seeds, followed by strategic planting, paves the way for a bountiful yield.
Soil Preparation for Planting
The soil’s health is paramount to successful cantaloupe germination. Cantaloupe thrives in well-drained, fertile soil rich in organic matter. Avoid compacted or overly heavy soils. Preparing the soil involves more than just tilling; it’s about creating a bed conducive to root growth and nutrient absorption.
- Amend the soil with compost, well-rotted manure, or other organic matter. This improves drainage, aeration, and water retention, providing a balanced environment for seed germination. Adding a generous amount of organic matter ensures the soil is loose and fertile, providing essential nutrients for the developing roots.
- Ensure good drainage. Poor drainage can lead to waterlogging, a common enemy of seedlings. Amend clay-heavy soil with sand or perlite to improve drainage. Water should drain readily but not run off completely, promoting a moist but not soggy environment.
- Test the pH of the soil. A slightly acidic to neutral pH (6.0-7.0) is ideal for cantaloupe growth. Adjust the pH if necessary with lime or sulfur, as this can significantly impact nutrient availability.
Planting Practices
Correct planting techniques are vital for healthy seedling development. Consider factors such as seed spacing, depth, and the overall planting area to optimize germination and future growth.
- Space seeds appropriately. Following recommended spacing ensures that each plant has sufficient room to grow and develop its root system and foliage. Too close, and you risk competition for resources, leading to weaker plants and potentially lower yields. The spacing recommendations will depend on the chosen variety.
- Plant seeds at the appropriate depth. The ideal depth will vary depending on the size of the seed. Generally, a depth of about 1 inch (2.5 cm) is sufficient for most cantaloupe seeds. Planting too deep can hinder germination; planting too shallow may expose the seed to drying out.
- Water gently after planting. Avoid disturbing the soil around the seeds; gentle watering ensures that the seeds are properly hydrated without disrupting the soil structure. Light, consistent moisture is key for the initial stages of germination.
Ideal Germination Conditions
Optimizing temperature and moisture levels are critical to the success of cantaloupe germination. The ideal conditions will vary depending on the specific cantaloupe variety.
- Temperature. Most cantaloupe varieties germinate best in temperatures ranging from 70-80°F (21-27°C). Warmer temperatures can accelerate the process, but extremes can be detrimental. Maintaining a consistent temperature is essential for uniform germination.
- Moisture. Maintain consistent moisture in the soil, keeping it consistently moist but not waterlogged. Regular checks are important to avoid overwatering or underwatering. A moist but not soggy environment is essential for healthy root development and seed germination.
Planting Methods
Different planting methods offer varying advantages, catering to diverse needs and preferences.
- Direct Sowing. Direct sowing involves planting the seeds directly into the final growing location. This method is straightforward, but germination success depends heavily on consistent moisture and temperature levels throughout the seedling’s development. A good example is planting seeds in a garden bed.
- Starting Seeds Indoors. Starting seeds indoors allows you to control the environment and optimize germination conditions before transplanting. This method is particularly useful in areas with cool spring temperatures or unpredictable weather patterns. For example, starting seeds indoors provides protection from frost and ensures a more consistent germination rate.
Growing Tips and Considerations
Cultivating cantaloupes is a delightful endeavor, akin to nurturing tiny, sun-kissed gourds. Success hinges on understanding the nuances of their growth, from the sun’s embrace to the soil’s nourishment. This section will guide you through the essential aspects of providing your cantaloupe vines with the best possible environment.Proper sunlight and water are fundamental for robust cantaloupe growth. Ignoring these basic needs is akin to neglecting a cherished pet—the results won’t be pretty.
Sunlight Requirements
Cantaloupe vines thrive under ample sunlight, ideally receiving at least 8 hours of direct sunlight daily. Insufficient sunlight can result in stunted growth and reduced fruit production, potentially leading to a harvest that’s less than satisfying. Planting in a sunny location, ensuring adequate exposure throughout the day, will maximize the chances of a bountiful crop. Think of it as giving your cantaloupe vines the Vitamin D they need to flourish!
Watering Strategies
Consistent moisture is vital for cantaloupe development. Water deeply and regularly, ensuring the soil remains consistently moist but not waterlogged. Waterlogging can lead to root rot, a dreadful condition that can quickly decimate a crop. Maintaining a healthy soil moisture balance is crucial, ensuring the roots receive the hydration they need without drowning. This is similar to giving your cantaloupes a refreshing drink, but not overdoing it.
Fertilizing Practices
Proper fertilization is crucial for cantaloupe plants to reach their full potential. Use a balanced fertilizer, rich in nitrogen, phosphorus, and potassium. A general rule of thumb is to apply a balanced fertilizer at the time of planting and every few weeks thereafter, following the instructions on the product label. Avoid over-fertilizing, as this can lead to excessive vegetative growth at the expense of fruit development.
This is similar to feeding your cantaloupes a nutritious meal, but not too much!
Pest and Disease Management
Unfortunately, cantaloupe plants are susceptible to a variety of pests and diseases. Early detection and prompt action are essential for mitigating damage and preserving the health of your plants. Regular inspection and vigilant monitoring are key to identifying potential problems early on.
Pest Control
Common pests include aphids, squash bugs, and spider mites. These pests can be controlled with organic methods like insecticidal soap or neem oil. Introducing beneficial insects, like ladybugs, can also help manage pest populations naturally. In cases of severe infestations, consider consulting with a local agricultural expert to determine the most effective approach.
Disease Management
Diseases such as powdery mildew and blight can also affect cantaloupe plants. Ensure proper spacing between plants to improve air circulation and prevent the spread of disease. Removing infected plants promptly is crucial to stop the spread. If you notice any signs of disease, consult a gardening expert for specific recommendations.
Troubleshooting Common Issues
- Yellowing leaves: This could indicate a lack of nutrients, improper watering, or pest infestation. Assess the overall health of the plant and adjust watering and fertilizing practices accordingly. This is akin to checking on a sick pet—identify the problem, and take action.
- Stunted growth: Insufficient sunlight, poor soil quality, or nutrient deficiencies are possible causes. Ensure adequate sunlight, improve soil conditions, and amend the soil with a suitable fertilizer.
- Fruit cracking: Rapid changes in temperature and water availability can lead to fruit cracking. Maintain consistent moisture levels to minimize this risk. This is akin to a sudden temperature change affecting a fragile item—be careful!
Seed Viability and Storage
Preserving your hard-earned cantaloupe seeds for future harvests is akin to preserving a tiny piece of horticultural history. Proper storage is crucial to ensure these tiny time capsules retain their sprouting potential, allowing you to enjoy the fruits (and seeds!) of your labor for years to come. Understanding the factors affecting seed longevity and employing the right storage techniques is key to a successful seed bank.
Factors Affecting Seed Viability
Seed viability, the ability of a seed to germinate, is influenced by several factors. Environmental conditions during seed development play a pivotal role. Moisture content, temperature fluctuations, and the presence of pathogens or pests can significantly impact seed longevity. Additionally, the genetic makeup of the seed itself contributes to its overall viability. Some varieties are naturally more resistant to deterioration than others.
Furthermore, the quality of the initial seed harvest and the immediate post-harvest handling also affect the overall viability of the seeds.
Best Methods for Long-Term Seed Storage
Several methods can extend the lifespan of your precious cantaloupe seeds. Properly storing them in optimal conditions can preserve their viability for years. These methods often involve reducing moisture content, lowering temperatures, and limiting exposure to light and oxygen.
- Refrigeration: Storing seeds in a cool, dark refrigerator is a practical approach for short-term preservation. This method effectively slows down the aging process, keeping seeds viable for several months. For example, a cool, dark vegetable drawer is a suitable location within the refrigerator.
- Desiccation: This technique, often employed for long-term storage, involves removing moisture from the seeds. This is typically achieved by placing seeds in a dry, airtight container and storing them in a cool, dark location, such as a pantry or a cool, dark basement. The principle is to reduce moisture content to a minimal level, significantly hindering the growth of microorganisms and slowing down the natural aging process.
For example, using silica gel packets to absorb any remaining moisture is an excellent strategy.
- Seed Vaults: For truly long-term storage, seed vaults, such as the Svalbard Global Seed Vault, offer the ultimate protection. These specialized facilities maintain exceptionally low temperatures and provide an impenetrable barrier against environmental hazards. This method provides the highest level of protection and security. For example, these vaults are built to withstand even extreme climate events, ensuring the long-term preservation of a wide array of seeds.
Testing Seed Viability
A crucial step in seed management is testing viability before planting. This helps you determine the proportion of seeds that are truly capable of germination. Several methods exist for assessing seed viability.
- Paper Towel Test: A simple and effective method involves placing seeds on a damp paper towel, wrapping it in plastic wrap, and placing it in a warm environment. Monitoring the germination rate within a specific timeframe allows you to assess the viability. For example, observing seed sprouting after a few days indicates good viability.
- Hydro Test: Submerging seeds in water allows you to visually identify those that are not viable. Non-viable seeds tend to sink, while viable seeds float, making the process of assessing viability fairly straightforward. For example, this is particularly useful for assessing a large number of seeds quickly.
Storage Method Comparison
The following table summarizes the different storage methods and their potential longevity.
| Storage Method | Potential Longevity | Advantages | Disadvantages |
|---|---|---|---|
| Refrigeration | Several months | Simple, readily available | Limited longevity |
| Desiccation | Several years | Relatively inexpensive, manageable at home | Requires careful moisture control |
| Seed Vaults | Decades to centuries | Ultimate protection from environmental hazards | Requires specialized facilities and infrastructure |
Cantaloupe Varieties and Seed Saving
A veritable cornucopia of cantaloupe varieties graces our gardens, each with its unique charm and flavour profile. Preserving these treasures through seed saving is a delightful pursuit, but understanding the nuances of each variety is key to ensuring successful propagation. Knowing which varieties are best suited for seed saving, and how their traits translate to their progeny, is essential for the discerning seed saver.
Popular Cantaloupe Varieties for Seed Saving
A diverse selection of cantaloupe varieties lends itself to seed saving. Choosing a variety that aligns with your preferences and the local climate is crucial for success. Some popular choices include:
- ‘Golden Delicious’: This variety boasts a sweet, golden flesh and a pleasing aroma. Its consistently high quality makes it a favourite among gardeners.
- ‘Cantaloupe de Bourgogne’: Known for its robust flavour and impressive yield, this French variety is a reliable choice for those seeking a robust and flavourful cantaloupe.
- ‘Honeydew’: While technically a different melon, its closely related characteristics and often-interchangeable uses make it a valuable seed-saving alternative for those looking for a slightly different melon type.
- ‘Sugar Baby’: This compact variety is perfect for smaller gardens or those who prefer a sweeter melon. Its smaller size also makes it easier to manage during the saving process.
Variety Influence on Saved Seeds
The genetic makeup of the parent plant directly impacts the characteristics of the seeds. A superior variety with robust flavour, texture, and disease resistance is more likely to pass these traits onto its progeny. Seed saving isn’t a guaranteed lottery ticket to producing identical offspring, but it does provide a strong foundation. The saved seeds will inherit the genetic traits of the parent plant.
Differences in Seed Saving Procedures, How to save cantaloupe seeds
While the basic principles of seed saving remain consistent across cantaloupe varieties, certain nuances may exist. For example, some varieties might be more prone to certain diseases or require specific growing conditions. Consequently, the seed saving procedure may vary slightly.
Cantaloupe Variety Seed Saving Requirements
A concise table outlining the specific seed saving requirements for various cantaloupe varieties is provided below. This table highlights the factors that may influence your choices when selecting a cantaloupe variety.
| Variety | Growing Season | Disease Resistance | Specific Notes |
|---|---|---|---|
| Golden Delicious | Medium | Average | Excellent flavour, suitable for various climates. |
| Cantaloupe de Bourgogne | Long | Good | Known for its robust yield and flavour. |
| Honeydew | Medium | Average | Excellent alternative for seed saving. |
| Sugar Baby | Short | Fair | Ideal for smaller spaces and sweeter flavour. |
Troubleshooting and Problem Solving: How To Save Cantaloupe Seeds
Ah, the perils of seed saving! Even the most diligent seed saver can encounter setbacks. From fungal infestations to premature decay, the path to perfect seeds is rarely smooth. But fear not, fellow enthusiasts! This section details the common pitfalls and provides foolproof solutions, ensuring your precious cantaloupe seeds reach their full potential.
Common Seed Saving Challenges
Seed quality and viability can be affected by various factors. Unfavorable environmental conditions, improper storage, or diseases can lead to decreased germination rates. Recognizing these challenges early allows for proactive measures to mitigate potential losses. This section highlights typical issues and the steps to address them.
Identifying Seed Quality Issues
A critical aspect of successful seed saving is recognizing potential problems early. Inspecting seeds for physical damage, discoloration, or unusual textures is essential. Observe for mold, mildew, or other signs of fungal growth. These visual cues can indicate issues that could compromise the viability of the seeds. For example, seeds exhibiting significant discoloration or shriveled textures may indicate a compromised internal structure.
Early detection allows for swift corrective action, maximizing your chances of success.
Preventing Seed Decay and Damage
Preventing seed decay and damage is crucial for maintaining seed viability. Proper drying techniques are essential to reduce moisture content, minimizing the risk of fungal infections. Storing seeds in airtight containers in a cool, dry environment helps maintain optimal conditions. Maintaining a consistent temperature and humidity level is paramount to prevent the growth of mold and other organisms that could harm the seeds.
For example, storing seeds in a refrigerator at a consistent temperature can significantly reduce the risk of spoilage.
Dealing with Common Seed Saving Challenges: A Step-by-Step Guide
This guide Artikels a systematic approach to tackling common seed saving challenges. This process is designed to ensure you address potential issues promptly and efficiently, preserving your valuable seeds.
- Inspecting Seeds Regularly: Visual inspections of seeds should be performed at regular intervals, paying close attention to any signs of mold, mildew, or other signs of decay. This proactive approach allows for prompt intervention if problems arise.
- Proper Drying: Ensure seeds are thoroughly dried before storage. This prevents moisture buildup, which can lead to fungal growth. Properly drying the seeds is crucial to preserve their viability. For example, spread seeds on a paper towel in a well-ventilated area.
- Sanitation Practices: Maintain a clean workspace and tools throughout the seed saving process. This helps prevent contamination by fungi and bacteria. Sanitizing tools and equipment before and after use helps reduce the risk of cross-contamination.
- Storage Conditions: Store seeds in airtight containers in a cool, dry, and dark place. Maintaining consistent temperature and humidity levels is critical for seed longevity. Avoid areas prone to fluctuations in temperature or humidity. For example, basements or attics should be avoided as storage locations.
Addressing Seed Viability Issues
If signs of decreased seed viability are observed, several measures can be implemented to address the problem. These approaches focus on optimizing conditions to stimulate germination and increase the chance of successful planting. Proper storage conditions, as mentioned previously, are crucial to maintaining seed viability.
- Testing Germination Rates: A small-scale germination test can identify the viability of a batch of seeds. This process involves planting a small sample of seeds and observing the germination rate. A low germination rate might indicate a problem with the seed batch. Compare the germination rates of the seeds to previous seed batches to determine if there is a pattern.
If a significant difference is observed, it may indicate a problem with the seed batch.
- Optimizing Storage Conditions: Adjust storage conditions to address any issues affecting seed viability. Consider factors like temperature, humidity, and light exposure. Proper storage of seeds is paramount for their long-term viability. For example, if the seeds are stored in a location with high humidity, adjusting the storage location or employing a desiccant may help.
Illustrations and Visual Aids

A visual feast awaits, my horticultural friends! Let’s dive into the world of cantaloupe seed saving with a healthy dose of imagery. Visual aids are crucial for mastering the art of seed harvesting, from recognizing a prize-winning specimen to identifying a seed’s potential.Visual aids are not just pretty pictures; they are your personal cantaloupe seed-saving guides. They will help you identify quality specimens and guide you through the entire process, ensuring a bountiful harvest of future cantaloupes.
Ripe Cantaloupe Identification
A truly ripe cantaloupe is a sight to behold! Imagine a beautiful, melon-shaped orb, smooth and slightly ribbed, like a gentle caress. The skin should be a rich golden-orange color, free of blemishes or soft spots. Its aroma should be sweet and inviting, beckoning you closer. The stem should be easily separated, indicating ripeness and readiness for harvesting.
Good vs. Bad Seeds
Good cantaloupe seeds are plump, firm, and a rich, ivory or cream color. Think of them as tiny, glistening pearls, ready to be nestled in the earth. Avoid seeds that are shriveled, misshapen, or discolored. These seeds may have encountered adverse conditions during development, potentially impacting their viability.
Seed-Saving Process Illustration
Imagine a meticulously planned sequence, like a master chef preparing a culinary masterpiece. We will depict this with clear, step-by-step visual guidance:
- Step 1: Harvesting. A ripe cantaloupe is carefully harvested, showing the stem’s easy detachment. The melon is placed on a clean surface, ready for the next step.
- Step 2: Cutting. The cantaloupe is cut open, revealing the sweet, juicy flesh and the rows of seeds. The cut is neat and straight, showcasing the internal structure.
- Step 3: Seed Extraction. The seeds are gently scooped out using a spoon, showcasing the process of careful removal without damaging the delicate seeds. A clean, shallow container is shown for collecting the seeds.
- Step 4: Washing. The seeds are thoroughly washed in a clean sieve or strainer under running water, ensuring all the pulp is removed, showing a clean, clear water stream washing away any remnants of the flesh.
- Step 5: Drying. The seeds are carefully spread out on a paper towel or tray, illustrating a flat, even spread to allow proper drying, and then are placed in a dark, dry area to prevent mold growth.
Storage Methods
Seed storage is critical for preserving viability. Different methods cater to different storage needs. Consider the following visual representations:
| Method | Description |
|---|---|
| Paper Envelope | Small, labeled paper envelopes are ideal for short-term storage, offering protection from moisture and pests. |
| Mason Jar | A mason jar with a tight-fitting lid is a perfect choice for longer-term storage, keeping the seeds protected from moisture and light. |
| Airtight Container | An airtight container with a desiccant pack is excellent for extended storage, providing a dry environment to prevent seed decay. |
Final Summary
Congratulations! You’ve now equipped yourself with the knowledge to successfully save and cultivate cantaloupe seeds. Remember, careful attention to detail, from selecting the right fruit to proper storage, is key to achieving a bountiful harvest. Cultivating your own seeds empowers you to create a thriving garden, filled with the fruits of your labor and the satisfaction of nurturing nature’s bounty.
Questions and Answers
How do I know if a cantaloupe is ripe for seed saving?
Look for a deep, rich orange color, a slightly sweet aroma, and a slightly soft rind. Avoid any with bruises or signs of decay.
What’s the best way to clean the seeds after harvesting?
Gently rinse the seeds under cool water, ensuring you remove all pulp and debris. Avoid harsh scrubbing that could damage the seeds.
How long should I dry the seeds before storing?
Dry the seeds thoroughly on a paper towel or screen in a cool, dry, and well-ventilated area until they feel crisp and no longer sticky. Avoid direct sunlight.
What are some common pests that affect cantaloupe plants?
Aphids, squash bugs, and cucumber beetles are common pests. Inspect plants regularly and take action if infestations are detected. Consider using natural pest control methods whenever possible.
