How long does window tint take to dry? A crucial question for any automotive enthusiast or home improvement aficionado. The answer, shrouded in a tapestry of variables, unveils a captivating journey through the intricate science of film curing. From the subtle nuances of film type to the dramatic impact of environmental conditions, this exploration reveals the secrets behind achieving flawless, long-lasting window tint applications.
Factors such as temperature, humidity, and application method all play a pivotal role in determining the drying time. A deeper dive into these factors will unveil the intricate dance between the tint and its environment, ultimately revealing the optimal conditions for a swift and successful curing process.
Factors Affecting Drying Time
Window film curing, a critical aspect of professional application, is influenced by a multitude of variables. Understanding these factors ensures optimal adhesion and longevity of the film, preventing premature peeling or bubbling. Proper consideration of these variables is essential for achieving a flawless and durable installation.The drying time of window tint is not a fixed value. It depends on various factors interacting in complex ways.
These factors range from the specific type of film to the environmental conditions and the application method employed. Predicting the precise drying time requires careful evaluation of these elements.
Different Types of Window Tint Film
Various window tint film types exhibit different curing mechanisms. Ceramic films, for example, often require longer drying times compared to metallic or carbon-based films. The inherent chemical composition of the film significantly impacts its reaction rate and, subsequently, its drying time. The specific chemical formulation used in the film manufacturing process affects the curing rate. Films designed for high-temperature environments, for instance, might contain specialized additives that necessitate extended curing times to ensure robust adhesion.
Ambient Temperature and Humidity, How long does window tint take to dry
Temperature and humidity significantly impact the drying time of window tint film. Higher temperatures accelerate the curing process, while high humidity can slow it down. This is due to the evaporation rate of the solvent or curing agents. Warmer temperatures expedite the evaporation of solvents or curing agents, thereby reducing the drying time. Conversely, high humidity can impede evaporation, leading to longer drying times.
The interplay between these environmental factors is critical in determining the overall drying time.
Film Thickness
The thickness of the window tint film directly correlates with the drying time. Thicker films require more time to cure as the curing agent needs to penetrate and react throughout the entire film thickness. This effect can be observed in tinted films designed for extreme weather conditions, as these films typically have a thicker construction to maintain their structural integrity and to withstand various environmental impacts.
Application Methods
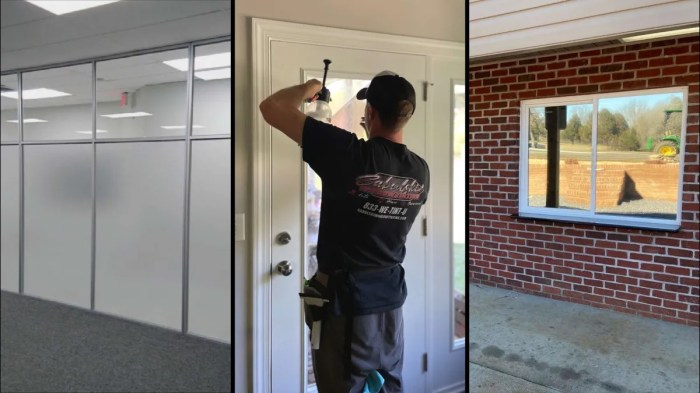
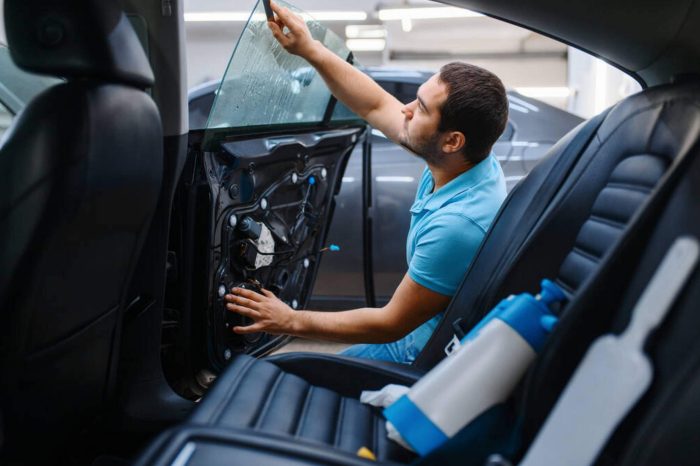
The application method significantly influences drying time. Professionally applied window tint, with the use of specific techniques, often cures faster and more evenly. Applying the tint with precision and care, using tools such as squeegees or rollers, minimizes air bubbles and ensures even distribution of the adhesive. These techniques help to accelerate the curing process. Conversely, improper application can result in uneven drying, leading to longer drying times and potential issues.
Curing Process
The specific curing process of the tint film impacts the drying time. Some films use UV curing, which accelerates the process. The curing process relies on the chemical reactions within the film. Different types of films utilize various curing mechanisms, some of which are faster than others. The specific type of curing agent and its reaction rate determine the overall curing time.
Understanding the curing mechanism is critical for estimating drying times accurately.
Drying Time Comparison Table
| Tint Type | Temperature (°C) | Humidity (%) | Estimated Drying Time (hours) |
|---|---|---|---|
| Ceramic | 25 | 50 | 12 |
| Metallic | 25 | 50 | 8 |
| Carbon | 25 | 50 | 10 |
| Ceramic | 35 | 50 | 9 |
| Ceramic | 25 | 80 | 15 |
Drying Time Procedures
Proper window tint application hinges on meticulous drying procedures. Skipping these steps can lead to unsightly imperfections, compromised adhesion, and a window tint that doesn’t last. Understanding the drying process and following the Artikeld steps ensures a flawless and durable finish.Careful attention to drying time and techniques ensures a professional-quality installation, maximizing the longevity and aesthetic appeal of your window tint.
Each stage plays a crucial role in the final outcome.
Step-by-Step Drying Procedure
Following a systematic approach to drying is paramount for achieving optimal results. This detailed procedure Artikels the critical steps for a flawless application.
- Initial Cooling and Inspection: Immediately after application, allow the tint to cool slightly. Carefully inspect the application area for any visible imperfections, like wrinkles or bubbles. Addressing these immediately is crucial for a smooth finish.
- Gentle Smoothing: Using a soft, lint-free cloth, gently smooth out any wrinkles or imperfections. Avoid applying excessive pressure, which can cause the tint to stretch or tear. Employing a soft-edged squeegee is often beneficial for smoothing out areas.
- Controlled Drying: Employ a professional-grade squeegee or specialized tools to remove excess adhesive. This step is vital to ensure the tint adheres properly and that no air pockets are trapped beneath. The proper use of these tools is key to a clean, smooth finish.
- Avoiding Direct Heat: Direct sunlight or excessive heat can hinder the drying process and cause issues like warping or discoloration. Maintaining a controlled environment is vital for optimal adhesion. Keep the area well-ventilated to accelerate the drying process while maintaining an even temperature.
- Monitoring the Drying Process: Continuously monitor the tint for any signs of bubbling or uneven adhesion. Using a strong light source to check for any irregularities is recommended. Be attentive to the specific drying times recommended by the manufacturer of the window tint, as this will vary based on the material and application.
- Final Inspection: After the initial drying period, perform a thorough inspection for any remaining imperfections. Re-applying the smoothing techniques as needed can correct minor issues. Verify that the tint is fully adhered and smooth across the entire surface.
Importance of Following Procedures
Adhering to the drying procedures is crucial for several reasons. First, it ensures that the tint adheres properly, maximizing its longevity. Second, it prevents issues like bubbles, wrinkles, or uneven adhesion, maintaining a professional-looking finish. Third, following the correct drying procedures minimizes the risk of damaging the tint itself, preventing premature peeling or cracking. Ultimately, meticulous adherence to the Artikeld procedures guarantees a high-quality, durable installation.
Influence of Application Tools
The tools used during the application significantly impact the drying process. A quality squeegee, for instance, facilitates smooth application and controlled adhesive removal. Different squeegees, and application methods, will have differing drying times. For optimal results, choose tools appropriate for the tint material and application technique.
Importance of Avoiding Direct Sunlight or High Heat
Excessive heat can negatively impact the drying process, potentially causing warping, discoloration, or reduced adhesion. Protecting the tinted area from direct sunlight or high heat sources during the drying period is essential. Keeping the area cool and well-ventilated will allow the adhesive to cure properly.
Monitoring the Drying Process
Monitoring the drying process is essential to catch any potential issues early. This can involve visually inspecting the tint for bubbles, wrinkles, or uneven adhesion. A strong light source can highlight irregularities. Following the manufacturer’s recommended drying time is also crucial.
Potential Issues During Drying and Solutions
| Issue | Description | Solution |
|---|---|---|
| Bubbles | Air trapped under the tint | Re-apply and smooth out the affected area with a soft, lint-free cloth and a squeegee. |
| Wrinkles | Uneven application of the tint | Re-apply and smooth out the affected area using a soft squeegee and lint-free cloth, ensuring even pressure. |
| Uneven Adhesion | Uneven bonding of the tint | Re-apply and ensure proper smoothing with a squeegee, ensuring even pressure and a uniform application. Adjust drying time if needed. |
Troubleshooting Common Issues
Window tint application, while generally straightforward, can sometimes encounter hiccups during the drying phase. Understanding the potential pitfalls and their remedies is crucial for achieving a professional-looking, long-lasting result. Knowing the causes of these issues will allow you to address them quickly and effectively, preventing costly mistakes.Uneven drying, cracking, and peeling are common problems that can be traced back to various factors, from improper application techniques to environmental conditions.
Careful attention to detail during the entire process, from preparation to curing, is essential to minimize these issues and achieve a flawless finish.
Uneven Drying
Uneven drying often stems from inconsistent application of the tint material. If the tint wasn’t evenly spread across the window surface or if certain areas received more product than others, the curing process may lead to noticeable variations in the final finish. This can be especially problematic in larger windows.Another cause of uneven drying is inconsistent heat distribution during the curing process.
If the heat source is not properly positioned or if the window is not uniformly exposed to the heat, parts of the tint may dry faster than others. This difference in drying times creates the uneven look.
Cracking
Tint cracking, a frustrating issue, frequently arises from improper preparation of the window surface. If the window isn’t meticulously cleaned or if contaminants remain, these imperfections can act as stress points, leading to cracks in the cured tint. Using an inadequate adhesive or applying it incorrectly can also contribute to cracking.Rapid temperature fluctuations during the curing process can also cause cracking.
Sudden changes in temperature can create stress within the tint, leading to micro-fractures. It’s crucial to maintain a stable environment throughout the curing period to avoid this.
Peeling
Peeling, unfortunately, is another common problem after window tint application. This can occur due to improper adhesion between the tint and the window. This could be caused by using a subpar adhesive, applying too much or too little adhesive, or applying the tint in a hurry. Inadequate surface preparation or the presence of residual contaminants can also lead to peeling.Incorrect application techniques, like not pressing the tint firmly enough or applying it with excessive pressure, can lead to uneven adhesion, resulting in areas more prone to peeling.
This can be avoided by using proper techniques and taking the time to ensure the tint is adequately bonded to the window surface.
Preventing Issues During Application
Implementing proper application procedures can significantly reduce the risk of encountering drying problems. Thoroughly cleaning the window surface before application is paramount. Using the correct adhesive and following the manufacturer’s instructions closely is crucial. Ensuring even application and maintaining a controlled curing environment will minimize the risk of uneven drying, cracking, and peeling.
Troubleshooting Guide
| Question | Answer |
|---|---|
| Why is my tint taking longer than expected? | Several factors can contribute to extended drying times. Low ambient temperatures, inadequate curing equipment, or insufficient adhesive can all slow down the curing process. Also, insufficient or incorrect application technique can hinder the drying process. |
| My tint is unevenly dry. What should I do? | Uneven drying often results from inconsistent application or improper heat distribution. Ensure consistent application of the tint and proper heat positioning during the curing process. |
| How do I prevent cracking? | Thorough window preparation, using appropriate adhesive, and maintaining a stable curing temperature can prevent cracking. |
| My tint is peeling. What’s the cause? | Improper adhesion, inadequate surface preparation, or using the wrong adhesive are common causes of peeling. Check for contaminants and ensure the tint is properly adhered to the window. |
Visual Aids & Illustrations
Visual aids are crucial for understanding the intricacies of window tint drying. Clear diagrams and illustrations can transform complex processes into easily digestible information, enabling better comprehension and practical application. They allow us to visualize different scenarios, from ideal drying conditions to potential problems, ultimately leading to more efficient and effective window tinting.
Stages of Window Tint Drying
Visualizing the drying process is essential for quality control and troubleshooting. A diagram depicting the stages of window tint drying can be highly beneficial. Imagine a timeline divided into three key stages: initial adhesion, solvent evaporation, and final curing. The initial adhesion stage is represented by the tint firmly adhering to the window surface. Solvent evaporation is depicted as the tint’s liquid components gradually transforming into a vaporous state, leaving behind a hardened film.
The final curing stage shows the tint reaching its maximum hardness and achieving its final aesthetic appeal.
Effects of High Humidity on Drying Time
High humidity significantly impacts the drying process. A visual illustration could show a window with applied tint, juxtaposed with another window exhibiting condensation. The humid environment slows down the evaporation rate of the solvent in the tint, leading to prolonged drying times. This increased moisture in the air creates a barrier to the evaporation process, making it harder for the solvent to escape and the tint to fully cure.
This can result in a less durable and aesthetically pleasing final product.
Application Methods and Drying Time
Different application methods affect the drying time of window tint. A series of illustrations would compare and contrast spray application, roll application, and squeegee application. Spray application, for instance, could be depicted with a spray gun directed at the window, highlighting the potential for uneven drying due to varying solvent distribution. Roll application, where the tint is rolled onto the window, can be visualized with a roller applicator, showcasing the controlled application.
Squeegee application, utilizing a squeegee to spread and smooth the tint, would illustrate the potential for quicker drying times due to controlled pressure and even distribution.
Curing Process of Different Tint Types
The curing process varies depending on the type of tint used. Visual representations of different tint types undergoing the curing process would be helpful. For instance, a chart could show various types of tint – metallic, ceramic, or film-based – and their corresponding curing times. These illustrations could visually represent the differences in the chemical reactions involved in each type of tint, affecting the drying time and final properties of the tint.
Role of Air Circulation in Drying
Proper air circulation is crucial for optimal drying. A visual aid could show a window with applied tint, with arrows indicating air flow. Adequate airflow facilitates the removal of solvent vapors, speeding up the drying process. Poor airflow, illustrated by a stagnant air pocket around the window, would hinder solvent evaporation, leading to extended drying times and potentially leading to bubbles or uneven curing.
Additional Considerations: How Long Does Window Tint Take To Dry
Beyond the fundamental factors influencing window tint drying time, several external variables significantly impact the process. Understanding these nuances is crucial for achieving a successful and long-lasting application. Factors such as climate, application method, and the specific products used all play a role in the overall drying period.
Impact of Climate on Drying Time
Different climates present varying conditions that affect the rate at which window tint cures. High humidity, for example, can impede the evaporation of solvents, leading to prolonged drying times. Conversely, dry, arid climates can accelerate the drying process. In regions with frequent temperature fluctuations, the curing process may be uneven, resulting in potential inconsistencies in the final product.
Extreme temperatures, both high and low, can also affect the adhesive’s performance and the overall quality of the bond. For example, in exceptionally hot environments, the solvents may evaporate too rapidly, leading to uneven curing.
Comparison of Drying Times for Different Application Methods
The method employed for window tint application directly influences the drying time. Spray application, for instance, often involves a quicker initial drying phase but may require longer overall curing time compared to heat-applied methods. Heat application, which utilizes specialized tools to activate the adhesive, usually accelerates the process, resulting in a faster drying time. This difference is due to the increased temperature facilitating faster solvent evaporation.
Effect of Products on Drying Time
The use of specific products can dramatically affect the drying time of window tint. Drying agents, for instance, are designed to accelerate the evaporation of solvents, reducing the overall drying time. Similarly, different adhesives will have varying drying characteristics. Some adhesives may require longer curing times than others to achieve a strong and durable bond. For example, a specialized, high-performance adhesive designed for extreme environments might have a longer drying time to ensure optimal adhesion and longevity.
Safety Precautions During the Drying Period
Maintaining safety during the drying period is paramount. Adequate ventilation is crucial to prevent the inhalation of potentially harmful solvents. Care must be taken to avoid contact with the adhesive or any chemical residues, as they can cause irritation or harm. Proper safety equipment, including gloves and eye protection, should always be worn during the application and drying phases.
Additionally, caution should be exercised when handling the application tools to prevent accidental injury.
Role of Proper Ventilation During the Drying Process
Adequate ventilation during the drying process is essential for a successful and safe installation. Proper airflow facilitates the rapid evaporation of solvents, reducing the drying time and minimizing the risk of health hazards. Poor ventilation can lead to prolonged exposure to potentially harmful fumes and increase the risk of respiratory problems. Ensuring proper ventilation, particularly in enclosed spaces, is critical to worker safety and the successful completion of the window tinting job.
Outcome Summary
In conclusion, the drying time of window tint is a multifaceted process, influenced by a multitude of variables. Understanding these factors, and meticulously following proper application procedures, ensures a professional-grade installation, free from common issues such as bubbles or uneven drying. With the knowledge gained, you are now empowered to achieve a perfect window tint finish, guaranteed to endure the test of time.
FAQs
Why is my tint taking longer than expected?
Several factors can contribute to extended drying times. High humidity, inadequate ventilation, or the use of improper application methods can all lead to slower curing. Moreover, certain types of tint film, especially thicker ones, naturally require more time to fully cure. A thorough review of the application process and environmental conditions can pinpoint the cause of the delay.
How do I prevent bubbles from forming during drying?
Bubbles, a common affliction, arise from trapped air pockets. Ensure proper smoothing of the film during application, using specialized tools to eliminate wrinkles and ensure a tight seal. Using a squeegee or other appropriate tools to thoroughly remove air pockets is crucial. Applying a thin, even layer of the tint and working in sections also helps.
Can I use a hairdryer to speed up the drying process?
While a hairdryer might seem like a tempting solution, it’s generally not recommended. The concentrated heat can cause uneven drying, potentially leading to damage to the tint film. Instead, focus on proper application techniques and environmental conditions to achieve optimal drying results.
What are the potential safety precautions during the drying period?
Safety is paramount during the drying process. Avoid direct sunlight or high heat during the critical curing period. Ensure adequate ventilation to prevent the buildup of harmful fumes, especially if using specialized adhesives or solvents. Always consult the manufacturer’s instructions for specific safety guidelines.
