How to cut a graphite golf shaft sets the stage for understanding the crucial process of customizing your golf club. This detailed guide will walk you through the steps of safely and effectively cutting a graphite golf shaft, ensuring optimal performance and a precise fit for your game.
Graphite shafts are commonly used in golf clubs due to their lightweight nature and enhanced feel. Understanding the different types of graphite shafts and their characteristics is essential for making informed choices. This guide will cover the necessary tools, safety precautions, and step-by-step instructions for a successful cut. It will also help you prepare and measure the shaft correctly before starting the cutting process.
Introduction to Graphite Golf Shaft Cutting
Graphite golf shafts are a popular choice for golfers seeking improved performance and feel. Their lightweight nature and flexibility contribute to increased swing speed and distance. They offer a more forgiving feel compared to steel shafts, especially beneficial for golfers with less consistent swing mechanics.The flexibility and responsiveness of graphite shafts are carefully designed to enhance the club’s overall performance.
Different graphite shaft types are available, each with its own unique characteristics. These characteristics influence the overall feel, distance, and forgiveness of the club. Properly understanding these differences is crucial for selecting the right shaft for your game.
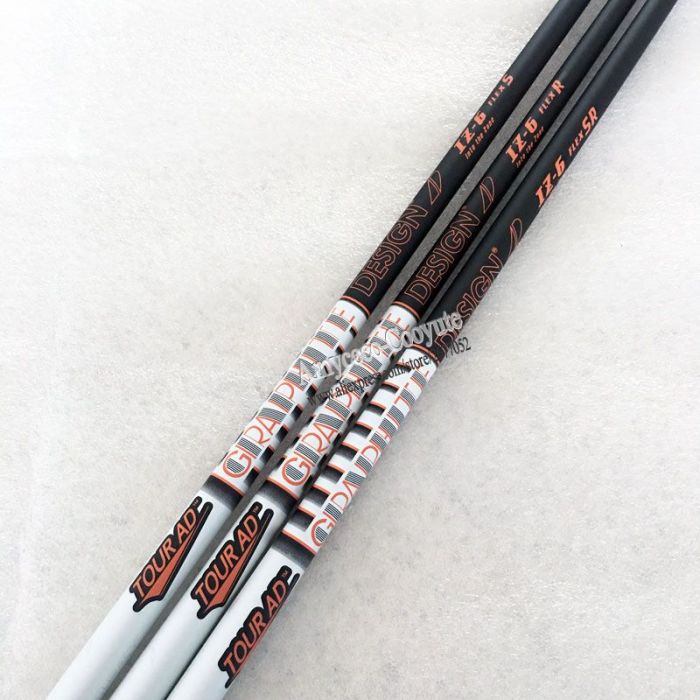
Graphite Golf Shaft Types
Graphite shafts are categorized based on their flex characteristics, which directly impact a golfer’s swing and the ball’s flight. Common flex types include stiff, extra stiff, regular, and senior. Stiff shafts are best suited for powerful swings and provide maximum distance. Extra stiff shafts offer even more distance for elite golfers with powerful swings. Regular shafts are a versatile option for golfers with moderate swing strength, aiming for a balance of distance and control.
Senior shafts are designed for golfers with a weaker swing, offering greater forgiveness and easier control. Understanding the differences in these flex types is key to optimizing club performance.
Importance of Proper Shaft Cutting
Precise cutting of graphite golf shafts is essential for optimal performance. A poorly cut shaft can lead to inaccurate ball flight, reduced distance, and compromised feel. Precise shaft alignment and accurate cutting contribute to consistent clubhead speed and trajectory, ensuring the intended ball flight is achieved. The shaft’s length and alignment directly affect the club’s overall feel and performance, ultimately influencing the golfer’s overall game.
Common Tools for Cutting Graphite Shafts
Proper tools are essential for safe and effective shaft cutting. This ensures the process is done correctly and efficiently, preventing damage to the shaft or the cutting tools. The table below Artikels the commonly used tools and their functions:
| Tool | Description | Use |
|---|---|---|
| Shaft cutter | A specialized tool designed to precisely cut graphite shafts. | For cutting the shaft to the desired length. |
| Shaft holder | A device that securely holds the shaft during the cutting process. | Ensures stability and prevents slippage during cutting. |
| Measuring tape | A precise measuring tool. | For accurately measuring and marking the shaft’s desired length. |
| Marker | A tool for marking the shaft’s cutting point. | For precise marking of the shaft’s cutting point. |
Safety Precautions
Safety should be paramount during the graphite shaft cutting process. Appropriate safety measures will protect the user from injury and ensure a safe working environment. Wear safety glasses to protect your eyes from flying debris. Use work gloves to prevent cuts and abrasions. Ensure the work area is well-lit and clear of obstructions.
These precautions will minimize the risk of accidents during the process.
Understanding Shaft Specifications

Choosing the right graphite golf shaft is crucial for optimal performance. Understanding its specifications, such as flex, weight, and length, directly impacts your swing and shot outcomes. A well-matched shaft allows for a smoother, more controlled swing, resulting in straighter, more accurate shots.Understanding these specifications allows you to select a shaft that complements your swing style and physical attributes, leading to improved performance on the course.
Selecting the right shaft is an important step in fine-tuning your game.
Shaft Flex
Shaft flex refers to the shaft’s stiffness or flexibility. Different flexes are designed for various swing styles and player strengths. A stiffer shaft provides more control and distance, while a softer shaft allows for more forgiveness and a smoother feel. A player with a powerful swing might benefit from a stiffer flex, while a player with a weaker swing might find a softer flex more suitable.
Knowing your swing characteristics and strengths is essential for selecting the correct flex.
Shaft Weight
Shaft weight plays a significant role in swing speed and feel. Heavier shafts can enhance stability and control, while lighter shafts can promote faster swing speeds. The optimal shaft weight depends on individual swing characteristics and preferences. Consider the balance between power, control, and comfort when selecting a shaft weight.
Shaft Length
Shaft length is a critical aspect of club fit. The proper shaft length is crucial for maintaining a balanced swing and delivering optimal clubhead speed. An incorrect length can negatively impact swing mechanics and shot accuracy. Shaft length should be measured to match the player’s height and reach. A longer shaft might promote greater distance, but a shorter shaft might provide more control and precision.
Selecting the Right Graphite Shaft
Several factors should be considered when choosing a graphite shaft. These factors include your swing characteristics, strength, and personal preferences. Consider your current swing speed, and target clubhead speed. Different shaft weights and flexes will offer different results, so selecting the right combination for your game is vital. Trial and error with different shafts and specs is a valuable way to find the perfect fit.
Measuring Existing Shaft Length
To determine the existing shaft length, use a precise measuring tool like a ruler or a shaft measuring gauge. Carefully measure from the top of the grip to the end of the club’s ferrule. Accurate measurement is critical for proper shaft replacement and fitting. Record the measurement carefully for future reference.
Comparison of Shaft Types
| Shaft Type | Flex | Weight | Feel |
|---|---|---|---|
| Stiff | High | Moderate | Responsive, precise |
| Regular | Medium | Moderate | Balanced, forgiving |
| A-Flex | Low | Moderate | Soft, smooth |
This table provides a general overview of different shaft types and their corresponding characteristics. Feel is a subjective characteristic and can vary significantly among individuals. Consider your personal preferences when making your selection.
Tools and Equipment for Cutting
Precisely cutting a graphite golf shaft requires the right tools. This ensures a clean cut, minimizes damage to the shaft, and maximizes its performance potential. The right tools are the first step in achieving a professional cut.The selection and proper use of these tools directly affect the quality of the cut and the longevity of the shaft. Careful handling and maintenance are crucial for preserving the tools’ sharpness and effectiveness, ultimately improving your cutting precision.
Essential Tools
Proper tools are essential for a clean and precise cut. They minimize shaft damage and ensure a better playing experience. The following tools are typically required:
- Shaft Cutter: This tool is specifically designed for cutting golf shafts. It usually features a sharp blade that makes a clean cut. The cutter is held firmly and moved in a controlled manner to avoid damaging the shaft. It is essential to select a cutter that matches the shaft’s diameter to ensure a smooth cut. Different types of shaft cutters are available, each with its own unique design and advantages.
- Shaft Holder: This device securely holds the shaft in place during the cutting process. A proper shaft holder prevents the shaft from moving or wobbling, which is crucial for a clean cut. It typically consists of a clamp or a vise-like structure that grips the shaft firmly. Selecting a shaft holder that is appropriate for the size and type of shaft is crucial for preventing damage and maintaining control during the cutting process.
- Safety Glasses: Eye protection is vital to safeguard your eyes from potential flying debris. Always wear safety glasses when using the shaft cutter, especially during the cutting process. They provide a protective barrier against any small pieces of the shaft or metal fragments that may fly off during the cutting process. Properly fitted safety glasses should be selected and regularly maintained to ensure maximum protection.
Shaft Cutter Comparison
Different types of shaft cutters offer varying advantages and disadvantages. Understanding these differences helps in selecting the most appropriate tool for the task.
| Cutter Type | Advantages | Disadvantages |
|---|---|---|
| Rotary Cutter | Offers a precise cut, often with a clean finish. The rotating blade provides consistent cutting force. | Can be more expensive than other types. May require more practice to master the technique for achieving a consistent cut. |
| Fixed Blade Cutter | Relatively inexpensive and easy to use. Simple design for straightforward operation. | May not offer the same level of precision as rotary cutters. May require more force to cut, potentially causing more shaft damage. |
| Pneumatic Cutter | Provides controlled and consistent cutting force. Reduces the risk of user fatigue. | Requires compressed air and may be more expensive than other types. |
Setting Up the Cutting Area
A well-organized cutting area is essential for a smooth and efficient cutting process. This includes preparing the workspace and ensuring the necessary tools are readily available.
- Clear Workspace: Ensure a clear and unobstructed workspace. Remove any unnecessary items that could obstruct your movement or pose a risk during the cutting process. A designated area free of clutter promotes safety and efficiency.
- Stable Surface: Select a stable and level surface for your work. This prevents any movement or slippage during the cutting process, which could lead to an inaccurate cut. A sturdy table or workbench is ideal for a secure cutting area.
- Proper Lighting: Adequate lighting is crucial for clear visibility during the cutting process. Ensure the area is well-lit to avoid any errors due to poor visibility. Good lighting improves accuracy and reduces the risk of mistakes.
Preparing the Graphite Shaft for Cutting
A precise cut is crucial for optimal golf club performance. Proper shaft preparation ensures a clean, accurate, and safe cutting process. This meticulous stage sets the foundation for a perfectly fitted shaft.Careful preparation minimizes potential issues like chipping, splintering, or inaccurate length. By following these steps, you’ll guarantee a professional-quality cut, maximizing the life and performance of your graphite shaft.
Marking the Desired Cutting Length
Accurate marking is paramount. A slight error in length can dramatically affect club feel and distance. Use a sharp, permanent marker to clearly mark the desired cut point on the shaft. This precise marking ensures consistency and minimizes the risk of errors during the cutting process. For instance, a miscalculated cut could lead to a club that’s too long or too short, impacting swing mechanics and shot accuracy.
Cleaning the Shaft’s End
A clean shaft end is vital for a smooth cut. Remove any dirt, debris, or paint that might interfere with the cutting process. A clean end provides a sharp, precise cut, avoiding irregularities that could lead to problems with the final product. Thorough cleaning prevents these unwanted elements from getting embedded in the cut, potentially causing irregularities and impacting performance.
Marking Techniques
Various marking techniques can be employed, depending on personal preference and the equipment available.
- Using a ruler and a marker: A straightforward method involves placing a ruler against the shaft and marking the desired cut point. This is reliable and easy to execute.
- Employing a shaft measuring tool: Specialized shaft measuring tools provide precise and consistent results, particularly helpful for intricate shaft lengths.
- Using a template: Pre-made templates with accurate markings can guarantee uniformity in shaft preparation, reducing the potential for human error.
Shaft Preparation Methods
The following table Artikels different shaft preparation methods, highlighting their advantages and disadvantages.
| Method | Description | Advantages | Disadvantages |
|---|---|---|---|
| Using a ruler and marker | A simple method involving a ruler and marker to identify the cut point. | Easy to implement, readily available tools. | Potential for human error in marking, less precise than specialized tools. |
| Employing a shaft measuring tool | Specialized tools provide precise length measurements. | Highly accurate, minimizes errors. | More expensive than basic methods. |
| Utilizing a template | Pre-made templates with markings for various shaft lengths. | Consistent marking, reduced error potential. | Limited versatility, requires specific templates for different shaft types. |
The Cutting Process
Precision is key when cutting a graphite golf shaft. A clean, precise cut ensures the shaft maintains its structural integrity and plays as intended. This section details the procedure for a clean and precise cut, highlighting important techniques and potential pitfalls.The correct cutting technique significantly impacts the shaft’s performance and longevity. A poorly executed cut can compromise the shaft’s strength, leading to inconsistencies in its flight characteristics.
By following the steps and avoiding common mistakes, you can achieve a clean and controlled cut every time.
Shaft Cutting Procedure
A meticulous approach ensures a professional cut. The steps below Artikel the procedure for a variety of cutting tools, emphasizing the importance of precision and safety.
- Initial Inspection and Marking: Carefully examine the shaft for any existing damage or imperfections. Mark the precise cutting point using a fine-tipped marker, ensuring the mark is centered and accurately reflects your desired length. This crucial step ensures the cut is precise and avoids any unintentional errors.
- Secure the Shaft: Use a vise or a dedicated shaft holder to firmly secure the shaft. This prevents any movement during the cutting process, guaranteeing a clean and accurate cut.
- Selecting the Right Tool: Choose the cutting tool appropriate for the shaft material and your experience level. A sharp blade is essential for a clean cut. A dull blade will cause excessive force and risk damaging the shaft.
- Executing the Cut: Apply steady, controlled pressure. Avoid jerky movements that could compromise the precision of the cut. For rotary cutters, maintain a consistent speed. For shears, use smooth, even strokes. Maintain a firm grip on the tool to avoid slipping.
- Inspecting the Cut: After completing the cut, visually inspect the cut area for any irregularities. A clean cut should exhibit a smooth, straight edge with no splintering or rough edges.
Common Mistakes and Solutions, How to cut a graphite golf shaft
Understanding potential pitfalls allows for proactive correction. Common errors and their solutions are detailed below.
- Using a Dull Blade: A dull blade will result in a rough cut, potentially compromising the shaft’s integrity. The solution is to replace the blade with a sharp one.
- Applying Excessive Force: Unnecessary force can lead to a distorted or uneven cut. The solution is to apply consistent, controlled pressure.
- Improper Shaft Positioning: A poorly positioned shaft can result in a misaligned cut. The solution is to use a vise or shaft holder to secure the shaft firmly.
- Jerky Movements: Jerky movements during the cutting process often lead to uneven cuts. The solution is to maintain consistent, controlled movements while cutting.
Safety Precautions
Safe practices are essential for preventing accidents. Adhering to these precautions ensures a safe and successful cutting experience.
- Wear safety glasses to protect your eyes from flying debris.
- Ensure the cutting area is well-lit and clear of obstructions.
- Use appropriate gloves to protect your hands from cuts or abrasions.
- Work in a well-ventilated area to avoid inhaling dust or fumes.
- Keep children and pets away from the work area.
Post-Cutting Procedures
A perfectly cut graphite golf shaft is more than just a precise length; it’s a testament to meticulous care. Finishing touches after the cut ensure the shaft’s integrity and playability. Proper cleaning and a meticulous check for imperfections are crucial steps to ensure a high-quality result.Careful attention to post-cutting procedures will significantly enhance the overall performance and lifespan of your finished shaft.
This section details the steps for a clean and precise finish, guaranteeing the shaft is ready for use.
Cleaning the Cut Shaft End
Thorough cleaning removes any debris or residue that might have accumulated during the cutting process. This ensures a smooth and clean surface for the shaft to integrate with the club. Begin by using a soft brush to remove any loose particles. A gentle scrub with a clean cloth dampened with a mild detergent or alcohol will effectively eliminate any remaining dust or metal shavings.
Inspecting the Cut for Precision
A precise cut is essential for the shaft’s performance. Imperfections can lead to inconsistent feel, reduced clubhead speed, or even impact the shaft’s structural integrity. Visual inspection is crucial.
Identifying Imperfections
Several visual cues indicate potential imperfections in the cut. A rough or uneven surface is a clear sign of an imprecise cut. Chips or cracks in the shaft’s surface, or an uneven diameter of the cut end, can also affect the shaft’s performance. Checking for burrs or sharp edges that may cause discomfort or potentially damage the club’s ferrule is vital.
Post-Cutting Procedures Checklist
- Remove all debris from the cut end using a soft brush.
- Clean the cut end with a damp cloth and mild detergent or alcohol to remove any remaining residue.
- Visually inspect the cut end for any imperfections like roughness, chips, cracks, or burrs.
- Measure the cut end’s diameter to ensure it meets the specified tolerance.
- Ensure the cut end is smooth and free of any sharp edges.
Proper Storage of the Cut Shaft
Proper storage is crucial to maintaining the quality and preventing damage to the cut shaft. Store the shaft in a cool, dry place away from direct sunlight or extreme temperatures. Using a protective sleeve or wrapping the shaft in soft cloth can prevent scratching or nicks during storage. Keep the shaft away from sharp objects and other potential sources of damage.
Troubleshooting Common Issues
Cutting a graphite golf shaft can be tricky, but with a bit of patience and attention to detail, you can avoid common problems. Understanding the potential pitfalls and their solutions is crucial for a successful cut. Careful preparation and the right tools are essential to prevent costly mistakes.Accurately assessing the shaft’s condition and suitability for cutting is the first step towards a successful outcome.
Knowing what to look for and how to handle potential issues can save you time and frustration.
Identifying Shaft Suitability
Before you start, inspect the shaft closely. Look for any signs of damage, such as cracks, bends, or significant wear. A damaged shaft is more prone to breakage during the cutting process. A strong, undamaged shaft is more likely to yield a precise cut. Consider the shaft’s overall condition before committing to the cutting procedure.
A worn or damaged shaft may not produce the desired results.
Common Cutting Problems and Solutions
- Shaft Breakage During Cutting: This is a common issue, often caused by improper support, using excessive force, or a dull cutting tool. Properly supporting the shaft and using a sharp tool minimizes the risk. If a shaft breaks, assess the damage. If the break is too significant, discard the shaft and start again with a new one.
- Uneven Cut: An uneven cut can result from a dull cutting tool, improper alignment, or inconsistent pressure. Sharpen the tool and ensure the shaft is aligned precisely with the cutting guide. Maintaining a steady and controlled cutting pressure is crucial for a clean, even cut.
- Cutting Tool Damage: A dull or damaged cutting tool can lead to a poor cut or even damage the shaft itself. Use a sharp cutting tool and replace it as needed. Inspect the tool regularly to prevent issues during the process. A well-maintained cutting tool is essential for a smooth and precise cut.
Causes of Shaft Breakage
Shaft breakage during cutting is a common problem, often caused by several factors. These factors can include using excessive force, applying pressure inconsistently, using a dull cutting tool, or improper support. Insufficient support can lead to stress points that weaken the shaft, increasing the chance of breakage.
- Excessive Force: Applying too much pressure can overload the shaft and lead to a catastrophic failure. A controlled and consistent cutting pressure is crucial to prevent this issue. Using too much force often leads to an uneven or compromised cut. Proper tool use is critical to prevent damage.
- Dull Cutting Tool: A dull cutting tool requires more force and is more likely to cause breakage. Sharpness is key for a clean cut, minimizing stress on the shaft.
- Improper Support: Insufficient support can cause the shaft to flex or bend, increasing stress and the likelihood of breakage. Providing adequate support is critical to maintaining structural integrity. This includes using a stable cutting platform and holding the shaft firmly.
Preventing Shaft Breakage
Several techniques can help prevent shaft breakage during the cutting process. Using a sharp cutting tool, applying controlled and consistent pressure, and ensuring proper shaft support are crucial.
- Sharp Cutting Tool: Use a sharp cutting tool for a clean cut. A dull tool requires more force, increasing the risk of breakage. Proper tool maintenance is key to minimizing this problem.
- Consistent Pressure: Apply consistent pressure throughout the cutting process. Varying pressure can cause uneven stress on the shaft, leading to breakage. Maintaining a steady pressure is essential for a clean and precise cut.
- Adequate Support: Support the shaft firmly to prevent bending or flexing. A stable cutting platform is essential for a controlled cutting process. Ensure the shaft is held securely during the entire procedure.
Safety Considerations: How To Cut A Graphite Golf Shaft
Cutting graphite golf shafts requires careful attention to safety procedures. Ignoring these precautions can lead to injuries, damaging the shaft, or even worse, harming your tools. A safe and efficient cutting process is crucial for both your well-being and the quality of your work.Proper safety measures are paramount to prevent accidents and ensure a successful shaft cutting experience.
From the initial preparation to the final cleanup, each step involves specific safety protocols that must be followed meticulously. Understanding the potential risks and implementing the appropriate safety measures will contribute to a secure and productive workflow.
Importance of Safety Gear
Safety gear is essential for protecting yourself during the shaft cutting process. Wearing appropriate safety equipment significantly reduces the risk of injury. This includes protective eyewear, gloves, and potentially a face shield, depending on the cutting method and the specific tools used.
- Protective eyewear shields your eyes from flying debris. This is critical, as small fragments of graphite or metal can easily injure your eyes.
- Gloves provide protection for your hands from cuts or abrasions. The cutting process involves sharp tools and potentially abrasive materials, making gloves essential.
- A face shield provides an additional layer of protection for your face, protecting it from splashes, sparks, or debris generated during the cutting process.
Safe Tool Handling
Sharp tools, like the shaft cutter, must be handled with extreme care. Following the manufacturer’s instructions for use and storage is critical for preventing accidents. Always ensure that the cutting tools are in good condition and that any loose or damaged parts are repaired or replaced immediately.
- Inspect tools for damage before each use. A chipped blade or a loose handle can cause injuries.
- Grip tools firmly but not tightly, ensuring a secure hold that prevents slips and potential accidents.
- Store tools properly, in designated locations, and keep them away from children and others who may not be aware of the potential dangers.
Precautionary Measures Before Cutting
Taking precautions before starting the cutting process is vital. This includes verifying the work area, ensuring adequate ventilation, and preparing the necessary safety gear.
- Clear the work area of any obstructions or hazards. A clutter-free space helps prevent accidents.
- Ensure proper ventilation in the work area to prevent the inhalation of dust or fumes.
- Put on appropriate safety gear before starting the cutting process.
Risks of Improper Safety Precautions
Failing to follow safety guidelines during shaft cutting can lead to various hazards. These can range from minor cuts and abrasions to more severe injuries, such as eye damage or lacerations.
- Cuts and abrasions are common if safety gear is not used or tools are handled improperly.
- Eye injuries can occur from flying debris generated during the cutting process.
- More serious injuries, such as lacerations or fractures, are possible if proper safety measures are not followed.
Post-Cutting Safety Procedures
After the cutting process, it’s important to follow up with cleanup procedures. Proper disposal of debris and tool maintenance are key steps.
- Clean up any debris or dust immediately after the cutting process to avoid potential hazards.
- Dispose of the cut-off portion of the shaft appropriately, following local guidelines.
- Thoroughly clean and maintain your tools according to the manufacturer’s instructions.
Outcome Summary
In conclusion, cutting a graphite golf shaft involves a series of crucial steps, from preparation to the actual cutting process, and finally, post-cutting procedures. By following the detailed instructions and safety precautions Artikeld in this guide, you can achieve a precise and safe cut. Remember, practice and precision are key to a successful outcome. By carefully measuring, preparing, and cutting the shaft, you’ll optimize its performance and enhance your golf game.
FAQ Corner
What are the common mistakes to avoid during the cutting process?
Common mistakes include using improper cutting techniques, not marking the desired length accurately, or not cleaning the shaft end before cutting. Also, rushing the process and neglecting safety precautions can lead to errors. Double-checking your measurements and techniques before starting the cut will help avoid these pitfalls.
What are the different types of graphite shafts available?
Graphite shafts come in various flexes (stiff, regular, etc.) and weights. Different shaft types have varying performance characteristics, such as feel, distance, and accuracy. The choice of shaft will depend on your playing style and swing characteristics. Refer to the shaft specifications table for more details.
What safety gear should I wear while cutting a graphite shaft?
Always wear safety glasses and gloves to protect your eyes and hands from flying debris or sharp edges. A sturdy work surface is also important. Following safety guidelines during the cutting process will help prevent accidents.
