How to seal butcher block countertops effectively is crucial for maintaining their beauty and longevity. Butcher block, known for its rustic charm, is susceptible to staining and damage if not properly protected. This guide provides a detailed walkthrough of the process, from surface preparation to achieving a polished finish. Understanding the various types of sealers, application techniques, and maintenance strategies will ensure your butcher block remains a stunning centerpiece for years to come.
This comprehensive guide covers everything from selecting the right sealer to ensuring proper drying time. The detailed explanations and practical advice will equip you with the knowledge to confidently seal your butcher block countertops and maintain their quality.
Introduction to Butcher Block Sealing
Butcher block countertops, prized for their rustic charm and unique grain patterns, are a popular choice for kitchens and dining areas. However, their natural porous nature makes them susceptible to stains, water damage, and scratches. These imperfections can quickly diminish the aesthetic appeal and durability of the countertop.Proper sealing of butcher block countertops is crucial for maintaining their beauty and extending their lifespan.
Sealing creates a protective barrier that prevents liquids from penetrating the wood, mitigating the risk of stains and moisture damage. It also helps to enhance the wood’s natural appearance and protect it from scratches and everyday wear. This process enhances the overall longevity and resilience of the countertop. Many homeowners choose to seal their butcher block to preserve its visual appeal and functionality.
Importance of Butcher Block Sealing
Butcher block countertops, despite their aesthetic appeal, are prone to absorbing liquids and accumulating stains. Proper sealing is essential to maintain the countertop’s appearance and protect it from damage over time. The natural porous nature of butcher block makes it vulnerable to spills, water damage, and discoloration. A well-sealed butcher block is less likely to develop these issues.
Common Reasons for Sealing Butcher Block
Homeowners opt to seal their butcher block countertops for a variety of reasons. Protecting the countertop’s natural beauty and durability is paramount. Maintaining the wood’s integrity and preventing damage from spills and stains are critical considerations. The sealing process helps enhance the wood’s aesthetic qualities. Furthermore, sealing creates a protective layer that makes the countertop easier to clean and maintain.
This makes upkeep straightforward.
Overview of Butcher Block Sealing Methods
Different methods of sealing butcher block countertops offer varying degrees of protection and maintenance requirements. Understanding the advantages and disadvantages of each approach is key to making an informed decision.
| Method | Pros | Cons |
|---|---|---|
| Mineral Oil | Affordable, readily available, penetrates deeply, nourishes the wood, and enhances the wood’s natural appearance. | May not provide as much water resistance as other sealants, may need more frequent applications, and can cause a slight yellowing over time. |
| Food-Grade Mineral Oil | Provides excellent protection against water and stains, penetrates deeply, nourishes the wood, and is safe for use around food. | May not be as effective as other sealants against deep stains, and can take longer to fully penetrate the wood. |
| Butcher Block Specific Sealant | Provides a high level of water resistance and stain protection, typically offers longer-lasting protection compared to mineral oil, and often comes in a variety of colors and finishes. | Can be more expensive than mineral oil, may not be as easy to find, and may not be as nourishing to the wood. |
| Polyurethane | Provides a high level of water and stain resistance, often forms a durable and hard-wearing finish. | Can create a less natural look, may be less breathable than other sealants, and can be more difficult to apply evenly. |
Types of Butcher Block Sealers: How To Seal Butcher Block
Choosing the right butcher block sealer is crucial for preserving its beauty and longevity. Different sealers offer varying levels of protection and maintenance, impacting the overall lifespan and aesthetic appeal of your countertop. Understanding the characteristics of each type allows you to make informed decisions aligned with your specific needs and preferences.
Oil-Based Sealers
Oil-based sealers, often composed of mineral oils, tung oil, or similar natural compounds, penetrate deeply into the wood pores of the butcher block. This deep penetration leads to a more natural look and feel, often enhancing the wood’s grain. They create a protective barrier that helps repel water and stains.
Water-Based Sealers
Water-based sealers, usually acrylic- or polyurethane-based, are easier to apply and clean up compared to oil-based counterparts. Their application is typically faster, with quicker drying times. They offer a good level of protection against water and some stains, but their penetration depth is generally less significant than oil-based sealers.
Comparison of Durability and Longevity
Oil-based sealers generally exhibit higher durability and longevity due to their deeper penetration and stronger barrier formation. However, water-based sealers offer convenience in application and cleanup, making them suitable for frequent maintenance and touch-ups. Ultimately, the best choice depends on the frequency of use and the desired level of protection. For high-traffic areas, oil-based sealers might be preferred for their enhanced durability.
Detailed Comparison Table
| Sealer Type | Applications | Drying Time |
|---|---|---|
| Oil-Based | Excellent protection against water and stains, enhances the natural look of the wood. | Typically longer drying time, ranging from several hours to a day or more, depending on the product and the thickness of the applied coat. |
| Water-Based | Easier to apply and clean up, good protection against water and some stains. Faster drying time. | Generally quicker drying time, often within a few hours. |
Preparing the Butcher Block Surface
A pristine butcher block surface is crucial for a durable and aesthetically pleasing finish. Proper preparation ensures the sealer adheres effectively, maximizing its longevity and protection against stains and damage. This section details the steps involved in getting your butcher block ready for its new protective layer.Thorough cleaning and contaminant removal are paramount. Any residual food particles, oils, or other debris can hinder the sealer’s ability to penetrate the wood’s pores and create a uniform, protective barrier.
Proper sanding ensures a smooth surface, enhancing adhesion and preventing the sealer from clumping or flaking. Finally, a thorough degreasing step removes any lingering oils that might interfere with the sealer’s effectiveness.
Cleaning and Contaminant Removal
Effective cleaning is the first step to a successful sealing process. Remove any visible debris, food particles, or spills from the butcher block surface. Use warm, soapy water and a non-abrasive sponge or cloth. Avoid using harsh chemicals or abrasive cleaners, as these can damage the wood’s surface. Ensure the surface is completely dry before proceeding to the next step.
This meticulous step is essential to prevent issues with the sealer adhering properly and for the sealer’s long-term effectiveness.
Sanding the Butcher Block Surface
Sanding is crucial for achieving a smooth, consistent surface that allows the sealer to penetrate the wood uniformly. This step enhances the sealer’s longevity and its ability to protect the butcher block. It is critical to ensure a consistent level of sanding, avoiding deep scratches or uneven surfaces that can compromise the aesthetic and protective qualities of the sealer.
- Choosing the Right Grit Sandpaper: Start with a coarser grit sandpaper (e.g., 120-grit) to remove any imperfections or previous finishes. Then, use a finer grit (e.g., 150-grit or 180-grit) to smooth the surface further. Finally, use a very fine grit (e.g., 220-grit or 320-grit) to achieve a very smooth, even surface. Each grit step will progressively smooth the wood, preventing scratches and ensuring a consistent surface for sealing.
- Sanding Methods: Use a sanding block or a sanding sponge to ensure consistent pressure and prevent scratches. Work with the wood grain to minimize the risk of marring the surface. Avoid using excessive pressure, which can damage the butcher block’s surface. Always sand in one direction to create a consistent surface texture, ensuring a uniform level of sanding across the entire surface.
Degreasing the Butcher Block
A crucial step in preparation is degreasing. This removes any lingering oils or grease that could interfere with the sealer’s ability to bond properly to the wood. Using a degreaser specifically designed for wood surfaces will effectively eliminate any lingering contaminants.
- Application: Apply the degreaser to the butcher block using a clean cloth or sponge. Work in small sections to ensure complete coverage. Allow the degreaser to sit for the recommended amount of time specified by the product instructions. Do not apply excessive amounts of degreaser, as this could lead to unwanted saturation or residue on the wood.
- Cleaning: After the recommended time, thoroughly wipe away all traces of the degreaser using a clean, damp cloth. Then, allow the butcher block to air dry completely before proceeding to the sealing step. This meticulous step will guarantee that the sealer adheres properly and enhances the overall durability of the butcher block surface.
Applying the Sealer
Transforming your butcher block from a raw, absorbent surface to a durable, beautiful countertop requires meticulous sealer application. The right technique ensures a flawless finish, resisting stains and extending the lifespan of your prized surface. Proper application is paramount, affecting not only the aesthetic appeal but also the protective properties of the sealer.Applying the sealer isn’t a one-size-fits-all process.
Different sealers have specific application guidelines, demanding a tailored approach. Understanding these nuances is crucial for achieving optimal results. This section will guide you through the critical steps, ensuring a streak-free and durable finish on your butcher block.
Application Techniques for Various Sealers
Different sealers have unique application characteristics. Some sealers are best applied with a brush, allowing for precise control and even coverage, particularly on intricate patterns. Others respond well to a sprayer, enabling rapid coverage across large areas, but meticulous attention is needed to prevent runs and drips. For a more nuanced approach, a rag can be employed, offering excellent control over the application.
Experimentation is key to finding the technique that best suits your sealer.
Amount of Sealer for Optimal Results
The amount of sealer required depends largely on the sealer type and the butcher block’s porosity. A thinner, more penetrating sealer will require multiple coats to achieve optimal results. Conversely, a thicker, more protective sealer might only need one or two coats. Always follow the manufacturer’s instructions for the recommended amount and number of coats. Generally, a thin, even coat is more effective than a thick, uneven one.
Application Tools
Proper application tools are essential for achieving a professional finish. For precise, even coverage, a high-quality brush is ideal, especially for intricate designs or small areas. A microfiber cloth or rag provides a more controlled application, suitable for smaller surfaces or delicate areas. Sprayers offer the fastest coverage for larger butcher blocks, but require careful attention to avoid drips or uneven application.
Consider the surface area and the desired level of control when selecting your application tool.
Importance of Even Application
Even application is critical for a flawless finish. Streaks and uneven coatings compromise the sealer’s effectiveness, leading to a weak barrier against stains and moisture. A consistent coat ensures the sealer penetrates evenly throughout the wood, maximizing its protective properties. Maintaining a uniform application across the entire surface is key to preventing uneven coloration and highlighting surface imperfections.
Step-by-Step Guide for Applying the Sealer
- Thoroughly clean the butcher block surface with a gentle cleaner and water, ensuring all dust, debris, and food particles are removed. A clean surface ensures proper sealer adhesion.
- Allow the surface to completely dry. Moisture will interfere with the sealer’s effectiveness.
- Apply the sealer in thin, even coats, following the manufacturer’s instructions. Apply with the chosen tool (brush, rag, or sprayer) and ensure uniform coverage.
- Allow each coat to dry completely before applying the next, following the manufacturer’s drying time recommendations. Rushing this process can lead to uneven sealing.
- Once all coats are applied and dry, lightly sand the surface to smooth out any imperfections. This step enhances the surface’s overall appearance and allows for a superior sealer bond.
- Repeat the sealing process until the desired level of protection and aesthetic appeal is achieved. Usually, 2-3 coats are adequate, but follow the manufacturer’s recommendations.
Drying and Finishing
Proper drying is crucial for achieving a durable and aesthetically pleasing finish on your butcher block. A hastily applied sealer, or one not allowed sufficient time to cure, can lead to issues like bubbling, cracking, or unevenness. A thorough drying process ensures the sealer penetrates the wood properly, enhancing its protective properties and preventing future problems.The drying process varies significantly based on the type of sealer and the environmental conditions.
Understanding these factors is vital for a successful outcome. Follow the manufacturer’s instructions carefully for optimal results.
Drying Times for Butcher Block Sealers, How to seal butcher block
Different sealers have varying drying times. Factors like the type of wood, temperature, and humidity influence the drying process. A complete drying time is essential to prevent issues with the sealer and ensure long-term protection for the butcher block.
- Monitoring the drying process involves checking for a noticeable change in the surface. Look for the sealer to transition from a wet or tacky appearance to a dry, matte or glossy finish, depending on the specific sealer. If the sealer remains tacky or wet, it’s important to allow for additional drying time.
- Waiting for the sealer to dry completely before use is critical. This allows the sealer to fully bond with the wood, creating a barrier against moisture and stains. Rushing this step can lead to issues later on, such as peeling, discoloration, or uneven application.
- Addressing potential issues like bubbling or unevenness involves understanding the root causes. Bubbling can arise from insufficient drying time, improper application, or using a sealer incompatible with the wood type. Unevenness can be a result of inconsistent application, uneven wood grain, or improper surface preparation.
- Achieving a polished finish after sealing involves a careful approach. After the sealer has dried completely, you can use a soft cloth and a gentle rubbing motion to remove any minor imperfections. Consider using a specialized butcher block finishing product for a professional shine. You may also need to repeat the sealing process for a more significant gloss or protection.
Drying Time Comparison Table
This table provides a general guideline for drying times. Actual drying times may vary depending on factors such as the specific sealer, environmental conditions, and the thickness of the application. Always refer to the manufacturer’s instructions for the most accurate information.
| Sealer Type | Drying Time (Estimated) | Additional Notes |
|---|---|---|
| Water-based sealers | 2-4 hours (initial dry), 24-48 hours (full cure) | Typically require less maintenance, easier to apply |
| Oil-based sealers | 8-24 hours (initial dry), 3-7 days (full cure) | Often provide a more durable and protective finish |
| Polyurethane sealers | 12-24 hours (initial dry), 7-14 days (full cure) | Known for high resistance to moisture, stains, and scratches |
Maintaining a Sealed Butcher Block
Protecting your butcher block’s investment requires consistent care. Regular maintenance is crucial to preserving the beauty and longevity of your sealed surface, ensuring its continued functionality and aesthetic appeal. Proper cleaning techniques and preventative measures will extend the life of your butcher block, keeping it a reliable work surface for years to come.
Importance of Regular Maintenance
Regular maintenance of a sealed butcher block is paramount to preserving its quality and preventing premature deterioration. Consistent cleaning and proper sealing techniques prevent the buildup of food particles, spills, and stains that can compromise the surface’s integrity. This proactive approach minimizes the risk of scratches, cracks, or discoloration, maintaining its structural integrity and appealing appearance.
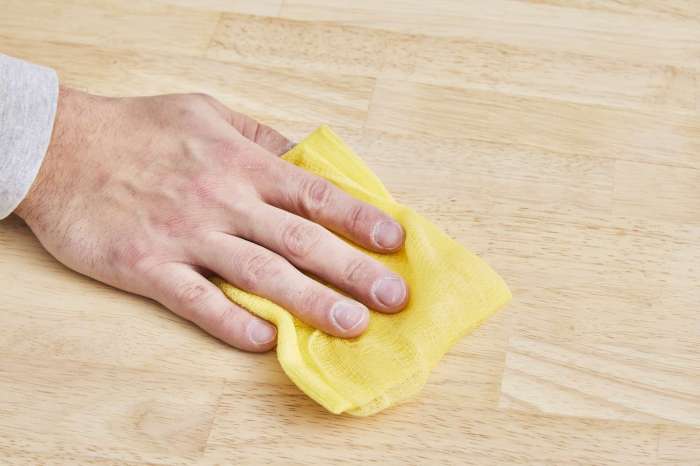
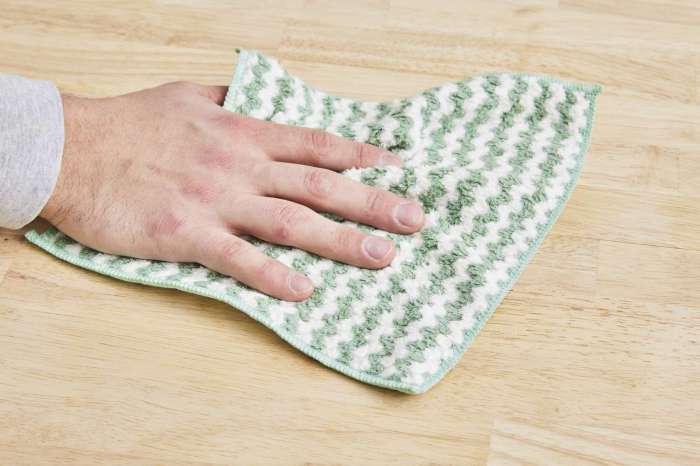
Proper Cleaning Procedures
Maintaining a sealed butcher block involves gentle yet effective cleaning practices. Aggressive scrubbing or harsh chemicals can damage the sealer, potentially leading to dulling, discoloration, or even lifting of the protective layer. A gentle approach is key to preserving the sealer’s effectiveness.
- Use warm, soapy water with a mild dish soap. Avoid abrasive cleaners, scouring pads, or harsh chemicals that could damage the sealed surface.
- Rinse thoroughly with clean water to remove all traces of soap and residue. This step prevents the buildup of minerals and residues that can lead to dulling and spotting.
- Dry the surface immediately with a clean, soft cloth. Moisture can lead to water spots and potential damage, especially to the sealer.
Preventing Damage to the Sealed Surface
Proactive measures are essential to safeguard your sealed butcher block from potential damage. Understanding how to handle spills, cuts, and other common occurrences will help prevent long-term problems.
- Wipe up spills immediately. Prompt action prevents the penetration of liquids into the wood, which can lead to staining and discoloration. This also prevents the formation of hard-to-remove residues.
- Use cutting boards when possible. This protects the butcher block surface from potential scratches or nicks from knives and other utensils. Cutting directly on the surface can lead to lasting damage.
- Avoid placing hot cookware or extremely cold items directly on the surface. Temperature fluctuations can cause warping or cracking in the wood. This includes placing hot pots or pans directly onto the surface without using a trivet.
Cleaning Solutions and Effectiveness
Choosing the right cleaning solution can significantly impact the longevity of your sealed butcher block. Experiment with different solutions to determine which works best for your specific needs and the type of sealer you’ve used.
| Cleaning Solution | Effectiveness | Considerations |
|---|---|---|
| Warm, soapy water | Effective for general cleaning and removing food particles | Safe for most sealed butcher block surfaces |
| Mild dish soap | Removes food particles and grease effectively | Ensure the soap is free of harsh abrasives |
| White vinegar solution (1:1) | Excellent for removing stubborn stains and odors | Can be harsh on some sealers, test in an inconspicuous area first |
| Baking soda paste | Excellent for scrubbing stubborn stains | Can be abrasive, use with caution |
Maintenance Checklist
This checklist will help you maintain the beauty and functionality of your butcher block.
- Wipe up spills immediately.
- Use cutting boards to prevent scratches.
- Avoid placing hot or cold items directly on the surface.
- Clean the surface regularly with warm, soapy water and a soft cloth.
- Dry the surface thoroughly.
- Inspect the surface for any signs of damage or wear.
Troubleshooting Common Issues
Proper butcher block sealing is crucial for its longevity and aesthetic appeal. However, unforeseen problems can arise. Understanding the potential pitfalls and their remedies allows for confident maintenance and ensures your butcher block remains a beautiful and functional kitchen staple.Troubleshooting involves identifying the source of issues and implementing appropriate solutions. This section details common problems, their root causes, and effective solutions, empowering you to maintain your butcher block’s pristine condition.
Identifying and Addressing Cracking
Butcher block sealing can sometimes lead to cracking, a frustrating issue. This problem often stems from improper sealer application or inadequate surface preparation. The sealer may not penetrate deeply enough into the wood pores, causing stress and eventual cracking when the block is subjected to normal use. Alternatively, applying too thick a layer of sealer can create a hard, inflexible surface, increasing the risk of cracking under stress or temperature fluctuations.
Furthermore, improper curing can cause shrinkage and cracking.
Understanding Peeling and Bubbling
Peeling and bubbling are other common problems that can occur after sealing. These issues often indicate that the sealer wasn’t properly bonded to the surface of the butcher block. The surface might not have been thoroughly cleaned or dried before applying the sealer, leading to a poor initial bond. The sealer may also be incompatible with the wood’s properties or the sealer might not be appropriate for the type of butcher block.
Furthermore, if the sealer is applied too thickly, it can form bubbles or peel as it dries.
Sealer Adherence Issues
Sealer adhesion problems are often indicative of underlying issues with the butcher block surface itself or the sealing process. If the sealer isn’t adhering properly, it’s likely that the butcher block surface isn’t properly prepared. This could involve insufficient cleaning, residual contaminants, or insufficient drying time before applying the sealer. The sealer’s compatibility with the wood type can also play a significant role.
Furthermore, uneven application of the sealer can lead to areas where the sealer isn’t properly adhered.
Troubleshooting Table
| Problem | Cause | Solution |
|---|---|---|
| Cracking | Improper sealer application, inadequate surface preparation, improper curing, or using an incompatible sealer. | Thoroughly clean the surface, ensure complete drying before applying sealer, apply sealer in thin coats, and allow adequate drying time. Consider using a sealer compatible with the wood type. |
| Peeling/Bubbling | Improper surface preparation (e.g., insufficient cleaning or drying), incompatibility of the sealer with the wood, or applying too thick a layer of sealer. | Ensure the butcher block is completely clean and dry before applying the sealer. Apply thin coats of sealer, and allow ample drying time. Choose a sealer compatible with the wood type. |
| Poor Adherence | Insufficient cleaning or residual contaminants on the surface, incompatible sealer, or improper application technique. | Thoroughly clean the surface to remove any contaminants. Use a sealer that’s compatible with the wood type. Apply the sealer in thin coats, ensuring even coverage. |
Different Butcher Block Types and Sealing
Butcher blocks, a popular choice for kitchen countertops, come in various forms, each with unique characteristics affecting the sealing process. Understanding these differences is crucial for achieving optimal protection and longevity. Proper sealing methods, tailored to the specific type of butcher block, significantly impacts its durability and aesthetic appeal.Solid butcher blocks, often crafted from hardwoods, exhibit a natural beauty and inherent strength.
Engineered butcher blocks, a composite material, offer a cost-effective alternative with a variety of looks. The distinct properties of these types necessitate different sealing approaches to maintain their integrity and functionality.
Solid Butcher Block Sealing
Solid butcher blocks, prized for their natural beauty and durability, often require a more meticulous sealing approach. The inherent variability in wood grain and density necessitates careful consideration. The wood’s porosity dictates the sealer’s penetration and subsequent protection.
- Wood Type Variation: Different hardwoods, like maple, walnut, or cherry, possess varying degrees of porosity. This necessitates a careful selection of sealers. Sealers designed for hardwoods with higher porosity should be prioritized.
- Sealer Selection: Deep penetration sealers are ideal for solid butcher blocks. They offer comprehensive protection, preventing moisture absorption and the potential for staining. Penetrating sealers that can embed within the wood structure are recommended. Avoid sealers that simply sit on the surface, as they won’t provide adequate protection against moisture.
- Multiple Coats: Applying multiple thin coats of sealer, allowing each coat to dry completely before the next, is often necessary for achieving a robust seal on solid butcher blocks. This layered approach ensures complete penetration and protection.
Engineered Butcher Block Sealing
Engineered butcher blocks, a composite material, usually present a smoother surface than solid wood. Their composition, often a combination of wood particles and resin, influences the sealing process.
- Surface Characteristics: The engineered block’s smoother surface generally allows for easier sealing, requiring fewer coats compared to solid wood. The resin binder significantly impacts how the sealer reacts with the surface.
- Sealer Choice: A variety of sealers can be used, but penetrating sealers might not be as critical as with solid wood. A good quality, general-purpose sealer often works effectively, focusing on the top layer. Sealers that are specifically designed for composite materials are also available and may offer enhanced protection.
- Even Application: Even application is key to achieving a uniform seal on engineered butcher blocks. Avoid applying too much sealer in one area, as this can lead to uneven drying and potential issues. A consistent, thin layer across the entire surface is optimal.
Comparative Analysis of Butcher Block Sealing
| Butcher Block Type | Sealer Recommendations | Additional Considerations |
|---|---|---|
| Solid Butcher Block (Hardwood) | Deep penetrating sealers, multiple thin coats, allowing drying between coats. | Varied porosity of different hardwoods. Choose sealers suitable for the specific wood type. |
| Engineered Butcher Block | General-purpose sealers or those specifically designed for composite materials. | Smoother surface; fewer coats may be needed compared to solid wood. Even application is critical. |
Safety Precautions During Sealing
Protecting yourself and your butcher block during the sealing process is paramount. Improper handling of sealers can lead to health risks and damage to your valuable countertop. Following these safety precautions will ensure a smooth and safe sealing experience.Proper ventilation and protective gear are crucial elements in a safe sealing environment. Many sealers contain volatile organic compounds (VOCs) that can be harmful if inhaled for extended periods.
By taking precautions, you can mitigate potential risks and enjoy a safer sealing process.
Ventilation Considerations
Adequate ventilation is essential to minimize exposure to harmful fumes. Poor ventilation can lead to respiratory problems and headaches. Work in a well-ventilated area, preferably outdoors or in a garage with an open door and windows. If working indoors, use a fan to circulate air and prevent the buildup of fumes. Ensure that the room has sufficient airflow to disperse the fumes.
Personal Protective Equipment (PPE)
Using appropriate personal protective equipment (PPE) is vital for minimizing exposure to sealers. Wear a respirator if the sealer’s label indicates the need for one, especially if the sealer has a high VOC content. Always wear gloves to prevent skin irritation or absorption of the sealer. Eye protection, such as safety glasses or goggles, is also recommended to shield your eyes from splashes or fumes.
A long-sleeved shirt and pants will also help prevent skin contact with the sealer.
Potential Hazards of Sealers
Certain sealers contain chemicals that can cause allergic reactions, skin irritation, or respiratory problems. Always read the product label carefully for potential hazards and follow the manufacturer’s instructions regarding safety precautions. Some sealers may contain solvents or other chemicals that are flammable. Avoid using sealers near open flames or heat sources.
Safety Precautions for Butcher Block Sealing
- Always work in a well-ventilated area.
- Wear appropriate personal protective equipment, including gloves, eye protection, and a respirator (if necessary).
- Read and follow all instructions and safety precautions provided by the sealer manufacturer.
- Keep children and pets away from the work area during sealing.
- Store sealers in a cool, dry place, away from direct sunlight and heat sources.
- Never mix sealers unless explicitly instructed by the manufacturer.
- Clean up any spills immediately with appropriate cleaning solutions.
- Dispose of used sealers and rags according to local regulations.
- If you experience any adverse reactions, such as skin irritation, breathing difficulties, or dizziness, seek immediate medical attention.
Closing Summary
In conclusion, sealing butcher block countertops is a multifaceted process requiring careful attention to detail. By understanding the different types of sealers, proper surface preparation, and application techniques, you can significantly enhance the longevity and aesthetic appeal of your butcher block. Regular maintenance and addressing any potential issues promptly are essential for preserving the integrity and beauty of your investment.
This guide provides a solid foundation for successfully sealing and maintaining your butcher block, ensuring years of enjoyment.
Q&A
What is the best type of sealer for butcher block?
There’s no single “best” sealer, as the optimal choice depends on the specific butcher block type and desired finish. Consider factors like the sealer’s water resistance, durability, and ease of application when making your decision.
How often should I reseal my butcher block countertops?
Resealing frequency depends on usage and environmental factors. High-traffic areas may require resealing more frequently than less-used surfaces. Regular inspection for signs of wear and tear, such as water damage or discoloration, will help determine when resealing is necessary.
What should I do if the sealer bubbles after application?
Bubbling can result from inadequate surface preparation, improper application technique, or using an unsuitable sealer for the butcher block type. Thoroughly inspect the surface for imperfections and inconsistencies, and ensure the sealer is applied evenly and allowed sufficient drying time before use.
Can I use a spray bottle to apply the sealer?
While spray bottles can be used, it’s often recommended to use a brush for a more even application. A spray bottle may lead to uneven coverage, creating streaks or leaving some areas unsealed.
