How to fix Stabilitrak, a crucial vehicle safety system, presents a complex yet essential task for drivers and mechanics alike. Understanding its intricacies, from basic troubleshooting to advanced diagnostics, is key to maintaining vehicle stability and preventing costly repairs. This guide delves into the intricacies of the system, covering everything from common causes of malfunction to detailed repair procedures, equipping you with the knowledge to tackle Stabilitrak issues effectively.
This comprehensive guide provides a detailed overview of the Stabilitrak system, outlining its function, components, and maintenance needs. It then progresses through troubleshooting techniques, exploring common symptoms, diagnostic methods, and repair procedures. A critical analysis of common causes, from faulty sensors to environmental factors, is also included, highlighting the importance of proactive maintenance.
Introduction to Stabilitrak System
The Stabilitrak system, a marvel of automotive engineering, is essentially your vehicle’s secret weapon against unwanted sideways excursions. Think of it as a sophisticated anti-skidding, anti-swaying, and overall-stability-enhancing superhero in your car’s undercarriage. It works tirelessly to keep you on the straight and narrow, even in challenging driving conditions.This system, often a crucial component of advanced driver-assistance systems (ADAS), uses a complex interplay of sensors, actuators, and sophisticated algorithms to maintain vehicle stability.
Its primary purpose is to prevent skids and rollovers by automatically adjusting braking and throttle inputs, essentially acting as a guardian angel for your wheels.
Components of the Stabilitrak System
The Stabilitrak system isn’t a single entity; it’s a network of interconnected parts. Key components include:
- Anti-lock Braking System (ABS): This system, a fundamental part of the Stabilitrak setup, prevents the wheels from locking up during hard braking, ensuring control and avoiding skidding. ABS is a vital partner in maintaining traction.
- Electronic Stability Control (ESC): This is the brain of the operation. ESC uses sensors to monitor the vehicle’s position and yaw rate, and it calculates corrective measures. If a skid is detected, ESC intervenes to restore stability.
- Wheel Speed Sensors: These sensors provide crucial data on the speed and rotation of each wheel, allowing the system to detect wheel slippage and adjust accordingly.
- Yaw Rate Sensor: This sensor tracks the vehicle’s turning rate. By measuring how quickly the vehicle is changing direction, the system can anticipate and react to potential instability.
- Steering Angle Sensor: This sensor detects the angle of the steering wheel, offering the system a crucial perspective on the driver’s intentions. This allows the system to better understand the desired path of the vehicle.
Importance of Stabilitrak Maintenance
Maintaining your vehicle’s Stabilitrak system is crucial for safe operation. A malfunctioning system can lead to unpredictable behavior, especially in challenging driving conditions. A well-maintained Stabilitrak system translates to increased driver confidence and safety, especially in hazardous weather or on slippery surfaces. Think of it as insurance for your driving experience.
Common Causes of Stabilitrak Malfunctions
A malfunctioning Stabilitrak system can be frustrating and, more importantly, hazardous. Understanding potential issues is key to prompt repairs.
| Cause | Description |
|---|---|
| Faulty Sensors | Malfunctioning wheel speed sensors, yaw rate sensors, or steering angle sensors can provide inaccurate data to the system, leading to incorrect responses. Imagine a blindfolded driver trying to navigate a maze – inaccurate information makes navigation impossible. |
| Wiring Problems | Damaged or corroded wiring in the system can disrupt communication between components. Think of it like a faulty telephone line in a control center, disrupting communication and coordination. |
| Control Module Issues | The control module, the brain of the system, is susceptible to malfunctions. A glitch in the system’s software or hardware can lead to incorrect commands and reduced responsiveness. |
| Brake System Malfunctions | Malfunctioning brakes, such as uneven brake pad wear or faulty calipers, can disrupt the system’s ability to apply braking force as needed. A poorly functioning braking system can be likened to an unreliable assistant during a critical task. |
| Low Battery Voltage | A weak or dying battery can cause intermittent or complete system failures. This is akin to a computer shutting down due to low power. |
Troubleshooting Stabilitrak Malfunctions
Your Stabilitrak system, the unsung hero of your vehicle’s stability, might occasionally exhibit signs of distress. Don’t panic! This section will guide you through identifying, diagnosing, and resolving common Stabilitrak issues, turning you into a stability-savvy mechanic (or at least a knowledgeable owner). We’ll equip you with the tools and knowledge to confidently tackle these tricky situations.Understanding the telltale signs of a malfunctioning Stabilitrak system is crucial for timely intervention.
A properly functioning system provides a seamless driving experience, but when something’s amiss, you’ll notice subtle or not-so-subtle clues.
Common Symptoms of Stabilitrak Malfunctions
Recognizing the symptoms of a malfunctioning Stabilitrak system is the first step in the troubleshooting process. These symptoms can range from subtle warnings to outright system failures. Pay close attention to the following indicators:
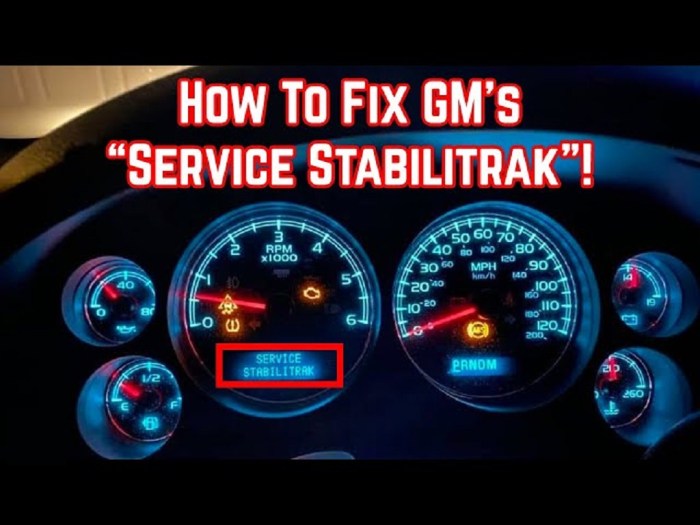
- The Stabilitrak warning light illuminating on the dashboard. This is a clear sign that the system is experiencing a problem.
- Unusual steering wheel vibrations or a feeling of instability during cornering or braking. These sensations might hint at a sensor issue or a problem with the system’s control algorithms.
- The vehicle exhibiting a tendency to skid or lose traction more easily than usual. This is a serious indicator that the system is not functioning as intended and may require immediate attention.
- Strange noises emanating from the vehicle’s drivetrain or suspension components. This can indicate underlying mechanical problems that are affecting the system’s operation.
Diagnosing Stabilitrak Problems
Several methods can be used to diagnose Stabilitrak problems. These range from straightforward visual inspections to more advanced diagnostic tools. Careful observation is key.
- Visual Inspection: A thorough visual inspection of the Stabilitrak system components, such as sensors, actuators, and wiring harnesses, can reveal obvious issues. Look for signs of damage, corrosion, or loose connections. Pay attention to the condition of the system’s hoses and fluid levels, as well.
Visual Inspection Steps
A methodical visual inspection can often identify potential problems. This is a critical first step, often revealing easily fixable issues.
- Inspect all wiring harnesses for damage, frayed wires, or loose connections. Look for signs of rodent chewing or other environmental damage.
- Check the condition of all sensors. Look for signs of physical damage, such as bent or broken components.
- Examine the hydraulic lines (if applicable) for leaks, kinks, or damage. Ensure that fluid levels are within the specified range.
- Verify that all connections are secure and that no components are loose or improperly mounted.
Diagnostic Tools for Stabilitrak
Different diagnostic tools offer varying levels of detail in assessing the Stabilitrak system. A good understanding of these tools is vital.
| Diagnostic Tool | Description | Strengths | Limitations |
|---|---|---|---|
| Vehicle Diagnostic Scan Tool | These tools connect to the vehicle’s onboard computer system to read trouble codes and retrieve diagnostic information. | Comprehensive data, real-time monitoring, and potential for further troubleshooting. | Requires a compatible tool and some technical expertise. |
| Multimeter | Measures voltage, current, and resistance. Useful for checking sensor readings and wiring integrity. | Affordable and readily available. | Requires some electrical knowledge and can be time-consuming. |
| Oscilloscope | Displays electrical waveforms. Provides detailed insights into signal integrity. | Detailed analysis of electrical signals. | Requires specialized training and equipment. |
Interpreting Diagnostic Trouble Codes (DTCs)
Diagnostic trouble codes (DTCs) provide specific information about the malfunctioning component or system. Understanding these codes is critical for effective troubleshooting. Consult your vehicle’s specific repair manual for detailed explanations of DTCs.
Troubleshooting a Malfunctioning Sensor
This detailed step-by-step procedure Artikels the troubleshooting process for a suspected malfunctioning sensor.
- Check the sensor’s electrical connections. Ensure that the wiring is intact and properly connected.
- Verify the sensor’s physical condition. Look for any signs of damage or wear.
- Use a diagnostic tool to read the sensor’s output. Compare the reading with the specifications in your vehicle’s repair manual.
- If the sensor is deemed faulty, replace it with a new, genuine part.
Common Causes of Stabilitrak Problems

Your Stabilitrak system, the unsung hero of your vehicle’s stability, isn’t immune to the occasional hiccup. Like a fussy toddler, it can throw a tantrum if something isn’t quite right. Let’s delve into the potential culprits behind these malfunctions, from tiny sensor snags to more significant control module mishaps.The Stabilitrak system, designed to maintain your vehicle’s trajectory, relies on a complex interplay of sensors, wires, and electronic brains.
Any disruption in this delicate dance can lead to a less-than-stellar performance, from subtle warnings to full-blown system failures. Understanding the potential causes allows you to troubleshoot the issue and get your vehicle back on track, metaphorically and literally.
Faulty Sensors
Stabilitrak’s sensitivity hinges on precise sensor readings. If these sensors, acting like tiny, dedicated spies, malfunction, the system loses its crucial data. This can manifest as erratic braking responses or an inability to detect wheel slippage. Imagine trying to navigate a maze with a faulty compass; you’d be lost. Similar to that, the system struggles to maintain stability.
Faulty sensors often signal the system’s need for replacement.
Wiring Issues
Imagine a network of electrical pathways as the highway system for the Stabilitrak system. A frayed wire, a corroded connection, or a damaged harness can disrupt the flow of crucial information, leading to the system’s inability to function properly. This is akin to a traffic jam on a highway, slowing down the transmission of information to the control module.
This interruption leads to various problems, including loss of control over the vehicle.
Control Module Problems
The control module is the central processing unit, the brain of the operation. If this central hub experiences a malfunction, the entire Stabilitrak system can go haywire. Think of it as the conductor of an orchestra; without a functioning conductor, the musicians play out of tune. This can result in a variety of issues, ranging from intermittent warnings to a complete system shutdown.
These issues are frequently resolved by a professional.
Wear and Tear
Like any mechanical component, Stabilitrak components experience wear and tear over time. Constant exposure to the elements, along with regular use, can cause parts to degrade, affecting their ability to perform optimally. Think of a well-used hiking trail; over time, the path might become uneven and challenging to navigate. Similarly, components that age over time can cause system malfunctions.
Environmental Factors
External conditions can also play a role in Stabilitrak system malfunctions. Extreme temperatures, for example, can affect the performance of electronic components. Exposure to moisture can corrode electrical connections, leading to intermittent issues or complete failure. Imagine the impact of a heavy downpour on the integrity of electrical systems. Extreme temperatures can similarly impact the functionality of components, impacting the accuracy of sensor readings and leading to intermittent issues or complete failure.
Comparison of Damage Types
The impact of damage on Stabilitrak functionality varies depending on the type of damage. A faulty sensor might cause intermittent problems, while a control module failure can lead to a complete loss of function. This is analogous to a minor glitch on a computer versus a total system crash. The severity of the impact on the vehicle’s stability and maneuverability is also different.
Frequent Component Failures in Stabilitrak
| Component | Frequency of Failure | Impact |
|---|---|---|
| Speed sensors | High | Erratic braking, loss of stability |
| Control module | Medium | System shutdown, inability to control |
| Wiring harness | Low | Intermittent errors, system malfunctions |
| Anti-lock braking system (ABS) sensors | High | System errors, loss of braking |
Repair and Maintenance Procedures
Welcome to the thrilling world of Stabilitrak maintenance! Fixing this sophisticated system is like being a detective, except instead of solving crimes, you’re solving tricky electronic puzzles. Knowing the right tools and procedures is key to keeping your Stabilitrak humming like a well-oiled machine. Let’s dive into the nitty-gritty!The Stabilitrak system, while incredibly reliable, requires periodic maintenance to ensure optimal performance.
Proper repair and maintenance not only prolongs the system’s lifespan but also prevents costly malfunctions down the road. Following these procedures ensures your vehicle stays on the road and you stay out of trouble.
Sensor Replacement Procedures
Replacing a Stabilitrak sensor is a critical procedure. Incorrect replacement can lead to inaccurate readings, triggering unwanted interventions or, worse, system failure. Accuracy is paramount!
- Safety First: Disconnect the battery. This is crucial for electrical safety. Never underestimate the power of electricity, especially in complex automotive systems.
- Locating the Sensor: Carefully locate the faulty sensor. Refer to your vehicle’s repair manual for precise diagrams and sensor identification. If unsure, consult a qualified mechanic.
- Tools of the Trade: You’ll need appropriate tools, including a torque wrench, screwdrivers, and possibly a specialized sensor removal tool. Always use the correct size and type of tools for the job.
- Removing the Old Sensor: Follow the manufacturer’s instructions. Carefully detach any connectors and secure the sensor to prevent damage to the surrounding wiring. This often involves releasing clips or bolts.
- Installing the New Sensor: Carefully align the new sensor with the mounting points. Ensure proper connection of all electrical components. Make sure you don’t force any connections.
- Torque Specifications: Apply the correct torque to fasteners during installation. Incorrect torque can lead to sensor malfunction or damage to the vehicle’s chassis. Always consult your vehicle’s repair manual for specific torque specifications.
- Testing the System: After installation, test the system to ensure proper functionality. This involves driving the vehicle under various conditions and monitoring the Stabilitrak’s operation. If the system is not operating correctly, troubleshoot the problem before continuing.
Maintenance Schedule
A well-maintained Stabilitrak system is a happy Stabilitrak system. This schedule helps you stay on top of necessary upkeep.
| Component | Frequency | Description |
|---|---|---|
| Sensors | Annually or as needed | Check for signs of wear, damage, or malfunction. Replace as required. |
| Actuators | Annually or as needed | Inspect for proper function and potential wear. Replace if necessary. |
| Wiring and Connections | Semi-annually | Visually inspect for damage or corrosion. Tighten loose connections. |
| Fluid Levels | Monthly | Check fluid levels in any related systems. Replace fluids as needed. |
Proper maintenance is not just about fixing problems; it’s about preventing them. A proactive approach to maintenance will save you time, money, and potential headaches.
Actuator Repair
Actuator repair is like a delicate dance between precision and patience. These components are crucial for the Stabilitrak system’s operation, so accuracy is vital.
- Diagnosis: Identify the specific actuator problem. A failed actuator might exhibit unusual sounds, erratic performance, or outright failure. Proper diagnosis is essential.
- Disassembly: Carefully disassemble the actuator, following the manufacturer’s instructions and referencing diagrams. Take detailed notes during this process to ensure correct reassembly.
- Inspection: Thoroughly inspect the actuator for damage, wear, or debris. Pay close attention to any signs of internal damage or malfunction.
- Repair or Replacement: Repair the actuator if possible, replacing any damaged parts. If the actuator is beyond repair, replace it with a new one.
- Reassembly: Carefully reassemble the actuator, ensuring proper alignment and connection of all parts. Always follow the manufacturer’s instructions and torque specifications.
DIY Troubleshooting and Repair Techniques
Unleash your inner mechanic! This section dives into the exhilarating world of DIY Stabilitrak troubleshooting. We’ll equip you with the knowledge and tools to tackle common problems without breaking the bank or calling a (potentially expensive) professional. Prepare to become a Stabilitrak superhero!This section will guide you through basic troubleshooting steps and repairs, focusing on diagnosing and fixing issues without specialized equipment.
Remember, while these techniques are helpful, if you’re uncomfortable with any step, it’s always best to seek professional help. Safety first!
Basic Troubleshooting Steps
Understanding the fundamental steps to diagnose Stabilitrak problems is crucial. This involves careful observation and methodical testing. Ignoring subtle signs can lead to more significant issues down the road. Don’t be a detective without a magnifying glass; pay attention to the clues!
- Visually inspect the system for obvious damage or loose connections. Look for frayed wires, damaged components, or anything out of place. A keen eye can spot problems before they escalate.
- Check the fluid levels and ensure they are within the recommended range. Low fluid can cause numerous problems, like a dry mouth for your Stabilitrak system. Maintaining proper fluid levels is key to optimal performance.
- Test the system’s response to various inputs. Accelerate, decelerate, and steer to assess if the Stabilitrak system is responding as expected. It’s like giving your Stabilitrak a driving test!
Techniques for Basic Repairs
This section Artikels simple repairs you can perform to resolve minor Stabilitrak issues. Remember, these are basic fixes; more complex repairs may require professional expertise.
- Tighten loose connections. A loose connection can cause a host of problems, ranging from a subtle hum to a complete system shutdown. Tightening connections is a quick fix for many issues.
- Replace worn or damaged components. If you find a component is worn out or damaged, replace it with a new one. It’s like changing a flat tire – a quick fix for a major problem.
- Clean sensors and actuators. Dirt and debris can interfere with the proper functioning of sensors and actuators. A quick clean can restore optimal performance.
Tools Needed for DIY Troubleshooting and Repair
Gathering the necessary tools is essential for successful DIY repairs. Having the right tools ensures a smooth and efficient process.
- Screwdrivers (various sizes)
- Wrench set
- Wire strippers/cutters
- Torque wrench (recommended)
- Fluid containers and funnels
- Gloves
- Safety glasses
- A digital multimeter (for checking voltage and resistance)
DIY Troubleshooting Steps and Solutions
This table summarizes common DIY troubleshooting steps and their corresponding solutions.
| Troubleshooting Step | Solution |
|---|---|
| Loose electrical connections | Tighten connections with appropriate tools. |
| Low fluid levels | Add the correct type and amount of fluid to the recommended level. |
| Malfunctioning sensors | Clean or replace the sensors as needed. |
Precautions When Attempting DIY Repairs
Taking the necessary precautions is critical to ensure safety and prevent further damage to the system.
- Disconnect the power source before working on any electrical components.
- Handle all parts carefully to avoid damage.
- Consult the owner’s manual for specific instructions and warnings.
- Ensure proper ventilation when working with fluids.
- Wear appropriate safety gear to protect yourself from injury.
DIY Stabilitrak Troubleshooting Flowchart (Example)
This flowchart illustrates a specific DIY troubleshooting scenario for a Stabilitrak system that is not functioning properly.
(Diagram: A flowchart with boxes for “Check fluid levels”, “Check connections”, “Test system response”, “Replace faulty components”, “System working?”)
Vehicle-Specific Stabilitrak Information
Unleash the inner mechanic within! Knowing your Stabilitrak system’s secrets is key to keeping your wheels on the road (and your sanity intact). This section dives into the crucial world of vehicle-specific information, ensuring you’re armed with the right tools for troubleshooting.Specific Stabilitrak systems are tailored to the unique design and engineering of each vehicle model. This means a fix for a 2010 Honda Accord’s Stabilitrak might not work on a 2022 Ford Mustang.
Understanding these differences is paramount to successful repairs.
Finding Your Vehicle’s Stabilitrak Manual
The best source of accurate information is your vehicle’s repair manual. This comprehensive guide acts as your ultimate Stabilitrak bible, containing detailed diagrams, step-by-step procedures, and specific specifications. These manuals are often available online or in print, but be sure to verify it’s the correct model and year for your vehicle.
Locating Repair Procedures
Repair manuals typically organize information by system, often featuring a dedicated section for the Stabilitrak. Within this section, you’ll find diagnostic trouble codes (DTCs), schematics, and specific troubleshooting procedures. Sometimes, these procedures are categorized by the specific component that might be malfunctioning. For example, a section might be devoted to replacing the Stabilitrak control module. Furthermore, diagrams often depict the location of critical sensors and actuators within the system.
Vehicle-Specific Troubleshooting Guides
Accessing the right information can feel like a treasure hunt. To simplify this process, here’s a handy table summarizing where to find troubleshooting guides for various vehicle models.
| Vehicle Make and Model | Troubleshooting Guide Location |
|---|---|
| 2018 Toyota Camry | Section 17-4 of the repair manual, “Stabilitrak System Diagnostics” |
| 2021 Honda Civic | Appendix C, “Electronic Stability Control (ESC) Troubleshooting” |
| 2022 Ford Mustang | Chapter 12, “Stabilitrak System Repair Procedures” |
| 2019 Chevrolet Silverado | Section 19-6, “Electronic Stability Control System Diagnostics” |
Remember, always prioritize using your vehicle’s specific repair manual for accurate and reliable information. Don’t rely on generic online guides that might not apply to your exact model.
Advanced Diagnostics and Repairs
Unveiling the mysteries of a malfunctioning Stabilitrak system often requires more than a casual glance. We’re diving into the deep end now, tackling those complex cases that stump even the most seasoned DIY enthusiasts. Think of this section as your guide to deciphering the cryptic whispers of your vehicle’s electronic stability control.Advanced diagnostics are crucial for pinpointing the root cause of persistent or complex Stabilitrak issues.
Sometimes, a simple visual inspection isn’t enough; you might need to delve into the realm of sophisticated testing equipment and specialized procedures. We’ll arm you with the knowledge to understand the intricate dance of sensors, actuators, and control modules.
Advanced Diagnostic Techniques
Advanced diagnostic techniques for complex Stabilitrak issues often involve specialized equipment beyond basic scan tools. These tools allow for more in-depth analysis of the system’s various components, including sensor readings, actuator response times, and control module functionality. Sophisticated software and specialized test equipment are crucial for isolating and diagnosing the exact nature of the problem. Proper usage of these advanced tools is vital to avoiding further damage to the system.
Specialized Tools and Equipment
Diagnosing complex Stabilitrak issues demands specialized tools. A dedicated Stabilitrak diagnostic toolset often includes sophisticated oscilloscopes for evaluating signal waveforms, data loggers for capturing sensor data over extended periods, and sophisticated scan tools capable of accessing detailed control module data. These tools allow for precise analysis of system interactions and facilitate accurate identification of faulty components.
Role of Professional Technicians
Professional technicians possess a comprehensive understanding of complex vehicle systems and the intricate interactions between different components. They have the experience and training to interpret intricate diagnostic data, isolate the source of the problem, and perform the necessary repairs with precision. They also have access to specialized diagnostic software and tools that are not always readily available to the average DIY enthusiast.
Don’t underestimate the value of expert guidance when dealing with a complicated Stabilitrak malfunction.
Calibration Procedures After Repairs
Proper calibration of the Stabilitrak system after repairs is paramount for optimal performance and safety. Improper calibration can lead to inaccurate sensor readings, faulty actuator responses, and potentially compromised stability control. The calibration process usually involves specific sequences and inputs that must be followed precisely to ensure that the system is functioning as intended. This step is essential for restoring the vehicle’s stability control system to peak efficiency.
Complex Stabilitrak Troubleshooting Flowchart, How to fix stabilitrak

(Note: This image is not available. A detailed flowchart would be a visual representation of the steps involved in troubleshooting a complex Stabilitrak issue. It would begin with a description of the symptoms and then branch into various diagnostic paths, considering different potential causes. Each path would ultimately lead to a repair or calibration procedure. A comprehensive flowchart would be complex, involving multiple steps and conditions.
Consider searching online for examples of similar technical flowcharts.)
Summary
In conclusion, successfully fixing Stabilitrak issues demands a multifaceted approach, ranging from basic DIY troubleshooting to advanced professional repairs. This guide has equipped readers with the necessary tools, knowledge, and insights to diagnose and address Stabilitrak problems effectively. However, the safety of vehicle operation should always be prioritized, with professional assistance recommended for complex or potentially hazardous repairs.
Remember, a properly functioning Stabilitrak system is essential for driver and passenger safety.
Popular Questions: How To Fix Stabilitrak
What are the typical symptoms of a malfunctioning Stabilitrak system?
Symptoms can include a warning light illuminating on the dashboard, erratic vehicle behavior during turns or braking, and a loss of vehicle stability. Additional symptoms might include unusual noises from the vehicle’s chassis.
What are some basic diagnostic tools I can use to troubleshoot Stabilitrak issues?
Basic diagnostic tools might include a multimeter to check wiring integrity, a visual inspection of the sensors and actuators, and a vehicle’s onboard diagnostic (OBD) system, if available. The vehicle repair manual can be a helpful reference for specific procedures and expected readings.
How can I find specific information on Stabilitrak systems for my vehicle model?
Consult your vehicle’s owner’s manual or repair manual. Online forums and communities dedicated to specific vehicle models may also contain valuable information from other users.
What safety precautions should I take when performing Stabilitrak repairs?
Always disconnect the vehicle’s battery before performing any work on the Stabilitrak system. Ensure you have the proper tools and safety equipment, such as gloves and eye protection, for any potential hazards.
