How long does it take for grout sealer to dry? It’s a crucial question for any DIYer or pro working with grout. The drying time depends on a bunch of factors, like the type of sealer, the weather, and how you apply it. This guide breaks down everything you need to know, from the science behind the drying process to troubleshooting common issues and speeding things up.
Grout sealer is like a protective shield for your grout, but it needs time to properly set. Different sealers have different drying times, and understanding these factors will ensure your grout stays beautiful and protected for years to come.
Drying Time Factors
Grout sealer drying time isn’t a one-size-fits-all scenario. Numerous factors play a crucial role, impacting everything from the initial application to the final, fully cured result. Understanding these factors is essential for successful tiling projects, ensuring your grout looks its best and lasts for years. Proper drying time is vital to avoid issues like premature use, uneven curing, or peeling sealers.The drying time of grout sealer is not a fixed number, but rather a range influenced by a multitude of variables.
This range can vary significantly, and understanding these factors allows you to better plan your projects and achieve optimal results.
Factors Influencing Drying Time
Several key elements significantly affect how long it takes for grout sealer to dry completely. These factors need to be carefully considered to ensure a successful and long-lasting finish.
- Type of Grout Sealer: Different sealer types have varying drying times. Epoxy sealers, known for their strength and durability, typically take longer to cure than acrylic sealers. Solvent-based sealers often have quicker drying times, but they may have a stronger odor and require more ventilation.
- Environmental Conditions: Temperature, humidity, and air circulation significantly influence the drying process. Higher temperatures and good air circulation generally speed up drying time, while high humidity can slow it down considerably. For example, a hot, dry day in a well-ventilated room will significantly reduce drying time compared to a humid, cool environment with poor air circulation.
- Sealer Application Technique: Applying the sealer evenly and avoiding excessive buildup or pooling is crucial. Uneven application can lead to uneven drying and potential issues like premature cracking. Applying too much sealer can lead to pooling, which slows down drying and can result in a less-than-ideal finish. A thin, even coat is key.
- Surface Preparation: Thorough cleaning of the grout before applying the sealer is essential. Removing any debris, dirt, or old sealer residue ensures the sealer adheres properly and dries evenly. Improper surface preparation can lead to poor adhesion, uneven drying, and potential issues with the overall durability of the sealer.
Impact of Sealer Type on Drying Time
The type of grout sealer directly affects its drying time. Understanding these differences is crucial for project planning.
Epoxy sealers, known for their superior strength and resistance to chemicals, typically have longer drying times compared to acrylic sealers. Acrylic sealers often dry faster but may not offer the same level of durability as epoxy sealers. Solvent-based sealers, while generally faster-drying, require careful handling due to the volatile nature of the solvents. Always follow the manufacturer’s instructions for each type.
Environmental Conditions and Drying Time
Environmental factors like temperature and humidity play a critical role in the drying process.
Higher temperatures and good air circulation generally accelerate the drying process. Conversely, high humidity slows down the drying time. The rate of drying is also affected by the amount of direct sunlight or heat lamps used. For example, a hot, dry environment with good ventilation will significantly reduce drying time compared to a cool, humid environment with poor air circulation.
Drying Time Comparison Table
This table provides an estimated comparison of drying times for different grout sealer types under varying environmental conditions. Remember, these are estimations, and actual drying times may vary based on specific product formulations and application methods.
| Sealer Type | Temperature (°C) | Humidity (%) | Estimated Drying Time (hours) |
|---|---|---|---|
| Acrylic | 25 | 50 | 4-6 |
| Acrylic | 25 | 80 | 6-8 |
| Epoxy | 25 | 50 | 8-12 |
| Epoxy | 25 | 80 | 12-16 |
| Solvent-Based | 25 | 50 | 2-4 |
| Solvent-Based | 25 | 80 | 4-6 |
Understanding the Drying Process
Grout sealer drying is more than just waiting. It’s a fascinating chemical process that dictates the longevity and performance of your sealed grout. Understanding the intricacies of this process allows you to better predict drying times and ensure optimal results, preventing costly mistakes and prolonging the beauty of your tiled surfaces.The drying process of grout sealer isn’t simply water evaporating; it’s a complex interplay of chemical reactions, influencing how the sealer hardens and bonds with the grout.
This involves specific steps and stages, each crucial for a successful seal. Knowing these details can help you avoid common problems like premature sealing or uneven drying, leading to a more professional-looking and durable finish.
Chemical Reactions in Sealer Drying
The chemical reactions involved in grout sealer drying are essential for its effectiveness. These reactions often involve the curing agent within the sealer interacting with the surrounding environment, specifically water molecules. As the sealer dries, the curing agent undergoes a process of polymerization, where individual molecules link together to form a larger, more robust structure. This process of cross-linking creates a strong, cohesive bond within the sealer.
This strong bond then connects with the grout surface, sealing it effectively against water and stains. Think of it like a network of tiny bridges connecting the grout and the sealer.
Stages of the Drying Process
Grout sealer drying typically involves two main stages: evaporation and curing.
- Evaporation: This initial stage involves the removal of the solvent, often water, from the sealer. As the solvent evaporates, the sealer begins to thicken and solidify. The rate of evaporation depends on environmental factors like temperature and humidity. For instance, a warmer, drier environment will speed up evaporation, while cooler, more humid conditions will slow it down.
- Curing: This is the critical stage where the sealer’s chemical bonds form and strengthen. The curing agent within the sealer undergoes polymerization, creating a strong, durable film. This process is often aided by catalysts that accelerate the chemical reactions, reducing the time needed for curing. The strength of the cured sealer is crucial for its long-term resistance to stains and moisture.
This stage is crucial because it’s where the sealer transforms from a liquid to a solid and develops its waterproof properties.
How the Sealer Hardens and Bonds
The sealer hardens and bonds with the grout through a combination of chemical and physical mechanisms. The sealer’s molecules interact with the grout’s surface, creating a strong adhesive bond. This adhesion is crucial for preventing stains and water damage from penetrating the grout. The chemical reactions involved in curing lead to a rigid, waterproof layer on the grout surface.
The bonding process is crucial for creating a protective barrier.
Step-by-Step Guide to Grout Sealer Drying
- Application: Proper application is essential for a uniform and complete seal. Follow the manufacturer’s instructions carefully. This ensures an even distribution of sealer across the grout.
- Evaporation Phase: The sealer will initially appear wet. This is the evaporation phase. Allow ample time for the solvent to evaporate. Environmental conditions will impact how long this takes. Observe the manufacturer’s recommended drying time for your specific product.
For example, in a warm, dry climate, the evaporation phase might be quicker than in a cool, humid environment.
- Curing Phase: After the solvent has evaporated, the curing process begins. This is where the sealer’s chemical bonds form. Allow the sealer to cure completely, according to the manufacturer’s instructions. Avoid using the sealed area before the sealer has fully cured.
- Inspection: Once the curing process is complete, check the sealed grout for any imperfections or areas that need reapplication. This final inspection is important to ensure the sealer is applied properly.
Application and Drying Times
Grout sealer application is crucial for the longevity and aesthetics of your tile work. Proper application, encompassing technique and the amount of sealer used, directly impacts the drying time and the final quality of the finished product. Ignoring these factors can lead to issues like uneven sealing, premature cracking, or even damage to the tile itself. Let’s dive into the specifics.Applying grout sealer effectively is a game-changer for your project.
It’s not just about getting the job done; it’s about doing it right, the first time. A well-executed application minimizes the risk of problems down the road. Understanding how your application method influences drying time is essential for a successful outcome.
Application Techniques and Drying Time
Different application methods significantly affect how quickly grout sealer dries. The consistency of the application and the tools used play a vital role. A smooth, even coat will dry faster than a lumpy, uneven one.
| Method | Estimated Drying Time | Potential Issues |
|---|---|---|
| Roller application | 1-3 hours (depending on product and thickness) | Potential for uneven coverage if not rolled smoothly; excess sealer can pool and create an uneven surface. |
| Spray application | 30 minutes-2 hours (depending on product and coverage) | Requires precise control to avoid over-spray and uneven application; the speed of the spray can affect the drying time. |
| Brush application | 1-2 hours (depending on product and thickness) | Can lead to streaks or brush marks if not applied evenly; the quality of the brush can influence the application and drying time. |
| Manual trowel | 2-4 hours (depending on product and thickness) | High risk of uneven application; excess sealer will likely pool and dry unevenly. |
Effect of Sealer Amount on Drying Time
The amount of sealer applied directly correlates with the drying time. Applying a thin, even layer will dry faster than a thick layer. A thick layer takes longer to dry and may create issues with sealing.
Applying too much sealer can lead to prolonged drying times, increased risk of issues, and potentially wasted product. A thin, even coat is key.
Think of it like painting a wall. A thin coat of paint dries faster than a thick one. The same principle applies to grout sealer. A thin layer dries quicker, ensuring a professional finish and minimizing potential problems. Excessive sealer can create an uneven surface and make the grout look unattractive.
It also leads to longer drying times.
Troubleshooting Drying Issues
Grout sealer drying problems can be frustrating, impacting the final aesthetic and potentially leading to issues down the line. Understanding the common culprits and how to address them is key to achieving a flawless finish. From slow drying to uneven coverage, this section provides practical solutions to overcome these challenges and ensure your grout looks its best.Grout sealer drying problems often stem from a combination of factors related to the product itself, the application process, and environmental conditions.
Addressing these factors proactively can prevent many drying issues and ensure a smooth, consistent drying process. Knowing how to identify and correct these issues is essential for achieving a beautiful and durable tiled surface.
Common Drying Time Issues
Understanding the potential pitfalls in grout sealer drying is crucial for a successful project. Several factors can disrupt the intended drying time, impacting the final result.
- Incorrect Product Application: Applying too thick a layer of sealer can lead to uneven drying and prolonged drying times. A thin, even coat is essential for proper penetration and consistent drying. Think of it like painting a wall; too much paint creates drips and uneven coverage.
- Environmental Conditions: High humidity and low temperatures can significantly slow down the drying process. Sealer needs appropriate environmental conditions to dry effectively. This is analogous to paint needing ideal temperatures to dry.
- Insufficient Ventilation: Poor ventilation can trap moisture, hindering the drying process. Ensuring adequate airflow is vital for the grout sealer to evaporate completely and dry properly.
- Low-Quality Sealer: Using a low-quality or expired sealer can impact its drying time and effectiveness. The sealer’s formulation plays a crucial role in achieving proper drying times.
- Substrate Issues: If the grout or tile surface isn’t properly prepared, the sealer may not adhere correctly, leading to inconsistent drying.
Troubleshooting Slow Drying
Slow drying can be a significant concern, extending the project timeline and potentially leading to undesirable results. Here are strategies to tackle slow drying issues.
- Assess Environmental Factors: Check the humidity level and temperature in the area. If humidity is high, consider using a dehumidifier to lower the moisture level. If the temperature is too low, ensure the space is adequately heated to support the drying process. Adjusting these environmental factors can significantly speed up the drying process. For instance, a kitchen with high humidity will require more active measures to ensure the sealer dries properly.
- Adjust Application Technique: If you suspect the application is the culprit, try applying a thinner coat. A thin, even coat allows the sealer to dry more uniformly and effectively. This is akin to applying paint; a thin, even coat prevents drips and ensures a smooth finish.
- Increase Ventilation: Improve air circulation in the area by opening windows or using fans. Good ventilation is crucial for moisture to escape, promoting quicker drying. This is comparable to drying laundry; proper ventilation speeds up the process.
- Verify Product Compatibility: Confirm the sealer is compatible with the tile or grout. Using a suitable product ensures that the drying process follows the manufacturer’s specifications. This is analogous to using the correct paint for a specific surface to prevent issues.
Addressing Uneven Drying
Uneven drying can manifest as streaks, blotches, or variations in the sealer’s appearance. Understanding the causes and solutions is essential for a uniform finish.
- Inconsistent Application: Uneven application is a common cause of uneven drying. Ensure a consistent application technique, maintaining an even layer of sealer across the grout lines. A professional approach ensures a uniform finish. For instance, using a brush or sprayer with even pressure across the entire surface minimizes variations in the sealer’s application.
- Uneven Surface Preparation: If the grout or tile surface isn’t completely clean and smooth, the sealer might not adhere uniformly, leading to uneven drying. Ensure proper preparation and cleaning of the surface to create an optimal environment for the sealer. Think of preparing a wall before painting; a clean, smooth surface is essential for an even finish.
- Environmental Variations: Local temperature or humidity fluctuations can contribute to uneven drying. Ensure consistent environmental conditions throughout the drying process. For instance, if there are temperature differences within the tiled area, consider applying the sealer in sections to address localized inconsistencies in drying time.
Tips for Faster Drying
Grout sealer drying time can vary significantly depending on several factors, including the type of sealer, the porosity of the grout, and the environmental conditions. Understanding how to accelerate the drying process without compromising quality is crucial for efficient tile work. Quick drying allows for faster project completion and minimizes the risk of issues like discoloration or uneven sealing.Knowing how to manipulate environmental factors and product characteristics is key to a faster, safer, and more effective grout sealing process.
Optimizing these elements will help you avoid common issues and produce a superior finish.
Strategies for Accelerating Drying Time
Proper application techniques and environmental control can significantly impact grout sealer drying times. Choosing the right sealer and applying it effectively is essential for a quicker and more effective sealing process.
- Selecting the Right Sealer: Different sealers have varying drying times. High-quality, fast-drying sealers are designed for quicker results, allowing you to get back to your tasks faster. Choosing a sealer with a shorter drying time can save significant time and resources.
- Optimizing Application Techniques: A thin, even coat of sealer is key. Applying too much sealer can lead to pooling, which slows down drying and may result in unevenness. Use a brush, roller, or sprayer designed for grout, ensuring a consistent, thin layer to promote rapid drying.
- Maintaining Proper Air Circulation: Air circulation plays a crucial role in drying. Allowing air to circulate around the sealed grout area significantly speeds up the evaporation process. Ensure that the area is well-ventilated and that fans, if available, are directed to promote airflow around the sealed grout.
- Using Appropriate Ventilation: Ventilation is essential to remove moisture from the air. This is particularly important in enclosed spaces or when working with larger areas. Adequate ventilation, including the use of fans, ensures that the drying process isn’t hindered by trapped moisture in the air, which can cause uneven drying and potential issues.
- Controlling Temperature and Humidity: High temperatures and low humidity generally accelerate drying times. Work in a well-ventilated area with a controlled temperature. If the weather is unusually humid, consider using a dehumidifier to speed up the process. Using a dehumidifier or adjusting the room’s temperature can directly affect drying time, especially in humid climates. Maintaining optimal environmental conditions will lead to faster and more efficient grout sealing.
Comparison of Methods for Accelerating Drying
Various methods can be employed to expedite the drying process, each with its own advantages and disadvantages. Careful consideration of these factors can result in the optimal approach for your specific project.
| Method | Advantages | Disadvantages |
|---|---|---|
| Using a fast-drying sealer | Reduced drying time | Potentially higher cost, may require more coats for adequate coverage |
| Applying a thin, even coat | Promotes even drying, minimizes pooling | Requires precision and care during application |
| Improving air circulation | Faster evaporation, reduced drying time | May require fans or other ventilation equipment |
| Controlling temperature and humidity | Optimizes drying conditions | May require additional equipment or environmental controls |
Importance of Ventilation During Sealing
Proper ventilation during the sealing process is paramount to preventing moisture buildup and promoting rapid drying. Adequate ventilation is critical for a successful and efficient grout sealing process.
Proper ventilation during grout sealing is crucial for preventing moisture buildup, promoting rapid drying, and avoiding issues like discoloration or uneven sealing.
Ventilation helps ensure the sealer dries evenly, preventing issues that may arise from trapped moisture. Using fans or opening windows and doors can create a flow of air around the sealed grout, facilitating a faster and more thorough drying process.
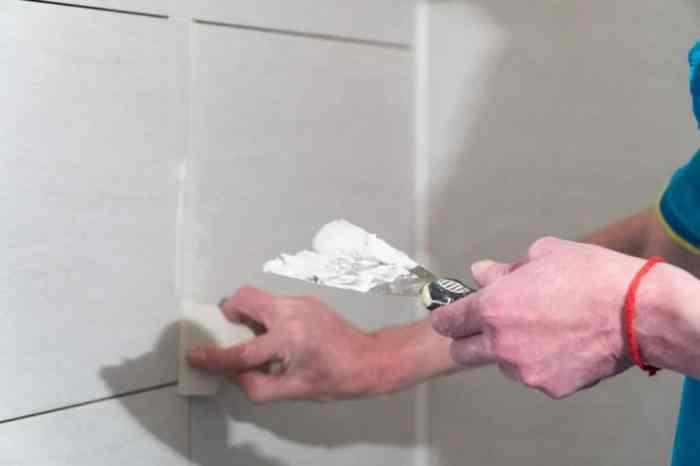
Visual Representation of Drying Stages: How Long Does It Take For Grout Sealer To Dry
Grout sealer drying is a process that often leaves DIYers scratching their heads. Understanding the visual cues of each stage helps you avoid costly mistakes and ensure a professional-looking finish. This visual guide will help you confidently monitor the drying process, from initial application to complete curing.
Visual Characteristics of Each Stage
The drying process of grout sealer isn’t just about time; it’s about observing subtle changes in the surface. These changes are your key to ensuring a successful seal. From the initial wet application to the final, hard-set finish, recognizing these stages will make the process easier.
Stages of Grout Sealer Drying, How long does it take for grout sealer to dry
| Stage | Visual Characteristics | Description |
|---|---|---|
| Wet |  |
The grout sealer is freshly applied and appears wet. It will likely have a noticeable sheen and will be tacky to the touch. |
| Tack-Free |  |
The sealer has begun to dry, losing its initial tackiness. It’s still slightly moist but no longer sticky. A light touch should leave no visible marks. This is a crucial stage as it indicates you can safely proceed with the next steps in your project. |
| Hard-Set |  |
The sealer is now firm to the touch and shows minimal to no signs of wetness. A gentle push or rub should not leave a noticeable impression. The sealer has achieved a significant degree of strength, resisting deformation from light pressure. This stage is often accompanied by a noticeable reduction in gloss. |
| Fully Cured |  |
The grout sealer is fully cured, demonstrating its ultimate strength and resistance to water and stains. The surface is dry, hard, and shows no signs of tackiness. This stage represents the final step in the drying process and indicates that the sealer is fully effective in its intended function. |
Epilogue
So, knowing how long grout sealer takes to dry is key to a successful project. By considering the factors mentioned, you can plan your project effectively and avoid common pitfalls. Remember to check the specific instructions on your chosen sealer for the most accurate drying time. Happy sealing!
Key Questions Answered
How do different grout sealer types affect drying time?
Epoxy sealers usually take longer to dry than acrylic ones. Solvent-based sealers might have faster drying times, but they often have stronger fumes.
What if my grout sealer isn’t drying evenly?
Uneven drying could be due to inconsistent application, temperature fluctuations, or insufficient ventilation. Check for any air pockets and re-apply the sealer in thin layers if needed.
Can I speed up the drying process?
Yes! Good ventilation and keeping the area warm and dry will help. Avoid applying in extremely humid or cold conditions.
What are the risks of insufficient drying time?
Insufficient drying can lead to the sealer not properly bonding with the grout, resulting in a weak seal that might peel or crack. Also, it could look blotchy.
