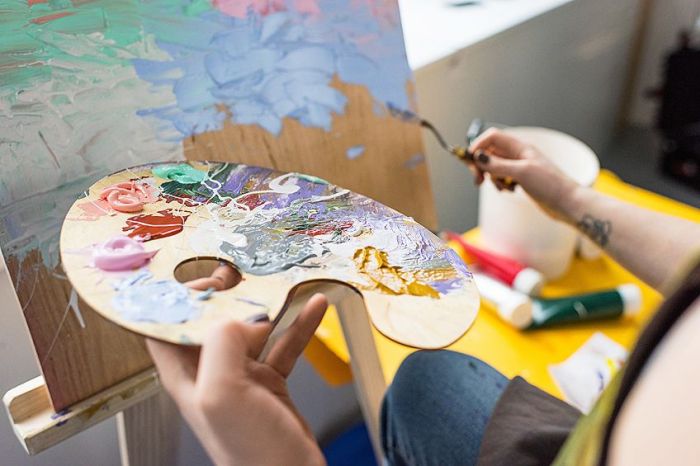
How long does it take for oil paints to dry? Understanding the drying process is crucial for any artist, whether you’re a seasoned professional or a budding enthusiast. Factors like oil type, pigment, temperature, and application method all play a role in the overall drying time.
This comprehensive guide delves into the science behind oil paint drying, exploring the chemical reactions, optimal conditions, and various considerations for different painting techniques. From fine art to murals, we’ll cover everything you need to know to manage your drying time effectively.
Factors Affecting Drying Time
Oil paints, renowned for their rich depth and luminous qualities, undergo a complex drying process. Understanding the variables that influence this process is crucial for achieving optimal results in painting. A painter’s ability to anticipate and manage these factors is key to successful application and longevity of the artwork.The drying time of oil paints isn’t a fixed parameter; it’s a dynamic process affected by a multitude of interacting elements.
These variables, from the type of oil used to the environmental conditions, significantly impact the final appearance and durability of the painted surface.
Oil Type and Drying Characteristics
Different types of oil in oil paints have distinct drying properties. Linseed oil, a common choice, is known for its rapid initial drying and eventual hard-wearing finish. This rapid initial drying is due to the high proportion of drying oils, such as linolenic acid, which are responsible for the oxidation process. Walnut oil, on the other hand, offers a slower drying time, resulting in a softer, more flexible film.
This difference is attributed to the distinct chemical composition of the oils, influencing the rate of oxidation and polymerization. The presence of different fatty acids, their relative amounts, and their degree of unsaturation dictate the drying characteristics.
Pigment Type and Particle Size, How long does it take for oil paints to dry
The pigment employed in the paint significantly influences drying time. Pigments with high surface areas or complex chemical structures can alter the drying process. For example, certain pigments might accelerate the oxidation process, leading to quicker drying. Conversely, other pigments might slow down the drying rate. Pigment particle size is also critical.
Smaller pigment particles generally lead to a thicker, more opaque paint, potentially delaying the drying time compared to larger particles. This is because a larger surface area of the pigment is exposed to the air, facilitating the oxidation reaction and accelerating the drying process.
Temperature and Humidity
Environmental conditions significantly affect the drying rate of oil paints. Higher temperatures accelerate the chemical reactions responsible for drying. The increased kinetic energy of the molecules within the paint leads to faster oxidation and polymerization, thus reducing the drying time. Conversely, lower temperatures slow down these processes, extending the drying time. Humidity also plays a crucial role.
High humidity can hinder the drying process by increasing the moisture content in the air. This moisture can compete with the drying agents in the oil, slowing the rate of evaporation and prolonging the drying time.
Paint Thickness and Application Method
The thickness of the paint layer and the application method greatly impact drying time. Thicker layers of paint will take longer to dry completely compared to thinner layers. This is due to the increased distance that the solvent and drying agents need to travel through the paint film to reach the surface and evaporate. Furthermore, different application methods like brushing, pouring, or spraying will affect the thickness and uniformity of the paint layer, and thus, the drying rate.
Summary Table of Factors Affecting Drying Time
| Factor | Description | Impact on Drying Time |
|---|---|---|
| Oil Type | Different oils (e.g., linseed, walnut) have varying chemical compositions and drying properties. | Linseed oil dries faster, while walnut oil dries slower. |
| Pigment Type and Particle Size | Pigments with high surface area or complex structure can accelerate or decelerate the drying process. Smaller particle sizes lead to slower drying. | Certain pigments might speed up or slow down the drying rate, while smaller particle size results in a slower drying process. |
| Temperature | Higher temperatures accelerate chemical reactions in the paint. | Higher temperatures lead to faster drying times. |
| Humidity | High humidity hinders the drying process by increasing moisture in the air. | High humidity leads to slower drying times. |
| Paint Thickness | Thicker layers require more time to dry completely. | Thicker layers take longer to dry than thinner ones. |
| Application Method | Different methods like brushing, pouring, or spraying impact the paint’s thickness and uniformity. | Application method affects the paint’s consistency and consequently, the drying rate. |
Drying Mechanisms: How Long Does It Take For Oil Paints To Dry
Oil paints, a cornerstone of artistic expression, owe their enduring nature to a fascinating interplay of chemical reactions. These reactions, driven by oxygen and various compounds within the paint, determine the final, hardened state of the artwork. Understanding these mechanisms is crucial for predicting drying times, ensuring proper handling of paintings, and appreciating the intricate chemistry behind a masterpiece.The drying process of oil paints is not instantaneous; it’s a multi-stage transformation involving complex chemical reactions that fundamentally alter the paint’s composition.
This metamorphosis, which transforms a liquid medium into a solid, durable layer, is orchestrated by oxidation and polymerization.
Chemical Reactions in the Drying Process
The drying of oil paints is fundamentally a process of oxidation, where the oil components react with oxygen from the air. This oxidation process is initiated by the exposure of the oil to oxygen. The unsaturated fatty acids in the oil, typically linseed oil, are prone to oxidation. The chemical reactions, while complex, can be summarized by the addition of oxygen molecules to the unsaturated carbon bonds in the oil molecules.
This leads to the formation of peroxides and hydroperoxides.
Role of Oxygen and Air Exposure
Air exposure is critical for the drying process. Oxygen, a vital component of the atmosphere, acts as a catalyst for the oxidation reactions that transform the oil into a solid. Without sufficient oxygen, the drying process is significantly hindered. This explains why paintings in enclosed environments or with limited air circulation take longer to dry completely.
Stages of Drying
The drying process of oil paints isn’t a linear progression; it occurs in distinct stages. Each stage is characterized by specific chemical changes and visual alterations.
- Initial Drying: In the initial stages, the oil film begins to thicken and lose its fluidity. This is primarily due to the formation of initial oxidation products, which create a rudimentary, weak film. The surface of the painting appears somewhat tacky, and the paint loses its tackiness relatively quickly.
- Intermediate Drying: As the oxidation process continues, the oil film solidifies further. More complex oxidation products, including polymeric structures, start to form. The surface of the painting becomes less sticky, but may still feel slightly soft or pliable.
- Final Drying: This stage involves the formation of a robust, insoluble network of polymerized structures. The chemical reactions have essentially reached completion, leading to a hardened and durable film. The painting is now resistant to solvents and moisture, marking the end of the drying process.
Chemical Compounds and Processes
Linseed oil, a common oil used in oil paints, is rich in unsaturated fatty acids. These unsaturated fatty acids, primarily linoleic and linolenic acids, are susceptible to oxidation reactions. As oxygen molecules interact with these unsaturated bonds, they create a complex network of polymeric compounds.
Drying Process Diagram
[Imagine a diagram here showing the stages of drying. The diagram would have a representation of an oil paint layer. The top would show the initial liquid state, and subsequent stages would show the layer thickening, becoming more solid, and finally, fully hardened, with different chemical compounds being highlighted at each stage. The diagram would illustrate the role of oxygen molecules interacting with the unsaturated fatty acids.]
Summary Table
| Stage | Chemical Reactions | Timing |
|---|---|---|
| Initial Drying | Formation of peroxides and hydroperoxides | Days to weeks (depending on factors) |
| Intermediate Drying | Polymerization of oxidation products | Weeks to months |
| Final Drying | Formation of a stable, insoluble polymer network | Months to years (potentially) |
Drying Times of Different Oil Paints
Oil paints, renowned for their rich depth and luminosity, exhibit a range of drying times influenced by numerous factors. Understanding these variations is crucial for artists to effectively manage their workflow and achieve the desired final results. This section delves into the specific drying times of various oil paints, highlighting brand differences, layered effects, and the impact of mediums.
Typical Drying Times for Different Oil Paints
Different oil paints, owing to variations in their formulations and pigments, exhibit differing drying rates. A general guideline for drying times is crucial for planning and executing painting projects. Alkyd-based oil paints, often preferred for their quicker drying times compared to traditional linseed oil paints, tend to dry faster than their counterparts.
Comparison of Drying Times Across Paint Brands and Types
Variability in drying times is evident across different paint brands and types. While general trends exist, specific brands often employ unique formulations and additives. A brand specializing in fast-drying oil paints might employ alkyd resins or other accelerating agents to reduce the drying time. Conversely, a brand emphasizing archival quality might use slower-drying linseed oil as a primary ingredient.
Drying Times of Different Paint Layers
The drying time of a paint layer is profoundly influenced by the subsequent layers. A thick, initial layer will inherently take longer to dry compared to a thin, subsequent layer. The thickness of the layer affects the drying time because of the increased amount of oil and pigment that needs to evaporate or polymerize. The underlying layers influence the drying time of subsequent layers.
A wet, freshly applied layer will slow the drying of the layer above it.
Effect of Mediums and Additives on Drying Times
Mediums and additives play a significant role in modifying the drying characteristics of oil paints. The inclusion of mediums like linseed oil, turpentine, or varnish can affect the drying rate and final appearance of the paint. For example, adding more drying oil to a paint will speed up the drying time, while adding a retarder will slow it down.
Table Comparing Drying Times of Specific Oil Paint Types
| Paint Type | Drying Time (approx.) | Notes |
|---|---|---|
| Linseed Oil-based (traditional) | Several days to several weeks | Drying time depends on thickness and environmental conditions. |
| Alkyd-based | 1-3 days | Faster drying than linseed oil paints. |
| Fast-drying oil paints | 1-2 days | Often formulated with alkyd resins. |
| Oil paints with retarders | Several weeks | Used for specific effects, like glazing. |
Note: Drying times are approximate and can vary significantly based on factors like temperature, humidity, and paint thickness.
Tips and Techniques for Faster Drying
Oil paints, while offering rich colours and unique textures, often require careful management of their drying process. Understanding the factors influencing drying time is crucial for optimizing the painting workflow and achieving desired results. Techniques for accelerating the drying process without compromising quality are paramount for efficient painting.
Optimizing the Drying Environment
The environment plays a significant role in the drying time of oil paints. Controlling temperature, humidity, and ventilation directly impacts the drying rate. A consistent, well-managed environment is essential for predictable drying.
- Temperature Control: Maintaining a stable temperature, ideally between 65°F and 75°F (18°C and 24°C), minimizes variations in the drying process. Extreme temperatures can either slow down or accelerate the drying process unevenly, leading to inconsistencies in the paint’s final appearance.
- Humidity Management: Lower humidity levels generally expedite the drying time. High humidity can create moisture that hinders the evaporation of solvents, thus prolonging the drying process. Using a dehumidifier in a workspace can significantly impact the drying rate.
- Ventilation: Proper ventilation is critical. Adequate airflow removes moisture and accelerates the evaporation of solvents, reducing the drying time. Ensure the painting area has proper ventilation to avoid trapping moisture and promoting faster drying.
Utilizing Drying Agents
Certain additives can accelerate the drying process without compromising the paint’s quality. However, the use of these agents should be approached cautiously and in accordance with the specific product instructions.
- Linseed Oil-Based Drying Agents: Linseed oil, a common component in many oil paints, has inherent drying properties. Certain drying agents can accelerate this process. These agents, typically metallic driers, increase the oxidation rate of the oil, thus speeding up the curing process.
- Metallic Driers: Cobalt, manganese, and lead driers are examples of metallic compounds that can accelerate the drying process by catalyzing the oxidation process in the oil. These agents are often included in specific oil paint formulations to adjust drying time, but their use should be done cautiously due to potential environmental and health concerns.
Effective Management of the Drying Process
Efficient management of the drying process is key to achieving high-quality results. Implementing these practices will enhance the workflow.
- Thin Coats: Applying thin coats of paint allows the solvents to evaporate more readily, thus accelerating the drying time. Thicker coats can result in longer drying times and potentially uneven drying, increasing the risk of cracking or uneven textures.
- Proper Application Techniques: Employing proper application techniques, such as even brushstrokes and smooth blending, reduces the risk of uneven drying and enhances the final result. A consistent application method also helps achieve a smooth, even drying process.
Factors to Consider for Accelerated Drying
Careful consideration of these factors is vital for a successful and accelerated drying process.
- Paint Type: Different oil paints have varying drying times. Some paints are formulated with faster-drying solvents or drying agents, leading to quicker drying times.
- Thickness of the Coat: Thinner coats dry faster than thicker ones, as solvents can evaporate more readily.
- Temperature and Humidity: Higher temperatures and lower humidity levels expedite the drying process.
- Ventilation: Adequate ventilation is crucial for faster drying, removing moisture and accelerating the evaporation of solvents.
- Drying Agents: Metallic driers can accelerate the oxidation process, thus speeding up the drying time. However, use them with caution, following manufacturer’s instructions.
Considerations for Different Applications
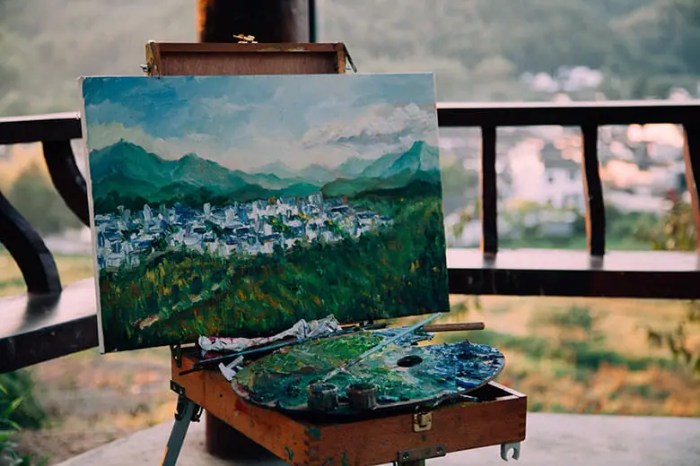
Oil painting, a captivating art form, demands meticulous planning, especially concerning drying times. The duration of drying significantly impacts the workflow and final quality of the artwork, from a small, intricate piece to a grand mural. Understanding how different painting applications necessitate varying drying times is crucial for achieving the desired results.
Varying Drying Times Based on Application
Different painting applications necessitate different approaches to drying time. Murals, for instance, often require extended drying periods due to their large scale and the need for multiple coats. Fine art pieces, on the other hand, might demand a more nuanced understanding of drying, as the artist needs to carefully manage the drying time of individual brushstrokes or layers.
The thickness of the paint application, the chosen medium, and the environment significantly influence the drying time.
Planning for Drying Times in Painting Projects
Effective project planning involves a thorough understanding of drying times. A detailed timeline should be established, considering the drying intervals between coats and the overall project duration. For example, a mural project might require multiple days between coats to allow sufficient drying. Estimating the drying time for each coat and the time needed for the entire project is vital to ensure the final piece meets the desired quality standards.
Drying Requirements for Various Painting Styles
The choice of painting style influences the approach to drying time. Impressionist techniques, with their quick brushstrokes, might necessitate a rapid drying time, while detailed, layered styles, such as realism, could necessitate a slower drying process to allow for precise blending and layering. Understanding the drying characteristics of the specific paint used is essential for adjusting the workflow.
Anticipating and Managing Drying Time in Different Environments
The painting environment significantly impacts drying times. High humidity can slow down the drying process, while low humidity can expedite it. Similarly, temperature plays a crucial role. Artists working in humid climates might need to plan for longer drying times, considering the need for multiple coats and extended intervals between them. Conversely, in dry climates, drying times can be shorter, allowing for faster progress.
A well-ventilated workspace can help moderate the humidity and ensure consistent drying.
Recommended Drying Time for Specific Applications
| Application | Drying Time (Estimate) | Factors to Consider |
|---|---|---|
| Small Fine Art Piece | 24-48 hours (per coat) | Paint type, thickness, humidity, temperature |
| Large Mural | 72+ hours (per coat) | Surface area, paint type, humidity, temperature, ventilation |
| Portrait Painting | 24-72 hours (per coat) | Detail level, paint type, humidity, temperature |
| Landscape Painting | 24-72 hours (per coat) | Size, paint type, humidity, temperature, layering |
Note: Drying times are estimates and can vary based on individual conditions. Always allow extra time for drying, especially in humid environments. The table serves as a general guideline, and careful observation is key to ensuring the successful completion of the painting project.
Visual Aids and Illustrations
Visual aids are crucial for understanding complex processes like oil paint drying. They transform abstract concepts into tangible representations, making it easier to grasp the intricate interplay of factors influencing drying time. These visual tools provide a clear and concise summary of the information, allowing for a more engaging and effective learning experience.Oil painting is a process involving numerous factors influencing the final product.
Understanding these factors is key to achieving the desired outcome, and illustrations provide an effective way to visually communicate these intricacies.
Stages of Oil Paint Drying
Visualizing the stages of oil paint drying provides a clear understanding of the chemical transformations involved. A detailed illustration would show the initial, wet state of the paint, transitioning through various intermediate stages of drying, culminating in the final, hardened state. The illustration should clearly demarcate these phases, perhaps with color gradients to represent the increasing hardness and dryness.
The stages could include: a wet, glossy layer; a semi-dry, slightly tacky surface; a drying layer exhibiting cracks or shrinkage; and a completely hardened, matte layer. This visual representation aids in comprehending the time-dependent nature of the drying process.
Impact of Factors on Drying Time
An infographic effectively illustrates the complex relationship between various factors and drying time. The infographic should visually represent the different factors, such as temperature, humidity, and pigment type, using icons, charts, or graphs. Each factor could be represented by a section of the infographic, with arrows connecting the factor to its impact on drying time. For example, a section representing temperature could include a thermometer icon and a graph showing how increasing temperature accelerates drying.
The infographic should clearly demonstrate the interactions between the factors. A visual representation of these relationships, for instance, illustrating how higher temperatures and lower humidity lead to faster drying times, makes the information more easily digestible and memorable.
Comparison of Drying Times for Different Oil Paints
A graphic comparing the drying times of different oil paint types provides a concise overview of the variations. A bar graph would be suitable for this comparison, with each bar representing a specific oil paint type (e.g., linseed oil, poppy seed oil, walnut oil). The height of each bar would correspond to the average drying time for that paint type.
The graphic should also consider factors influencing drying time such as the thickness of the paint layer, the specific pigment used, and the ambient conditions. The visual comparison will allow artists to quickly assess the suitability of different paints for their projects based on drying speed.
Influence of Pigments on Drying Times
Illustrations demonstrating the influence of different pigments on drying times can be valuable. A series of small panels could show various pigments (e.g., titanium white, cadmium red, ultramarine blue) and their corresponding drying times. The panels could use color-coded bars or shading to visually indicate the relative drying times. For instance, a panel showcasing titanium white could include a bar graph indicating its faster drying time compared to a pigment like a lead-based color.
This visualization helps artists understand how pigment composition impacts the drying process.
Humidity’s Effect on Drying Speed
A visual representation of how humidity affects drying speed can be created using a simple diagram. The diagram could feature two panels, one depicting a dry environment (low humidity) and another illustrating a humid environment (high humidity). Arrows could be used to indicate the direction of the drying process, showing how the moisture content in the air slows down the evaporation of solvents, thus lengthening the drying time.
The visual representation could include a graph comparing drying times in different humidity levels, further emphasizing the effect of humidity on the process.
Closing Notes
In conclusion, oil paint drying time is a multifaceted process influenced by a range of variables. By understanding the interplay of these factors, you can optimize your painting workflow, ensuring your artwork meets your artistic vision and desired aesthetic. Remember, proper drying conditions are essential for long-lasting results. Always allow sufficient drying time between layers to avoid unwanted issues.
Questions and Answers
How does the type of oil affect drying time?
Different oil types, like linseed and walnut, have varying drying times. Linseed oil, known for its slower drying time, often produces a more flexible and durable finish. Walnut oil, on the other hand, generally dries faster.
What’s the impact of temperature and humidity on drying time?
Higher temperatures accelerate the drying process, while high humidity can slow it down. Ideal conditions for oil paint drying often involve moderate temperatures and low humidity.
Can I use any drying agent with oil paints?
Using certain drying agents can indeed accelerate the drying time of oil paints. However, it’s crucial to research and select the appropriate drying agent to avoid compromising the paint’s quality or integrity.
How do I prepare my canvas for oil painting to ensure proper drying time?
Proper canvas preparation is key to ensuring consistent oil paint drying. Using appropriate priming techniques will prevent issues with paint absorption or uneven drying.
