How long does it take to put new tires on? This ain’t rocket science, but it’s more than just slapping ’em on. Factors like your ride’s size, if you’ve got the right tools, and even your own skills play a role. Expect a DIY job to take a bit longer than a pro’s, and the size of the vehicle’s a biggie.
Read on for a breakdown.
From basic passenger cars to hefty trucks, changing tyres takes time. Getting the right tools and knowing the steps are crucial for a smooth operation. Knowing the typical time needed can help you plan ahead, whether you’re a seasoned hand or a newbie.
Factors Affecting Tire Change Time
The time it takes to change a tire is not a fixed number; various factors significantly influence the duration of this seemingly simple task. From the type of vehicle to the mechanic’s expertise, a multitude of variables play a role. Understanding these factors can help anticipate the time needed for a tire change and plan accordingly.
Vehicle Type Influence
Different vehicle types present varying degrees of complexity during a tire change. The size and weight of the vehicle, coupled with its specific design, impact the ease and speed of access to the tire and tools required. For instance, a compact car often has readily accessible wheel wells, whereas a large SUV might require more extensive maneuvering.
- Cars: Typically, changing a tire on a car is a relatively quick process, often taking between 15-30 minutes, depending on the specific car model and the mechanic’s proficiency. Their lighter weight and more straightforward suspension designs often contribute to this quicker turnaround time.
- Trucks: Larger trucks, particularly heavy-duty models, often require more time for a tire change due to the vehicle’s size and the potential need for specialized tools. The added weight and complexity of the suspension system can increase the time required compared to cars.
- SUVs: SUVs, occupying a middle ground between cars and trucks, present a somewhat longer time commitment for a tire change than cars, but typically shorter than trucks. The larger size and suspension design of SUVs can affect access and the tools needed.
Tire Size Impact
Tire size plays a critical role in the time required for a tire change. Larger tires, often found on trucks and SUVs, require more space for manipulation and potentially more force for removal and installation. The greater circumference of larger tires can also make the process slightly slower.
- Smaller Tires: Changing tires on smaller vehicles with smaller tires usually involves less time than on larger vehicles. Access to the wheel well and tools needed is typically more straightforward.
- Larger Tires: Changing tires on larger vehicles with larger tires is generally more time-consuming. Access to the wheel well may require more effort, and specialized tools might be needed.
Tools and Mechanic Experience
The availability of the correct tools and the mechanic’s experience significantly influence the speed of a tire change. Having the right tools minimizes the need for extensive searching and maneuvering, directly affecting the overall time.
- Proper Tools: Having the right tools, such as a lug wrench appropriate for the vehicle, can significantly streamline the tire-changing process. Incorrect tools or the lack of necessary equipment can greatly increase the time required.
- Mechanic’s Skill: A skilled mechanic can change a tire much faster than a novice. Familiarity with the vehicle’s design and the steps involved in the process can greatly affect the time taken. Experience allows for quicker assessment of potential problems and efficient execution of each step.
Estimated Time Differences
The following table provides an estimated comparison of tire change times based on vehicle type and tire size. These are general estimates and actual times may vary.
| Vehicle Type | Tire Size (Example) | Estimated Time (Minutes) |
|---|---|---|
| Compact Car | 185/65R14 | 15-25 |
| SUV | 265/70R17 | 20-35 |
| Large Truck | 315/80R22 | 30-45 |
Steps Involved in a Tire Change
A flat tire can disrupt a journey, but with the right knowledge and meticulous steps, changing a tire can be accomplished safely and efficiently. This process, while seemingly straightforward, demands attention to detail and safety precautions to prevent accidents and ensure a smooth, successful repair. Proper execution is critical for avoiding potential hazards and ensuring the longevity of your vehicle’s components.
Preparation for the Tire Change
Before embarking on the tire change, meticulous preparation is paramount. Gather all necessary tools and supplies. These typically include a spare tire, jack, lug wrench, owner’s manual, gloves, and a reflective safety vest or warning triangle. A well-lit area is also crucial for visibility. Checking the condition of the tools and ensuring they are in good working order is essential.
This will prevent unexpected issues during the change process.
Safety Precautions, How long does it take to put new tires on
Safety should be the top priority during any tire change. Park on a level surface, engage the parking brake, and place the vehicle’s gear shift in park. Ensure that the area around the vehicle is clear of obstructions. Use reflective materials for visibility and warn others of the potential hazard. Never attempt a tire change near traffic, especially on highways or busy roads.
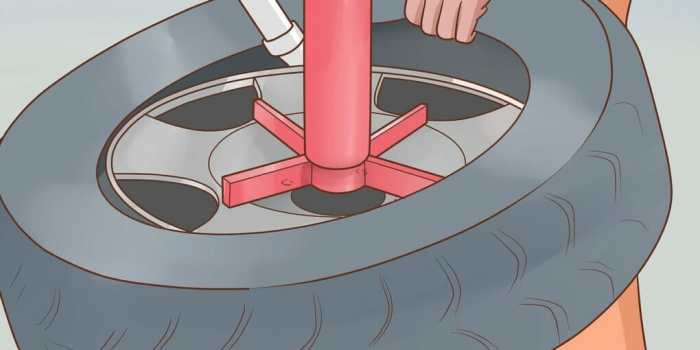
Dismounting and Mounting the Tire
Dismounting involves loosening the lug nuts. The lug nuts are the bolts that secure the tire to the wheel. Once loosened, the tire can be carefully removed using the jack. Mounting the spare tire is the reverse process. The lug nuts should be tightened in a star pattern, alternating between opposite sides, to ensure even pressure distribution.
Securing Lug Nuts
Properly securing the lug nuts is critical for vehicle safety and tire integrity. Tighten the lug nuts in a star pattern, starting with a few turns. This prevents the lug nuts from binding or damaging the wheel studs. After the initial tightening, raise the vehicle with the jack to allow for further tightening. Continue to tighten the lug nuts in a star pattern, increasing the tightness until the torque specification recommended by your vehicle manufacturer is reached.
Use the lug wrench for this step.
Tire Pressure Check
After the tire change, an accurate tire pressure check is essential. Consult your owner’s manual for the recommended tire pressure for your vehicle. Use a reliable tire pressure gauge to ensure the pressure in the spare tire is consistent with the recommended value. Maintaining proper tire pressure is critical for optimal vehicle performance and safety. A noticeable discrepancy between the pressure in the new tire and the recommended value requires immediate attention.
Table of Steps in a Tire Change
| Step | Action | Safety Procedure |
|---|---|---|
| 1 | Gather necessary tools and supplies. | Ensure tools are in good working order. |
| 2 | Park on a level surface and engage the parking brake. | Clear the area around the vehicle. |
| 3 | Loosen lug nuts. | Use the lug wrench in a star pattern. |
| 4 | Raise the vehicle using the jack. | Place the jack in the designated location. |
| 5 | Remove the flat tire. | Support the vehicle with the jack. |
| 6 | Mount the spare tire. | Ensure the tire is correctly seated. |
| 7 | Tighten lug nuts in a star pattern. | Reach the recommended torque value. |
| 8 | Lower the vehicle. | Slowly lower the vehicle and tighten the lug nuts. |
| 9 | Check tire pressure. | Use a reliable tire pressure gauge. |
Tools and Equipment Needed
Unveiling the arsenal of tools required for a successful tire change transforms the seemingly daunting task into a manageable procedure. From the humble lug wrench to the trusty jack, each piece of equipment plays a crucial role in ensuring a safe and efficient operation. Proper selection and use of these tools are paramount to avoiding accidents and ensuring a smooth experience.
Lug Wrenches: A Comprehensive Overview
Lug wrenches, the unsung heroes of tire changes, are essential for loosening and tightening lug nuts. Their design and construction vary significantly, impacting their suitability for different vehicle types. Choosing the right lug wrench can make all the difference between a straightforward and a frustrating experience.
- Different types of lug wrenches, like the standard open-end wrench and the more specialized box-end wrench, cater to specific vehicle needs. Open-end wrenches are generally less expensive but require more space and effort. Box-end wrenches provide better leverage and are more suited to tight spaces. An impact wrench, used in professional settings, can significantly reduce the physical strain on the user.
- The size and design of the lug wrench must match the lug nuts on the specific vehicle. Using a wrench that’s too small or too large can lead to damage or inadequate torque. Incorrect torque can compromise the safety and longevity of the wheel assembly.
- Consider the vehicle’s make and model when selecting a lug wrench. Different vehicles have different lug nut sizes and configurations. Using a wrench that doesn’t perfectly fit can lead to issues.
Jacks: Ensuring Vehicle Stability
A sturdy and appropriate jack is indispensable for safely lifting the vehicle. The wrong jack can cause damage to the vehicle and compromise safety. The jack’s specifications are critical to the success of the tire change.
- Different vehicles have varying weight capacities, and a jack that’s too weak can collapse under the strain. Using a jack rated below the vehicle’s weight limit can lead to accidents. Always refer to the vehicle’s owner’s manual for the recommended jack capacity.
- The jack’s lifting capacity should always exceed the vehicle’s weight. This safety margin ensures that the jack can safely lift the vehicle without any risk of failure.
- Consider the jack’s lifting height and the jacking points on the vehicle. Some vehicles have specific jacking points, and using the incorrect points can lead to damage to the vehicle’s frame or other components.
Lug Wrench Specifications for Different Vehicles
The ideal lug wrench should be robust enough to handle the tightening and loosening of the lug nuts, yet not overly large, making it cumbersome.
- For passenger vehicles, a standard 12-inch or 15-inch lug wrench often suffices. However, for heavier vehicles, a larger lug wrench may be necessary to provide adequate leverage. Consult the owner’s manual to find the correct size.
- Consider the material composition of the lug wrench. High-quality lug wrenches are made from durable materials like chrome vanadium steel, which ensures their longevity and resistance to wear.
- A lug wrench should feature a comfortable grip for prolonged use. This ensures the user has a good grip, avoiding slippage and accidents.
Tire Changing Tools: A Comparative Analysis
A variety of specialized tools streamline the tire-changing process. Their advantages and disadvantages depend on the specific situation.
- A lug wrench with a built-in torque indicator can ensure the lug nuts are tightened to the manufacturer’s specifications. This is particularly important for safety and longevity. An impact wrench, used in professional settings, can significantly reduce the physical strain on the user, but it is typically more expensive.
- Wheel chocks are crucial for preventing the vehicle from rolling during the tire change. They are especially essential for vehicles on inclines.
- Tire irons, while often overlooked, are helpful for holding the tire in place during the change. This helps prevent accidental movement or damage to the tire.
Tire Changing Tool Summary
| Tool | Description | Recommended Use Cases |
|---|---|---|
| Lug Wrench | Used to tighten and loosen lug nuts. | All vehicles. |
| Jack | Lifts the vehicle. | All vehicles. |
| Wheel Chocks | Prevent vehicle movement. | Vehicles on inclines or uneven surfaces. |
| Tire Irons | Help hold the tire in place. | Assists with tire removal and installation. |
Troubleshooting Common Issues: How Long Does It Take To Put New Tires On
The unexpected can always arise during a tire change. A stubborn lug nut, a balky jack, or a slight misstep can quickly transform a simple task into a frustrating ordeal. Understanding these potential pitfalls and having solutions at the ready is crucial for a safe and efficient tire replacement.Knowing how to handle common problems is vital. Preparedness minimizes the risk of damage to your vehicle or injury to yourself.
This section Artikels potential obstacles and effective strategies to overcome them, ensuring a smooth and successful tire change.
Stubborn Lug Nuts
Lug nuts, those seemingly simple fasteners, can sometimes prove surprisingly resistant. This resistance often stems from factors like rust, dirt buildup, or the torque being insufficient to overcome the friction. Identifying the source of the problem is the first step toward a resolution.
- Inspection and Lubrication: Carefully examine the lug nuts for rust or corrosion. If present, a penetrating oil or lubricant can help free them. Apply the lubricant to the lug nut threads and allow it time to work. This will help to break down the rust and allow the lug nut to turn more easily.
- Proper Wrenching Technique: Use the correct lug wrench size and ensure it’s firmly gripping the lug nut. A loose grip can cause the wrench to slip, leading to potential damage. Avoid using excessive force, which can damage the lug nut or the lug nut threads.
- Impact Wrench: For severely stuck lug nuts, an impact wrench can be a lifesaver. However, be cautious about the impact force to avoid damaging the lug nuts or the wheel studs. Follow the manufacturer’s instructions for the appropriate settings and use a protective covering to minimize the chance of any debris being thrown.
- Tap and Hammer: If the above methods don’t work, gently tap the lug nut with a hammer and a suitable tap to loosen it. This should be done cautiously to prevent damaging the wheel. Use appropriate protection for your hands.
Difficult-to-Use Jack
A jack that refuses to lift or moves unevenly can quickly become a major source of frustration. Ensure the jack is properly positioned on a level and solid surface, avoiding uneven terrain or soft ground. Using the incorrect jack type or a damaged jack will only add to the problem.
- Level Ground: A critical step is ensuring the vehicle is on a level, firm surface. Uneven ground can cause the jack to slip or tilt, leading to an unsafe situation.
- Proper Jack Placement: Refer to the vehicle’s owner’s manual for the correct jacking points. Incorrect placement can cause damage to the vehicle’s frame or suspension.
- Jack Capacity: Verify that the jack’s lifting capacity is sufficient for the vehicle’s weight. Using a jack that’s too weak can result in a dangerous situation.
- Jack Support: After lifting the vehicle, use jack stands for added safety. This will prevent the vehicle from collapsing if the jack fails. This is a vital step that must be followed.
Potential Damage During Tire Change
Several potential issues can lead to damage during a tire change. A common oversight is not ensuring the lug nuts are properly tightened after the tire is mounted. This can lead to wheel slippage and potential accidents.
- Improper Lug Nut Torque: Tightening lug nuts to the manufacturer’s specifications is critical. Under-tightening can lead to wheel slippage, while over-tightening can damage the wheel studs or lug nuts.
- Jacking Point Damage: Using the incorrect jacking point or applying excessive force can damage the vehicle’s frame or suspension.
- Wheel Alignment: If the wheel isn’t properly aligned, it can cause uneven tire wear and potentially affect the vehicle’s handling.
Troubleshooting Table
| Problem | Solution |
|---|---|
| Stubborn lug nut | Inspect for rust, lubricate, use correct wrench, impact wrench (carefully), tap gently with hammer and tap. |
| Difficult-to-use jack | Ensure level ground, proper jack placement, sufficient jack capacity, use jack stands. |
| Damage risk | Follow manufacturer’s specifications for torque, use proper jack points, ensure correct wheel alignment. |
Average Time Estimates
A crucial aspect of tire changes lies in understanding the time commitment involved. Whether tackling this task yourself or relying on a professional, accurate time estimates are essential for planning and resource allocation. Knowing the average timeframes for different scenarios empowers informed decisions and helps manage expectations.
General Time Ranges
The time needed for a tire change varies significantly depending on several factors. A DIY approach typically takes longer than a professional service, with the disparity stemming from experience, tools, and vehicle accessibility. Professional tire shops are equipped with specialized tools and trained technicians, allowing them to complete the task swiftly and efficiently. Conversely, DIY attempts often involve acquiring the necessary tools and the learning curve associated with the procedure.
Vehicle Type Influence
Different vehicles present varying levels of accessibility for tire changes. A compact car, for example, typically has a more straightforward process than a large SUV. The position of the spare tire and the location of the tools can affect the time it takes.
Experience and Practice Impact
Experience plays a pivotal role in accelerating the tire-changing process. With repeated attempts, individuals gain proficiency in the steps involved, optimizing their efficiency and minimizing time spent on each stage. A seasoned DIYer can significantly reduce the time required compared to a novice.
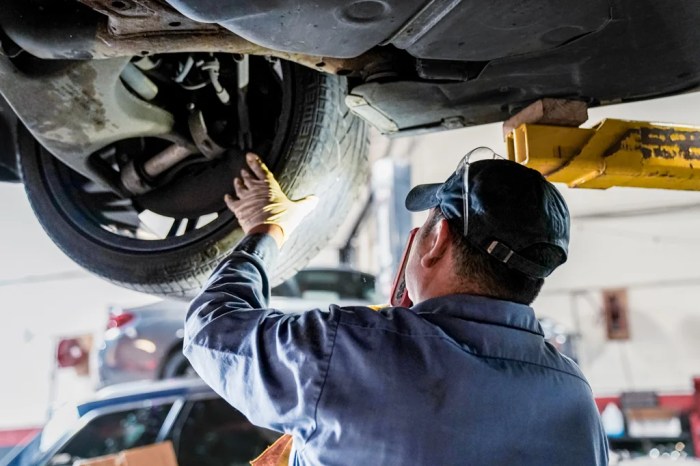
Accessibility Considerations
The accessibility of the vehicle is a key factor in the duration of the tire change. A vehicle parked on a flat, accessible surface will expedite the process. Conversely, a vehicle in a tight space or on an uneven surface can significantly increase the time required.
Average Time Estimates Table
| Vehicle Type | DIY (Beginner) | DIY (Experienced) | Professional |
|---|---|---|---|
| Compact Car | 30-45 minutes | 20-30 minutes | 15-25 minutes |
| SUV | 45-60 minutes | 30-45 minutes | 25-35 minutes |
| Truck | 60-90 minutes | 45-60 minutes | 35-45 minutes |
Note: These are estimates, and actual times may vary based on specific circumstances.
Summary
In short, changing tyres is a task that depends heavily on the vehicle, tools, and your experience. Knowing the factors influencing the time will help you prepare for the job. Whether you’re tackling it yourself or calling in a pro, understanding the process and potential issues will make the whole thing smoother. Now you’re armed with the knowledge to tackle that flat tyre like a boss.
Helpful Answers
How long does it typically take a professional mechanic to change a tire?
A pro can usually swap a tire in 30-45 minutes, depending on the vehicle and any extra work needed.
What if I don’t have the right tools for changing a tire?
Borrowing or renting the right tools will save you time and hassle.
What’s the most common problem people face when changing a tire themselves?
A stubborn lug nut is a frequent issue. Using the right tools and technique can prevent this.
Can I change a tire on a large SUV by myself?
Changing tires on an SUV can take longer than a smaller car, and you might need a stronger jack.
