How long does it take wood to dry? This crucial question dictates everything from project timelines to material preservation. Understanding the factors influencing drying time, from wood species to environmental conditions, is paramount for successful woodworking projects. This guide delves into the intricacies of wood drying, providing a comprehensive overview of methods, calculations, and safety precautions.
From the initial selection of wood to the final stages of the drying process, this guide will provide a thorough understanding of each step. We’ll explore the various methods, highlighting their strengths and weaknesses, and equip you with the knowledge to choose the most appropriate technique for your specific needs.
Factors Affecting Drying Time
The journey of a freshly felled log to a seasoned plank is fraught with the capricious whims of wood drying. Understanding the myriad variables that influence this transformation is crucial for anyone hoping to avoid a lumberyard-worthy catastrophe. This process, much like a delicate dance, requires careful consideration of the many factors at play.
Wood Species Influence
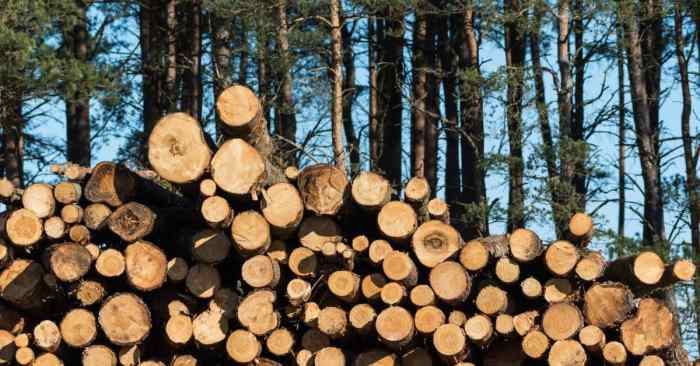
Different species of wood possess unique anatomical structures and densities, directly impacting their drying rates. Hardwoods, known for their tight grain and higher density, generally dry more slowly than softwoods. This difference stems from the wood’s cellular structure. Hardwoods, with their intricate network of vessels and fibers, present a greater resistance to moisture movement. Imagine a dense forest, where the hardwoods hold onto moisture stubbornly, while softwoods, like a breezy meadow, relinquish it more readily.
Moisture Content Impact
The initial moisture content of the wood is a primary determinant of the drying time. Higher moisture content necessitates a longer drying period. Think of a sponge – the more water it holds, the longer it takes to wring it dry. Similarly, wood with a high moisture content requires more time to release the excess water. This excess water, if not managed correctly, can lead to warping, cracking, and ultimately, compromised structural integrity.
Maintaining appropriate moisture levels is paramount for preserving the wood’s quality.
Ambient Conditions Role
Ambient conditions play a significant role in accelerating or hindering the drying process. Temperature and humidity levels, along with air circulation, directly affect the rate of moisture evaporation. Higher temperatures and good air circulation accelerate the drying process. Imagine a desert sun – the intense heat quickly dries the air and the wood. Conversely, high humidity slows down the process, creating an environment where moisture clings tenaciously to the wood.
Optimizing these conditions is key to efficient and quality drying.
Table of Typical Drying Times
| Wood Type | Typical Drying Time (Days) |
|---|---|
| Redwood | 20-30 |
| Pine | 15-25 |
| Oak | 30-45 |
| Maple | 35-50 |
| Cherry | 40-60 |
Note: These are approximate values and can vary significantly based on factors such as thickness, initial moisture content, and specific environmental conditions.
Drying Methods
A lumberyard’s quest for perfectly seasoned wood is akin to a culinary chef’s pursuit of the perfect roast. Just as a chef needs the right techniques to achieve a tender and flavorful dish, a lumberyard needs various methods to dry wood effectively. Different approaches yield different results, each with its own set of pros and cons. The choice of method depends on factors such as the type of wood, the desired final moisture content, and the available resources.
Kiln Drying
Kiln drying is the industrial heavyweight of lumber drying methods. Imagine a giant, climate-controlled oven, specifically designed for lumber. These kilns use carefully regulated temperatures and humidity levels to quickly reduce the moisture content of wood. This process is significantly faster than air drying, often requiring only weeks instead of months. The controlled environment ensures a consistent outcome, vital for manufacturers needing wood of uniform quality.
However, this speed comes with a price, as improper kiln settings can damage the wood’s internal structure, resulting in a slightly less aesthetically pleasing product. Kiln drying is a sophisticated technique, requiring specialized equipment and experienced operators.
Air Drying
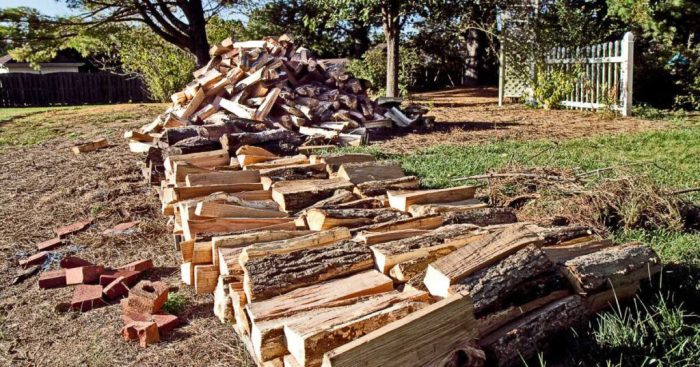
Air drying, the more traditional approach, is like letting the wood slowly air out in a well-ventilated area. This method relies on the ambient environment to reduce moisture. The wood is stacked in a well-ventilated area, often with careful consideration given to air circulation and exposure to sunlight (though excessive direct sunlight can be harmful). This natural process is generally more affordable and environmentally friendly than kiln drying, as it doesn’t require sophisticated machinery.
However, air drying takes significantly longer, sometimes stretching into years depending on the type of wood and local climate conditions. Variations in weather patterns can dramatically affect the drying time and final moisture content, introducing some variability into the process.
Solar Drying
Solar drying is a unique method, especially useful in regions with ample sunshine. Think of it as a natural, sun-powered kiln. The wood is stacked in a manner that maximizes sunlight exposure. The sun’s heat evaporates moisture from the wood, but the process is highly dependent on weather conditions. Solar drying is a cost-effective method, requiring little to no additional energy input.
However, its efficiency is strongly correlated with the availability and intensity of sunlight, making it less predictable than kiln or air drying. Furthermore, the unpredictable nature of weather can significantly affect the outcome and drying time.
Comparison of Drying Methods
| Drying Method | Effectiveness | Efficiency | Advantages | Disadvantages |
|---|---|---|---|---|
| Kiln Drying | High | High | Fast, consistent moisture content, uniform quality | Expensive, specialized equipment needed, potential for damage if not properly managed |
| Air Drying | Moderate | Low | Affordable, environmentally friendly, relatively simple | Slow, susceptible to weather variations, potential for warping or checking |
| Solar Drying | Low to Moderate (depending on conditions) | Very Low | Cost-effective, utilizes natural energy | Highly dependent on sunlight, slow, susceptible to weather variations |
Calculating Drying Time
Predicting the perfect wood drying time is a delicate balancing act, akin to predicting the weather – one must consider a multitude of variables. A precise calculation, while not an exact science, can significantly reduce the risk of warping, cracking, or other unwelcome surprises. Accurate estimation allows woodworkers to schedule their projects effectively, ensuring their prized creations remain sound and structurally stable.
Estimating Drying Time
A precise formula for estimating drying time does not exist, as numerous factors influence the process. Instead, a series of calculations and considerations are employed to gauge a suitable drying period. This approach relies on understanding the unique properties of the wood and the specific drying conditions.
Variables in Calculation
Several factors play a pivotal role in determining the appropriate drying time. These include the wood’s species, moisture content, dimensions, and the environmental conditions in the drying area. The rate of moisture loss directly correlates to the drying time, which is influenced by factors like air temperature, humidity, and ventilation. Other factors, such as the presence of knots or imperfections, can also affect the drying process and lead to variations in drying times.
Steps in Determining Drying Period
Accurately determining the appropriate drying period involves a systematic approach. First, assess the wood’s initial moisture content. This is crucial as it dictates the starting point for the drying process. Second, identify the desired final moisture content. This will determine how much moisture the wood needs to lose.
Third, evaluate the environmental conditions in the drying area. This includes factors like air temperature, humidity, and ventilation. Fourth, consider the wood’s species and dimensions. Different wood species have varying properties and drying rates. Finally, employ a combination of experience and available data to estimate the drying time.
The exact steps might vary depending on the chosen drying method and the specific needs of the project.
Flowchart for Calculating Wood Drying Time
Start
|
V
Assess Initial Moisture Content
|
V
Identify Desired Final Moisture Content
|
V
Evaluate Environmental Conditions (Temp, Humidity, Ventilation)
|
V
Consider Wood Species and Dimensions
|
V
Estimate Drying Time (Based on Experience & Data)
|
V
Monitor Wood Moisture Content Regularly
|
V
Adjust Drying Conditions if Necessary
|
V
Verify Desired Final Moisture Content Achieved
|
V
End
Assessing Wood Moisture Content
Knowing the precise water content within a piece of lumber is akin to knowing its secret desires – crucial for successful drying and preventing unwanted surprises, like warping or cracking.
A woodworker’s quest for a perfect piece is inextricably linked to understanding the wood’s hydration level. This section delves into the various methods for determining this vital moisture content.
Determining a piece of wood’s hydration level is paramount for optimal drying. Precise moisture content assessment prevents issues like warping or cracking during the drying process, ensuring the wood’s integrity and longevity. Accurate measurements allow woodworkers to fine-tune drying schedules, ultimately leading to a more satisfactory outcome.
Methods for Measuring Moisture Content
Accurate moisture content assessment is critical to successful drying. Various methods, each with its strengths and limitations, provide valuable insights into the wood’s water content. These methods are vital for woodworkers to ensure their projects last a lifetime.
- Oven-Drying Method: This method involves placing a small, precisely measured sample of the wood in a controlled-temperature oven until all the water has evaporated. The weight loss during this process reveals the moisture content, with the formula (Initial weight – Final weight)/Initial weight
– 100%. This classic approach provides a reliable and accurate reference point, often used as a benchmark for other methods.It is time-consuming but extremely precise. Think of it as a meticulously planned dehydration regime, providing a definitive answer to the wood’s water content.
- Equilibrium Moisture Content (EMC) Method: This approach is a more practical method for determining moisture content. It relies on the principle that wood in a given environment will eventually reach a state of equilibrium with the surrounding atmosphere. By measuring the moisture content of wood in a controlled environment, you can determine its moisture content. This method is quicker than oven-drying but might not always reflect the wood’s current moisture content if the environment hasn’t reached equilibrium.
Think of it as determining the wood’s natural tendency to absorb or release water, allowing for a more streamlined approach.
- Moisture Meters: These devices are fast and practical for on-site measurements, and come in a variety of types. They use various principles to estimate the moisture content, often utilizing electrical conductivity or other physical properties of the wood. These are essential tools for assessing wood’s moisture content on the go, providing quick and practical solutions.
Importance of Accurate Moisture Content Assessment, How long does it take wood to dry
Accurate moisture content assessment is crucial for successful wood drying. Incorrect moisture content estimations can lead to problems like warping, cracking, and dimensional instability in the finished product. This impacts the structural integrity of the wood, impacting its aesthetic and usability.
Equipment for Measuring Wood Moisture Content
A range of instruments are used for assessing wood moisture content. Each device employs a specific method to determine the wood’s moisture content. The choice of equipment depends on the desired level of precision and the scale of the project.
| Moisture Meter Type | Measurement Principle | Accuracy | Advantages | Disadvantages |
|---|---|---|---|---|
| Electrical Resistance | Measures the electrical resistance of the wood. | Generally good, but can vary depending on wood species and density. | Fast, portable, and relatively inexpensive. | Can be affected by wood defects, moisture gradients, and temperature. |
| Microwave | Measures the absorption of microwave energy by the wood. | High accuracy, less affected by wood defects. | Faster than oven-drying and less susceptible to errors than resistance meters. | Can be more expensive than resistance meters. |
| Infrared | Measures the infrared energy emitted by the wood. | Good accuracy and relatively fast. | Easy to use, and doesn’t require extensive sample preparation. | Can be affected by external factors like ambient temperature and humidity. |
Drying Wood in Different Environments
A lumberyard’s dream is a perfectly dry piece of wood, ready for crafting or construction. But the whims of Mother Nature, or rather, the specific quirks of a particular locale, can throw a wrench in those plans. Understanding how environmental factors influence drying times is key to successful lumber operations. From the sweltering sun to the damp chill, the world’s climate variations demand adaptable strategies.
Geographical locations present a diverse range of challenges for outdoor wood drying. The rate at which wood loses moisture depends heavily on temperature, humidity, and air circulation, all of which vary significantly from place to place. A dry, breezy desert climate will expedite the process, while a humid, rainy rainforest will create a formidable drying obstacle. Knowing these conditions will allow woodworkers to choose the most suitable drying methods and predict the time required for achieving the desired moisture content.
Outdoor Drying Strategies
Outdoor drying offers a cost-effective method for reducing wood moisture content, but it’s crucial to understand the intricacies of different climates. The amount of sunlight, the prevailing winds, and the relative humidity play pivotal roles in the drying process. A well-planned approach is essential to prevent damage and ensure a smooth drying period.
Impact of Climate Variations
Climate variations directly influence the drying process. High temperatures and low humidity accelerate the rate of moisture loss, while low temperatures and high humidity slow down the process significantly. For example, a hot, arid region may allow wood to dry in a matter of weeks, whereas a humid, temperate zone might take months or even longer. Understanding these differences allows for more precise estimations of drying time and appropriate adjustments to the drying strategy.
Adjusting Strategies for Different Locations
Different geographical areas require customized drying strategies. In regions with high humidity, consider using forced air drying or covering the wood to reduce moisture absorption from the atmosphere. Conversely, in areas with high winds, the wood might dry too quickly, leading to uneven drying and cracking. Therefore, strategies should be tailored to the specific climate conditions to ensure optimal results.
Tips for Safe and Efficient Outdoor Drying
Efficient and safe outdoor wood drying requires careful consideration of various factors. These strategies ensure the quality of the wood and prevent unnecessary damage.
- Proper Stacking: Ensure proper air circulation around the wood piles. This promotes even drying and minimizes the risk of mold or rot. Avoid stacking wood directly on the ground to prevent moisture absorption from the soil. Staggering the stacks and maintaining adequate spacing is crucial.
- Covering During Rain: Protecting the wood from rain and excessive moisture is paramount. Using tarps or other suitable coverings during periods of heavy rainfall or high humidity can significantly reduce moisture uptake and maintain a consistent drying rate.
- Monitoring Conditions: Regularly checking the moisture content of the wood is essential. This allows for adjustments to the drying strategy based on the specific conditions. Using moisture meters can provide accurate readings and help determine the ideal time to move the wood to a different location or implement a different drying method.
- Choosing the Right Location: Select a location with good air circulation and adequate sunlight exposure. Avoid areas prone to flooding or excessive moisture accumulation. A well-drained location will prevent issues related to standing water or excess moisture.
- Pest Control: Inspect the wood regularly for signs of insect infestation. Implementing preventive measures, such as using pest-resistant treatments, can help maintain the integrity of the wood during the drying process.
Safety Precautions During Wood Drying
Drying lumber, while a crucial step in woodworking, can be a perilous undertaking if not approached with the appropriate caution. A little forethought in safety measures can transform a potentially hazardous process into a smooth and successful one. Proper safety precautions are paramount to preventing accidents and ensuring a healthy and productive drying environment.
Potential Hazards Associated with Wood Drying
Various hazards lurk during the wood drying process. These range from the obvious, like falling lumber, to the less apparent, like the accumulation of moisture that can lead to mold and mildew. Improper handling of wood can result in splinters and cuts, while inadequate ventilation can lead to respiratory problems. Further, if drying occurs near flammable materials, a spark could ignite a disastrous fire.
Safety Measures to Prevent Accidents During the Drying Process
Preventing accidents during the wood drying process necessitates a multi-pronged approach. This includes ensuring the drying area is well-lit, free from obstructions, and properly ventilated. Implementing a system for safely handling and moving lumber is also essential.
Safe Practices for Handling Wood During Drying
Handling wood, particularly large or heavy pieces, requires extreme care. Workers should use appropriate safety equipment, including gloves and eye protection, to prevent cuts and splinters. Never attempt to lift lumber that is beyond your capabilities. Always utilize proper lifting techniques and mechanical aids, such as dollies or hand trucks, whenever possible.
Safety Guidelines for All Drying Methods
Safe wood drying practices are universal, regardless of the specific method employed. Adherence to these guidelines can significantly reduce the risk of accidents and injuries.
- Secure the drying area: Ensure the drying area is appropriately fenced or barricaded to prevent unauthorized access and accidental entry. This is particularly crucial if the drying area is in close proximity to roadways or high-traffic zones.
- Proper ventilation: Maintain adequate ventilation in the drying area to prevent the buildup of moisture and potential mold growth. Use exhaust fans or other appropriate ventilation systems to ensure fresh air circulation.
- Handling equipment: Use appropriate handling equipment, such as dollies, hand trucks, or cranes, when moving lumber. Never attempt to lift heavy loads manually without proper assistance.
- Eye and hand protection: Always wear safety glasses and gloves when handling lumber to prevent eye injuries and cuts.
- Fire safety: Keep the drying area free of flammable materials. Ensure a fire extinguisher is readily available and that appropriate fire prevention measures are in place. Regularly check for any signs of fire hazards. Implement a comprehensive fire safety plan.
- Protective clothing: Wear appropriate protective clothing, including sturdy work boots, to safeguard against potential injuries. This is especially important for individuals who may be exposed to dust or splinters during the process.
- Proper lifting techniques: Always use proper lifting techniques to avoid strains and injuries. Bend your knees, keep your back straight, and lift with your legs, not your back.
Troubleshooting Drying Issues
Ah, the dreaded wood-drying woes! It’s a delicate dance between the thirsty timber and the temperamental environment. Just like a fussy toddler, your lumber needs careful attention to avoid tears and tantrums (and warped wood!). Let’s navigate these potential pitfalls with a sprinkle of wit and a dash of practical advice.
Drying wood is a complex process, prone to hiccups. These hiccups can range from minor annoyances to major catastrophes, depending on how well you address them. By understanding the common issues and their solutions, you can ensure your lumber emerges from the drying chamber, not just dry, but perfectly prepared for its next adventure.
Common Drying Problems
Identifying the root of the problem is the first step to solving it. Various factors can disrupt the ideal drying process. These range from the lumber’s initial moisture content to the humidity levels in your drying room. Careful observation and prompt action are key to avoiding major headaches.
Troubleshooting Steps for Specific Issues
- Warped Lumber: If your lumber develops unwelcome curves, it’s often due to uneven moisture loss. Ensure consistent airflow around the wood pieces, and consider adjusting the drying environment’s humidity. Using moisture meters to check for uniform moisture content is a great practice. If the warping is severe, it might be best to reconsider using the lumber for your intended project.
- Excessive Cracking: Rapid drying can lead to unsightly cracks. Slowing the drying process by increasing the relative humidity in the drying chamber is often helpful. You might also consider reducing the temperature gradient between the lumber and the surrounding air. This approach can effectively reduce the stress on the wood, minimizing the risk of cracking. Consider using a moisture meter to track the moisture content accurately.
- Mold and Fungus Growth: High humidity and inadequate ventilation during the drying process can create a breeding ground for unwanted microorganisms. Increase air circulation and ensure adequate ventilation. A simple fix is to monitor the humidity levels and adjust the ventilation as needed. You may need to re-evaluate the wood’s suitability for use if mold or fungus are severe.
Preventing Drying Issues
Prevention is always better than cure, and in the realm of wood drying, this is especially true. Thorough preparation and attention to detail can prevent a multitude of potential problems.
- Proper Initial Grading: Start with lumber that has been properly graded and seasoned to ensure its quality and suitability for the drying process. This will greatly minimize potential problems down the line.
- Maintaining Consistent Environment: Consistent humidity and temperature are critical. Use monitoring equipment, and make adjustments as needed. Stability in these parameters will significantly reduce the likelihood of drying issues. Fluctuations can cause issues.
- Adequate Ventilation: Proper airflow is crucial for uniform moisture removal. Ensure adequate ventilation in your drying chamber. This will help prevent moisture buildup and maintain a healthy environment for the wood.
Summary of Common Problems and Solutions
| Problem | Troubleshooting Steps |
|---|---|
| Warped Lumber | Ensure consistent airflow, adjust humidity, and consider using moisture meters. |
| Excessive Cracking | Slow the drying process, reduce temperature gradients, and use moisture meters. |
| Mold and Fungus Growth | Increase air circulation, ensure adequate ventilation, and monitor humidity levels. |
Wood Species Specifics
A lumberyard’s delight, or a seasoned woodworker’s despair? Understanding the idiosyncrasies of various wood species is crucial for successful drying. Different woods react to moisture in ways that can be as unique as a fingerprint. Some species dry quickly and evenly, while others seem to defy the very laws of thermodynamics. This section will delve into these fascinating, and sometimes frustrating, variations.
Drying Characteristics of Different Wood Species
Various wood species exhibit different rates and patterns of drying. This stems from variations in their cellular structure, density, and the presence of natural oils or resins. Understanding these differences is key to successful drying, preventing warping, checking, and other undesirable outcomes.
Unique Drying Challenges for Specific Wood Types
Certain woods present unique challenges during the drying process. For instance, hardwoods like cherry or walnut, renowned for their beauty, often exhibit a tendency to warp or crack if dried too quickly. Conversely, softwoods like pine, while generally easier to dry, can sometimes suffer from uneven shrinkage. Understanding these quirks is essential for preventing costly mistakes.
Factors Affecting Drying Times for Different Wood Varieties
Several factors influence the drying time for various wood species. These include the wood’s density, moisture content, the surrounding environmental conditions, and the drying method employed. High-density woods, for example, tend to take longer to dry than low-density woods. Likewise, a higher initial moisture content necessitates a longer drying period.
Summary Table of Drying Times for Specific Wood Types
| Wood Species | Origin | Initial Moisture Content (%) | Estimated Drying Time (days) |
|---|---|---|---|
| Oak (Quercus spp.) | North America | 50 | 60-90 |
| Pine (Pinus spp.) | North America | 45 | 30-60 |
| Mahogany (Swietenia spp.) | Central America | 60 | 70-120 |
| Cherry (Prunus avium) | North America | 40 | 45-75 |
| Walnut (Juglans nigra) | North America | 55 | 70-100 |
Note: These are estimations only. Actual drying times may vary significantly depending on factors like the specific wood variety, the environmental conditions, and the drying method used.
Illustrations and Visual Aids
A visual feast for the wood-drying enthusiast! Illustrations are paramount in understanding the often-complex procedures involved in bringing lumber from a damp, green state to a dry, usable condition. These visual aids not only clarify the methods but also highlight the importance of each step in the process, akin to a recipe for perfectly seasoned lumber.Visual representations, from simple diagrams to elaborate process flows, can dramatically enhance our understanding of the drying procedures.
These aids will unveil the secrets behind efficient and effective wood drying, providing a roadmap for optimal results.
Illustrative Depictions of Wood Drying Methods
Understanding the nuances of different drying methods is crucial. Visual aids play a pivotal role in this understanding. By picturing the process, we can grasp the intricate details and nuances that would be lost in a purely textual description.
- Kiln Drying: Imagine a giant oven for wood! A series of illustrations showcasing the kiln, the wood stacks inside, and the temperature and humidity controls would visually demonstrate the meticulous process of kiln drying. This method uses controlled temperature and humidity to expedite the drying process. The illustrations could show the loading of wood, the gradual increase in temperature, and the precise monitoring of moisture content.
A diagram could also highlight the use of fans to circulate air within the kiln, ensuring even drying. Think of it as a wood-warming embrace, but with precise control.
- Air Drying: This method is often likened to a slow-cooked meal. Illustrations could depict open-air racks or sheds, showcasing the wood stacks exposed to the elements, along with diagrams of the surrounding environment, including air movement and humidity readings. A series of drawings illustrating the various stages of air drying – from initial stacking to final inspection – would greatly aid comprehension.
The drawings should show the importance of good ventilation, preventing moisture buildup and mold growth. Illustrations could also showcase how to protect the wood from rain and excessive sun. Imagine the lumber as a delicate flower needing careful nurturing.
- Solar Drying: Picture the sun’s warmth as a natural dehydrator! Illustrations could show lumber laid out on specially designed racks in a sunny area. Diagrams of the setup, including shading techniques to protect from excessive heat, and the measurement of ambient temperatures would be crucial. Illustrations could also highlight the importance of proper spacing between wood pieces to facilitate air circulation and prevent uneven drying.
A series of images showcasing the solar drying process, from initial placement to final inspection, will be invaluable. Think of the wood as enjoying a vitamin D boost.
Stages of the Wood Drying Process
Visual aids are indispensable for comprehending the various stages of the wood drying process. From initial preparation to final inspection, the illustrations should provide a clear sequence of steps.
- Preparation: Illustrations showcasing the meticulous sorting and stacking of lumber, highlighting the importance of proper orientation and spacing. This stage is crucial to ensure even moisture distribution during the drying process.
- Drying: Visual representations of the different drying methods (kiln, air, solar) would depict the process in action, with clear indications of the temperature, humidity, and air circulation. Illustrations would also showcase the monitoring equipment, such as hygrometers and thermometers.
- Monitoring: Illustrations depicting the use of hygrometers and moisture meters for measuring moisture content throughout the drying process. Visuals would highlight the importance of frequent checks and the correlation between moisture content and drying time.
- Inspection: Illustrations showcasing the inspection procedures for determining the final moisture content of the dried lumber. This stage involves careful evaluation of the lumber’s appearance and its readiness for use.
Ventilation and Moisture Control
Illustrations are paramount in emphasizing the importance of ventilation and moisture control in the wood drying process. Visual aids can illustrate how proper ventilation facilitates the removal of moisture and prevents the buildup of mold and mildew.
- Proper Ventilation: Illustrations demonstrating the importance of airflow around and between wood stacks. Visualizations would highlight how adequate ventilation prevents moisture buildup and promotes uniform drying. Diagrams showcasing different ventilation systems for various drying methods would be invaluable. Think of ventilation as the lungs of the drying process.
- Moisture Control: Illustrative representations of humidity levels and temperature changes during the drying process. Graphs and charts demonstrating the correlation between moisture content and the drying environment would help understand the impact of controlled environments on the wood. Illustrations should highlight how to regulate humidity levels to optimize the drying process. Imagine moisture as an enemy that needs to be banished.
Epilogue: How Long Does It Take Wood To Dry
In conclusion, drying wood effectively hinges on understanding its unique characteristics and environmental influences. This comprehensive guide has explored the intricate process, from assessing moisture content to choosing suitable drying methods. Armed with this knowledge, you can confidently embark on any woodworking project, ensuring optimal results and long-lasting quality.
FAQ Compilation
What are the most common wood species used for woodworking?
Popular choices include oak, maple, pine, and cherry, each with varying drying characteristics. Refer to the “Wood Species Specifics” section for a deeper dive into specific types and their unique drying needs.
How do I determine the right drying time for a specific project?
The calculation of drying time depends on factors like wood type, initial moisture content, and environmental conditions. The “Calculating Drying Time” section Artikels a step-by-step approach and considerations.
What safety measures should I take during the drying process?
Proper ventilation, protective gear, and adherence to specific drying methods are crucial. Consult the “Safety Precautions During Wood Drying” section for a comprehensive list of guidelines.
What are the advantages and disadvantages of kiln drying?
Kiln drying offers precise control over moisture content but can be costly and require specialized equipment. The “Drying Methods” section compares kiln drying to other methods, highlighting the trade-offs.
