How long for grout to dry before sealing? This crucial question often arises after tiling projects. Understanding the drying process is paramount to achieving a durable and aesthetically pleasing finish. Factors like grout type, environmental conditions, and proper drying techniques all play a vital role in the overall success of the project.
Grout, the filler between tiles, needs time to fully harden before sealing. Rushing this process can lead to issues like uneven drying, cracking, or a sealer that doesn’t adhere properly. This comprehensive guide will delve into the intricacies of grout drying, offering insights into optimal drying times, and providing a step-by-step approach to sealing your grout effectively.
Understanding Drying Times: How Long For Grout To Dry Before Sealing
The journey of grout curing is a sacred process, a time of transformation from a wet, pliable substance to a strong, enduring bond. Understanding the intricacies of this process allows us to appreciate the subtle dance between materials and environment. By recognizing the factors that influence grout drying time, we can ensure the longevity and integrity of our creations.
Factors Influencing Grout Drying Time
Grout drying time is not a fixed constant, but a dynamic response to various environmental and material factors. The interplay of these forces shapes the final product’s strength and durability. Different types of grout, and the conditions in which they are set, dictate the duration required for optimal hardening.
Grout Types and Drying Time
Different grout types possess varying compositions, influencing their rate of hydration and thus their drying time. Sanded grout, with its added aggregate, often takes longer to dry completely due to the larger surface area for water absorption. Unsanded grout, being finer in texture, tends to dry faster.
Environmental Conditions and Drying Time
Environmental conditions play a crucial role in grout drying. Temperature and humidity directly impact the rate of evaporation. Warm, dry environments accelerate the drying process, while cool, humid conditions slow it down. Think of it like this: a hot desert will dry things faster than a damp rainforest. A skilled artisan understands these conditions and adjusts their approach accordingly.
Comparison of Drying Times
| Grout Type | Drying Time (hours)
|
|---|---|
| Sanded | 12-24 hours |
| Unsanded | 6-12 hours |
Note: These are estimations and can vary based on the specific grout mix, thickness of the application, and the environmental conditions.
Importance of Proper Drying
Proper drying time is essential to achieve the full potential strength and durability of the grout. Rushing the process can lead to weakened bonds and potential cracking, whereas allowing sufficient time ensures a resilient and long-lasting result. A rushed project can cause problems in the long run, just as hurrying a spiritual journey can prevent a deep connection with one’s true self.
Identifying Drying Stages
Embarking on the journey of grout preparation, understanding the nuances of its drying process is akin to navigating a spiritual path. Each stage represents a unique phase of transformation, from the initial setting to the ultimate state of hardened perfection. By recognizing these stages, you cultivate a deeper understanding and control over the process, ensuring a beautiful and enduring result.The drying process of grout, like a carefully cultivated garden, requires mindful observation and attention to detail.
Each stage holds clues to the grout’s evolving state, guiding you towards the ideal moment for sealing. Paying close attention to these subtle indicators allows you to seal your grout at the optimal time, preventing potential issues and ensuring a long-lasting, beautiful finish.
Visual Indicators of Drying Stages
Understanding the visual cues of grout’s various drying stages is crucial for timely sealing. These indicators are akin to the subtle shifts in energy that signal the path’s progress. By learning to interpret these visual cues, you gain the wisdom to properly time the sealing process, maximizing its effectiveness.
| Stage | Visual Cues |
|---|---|
| Initial Setting | The grout will appear firm and resistant to light pressure. A slight indentation may remain but it will not easily deform. The surface may still appear somewhat wet or damp. Imagine this stage as the initial planting of a seed, holding the potential for growth. |
| Hardening | The grout will exhibit increased resistance to pressure. Indentation will be minimal, and the surface will have a noticeably firmer feel. The dampness will diminish, transitioning to a drier, more solid state. Think of this as the seed sprouting, anchoring itself firmly to the earth. |
| Complete Drying | The grout will be completely firm and resistant to pressure. No indentation is visible. The surface will feel completely dry to the touch. It has reached its full potential, like a mature plant standing tall and strong. |
Assessing the Drying Stage
Assessing the drying stage of grout is a vital step in the sealing process, much like evaluating the ripeness of a fruit before harvest. A proper assessment ensures the grout is ready to receive the protective seal, preventing potential issues.
- Initial Assessment: Carefully examine the grout’s surface. Look for any visible signs of dampness or wetness. Note any slight indentations that might persist. This initial observation sets the stage for the next steps.
- Touch Test: Gently press your fingertip onto the grout surface. If it feels firm and resistant to pressure, the grout is moving towards the hardening stage. A soft, yielding sensation indicates further drying time is needed.
- Visual Inspection: Observe the surface closely for any residual dampness. A completely dry surface, free of any wetness, suggests the grout is ready for sealing. Pay close attention to any subtle changes in texture and appearance.
- Patience: The drying process requires patience. Allow sufficient time for the grout to fully harden before sealing. Rushing the process may lead to issues like premature cracking or peeling of the seal. Consider the grout’s depth and the environmental conditions when determining the necessary drying time. Like a carefully nurtured seedling, the grout needs time to fully develop.
Grout Drying Best Practices
Embarking on the journey of grout installation is a sacred act, a testament to your dedication to craft and beauty. Just as a seed needs nurturing to sprout into a magnificent tree, grout needs the right conditions to reach its full potential, a masterpiece of enduring strength and refined aesthetics. Proper drying is the cornerstone of this process, ensuring longevity and a flawless finish.Understanding the meticulous dance between time and temperature is key to achieving a robust and beautiful grout.
The proper drying process safeguards the integrity of the work, ensuring it stands the test of time, just as a well-built temple endures the passage of ages. Embrace the wisdom of patience and precision, and your grout will be a testament to your commitment to excellence.
Recommended Procedures for Complete Grout Drying
Proper drying procedures are essential for a lasting, aesthetically pleasing result. Allowing the grout to cure completely before sealing prevents future issues and ensures the seal adheres effectively, fostering a durable and beautiful surface. Focus on creating an environment that fosters optimal drying, just as a gardener carefully nurtures a delicate seedling.
- Controlled Environment: Maintain a consistent temperature and humidity level. Avoid drastic temperature fluctuations. A stable environment is akin to a calm and peaceful sanctuary, allowing the grout to mature without stress or disruption.
- Ventilation: Ensure adequate ventilation in the area to promote airflow. Good ventilation helps the grout dry evenly and prevents moisture from pooling. This is analogous to a gentle breeze, carrying away excess moisture.
- Protection from Direct Sunlight: Avoid placing the area under direct sunlight, as excessive heat can accelerate drying unevenly, leading to potential cracking and weakening of the grout. Sunlight, though vital for life, can be detrimental if not managed carefully, like a powerful river that, if uncontrolled, can cause significant damage.
Methods for Accelerating Grout Drying Without Compromising Quality
While accelerating the drying process is often desired, it’s crucial to do so without jeopardizing the integrity of the grout. Employing suitable techniques can significantly reduce drying time without sacrificing the grout’s strength and durability, much like a skilled craftsman using tools to enhance efficiency without compromising the artistic integrity of the piece.
- Using Fans: Employing fans to circulate air can hasten the drying process, but ensure the air movement isn’t too forceful, as this can cause uneven drying. Careful consideration is essential, just as a sculptor meticulously shapes clay to achieve the desired form.
- Maintaining a Moderate Temperature: Avoid extreme temperatures. A moderately warm environment encourages even drying, similar to a gentle spring breeze that nurtures the growth of plants.
Consequences of Sealing Grout Too Early
Sealing grout before it’s fully cured can lead to several undesirable consequences. This hasty action is comparable to constructing a building on unstable ground, leading to cracks and eventual collapse.
- Uneven Seal: An incompletely cured grout surface may not adhere to the sealant effectively, resulting in a weak bond and potential peeling or chipping. The sealant, in this case, would be like a fragile sheet unable to adhere to the underlying surface.
- Cracking and Damage: Grout that hasn’t fully dried may shrink and crack as it continues to cure, rendering the seal ineffective and causing damage. This is akin to a tree that grows too quickly, lacking the structural integrity to withstand the forces of nature.
Comparison of Different Drying Methods
Different methods for drying grout have varying effects on the final outcome. Choosing the appropriate method is essential for achieving a beautiful and lasting result, much like selecting the right tool for a particular task.
| Method | Effect | Considerations |
|---|---|---|
| Fans | Accelerates drying | Ensure gentle airflow to avoid uneven drying |
| Avoiding Direct Sunlight | Prevents uneven drying | Indirect sunlight is generally preferable |
| Controlled Temperature | Promotes even drying | Maintain a moderate temperature range |
Potential Problems from Insufficient Drying Time, How long for grout to dry before sealing
Insufficient drying time can lead to several problems that compromise the long-term integrity and aesthetic appeal of the grout. These issues are analogous to neglecting the foundations of a structure, leading to instability and eventual collapse.
- Weakened Grout: Inadequate drying can result in weakened grout, making it more susceptible to cracking, staining, and other damage. This is akin to building a house with insufficient materials, resulting in a structure that is vulnerable to deterioration.
- Reduced Seal Adhesion: An incompletely dried grout surface will not adhere to the sealant as effectively, leading to a less durable and more prone-to-damage seal. This is comparable to attempting to glue two surfaces together before they are properly prepared.
Sealing Grout Procedures
Embarking on the sacred journey of grout sealing is akin to bestowing a protective aura upon your tiled surfaces. Just as a well-maintained temple requires careful upkeep, so too does your tiled haven. This meticulous process, when executed with grace and understanding, will ensure the longevity and beauty of your tile work.Thorough drying of the grout is paramount before sealing.
Imagine a foundation weakened by dampness; the sealant, in this analogy, is the powerful elixir that fortifies the grout against moisture penetration and staining. Without complete drying, the sealant will not adhere properly, rendering its protective powers ineffectual. This, in turn, compromises the integrity of the entire system. Embrace the importance of this step, for it is the bedrock upon which a durable and beautiful tile surface is built.
Importance of Complete Grout Drying
Grout, in its nascent state, is a porous material. Like a thirsty sponge, it absorbs moisture from the surrounding environment. Only when the grout is completely dry can the sealant effectively bond with it. A thorough drying period ensures a robust and lasting seal, protecting the grout from stains, moisture damage, and the unwelcome intrusion of mold and mildew.
This proactive approach is the key to preserving the timeless elegance of your tiled surfaces.
Types of Grout Sealers and Their Application Methods
Various types of grout sealers are available, each with its unique characteristics and application methods. These include penetrating sealers, topical sealers, and epoxy sealers. Penetrating sealers, akin to a nourishing balm, seep into the grout pores, fortifying its structure from within. Topical sealers, like a protective coating, create a barrier on the grout surface. Epoxy sealers, the strongest of the bunch, offer exceptional durability and resistance to stains.
Understanding the nature of each type will allow you to choose the best fit for your specific needs.
Correct Grout Sealer Application
Correct application of the sealer is critical for optimal results. Imagine painting a masterpiece; every brushstroke must be deliberate and precise. Apply the sealer evenly and thoroughly, ensuring all grout lines are covered. This meticulous attention to detail is the key to a seamless and protective layer. Avoid any unevenness or pooling, for these imperfections will compromise the sealant’s effectiveness.
Step-by-Step Guide to Sealing Procedures
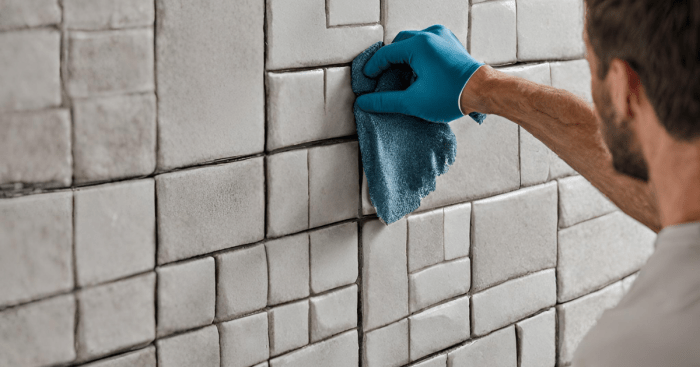
- Preparation: Thoroughly clean the grout lines with a suitable cleaner and water. Remove any dust, debris, or old sealer residue, just as you would cleanse a sacred space. This ensures the sealer adheres to the grout with precision and effectiveness.
- Application: Apply the sealer according to the manufacturer’s instructions. Use a grout brush or a sealant applicator to ensure even coverage, just as a skilled artisan would apply the finest paints to a masterpiece.
- Drying Time: Allow the sealer to dry completely, following the manufacturer’s recommended drying time. This period is crucial for the sealant to fully cure and develop its protective properties, just as a precious metal requires time to fully refine its beauty.
Importance of Proper Ventilation During Sealing
Adequate ventilation is crucial during the sealing process. A well-ventilated area prevents the buildup of fumes, protecting your health and ensuring a cleaner, more pleasant environment. This is similar to maintaining a sacred space, where fresh air and clean energy circulate freely. Open windows or use a fan to ensure proper airflow. This practice is as vital as the sealing process itself.
Troubleshooting Common Issues
Embarking on a grout sealing project is akin to embarking on a spiritual journey. Just as a journey of self-discovery requires mindfulness and patience, so too does grout sealing. Understanding the potential pitfalls allows you to navigate the process with grace and assurance, transforming your tiled surfaces into a testament to your meticulous craftsmanship.Addressing potential issues proactively fosters a sense of tranquility and mastery, much like a seasoned meditator finding peace amidst chaos.
By recognizing and understanding the causes of common problems, you equip yourself with the tools to overcome challenges and achieve a beautiful, long-lasting result.
Uneven Drying
Uneven grout drying often stems from inconsistent moisture absorption within the grout. This can be due to variations in the grout mix itself, differences in the substrate’s porosity, or even inconsistent application techniques. Maintaining a consistent environment and mindful application practices are key to achieving an even drying outcome.Understanding the grout’s inherent properties and the characteristics of the surface it’s applied to is crucial.
Consider using a consistent, even pressure when applying the grout. Ensuring uniform water distribution throughout the application process minimizes the risk of uneven drying.
Cracking
Grout cracking can manifest in various forms, from hairline fractures to more significant fissures. Factors such as improper drying time, excessive movement in the substrate, or insufficient bonding between the grout and the substrate contribute to cracking. A thorough understanding of the grout’s composition and the substrate’s properties is essential.Factors like rapid temperature fluctuations or insufficient curing time can also lead to cracking.
A slower, more controlled drying process, along with ensuring proper substrate preparation, can mitigate the risk of cracking. Careful monitoring of the environment during the drying period and the application process will aid in preventing this issue.
Table of Common Grout Drying and Sealing Issues
| Problem | Cause | Solution |
|---|---|---|
| Uneven Drying | Inconsistent moisture absorption, variations in grout mix, substrate porosity, or application technique. | Ensure a consistent mix, even application pressure, and uniform water distribution during application. Control the environment for consistent temperatures and humidity. |
| Cracking | Improper drying time, excessive substrate movement, insufficient bonding, rapid temperature fluctuations, or insufficient curing time. | Allow sufficient drying time, ensure proper substrate preparation, and control the environment. Use appropriate grout types for the substrate and application technique. |
Relevant Considerations
Embarking on the journey of sealing your grout is not merely a technical process; it’s a sacred ritual of bringing beauty and longevity to your space. Understanding the nuances of grout drying and sealing times empowers you to create a harmonious balance between aesthetic appeal and durability. With mindful consideration, you’ll transform your bathroom, kitchen, or any space into a sanctuary of beauty, built to last.The proper drying and sealing of grout hinges on several crucial considerations.
Each element, from the type of tile to the specific grout mix, plays a role in the overall success of the project. By acknowledging these factors, you’ll ensure a flawless and enduring finish, a testament to your commitment to quality.
Factors Influencing Drying Times
Understanding the interplay of variables is crucial for successful grout sealing. Different tile and grout combinations react uniquely to environmental conditions, affecting the drying time. The material’s inherent characteristics influence the drying process. The environment plays a crucial role in the rate of evaporation, which directly impacts the drying time.
- Tile Material: Porous tiles, such as terracotta or natural stone, absorb moisture more readily than non-porous options like porcelain or ceramic. This difference in porosity significantly impacts the drying time, necessitating a longer period for porous tiles to fully cure before sealing. A slower drying time allows the tile to fully absorb moisture, preventing potential issues later on.
- Grout Type: Different grout types have varying drying times. For instance, sanded grout, often favored for its strength, typically takes longer to dry than unsanded grout. The presence of sand particles within the mix adds complexity to the drying process. Understanding these differences ensures a proper cure time before sealing, guaranteeing longevity.
- Environmental Conditions: Temperature and humidity are paramount factors. High humidity and low temperatures can significantly slow down the drying process. The ideal conditions, often mentioned by manufacturers, are crucial for proper curing. Maintaining optimal environmental conditions during the drying phase is essential for preventing issues like uneven drying or cracking.
- Thickness of the Grout: A thicker layer of grout requires more time to dry completely compared to a thinner application. The depth of the grout impacts the rate at which moisture can escape. A thicker application may necessitate a longer drying time to ensure full curing and prevent issues.
Specific Tile and Grout Combinations
Careful consideration of specific tile and grout combinations is essential for optimal results. This awareness will allow you to create a truly harmonious and durable space.
| Tile Type | Grout Type | Drying Time (Estimated) | Notes |
|---|---|---|---|
| Porcelain Tile | Unsanded Grout | 24-48 hours | Typically dries quickly due to low porosity. |
| Ceramic Tile | Sanded Grout | 48-72 hours | Sand adds complexity to the drying process. |
| Natural Stone Tile | Epoxy Grout | 72-96 hours | Epoxy grout often requires longer drying times due to its composition. |
“Always consult the manufacturer’s recommendations for specific drying times and sealing procedures, as these will be tailored to the exact materials used.”
Adherence to Manufacturer Recommendations
The manufacturer’s instructions are your compass in this process. They provide invaluable insights tailored to specific products, ensuring optimal results. The manufacturer’s expertise is essential for achieving the best possible outcomes.
- Thorough Research: Carefully read and understand the manufacturer’s instructions for both the tile and grout. These instructions often contain crucial details, like recommended drying times and sealing procedures.
- Specific Guidelines: The manufacturer’s recommendations are tailored to the unique characteristics of their products. Following these guidelines will prevent potential issues and ensure a durable and beautiful finish.
- Avoiding Shortcuts: Rushing the drying or sealing process can compromise the integrity of the finished product. Adhering to manufacturer recommendations ensures a lasting and high-quality outcome.
Last Point
In conclusion, ensuring proper grout drying time is essential for a successful tiling project. By considering the various factors influencing drying time, and following the recommended procedures, you can prevent common issues and achieve a beautiful, long-lasting result. Remember, patience and attention to detail are key to achieving a flawless finish. Thorough preparation and adherence to the Artikeld steps will greatly increase the likelihood of a successful outcome.
FAQ Insights
What are the visual cues that indicate the grout has hardened enough for sealing?
Visual cues of grout hardening include a firm, non-sticky surface. The grout should appear completely set and no longer tacky or soft to the touch. Avoid touching or disturbing the grout before it has reached this stage.
How does temperature and humidity affect grout drying time?
High temperatures can speed up the drying process, while low temperatures or high humidity can significantly slow it down. Ideally, maintain a moderate temperature and humidity level during the drying period.
What are the potential problems if grout is sealed too early?
Sealing grout too early can result in uneven drying, cracking, and a sealer that doesn’t adhere properly, leading to a compromised finish and potential issues down the line. Allow the grout sufficient time to cure before sealing.
What are some common issues related to grout drying and sealing, and what are their solutions?
Common issues include uneven drying, cracking, and sealer issues. Addressing these issues often involves understanding the root causes, like improper ventilation or inadequate drying time. Solutions may include adjusting the drying conditions or repeating the sealing process.
