How long to stay off driveway after sealing? This is a crucial question for any homeowner tackling a driveway sealing project. It’s all about the drying time, right? Different sealants have different drying times, and weather plays a major role too. Knowing the dos and don’ts is key to a smooth sealing job, so you don’t end up with a sticky mess or worse, damage to your investment.
The article will dive deep into understanding drying times, safety precautions, the impact of traffic, and maintenance. We’ll cover everything from different sealant types to troubleshooting drying issues. So, get ready to seal the deal on driveway knowledge!
Understanding Drying Times
Driveway sealant drying times are crucial for achieving optimal performance and longevity. Proper drying allows the sealant to cure completely, creating a strong, durable, and weather-resistant surface. Factors such as weather conditions, sealant type, and application methods significantly influence the drying process. Understanding these factors is essential for homeowners and contractors to ensure a successful sealant application.
Factors Influencing Drying Times
Several factors play a critical role in determining how long a driveway takes to dry after sealing. These include the specific type of sealant used, environmental conditions, and application techniques. Accurate assessment of these factors is essential for achieving optimal drying and curing of the sealant.
Types of Sealants and Drying Times
Various sealant types are available, each with its own drying characteristics. Acrylic sealants, a common choice, typically have a drying time of 24-72 hours under optimal conditions. Polyurethane sealants, known for their durability, often require 48-72 hours or longer for complete curing. Elastomeric sealants, characterized by their flexibility, may take even longer, potentially up to 7 days or more.
The specific drying time is influenced by the manufacturer’s instructions and environmental conditions.
Weather Conditions and Drying Times
Weather significantly impacts the drying time of driveway sealant. Direct sunlight accelerates the evaporation process, reducing drying times. Conversely, shade can prolong the drying time, potentially leading to uneven curing. Rainfall interrupts the drying process, requiring extended drying periods before further traffic or activity. These effects are directly proportional to the intensity and duration of the weather events.
Air Circulation and Drying
Adequate air circulation is vital for proper drying. Restricted air flow can lead to moisture buildup, hindering the evaporation process and prolonging the drying time. Ensuring proper ventilation around the sealed area allows for better evaporation and quicker curing. A well-ventilated environment facilitates the drying process, which is crucial for the sealant to achieve its full potential.
Temperature and Humidity Impact
Temperature and humidity play significant roles in the drying time of driveway sealant. Higher temperatures promote faster evaporation, reducing drying times. Conversely, lower temperatures and high humidity can slow down the evaporation process, leading to longer drying times. Maintaining optimal temperature and humidity conditions is essential for a successful and complete drying process.
Drying Time Comparison Table
| Sealant Type | Optimal Drying Time (Hours) | Hot Sun | Shade | Rain |
|---|---|---|---|---|
| Acrylic | 24-72 | 20-48 | 48-72 | Delayed, requires additional drying time |
| Polyurethane | 48-72 | 40-60 | 60-72 | Delayed, requires additional drying time |
| Elastomeric | 72+ | 60-96 | 96-120+ | Delayed significantly, may require 7 days or more |
Note: These are general guidelines. Actual drying times may vary based on specific sealant product, application methods, and environmental conditions. Always consult the manufacturer’s instructions for detailed information.
Safety Precautions During Drying
Proper adherence to safety precautions during the drying period of a newly sealed driveway is crucial for preventing accidents and ensuring the longevity of the sealant. Failure to follow these guidelines can lead to damage to vehicles, personal injury, and compromised sealant effectiveness. Understanding the potential hazards and implementing appropriate safety measures are essential for a smooth and safe transition back to normal use.Driving on a freshly sealed surface presents specific risks.
The sealant, while still wet or tacky, can adhere to tires, potentially causing damage to the vehicle’s treads. Moreover, the reduced traction can increase the risk of skidding or loss of control, particularly for vehicles with heavy loads. The safety of pedestrians and vehicles must be prioritized during this critical period.
Safety Recommendations for Vehicles
Drivers should exercise extreme caution when navigating a freshly sealed driveway. Reduced traction and potential for tire damage are significant concerns. Vehicles should maintain a significantly reduced speed, ideally below the posted speed limit by half. This lowered speed provides increased reaction time and reduces the risk of skidding or loss of control, especially on inclines or declines.
Avoiding sudden acceleration, braking, or turns is equally important. The added risk of tire damage and reduced traction is exacerbated by heavier loads. Avoid unnecessary tire contact with the wet sealant.
Safety Recommendations for Pedestrians
Pedestrians should also take precautions when using a driveway that is still drying. The surface may be slippery or sticky, posing a risk of slips and falls. Slow, deliberate steps and avoidance of running or hurrying are essential. Individuals should wear appropriate footwear with good traction, and avoid areas where sealant is particularly wet or tacky. Consider utilizing alternate routes, if possible, until the surface has adequately dried.
Hazards of Driving on a Wet or Sticky Surface
Driving on a wet or sticky surface significantly increases the risk of loss of control. Reduced traction leads to a higher likelihood of skidding, particularly during turns or rapid maneuvers. The slickness can also affect braking distances, potentially leading to accidents. Maintaining a safe following distance and adhering to reduced speed limits is critical in these situations.
Comparison of Risks on Different Sealant Types
The specific risks associated with driving on different types of sealed driveways vary depending on the sealant used. Asphalt sealants, for instance, often have a more pronounced effect on traction compared to concrete sealants, which can offer some degree of grip even in wet conditions. The presence of debris or foreign materials on the surface can further increase the risk of skidding, regardless of the type of sealant or surface.
Table of Safety Precautions
| Sealant Type | Traffic Condition | Safety Precautions |
|---|---|---|
| Asphalt | Wet/Sticky | Reduce speed significantly, avoid sudden maneuvers, increase following distance. |
| Asphalt | Dry | Normal driving precautions, but maintain awareness of potential residual moisture. |
| Concrete | Wet/Sticky | Reduce speed moderately, maintain awareness of potential debris, consider alternate routes. |
| Concrete | Dry | Normal driving precautions, but maintain awareness of potential uneven surfaces. |
| Epoxy | Wet/Sticky | Reduce speed to a minimum, use extreme caution during turns and braking. |
| Epoxy | Dry | Normal driving precautions, but be aware of potential curing effects on tires. |
Impact of Traffic on Drying
Vehicle traffic significantly impacts the drying time of a sealed driveway. The constant pressure and friction from tires can disrupt the sealant’s curing process, potentially leading to uneven drying and reduced longevity of the sealant. Understanding how traffic affects the drying time is crucial for ensuring optimal performance and minimizing potential problems.
Effects of Tire Contact on Drying
Tire contact with the freshly applied sealant can introduce stress and mechanical disturbance to the surface. The pressure from tires can cause the sealant to be pushed or displaced, affecting its ability to bond evenly and fully cure. This is especially true for areas that experience high traffic volume. Furthermore, tire debris, such as gravel or dirt, can be embedded in the sealant, hindering the drying process and potentially leading to blemishes.
Methods to Reduce Traffic Impact
Implementing strategies to minimize traffic on the driveway during the drying period can greatly enhance the sealant’s quality and longevity. One approach is to use signage to alert drivers to the restricted area and the need to avoid the driveway until the sealant has fully cured. This is particularly important for driveways with high traffic volume or in residential areas where vehicles frequently traverse the surface.
A temporary barrier, such as cones or barricades, may also be necessary, particularly in commercial settings.
Drying Time Comparison with and without Traffic
Drying times are significantly impacted by traffic volume. Areas with minimal traffic experience a more uniform and consistent drying process, allowing the sealant to fully cure and bond properly. Conversely, areas subjected to heavy traffic often experience uneven drying, with pockets of incomplete cure. This can lead to premature cracking, peeling, and reduced overall lifespan of the sealant.
The difference in drying times is directly correlated with the intensity of traffic during the drying period.
Table: Traffic Volume vs. Drying Time
| Traffic Volume | Drying Time (Estimated) | Impact Description |
|---|---|---|
| Low (e.g., residential area with infrequent traffic) | 3-5 days | Sealant cures evenly, minimal disruption. |
| Medium (e.g., commercial driveway with moderate traffic) | 5-7 days | Potential for slight unevenness in some areas, depending on traffic patterns. |
| High (e.g., busy street or commercial area with high traffic) | 7-10+ days | Significant risk of uneven drying and potential for sealant displacement. Increased risk of surface imperfections. |
Note: Drying times are estimations and can vary based on environmental factors like temperature, humidity, and weather conditions.
Maintenance and Care After Drying
Proper maintenance and care after sealing a driveway significantly impacts the longevity and aesthetic appeal of the finished surface. Following the recommended procedures ensures the sealant’s effectiveness and protects the investment. This section details essential maintenance practices to extend the lifespan of the sealed driveway.
Post-Drying Maintenance Procedures
The newly sealed driveway requires careful handling to prevent premature deterioration. Immediate maintenance actions prevent damage caused by improper handling. Prompt attention to potential issues ensures the sealant performs as intended.
- Avoid Excessive Water Exposure: Immediately after the drying period, avoid exposing the sealed surface to excessive water, as this can negatively impact the sealant’s adhesion and durability. Water can dilute the sealant and create areas of weakness.
- Prevent Traffic: Minimize traffic on the driveway for the recommended period following sealing. Heavy vehicle traffic during the drying phase can cause premature wear and tear on the newly applied sealant, potentially leading to unevenness or cracks.
- Control Temperature Fluctuations: Avoid exposing the newly sealed driveway to rapid temperature changes. Significant temperature fluctuations can lead to contraction and expansion stresses that can crack the sealant layer.
- Prevent Staining: Avoid parking vehicles or placing objects that may leave stains on the surface until the sealant has fully cured. Early contact with substances like oil, grease, or chemicals can cause staining and affect the overall appearance.
Best Practices for Caring for a Newly Sealed Driveway
Regular care and attention to detail significantly enhance the lifespan of a sealed driveway. This includes routine cleaning and preventive measures.
- Routine Cleaning: Regular sweeping or light washing with a gentle detergent solution can remove loose debris and dirt that can accumulate on the surface over time. This helps maintain the appearance and prevents the build-up of substances that may damage the sealant.
- Addressing Stains Promptly: If stains or spills occur, address them promptly with appropriate cleaning agents to prevent them from penetrating the sealant and causing damage. Using the correct cleaning agents is critical to prevent further issues.
- Regular Inspection: Conduct periodic inspections of the driveway for any signs of damage, such as cracks, peeling, or discoloration. Prompt identification of potential problems allows for timely repair and prevents deterioration from progressing.
Importance of Avoiding Excessive Water Exposure
Maintaining the integrity of the sealant requires careful consideration of water exposure. The sealant is susceptible to damage from water, especially during the initial curing period.
Proper sealant application and curing processes depend on the absence of water to achieve a durable surface.
Excessive water can dilute the sealant, leading to premature deterioration.
Tips for Preventing Damage to the Sealed Surface
Proactive measures prevent damage and extend the driveway’s lifespan. This includes proper handling and environmental control.
- Avoid Harsh Chemicals: Avoid using harsh chemicals or abrasive cleaners on the sealed surface, as these can damage the sealant and cause discoloration. Appropriate cleaning agents are essential for preserving the sealant.
- Protect from Debris: Regularly remove leaves, twigs, and other debris that can scratch or damage the surface. Prompt removal prevents further damage.
- Address Spills Immediately: If spills occur, immediately address them using appropriate cleaning solutions to prevent staining and damage. Prompt attention prevents the issue from worsening.
Cleaning the Driveway After the Drying Period, How long to stay off driveway after sealing
Post-drying cleaning involves careful attention to detail to maintain the sealant’s integrity. Proper cleaning techniques are essential for preserving the surface’s aesthetic appeal.
- Use Gentle Detergents: Use a gentle detergent solution for washing the driveway to prevent damage to the sealant. Harsh chemicals can compromise the surface.
- Rinse Thoroughly: Rinse the driveway thoroughly after washing to remove any residual detergent that may damage the sealant or leave streaks. Complete rinsing prevents potential issues.
- Avoid Pressure Washing (Initially): Avoid using high-pressure washing equipment immediately after sealing. High pressure can damage the newly applied sealant. Wait for the sealant to fully cure before using pressure washing.
Sealant Type Maintenance Table
| Sealant Type | Maintenance Recommendations |
|---|---|
| Acrylic | Regular sweeping and occasional washing with mild detergent; avoid harsh chemicals. |
| Epoxy | Regular sweeping; avoid harsh chemicals; occasional washing with mild detergent; use specialized cleaning solutions if necessary. |
| Polyaspartic | Regular sweeping and light washing with mild detergent; avoid pressure washing immediately after application. |
| Polyurethane | Regular sweeping; avoid harsh chemicals; occasional washing with mild detergent; specialized cleaning solutions may be required for stubborn stains. |
Troubleshooting Drying Issues
Proper drying of driveway sealant is crucial for achieving a long-lasting, aesthetically pleasing, and functional surface. Failure to allow adequate drying time, or exposure to adverse conditions, can lead to various issues that necessitate troubleshooting. Understanding the potential problems and their solutions ensures a successful sealant application.
Common Drying Issues
Several factors can affect the drying process, leading to various issues. Environmental conditions, such as high humidity, heavy rain, or direct sunlight, can influence the sealant’s curing time. Variations in temperature, particularly sudden fluctuations, can also disrupt the drying process. Furthermore, inadequate application techniques, such as improper mixing ratios or insufficient coverage, can contribute to uneven drying.
Solutions for Addressing Drying Issues
Addressing drying problems promptly is essential to avoid costly repairs and maintain the integrity of the sealed surface. Adjusting application techniques, ensuring proper ventilation, and controlling environmental conditions can mitigate many issues. For instance, applying sealant in cooler, drier conditions minimizes the risk of premature curing or uneven drying.
Causes of Uneven Drying
Uneven drying is a common issue resulting from non-uniform sealant application, environmental inconsistencies, or variations in the sealant itself. Differences in the sealant’s thickness across the surface, insufficient coverage, or localized temperature fluctuations can all contribute to uneven drying. Improper mixing ratios can also lead to inconsistent drying times. Differences in surface preparation, like uneven porosity or the presence of residual debris, can also lead to uneven sealant adhesion and drying.
Methods to Fix Issues with Improper Drying
Addressing improper drying requires careful assessment of the cause. If uneven drying is due to inadequate application, re-application with proper techniques, ensuring uniform coverage, and controlling the environment are necessary. If environmental conditions are the culprit, adjusting application schedules or using a sealant designed for specific weather conditions is essential. In cases of peeling or bubbling, the affected area should be thoroughly cleaned and re-sealed using the correct procedure.
Identifying and rectifying the root cause of improper drying is crucial to prevent recurrence.
Troubleshooting Steps for Peeling or Bubbling
Peeling or bubbling indicates adhesion issues, potentially stemming from inadequate surface preparation, improper sealant application, or environmental factors. Initial steps involve carefully inspecting the affected area to identify the extent of the problem. If the peeling or bubbling is localized, a small patch repair may suffice. However, if the issue is widespread, a complete re-application of the sealant is necessary.
Proper surface preparation, including cleaning and priming, is crucial to prevent recurrence. Re-application should be performed using the correct sealant type and application technique.
Table of Drying Issues and Potential Solutions
| Drying Issue | Potential Solutions |
|---|---|
| Uneven Drying | Ensure uniform sealant application, control environmental conditions, adjust application schedules, or use sealant designed for specific weather conditions. |
| Peeling/Bubbling | Thorough cleaning and inspection of the affected area, localized patch repair if necessary, or complete re-application with proper surface preparation, including cleaning and priming. |
| Slow Drying | Ensure adequate ventilation, adjust application schedules, use sealant designed for specific weather conditions. |
| Premature Drying | Apply in cooler temperatures, adjust application schedule, or use sealant designed for specific weather conditions. |
Visual Representation of Drying Process

The visual stages of sealant drying are crucial for assessing the proper curing and readiness of a driveway for traffic. Different sealants exhibit varying drying characteristics, and understanding these visual cues is essential for ensuring a long-lasting and aesthetically pleasing surface. Monitoring the drying process allows for timely traffic resumption and prevents damage from premature use.
Visual Stages of Drying
The drying process of sealants involves several distinct visual stages. Initial application appears as a liquid or semi-liquid coating, depending on the sealant type. The physical changes observed during drying are crucial in determining when the surface is ready for traffic.
Stages of Drying Process for Different Sealants
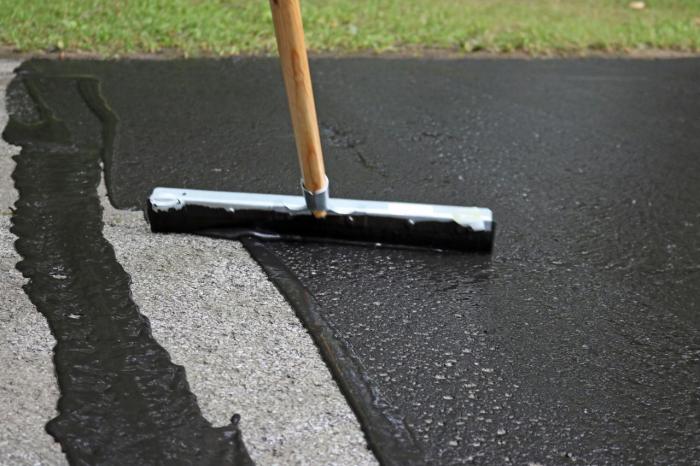
- Initial Application (Wet): Immediately after application, the sealant appears as a uniform liquid or semi-liquid film, potentially exhibiting a slightly glossy or viscous texture, depending on the type of sealant. This stage is characterized by a noticeable wetness, which should be monitored for proper drying time.
- Early Drying (Tacky): As the sealant begins to dry, the wet film gradually hardens and loses its gloss. The surface becomes tacky, and a light touch may leave a slight residue. This stage is crucial as it indicates the sealant is beginning to form a cohesive layer, but further drying is necessary.
- Intermediate Drying (Semi-Hard): The tacky residue diminishes, and the surface transitions from tacky to a somewhat hardened state. The sealant is no longer wet to the touch, but may exhibit a slight flexibility. This stage is marked by a reduction in tackiness.
- Final Drying (Hard): The sealant forms a solid, uniform, and hardened layer. The surface appears dry and firm, with no visible tackiness or residue. The color of the sealant may slightly darken or lighten as it fully cures. A crucial aspect of this stage is the absence of any significant changes in the surface texture or appearance.
Appearance of Driveway During Drying
The appearance of the driveway during different stages of the drying process varies significantly. Initially, it may appear as a uniformly wet surface, which progressively transitions to a tacky, semi-hard, and ultimately hard layer. Variations in color and texture can occur depending on the specific sealant used.
Visual Indicators of Full Drying
Several visual cues indicate a fully dried driveway. A hardened surface, free of tackiness and any signs of wetness, is a key indicator. The sealant should form a uniform, continuous layer without any visible cracks or unevenness. Furthermore, the sealant’s color should have stabilized, indicating completion of the curing process.
Visual Cues for Safe Driving
Visual cues that signal it is safe to drive on the driveway include a completely hardened, smooth, and uniform surface. The absence of any tackiness or wetness is paramount. Any unevenness or cracks should be absent, and the sealant should exhibit a consistent color throughout. Observing these characteristics ensures the sealant has adequately cured and can withstand traffic.
Closing Summary: How Long To Stay Off Driveway After Sealing
In short, staying off the driveway after sealing depends on a bunch of factors – sealant type, weather, and traffic. Safety is paramount. Following the drying time recommendations and safety precautions will help you avoid problems. Proper maintenance is crucial for keeping your freshly sealed driveway looking its best for years to come. Hopefully, this guide has given you the knowledge you need to tackle your driveway sealing project with confidence!
Key Questions Answered
How long does it typically take for a sealant to fully cure?
Drying times vary greatly depending on the sealant type, weather conditions, and the product’s instructions. Some sealants can take a few hours to a couple of days. Always check the product label for specific drying times.
What if it rains before the driveway is fully dry?
Rain can significantly impact the drying process. If it rains before the sealant is fully cured, you might need to wait longer before driving or walking on it. Check the sealant’s instructions for specific guidance in rainy conditions.
Can I drive on the driveway right after applying the sealant?
Absolutely not! It’s crucial to wait until the sealant is completely dry and cured according to the manufacturer’s instructions. Driving on a wet or sticky surface can damage the sealant and create a hazardous situation.
What are some common problems during the drying process?
Uneven drying, peeling, and bubbling are common issues. These problems are often linked to improper application, temperature fluctuations, or excessive traffic. Check the product’s instructions for specific recommendations and potential solutions.
