How many watts iron to solder battery terminals effectively and safely? This critical analysis delves into the intricate relationship between wattage, battery terminal type, wire gauge, and soldering iron selection. Understanding these factors is paramount to achieving reliable connections and avoiding potential damage or safety hazards.
Choosing the right wattage is not merely a matter of convenience; it’s crucial for maintaining the integrity of the battery system. Inadequate wattage can lead to weak solder joints, potentially jeopardizing the entire circuit. Conversely, excessive wattage can damage the battery terminals or the soldering iron itself, highlighting the necessity of a precise approach.
Introduction to Soldering Battery Terminals

Soldering battery terminals, a crucial procedure in electrical work, involves fusing a metallic solder to the connection points between the battery and the circuit. This process requires meticulous attention to detail, particularly regarding the selection of appropriate tools and techniques. A key element of successful soldering is the correct wattage of the soldering iron. Improper wattage selection can compromise the integrity of the connection, leading to poor performance or even safety hazards.The process of soldering battery terminals involves carefully heating the metal components until the solder melts and flows, creating a strong and durable bond.
This fusion is not merely cosmetic; it is a fundamental aspect of ensuring electrical continuity and preventing corrosion. The chosen wattage of the soldering iron is crucial in this process as it dictates the temperature and speed of the soldering action. High temperatures may damage the battery terminals or the surrounding insulation, while low temperatures may lead to an insufficient solder joint.
Furthermore, the selection of the appropriate wattage is influenced by the type of battery terminal, the gauge of the wire, and the overall electrical current involved.
Proper Wattage Selection for Soldering
Selecting the correct wattage soldering iron is paramount for achieving a robust and safe solder joint. Insufficient wattage will result in a weak and unreliable connection, prone to breakage or corrosion. Excessive wattage, on the other hand, can overheat the battery terminal or surrounding insulation, potentially leading to damage or even fire hazards. The ideal wattage is dependent on several factors, including the type of metal being soldered and the size of the connection points.
Experienced technicians often use a trial-and-error approach to determine the optimal wattage for specific applications.
Potential Risks of Incorrect Wattage
Using insufficient wattage can lead to a poor solder joint, resulting in intermittent connections, corrosion, and eventual failure. The solder may not adequately flow into the joint, leaving air gaps that compromise electrical conductivity. Conversely, excessive wattage can damage the battery terminal or the surrounding insulation, causing thermal stress and potentially compromising the structural integrity of the connection.
This can result in overheating, melting, and even ignition hazards. Furthermore, an excessively hot soldering iron can damage the battery’s internal components.
Common Mistakes When Soldering Battery Terminals
Several common mistakes can jeopardize the quality and safety of battery terminal soldering. These include using an inadequate wattage soldering iron for the job, applying the solder too quickly or too slowly, or failing to clean the terminals properly before soldering. Furthermore, not using flux to remove oxides from the metal surfaces can hinder the bonding process, leading to a poor connection.
Another critical mistake is applying excessive heat, which can cause the terminal to deform or melt, thus creating a weak connection and potentially damaging the battery.
Types of Battery Terminals and Wattage Requirements
| Terminal Type | Typical Wattage (W) | Notes |
|---|---|---|
| Automotive Battery Terminals (Heavy Duty) | 40-60 | Requires a higher wattage to handle the heavier current demands. |
| Small Battery Terminals (e.g., AA, AAA) | 10-20 | Lower wattage soldering irons are sufficient to avoid damaging the terminals. |
| Specialized Battery Terminals (e.g., Lithium-ion) | Specific to the manufacturer’s guidelines. | Consult the battery manufacturer’s instructions for recommended wattage. |
This table provides a general guideline, and specific wattage requirements may vary depending on the terminal’s dimensions, the wire gauge, and the specific application.
Factors Affecting Wattage Requirements
Selecting the appropriate wattage for soldering battery terminals is crucial for achieving a robust and reliable connection. Inadequate wattage can result in weak solder joints, prone to failure under stress, while excessive wattage risks damaging the terminal or wire, compromising the integrity of the connection. Understanding the interplay of various factors is paramount for a successful soldering process.The wattage required for soldering battery terminals is not a fixed value but a dynamic variable influenced by a range of interconnected factors.
These factors, which include the characteristics of the materials being joined, the properties of the solder, and the conditions of the soldering environment, must be considered when making wattage selections.
Wire Gauge and Terminal Size
The cross-sectional area of the wire, often expressed in terms of gauge (AWG), and the dimensions of the battery terminal significantly impact the heat required for effective soldering. Thicker wires (smaller gauge numbers) demand more heat input to achieve adequate melting of the solder and achieve a strong bond. Conversely, thinner wires (larger gauge numbers) require less heat, thereby mitigating the risk of overheating and potential damage.
Terminal size correlates with wire gauge, and larger terminals generally require higher wattage to achieve adequate melting of the solder. For example, soldering thick gauge copper wire to a large battery terminal will necessitate higher wattage than soldering thin wire to a smaller terminal.
Solder Type and Melting Point
The type of solder used, crucial for the quality of the joint, directly influences the wattage requirements. Solder alloys possess varying melting points. Higher melting point solders necessitate higher wattage for sufficient melting and achieving a robust joint. Conversely, lower melting point solders can be soldered with lower wattage settings, reducing the risk of overheating. Consideration of the solder’s melting point is critical for successful and safe soldering.
Soldering Iron Tip Size and Condition
The size and condition of the soldering iron’s tip are critical determinants in wattage selection. A larger tip area, capable of dissipating more heat, often requires higher wattage for proper heating. A smaller tip area, more efficient at concentrating heat, generally operates at lower wattage settings. The tip’s condition, including cleanliness and sharpness, directly affects its heat dissipation capacity.
A dull or oxidized tip will absorb more heat, requiring higher wattage to compensate, potentially leading to overheating. A sharp, clean tip allows for more efficient heat transfer, reducing the need for high wattage.
Ambient Temperature
Ambient temperature significantly impacts the soldering process. Lower ambient temperatures can reduce the thermal conductivity of the materials, requiring a higher wattage setting to compensate for the reduced heat transfer. In contrast, higher ambient temperatures can lead to faster heat dissipation, potentially reducing the required wattage. Careful monitoring of the soldering environment’s temperature is crucial for consistent and reliable results.
Comparison of Wire Gauges and Recommended Wattage Ranges
| Wire Gauge (AWG) | Recommended Wattage Range (Watts) |
|---|---|
| 10 | 40-60 |
| 12 | 30-50 |
| 14 | 20-40 |
| 16 | 15-30 |
| 18 | 10-25 |
This table provides a general guideline; precise wattage requirements will vary depending on the specific conditions of the soldering process, including the terminal type, solder alloy, and tip condition. Careful observation and adjustment are essential for optimal results.
Determining Suitable Wattage: How Many Watts Iron To Solder Battery Terminals
The selection of an appropriate soldering iron wattage is critical for achieving successful and safe battery terminal soldering. Improper wattage can lead to either insufficient heat for proper bonding, potentially causing poor electrical connections and a shortened battery life, or excessive heat, damaging the terminal or the battery itself. A thoughtful approach to wattage determination ensures a robust and reliable connection.Careful consideration of the materials being joined, the size of the terminals, and the overall soldering process are fundamental to selecting the right wattage.
This necessitates a methodical approach to determine the optimal wattage to prevent damage and ensure efficient soldering.
Calculating Wattage Requirements
A systematic approach to wattage calculation involves a careful assessment of the factors influencing the heat requirement of the soldering process. The size of the terminals, the type of metal, and the desired soldering quality all contribute to the wattage selection. Determining the appropriate wattage necessitates a combination of empirical knowledge and the application of appropriate reference tools.
Using Reference Charts and Online Tools
Reference charts and online tools offer a practical method for quickly determining suitable wattage. These resources typically categorize soldering irons by wattage and provide examples of suitable applications. These charts usually correlate wattage with terminal size and material, facilitating informed wattage choices. For example, a chart might show that a 40-watt iron is appropriate for smaller battery terminals, while a 60-watt iron is better suited for larger or thicker terminals.
Selecting the Right Soldering Iron
Choosing the correct soldering iron hinges on the calculated wattage requirement. Different soldering iron types have varying wattage capabilities, with some being more versatile than others. Factors like the soldering iron’s heating element design, insulation, and overall construction influence its wattage output and suitability for specific tasks. A higher wattage iron generally allows for faster heating and is better suited for more challenging soldering jobs, but it may also require more careful handling.
Comparison of Soldering Iron Types
Different soldering iron types offer varied wattage capabilities. For instance, pencil-style irons often have lower wattage ratings compared to heavier, more robust models. The choice between these types depends on the size and complexity of the soldering project. The pencil-style iron is often favoured for its maneuverability, while the heavier models are better suited for larger projects or those requiring more consistent power.
Examples of Soldering Iron Models and Wattage Ranges
Various soldering iron models are available, each with a specific wattage range. A 25-watt iron might be suitable for delicate electronic work, while a 60-watt model is better for larger projects, such as automotive or industrial applications. The precise wattage range for a specific model is usually detailed in the product specifications.
Soldering Iron Models and Wattage Ranges
| Soldering Iron Model | Wattage Range (Watts) |
|---|---|
| Model A | 20-40 |
| Model B | 40-60 |
| Model C | 60-80 |
| Model D | 80-100 |
Safety Precautions During Soldering
Soldering battery terminals, while a seemingly straightforward process, demands meticulous attention to safety protocols. Neglecting these precautions can lead to severe electrical hazards and potential injuries. The inherent voltage and amperage present in battery systems necessitates a heightened awareness of potential risks and a rigorous adherence to safety standards.Proper safety measures not only prevent accidents but also ensure the longevity of the soldering process and the integrity of the components.
A comprehensive understanding of safety precautions is crucial for anyone undertaking this task, from hobbyists to professionals.
Essential Safety Gear
Ensuring the safety of the soldering operation starts with appropriate personal protective equipment (PPE). Eye protection is paramount. Safety glasses or a face shield are indispensable for shielding the eyes from potential sparks, molten solder, or acid spatter, which could result from battery leakage or reaction during the process. Gloves provide protection for the hands from the heat of the soldering iron and potential chemical exposure.
Consider using heat-resistant gloves, often made of materials like leather or coated fabrics. Additionally, appropriate clothing should be chosen, preferably non-flammable materials to minimize risks associated with the heat and sparks generated.
Electrical Hazards and Mitigation
Battery systems pose a significant electrical hazard. Short circuits or improper connections can lead to high currents, generating intense heat and the potential for electrical shocks. A fundamental safety practice is to disconnect the battery’s power source before commencing any soldering work. This step is crucial to eliminate any possibility of accidental contact with live electrical components.
Proper grounding techniques are equally important. Ensuring the soldering station is grounded, preventing any electrical leakage to the operator, is a key preventative measure. Using a well-grounded soldering station and ensuring the work area is adequately grounded minimizes the risk of electrical shock. This precaution, combined with the battery disconnection, is critical for worker safety.
Ventilation Requirements
Adequate ventilation is critical during soldering operations, particularly when working with battery terminals. Battery terminals can emit fumes and gases, some of which can be harmful or irritating. Ensure that the work area is well-ventilated. Open windows or using exhaust fans can help to disperse fumes, reducing the risk of inhalation and related health issues. In confined spaces, consider using a fume extractor to efficiently remove potentially hazardous fumes and maintain an acceptable level of air quality.
The choice of ventilation method should align with the specific work environment and the type of battery being worked on.
Grounding Techniques
Grounding is a critical safety procedure to prevent electrical shocks. A good grounding system ensures that any stray electrical current is safely diverted to the ground, preventing it from flowing through the worker. A properly grounded soldering station is essential. Ensure that the soldering station is connected to a properly grounded electrical outlet. Inspect the grounding connections regularly for any signs of damage or deterioration.
Using a well-grounded workbench and ensuring proper grounding connections in the circuit minimizes the risk of electric shock.
Safety Procedures for Soldering Battery Terminals
- Disconnect the battery terminals from the power source before commencing any soldering work.
- Wear appropriate personal protective equipment (PPE), including safety glasses, gloves, and protective clothing.
- Ensure the work area is well-ventilated, utilizing exhaust fans or open windows to remove fumes.
- Use a well-grounded soldering station and verify that all connections are properly grounded.
- Use appropriate soldering techniques to avoid creating excessive heat and sparks.
- Inspect the battery terminals for any signs of damage or corrosion before soldering.
- Handle the battery terminals with care to avoid dropping or damaging them during the soldering process.
- Work in a well-lit area to ensure clear visibility during the soldering process.
- Follow the manufacturer’s instructions for the specific battery type and soldering procedure.
Soldering Techniques for Battery Terminals
The successful connection of battery terminals hinges critically on meticulous soldering techniques. Improper application can lead to weak connections, jeopardizing the battery’s performance and potentially causing safety hazards. Understanding the nuances of various soldering methods and their application is paramount for achieving a robust and reliable electrical bond.The effectiveness of a soldered connection depends not only on the chosen technique but also on the meticulous preparation of the terminals prior to soldering.
This includes ensuring a clean and consistent surface for solder to adhere. A robust connection is crucial for the safe and efficient transfer of electrical current, thereby extending the lifespan and reliability of the battery system.
Preparing the Terminals for Soldering
Thorough preparation of the battery terminals is fundamental to achieving a robust solder joint. This involves meticulous cleaning and ensuring a suitable surface area for optimal solder adhesion. This stage sets the foundation for a successful and lasting connection.
- Cleaning: The terminals must be thoroughly cleaned to remove any oxidation or contaminants that could hinder solder adhesion. This can be accomplished using a wire brush, sandpaper, or specialized cleaning solutions. Thorough cleaning removes insulating layers, promoting effective solder flow.
- Mechanical Preparation: The terminals should be mechanically prepared by removing any burrs or rough edges that could impede the soldering process. Careful filing or sanding ensures a smooth surface, facilitating uniform solder distribution.
- Surface Area: Ensure sufficient exposed surface area for the solder to grip. Any limitations in this regard could lead to inadequate contact and a poor connection. Sufficient surface area is essential for strong bonding and electrical conductivity.
Applying Solder to the Terminals
Proper solder application is vital for achieving a strong and reliable connection. The selection of solder type and the application technique significantly impact the outcome. A consistent application method guarantees a robust bond.
- Solder Selection: The appropriate solder type depends on the specific battery terminal material and the operating temperature. A suitable solder composition ensures optimal flow and adhesion. Selecting the correct solder alloy is crucial for effective adhesion and durability of the connection.
- Heating the Terminals: The terminals should be heated using a soldering iron with an appropriate wattage. Maintaining consistent heat throughout the process is critical for uniform solder flow. Precise temperature control during heating minimizes the risk of damaging the terminals.
- Applying Solder: Apply solder to the heated terminal joint, ensuring even distribution across the contact area. Gentle movement of the solder ensures complete coverage and minimizes the risk of solder bridging.
Ensuring a Strong and Reliable Connection
A strong and reliable connection is achieved by carefully considering several factors during the soldering process. A detailed analysis of these factors guarantees a robust and lasting connection.
- Complete Melt: Ensure complete melting of the solder to create a smooth and homogeneous joint. A complete melt ensures that the solder effectively connects the terminals, minimizing the risk of electrical resistance and improving conductivity.
- Sufficient Solder Quantity: Use the appropriate amount of solder to completely fill the joint without excess. Excess solder can lead to mechanical stress and hinder the performance of the connection.
- Cooling and Inspection: Allow the solder to cool and solidify completely before inspecting the joint. This cooling process ensures that the solder has solidified properly, resulting in a robust and lasting connection.
Comparing Soldering Methods
Different soldering methods offer varying advantages and disadvantages. An understanding of these comparative aspects helps determine the most appropriate approach for a given application.
| Soldering Method | Advantages | Disadvantages |
|---|---|---|
| Hand Soldering | Cost-effective, adaptable to various situations. | Can be time-consuming, less precise than automated methods. |
| Automated Soldering | High precision, faster, and more consistent. | Requires specialized equipment, higher initial cost. |
Troubleshooting Soldering Issues
Troubleshooting soldering issues is a crucial aspect of ensuring reliable electrical connections, particularly when dealing with the demanding environment of battery terminals. Proper identification and resolution of problems are paramount for preventing potential hazards and ensuring the longevity of the soldered joints. Inaccurate or poorly executed soldering can lead to compromised electrical conductivity, thermal instability, and ultimately, device malfunction.
Common Soldering Problems, How many watts iron to solder battery terminals
Identifying and addressing common soldering issues is vital for achieving high-quality, durable connections. A systematic approach to diagnosing and resolving problems minimizes the risk of costly repairs and ensures long-term reliability.
Causes of Poor Connections
Several factors contribute to poor solder joints, ranging from inadequate preparation to improper soldering techniques. Inadequate flux application, excessive heat, or incorrect solder type can all compromise the integrity of the joint. Improper cleaning of the metal surfaces can also hinder proper solder flow.
Diagnosing Soldering Issues
Visual inspection is often the first step in diagnosing soldering problems. Look for signs of insufficient solder coverage, cold solder joints, or excessively high solder buildup. Measuring the resistance of the connection can further reveal potential issues. A multimeter can aid in detecting any significant resistance readings, indicating a poor connection.
Troubleshooting Guide
- Insufficient Solder Coverage: This often results from inadequate flux application, insufficient heat, or using an unsuitable solder type. To resolve this, ensure proper flux application, adjust the soldering iron temperature, and/or select a solder with the appropriate melting point.
- Cold Solder Joints: These are characterized by a dull, grayish appearance and weak mechanical strength. Cold joints arise from insufficient heat or inadequate pre-heating of the workpieces. Ensure adequate heat application and pre-heating of the components.
- Excessive Solder Buildup: This occurs when the soldering iron’s heat or solder flow is excessive, leading to an undesirable build-up. Adjust the soldering iron’s heat setting and/or the solder application technique to control the amount of solder used.
- Contamination of the Metal Surfaces: Oxidized or unclean surfaces prevent proper solder flow. Proper cleaning techniques, like using flux and mechanical cleaning, are essential for preventing these issues.
- Incorrect Solder Type: Using an incompatible solder type can lead to weak or brittle solder joints. Use a solder that matches the metal types of the components being joined.
Examples of Poor Solder Joints and Their Causes
| Poor Solder Joint | Cause |
|---|---|
|
A solder joint with visible gaps and lack of solder filling the joint |
Insufficient heat or inadequate solder application |
|
A solder joint with a rough, uneven surface and excess solder |
Excessive heat or improper solder application |
|
A cold solder joint with a dull gray color |
Insufficient heat or inadequate pre-heating |
Reworking Faulty Solder Joints
Reworking a faulty solder joint requires careful attention to detail. Begin by removing the excess solder using a solder sucker or a sharp blade. Ensure the surfaces are clean and free from any residual solder. Then, reapply flux, apply heat to the joint with the soldering iron, and add the appropriate solder. Allow the solder to flow and solidify before cooling.
The process should be performed with precision to ensure the integrity of the connection.
Tools and Materials Needed
The successful soldering of battery terminals hinges critically on the appropriate selection and meticulous use of tools and materials. A well-equipped toolkit, coupled with an understanding of each component’s function, ensures a secure and reliable connection. This section details the essential tools and materials, their importance, and considerations for choosing the right solder.
Essential Tools
A well-stocked soldering toolkit is paramount for achieving professional results in battery terminal work. Each tool plays a specific role, from precise heat application to meticulous cleaning. Carefully selected tools contribute to a clean, secure joint, minimizing the risk of failure and maximizing the lifespan of the connection.
| Tool | Description | Importance |
|---|---|---|
| Soldering Iron | Generates heat for melting solder. | Provides controlled heat for joining components. Crucial for precise melting and flow of solder. |
| Solder | Alloy of metals used to fuse components. | Forms the conductive bridge between the terminals. Proper selection is vital for reliability. |
| Wire Cutters | Used for trimming excess wire. | Precise cutting of wire prevents damage to the terminal. |
| Wire Strippers | Used to remove insulation from wire. | Clean wire terminations are essential for proper solder adhesion and connection. |
| Flux | Substance that cleans and prepares the surface for soldering. | Promotes a smooth solder flow. Removes oxidation, improving solder adherence. |
| Tweezers | Used for holding small components and wires. | Provides precision handling of delicate parts during soldering. |
| Safety Glasses | Protective eyewear to prevent eye injuries. | Protects against flying debris or molten solder. |
| Work Surface | Stable, heat-resistant surface. | Ensures a stable working area, preventing accidents. |
Solder Selection
Selecting the right solder is crucial for a successful solder joint. The solder’s composition, including its melting point and alloying metals, directly impacts the joint’s strength and reliability.
- Lead-free solder is now widely used due to environmental concerns surrounding lead. Its properties vary significantly depending on the specific alloy. Lead-free solders often require different soldering techniques and iron settings than traditional lead-based solders.
- Tin-lead solder, while historically common, is now less prevalent due to environmental regulations. This type of solder typically melts at a lower temperature and is often preferred for general-purpose soldering.
- Different solder types are suited for various applications. For instance, higher tin content solders are often better for high-current applications, while lower tin content solders are preferred for applications where thermal expansion is a critical factor. Choose the solder based on the amperage and voltage requirements of the battery terminals being soldered.
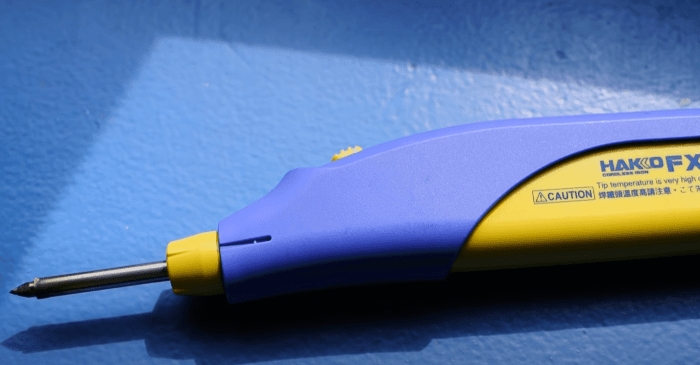
Soldering Iron Selection
The choice of soldering iron directly affects the efficiency and safety of the soldering process. Factors like wattage, tip size, and heating speed determine the optimal choice for the task at hand.
- Wattage: The wattage of the soldering iron determines the amount of heat available. Higher wattage irons are suitable for thicker materials, while lower wattage irons are more manageable for delicate work. Choose a wattage appropriate for the battery terminals being soldered, ensuring sufficient heat without damaging the terminals or the iron itself.
- Tip Size: The size and shape of the soldering iron tip influence the area of contact and the control over heat distribution. Smaller tips provide more precision, while larger tips offer more heat dissipation. Selecting the appropriate tip size ensures efficient heat transfer for the soldering job.
- Heating Speed: Faster heating irons can be advantageous in situations requiring quick assembly. The heating rate of the iron must be considered, especially when soldering numerous terminals.
Last Recap
In conclusion, determining the appropriate wattage for soldering battery terminals requires a comprehensive understanding of various influencing factors. Careful consideration of wire gauge, terminal type, solder characteristics, and the soldering iron’s capabilities are essential. By adhering to safety precautions and employing the right techniques, users can ensure strong, reliable connections, thereby maintaining the longevity and functionality of their battery systems.
General Inquiries
What are the typical wattage ranges for different battery terminal types?
A precise wattage recommendation varies significantly based on the specific battery terminal design. Larger terminals and thicker wires generally necessitate higher wattage irons. A table detailing these ranges is crucial for proper selection.
How does the wire gauge impact wattage requirements?
Thicker wires (lower gauge numbers) demand higher wattage to ensure adequate heat transfer and solder penetration. Conversely, thinner wires require lower wattage to prevent overheating and potential damage.
What are the potential consequences of using an iron with insufficient wattage?
Insufficient wattage results in weak solder joints, which can easily fail under load. This can lead to electrical shorts, reduced performance, and even safety hazards.
What safety precautions should be taken when soldering battery terminals?
Always wear appropriate safety gear, ensure proper ventilation, and use correct grounding techniques. Never work on live circuits and always exercise extreme caution. A detailed safety checklist is highly recommended.
