How to amke a new pint in Seamly2D? This comprehensive guide walks you through the process, from initial project setup to final rendering and export. Discover the intricacies of designing captivating pints within Seamly2D’s intuitive interface. We’ll cover essential aspects like template selection, element creation, and optimization techniques for stunning results.
This tutorial will equip you with the knowledge and skills to craft professional-quality pints in Seamly2D. From selecting the right template to mastering rendering options, you’ll gain a solid foundation in pint creation. The step-by-step approach ensures a smooth learning curve, perfect for beginners and experienced users alike.
Creating a New Pint in Seamly2D
Seamly2D, a powerful 2D vector graphics application, provides a user-friendly interface for crafting intricate digital artworks. This section details the crucial initial steps in launching a new project, from file selection to the establishment of project parameters. A thorough understanding of these foundational elements is essential for subsequent creative endeavors.Comprehending the project setup process in Seamly2D is vital for producing consistent and high-quality digital art.
Understanding templates, project settings, and the software’s interface will ensure that the initial stages of a new project are optimized for the desired artistic outcome.
Launching a New Project
The process of initiating a new project in Seamly2D is straightforward, beginning with the selection of a file type and project settings. The software presents several options to cater to various creative needs.
- File Selection: Seamly2D allows users to choose between existing templates or initiate a new project from a blank canvas. This initial decision significantly influences the subsequent design workflow.
- Template Selection: The software offers a range of pre-designed templates, each optimized for specific artistic goals. These templates provide a head start for various project types, offering a structured foundation for creative endeavors.
- Blank Canvas Option: For projects requiring complete customization, a blank canvas option provides the freedom to design from scratch. This approach offers unparalleled flexibility, enabling the creation of unique artistic visions.
Project Templates
A structured approach to project creation in Seamly2D is possible by utilizing templates. These pre-defined layouts simplify the process by providing a framework optimized for specific tasks.
| Template Name | Purpose | Associated File Types | Description |
|---|---|---|---|
| Character Design | Creating 2D character models | .psd, .svg, .png | Pre-configured with layers and design elements optimized for character creation. |
| UI/UX Design | Developing user interfaces | .sketch, .xd | Includes layouts and components commonly used in user interface design. |
| Game Asset Creation | Generating assets for video games | .fbx, .obj | Includes pre-configured layouts for game development, including textures and models. |
| Graphic Design | Developing various graphic designs | .ai, .eps | A versatile template for different graphic design purposes. |
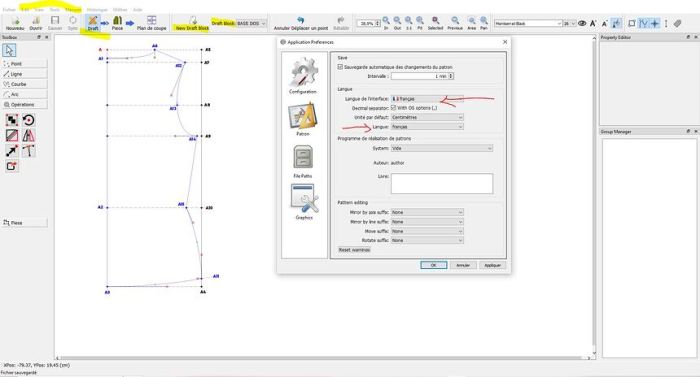
Project Settings
Crucial aspects of a project’s setup include resolution, units, and color profiles. These settings significantly impact the final product’s appearance and functionality.
- Resolution: The resolution of the project determines the image’s pixel density, influencing the level of detail and visual clarity. Higher resolutions are essential for intricate designs and print-ready outputs. For example, a project intended for high-resolution printing requires a higher resolution setting than a project meant for display on a mobile device.
- Units: Seamly2D offers various unit options, such as pixels, centimeters, and inches. The choice of units affects the precision and accuracy of design elements. For instance, projects requiring precise measurements, like architectural drawings, should use units like centimeters or millimeters.
- Color Profiles: The selection of a color profile ensures color consistency across different devices and applications. Using a standardized color profile is critical for maintaining color accuracy during the design process.
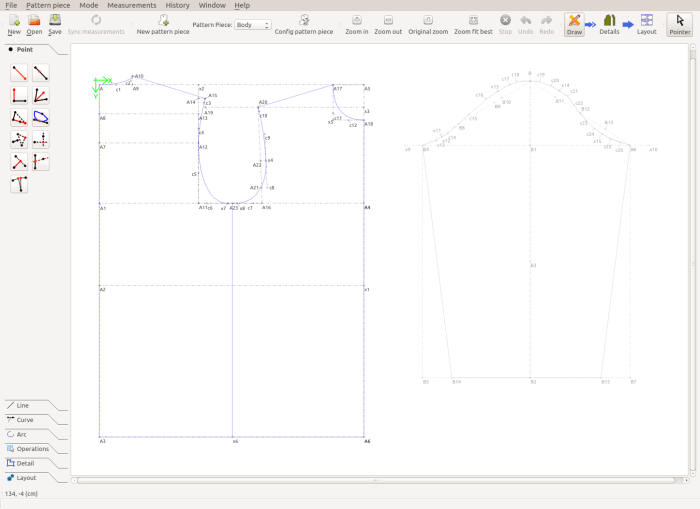
Seamly2D Interface
A strong understanding of the Seamly2D interface is essential for effective pint creation. The interface, carefully designed for intuitive operation, facilitates smooth transitions between various design stages.
Designing the Pint’s Components
The creation of a pint in Seamly2D transcends mere pixel manipulation; it involves a nuanced understanding of form, structure, and visual harmony. Effective design necessitates careful consideration of the pint’s constituent elements, their interrelationships, and the overall aesthetic impact. This process requires a thoughtful approach to shape manipulation, pattern creation, layering, and material application. Ultimately, the design process should aim to create a pint that is not only visually appealing but also functionally integrated within the Seamly2D environment.The meticulous construction of a pint in Seamly2D demands a comprehension of the tools and techniques available.
Each element, from the simplest shape to the most intricate pattern, plays a crucial role in the overall aesthetic and functionality of the pint. Understanding these tools and their applications allows for a more refined and efficient design process.
Shape and Pattern Creation Techniques
Seamly2D offers a diverse array of tools for generating and manipulating shapes. These tools include basic geometric shapes (circles, squares, polygons), along with more advanced options for freeform design. The program facilitates the creation of intricate patterns through the combination of shapes, utilizing functions for mirroring, rotating, and scaling. These techniques provide the foundation for constructing diverse pint components.
Tools and Techniques for Pint Construction
The construction of a pint involves a variety of tools and techniques, each serving a specific function within the design process. A comprehensive understanding of these tools allows for a more nuanced and refined approach to construction.
- Shape Tools: These tools allow for the creation of various geometric shapes, providing a foundation for the pint’s elements. They range from simple circles and squares to more complex polygons, enabling precise control over form.
- Pattern Tools: These tools facilitate the creation and application of repeating patterns on shapes. By utilizing mirroring, rotation, and scaling functions, these tools enable the generation of intricate and visually appealing designs. The creation of patterns can be customized using gradients, colors, and textures, allowing for greater control over the overall visual appeal of the pint.
- Transform Tools: These tools enable manipulation of shapes and patterns, allowing users to adjust size, position, rotation, and mirroring of elements. This fine-tuning is critical for achieving the desired form and arrangement of components.
- Selection Tools: Precise selection of elements is essential for manipulation and organization. Selection tools allow for the isolation of individual components, groups of components, or entire pint sections, enabling targeted modification.
Layering for Visual Depth
The layering system in Seamly2D allows for the creation of complex and visually rich pints. The layering options are crucial in achieving a sense of depth and dimension.
- Z-Order Management: The Z-order determines the visual priority of layers. By adjusting the order of elements, designers can control which elements appear in front of or behind others. This is crucial for creating the illusion of depth and visual interest.
- Opacity Adjustments: Controlling the transparency of layers enables a more subtle visual interaction between elements. Adjusting opacity levels allows for the creation of semi-transparent layers, which can add a sense of depth and atmosphere.
- Layer Grouping: Grouping related layers facilitates management of complex pints. Grouping allows for easier manipulation of related elements as a single unit, preventing issues with unintended modification of individual components.
Texture and Material Application, How to amke a new pint in seamly2d
Applying textures and materials enhances the visual realism and aesthetic appeal of the pint. The process involves selecting appropriate textures and materials from the available library, then applying them to the relevant pint elements.
- Texture Libraries: Seamly2D offers a wide array of textures, ranging from simple patterns to realistic materials, such as wood, stone, or metal. The variety allows for diverse visual outcomes.
- Material Properties: Beyond visual appeal, the choice of material affects the pint’s appearance and interactivity within the program. Different materials react differently to light, and these properties can be adjusted to create a sense of realism and depth.
- Texture Application Methods: Methods of texture application range from simple tiling to complex image mapping, enabling designers to precisely control the placement and appearance of textures.
Rendering and Exporting the Pint
The final stages of pint creation in Seamly2D involve meticulous rendering and export procedures. Proper optimization at this stage ensures a balance between high visual fidelity and manageable file sizes, critical for efficient distribution and use. This section provides a comprehensive guide to these crucial steps, encompassing various rendering options and export formats, ultimately empowering the user to achieve the desired output.
Preparing the Pint for Rendering
Effective rendering hinges on optimized asset preparation. This involves careful consideration of object complexity, texture resolution, and lighting configurations. Excessive detail in low-priority areas is often unnecessary and results in larger file sizes without a significant improvement in visual quality. Reducing polygon counts where possible, without compromising essential form, is a key principle. Texture compression techniques, like mipmapping, further contribute to file size reduction while maintaining visual fidelity.
Strategic placement of light sources, shadows, and ambient lighting enhances the realism of the final image, without overcomplicating the rendering process.
Rendering Options in Seamly2D
Seamly2D offers a suite of rendering options, each with unique strengths. The “Ray Tracing” mode, for example, yields photorealistic imagery by simulating light interactions with surfaces. This, however, comes at a cost in processing time, making it suitable for high-quality, detailed renders where time is less of a constraint. The “Raster” mode, conversely, offers a balance between speed and quality, making it a versatile choice for many scenarios.
Raster rendering, while not offering the same level of realistic light interactions as ray tracing, provides a more immediate feedback loop, allowing for iterative adjustments and experimentation. The “Vector” mode, ideal for scalable designs, renders the pint as paths and shapes, leading to small file sizes suitable for web use or scalable graphic design.
Exporting the Pint
Seamly2D facilitates the export of the pint in several common formats. Each format has distinct characteristics impacting file size and visual quality. PNG, for example, is a lossless format preserving image integrity, but can result in larger file sizes compared to lossy formats like JPG. JPG offers a more compact format, trading some image detail for smaller file sizes, making it a suitable choice for web images or applications where reduced file sizes are critical.
SVG, a vector-based format, is ideal for scalable graphics, preserving the image’s resolution at different scales, making it suitable for web graphics and illustrations.
Export Format Comparison
| Format | Quality | File Size | Suitability |
|---|---|---|---|
| PNG | High | Large | High-quality images, illustrations, logos |
| JPG | Medium | Medium | Web images, general use |
| SVG | High (vector) | Small | Scalable graphics, web graphics |
Rendering Presets
Seamly2D provides customizable rendering presets that tailor the output to specific needs. These presets combine rendering options, settings, and configurations into easily accessible packages, effectively streamlining the workflow. A “High Quality” preset might utilize high resolution textures, detailed lighting, and ray tracing, optimizing for maximum visual fidelity. A “Fast Render” preset, conversely, might reduce texture resolution, simplify lighting, and employ raster rendering, prioritizing speed over detail.
This allows for a rapid turnaround time, crucial in iterative design processes or when dealing with large projects.
Ultimate Conclusion
In conclusion, crafting a new pint in Seamly2D is a rewarding journey. This guide has provided a structured approach to mastering the software’s capabilities, empowering you to create visually appealing and technically sound pints. From the initial setup to the final export, we’ve covered every crucial step, ensuring you can confidently embark on your next design project.
Top FAQs: How To Amke A New Pint In Seamly2d
What file formats can I export my pint in?
Seamly2D supports various export formats, including PNG, JPG, and SVG, each offering distinct advantages in terms of quality and file size. The guide provides a detailed comparison table.
How do I optimize my pint for rendering?
Optimization techniques, such as adjusting layer order and using rendering presets, are discussed to improve rendering speed and quality. The guide highlights the significance of these steps.
What templates are available for pint creation in Seamly2D?
A table within the guide details various project templates, outlining their purposes and associated file types. This allows you to choose the template that best suits your design needs.
Can I customize existing Seamly2D templates?
While the guide focuses on creating new pints, you can certainly modify existing templates to fit your unique needs. Seamly2D offers a robust interface for customization.
