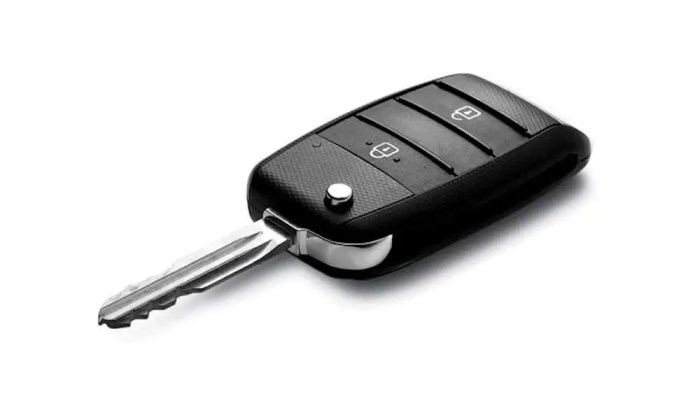
How to change a battery in a Kia key fob sets the stage for this comprehensive guide, providing a detailed and analytical approach to a common automotive task. A dead or malfunctioning key fob can be a frustrating inconvenience, but replacing the battery is often a straightforward process. This guide will walk you through the necessary steps, from identifying your specific Kia key fob model to reassembling it and testing its functionality.
Understanding the correct battery type is crucial, as improper selection can lead to further problems. This guide also covers essential preventative measures to extend the lifespan of your key fob battery.
This guide will take you through the process in a step-by-step manner, equipping you with the knowledge and confidence to tackle this task yourself. Proper identification of your key fob model is paramount, ensuring you select the correct battery size and type. Following the detailed instructions, you can efficiently and safely replace the battery, restoring your key fob to full operational efficiency.
Introduction to Kia Key Fob Battery Replacement
Yo, fam! Your Kia key fob’s battery gettin’ weak? That ain’t no joke. A dead or dying battery can mess up your whole ride, from not unlockin’ the car to makin’ it hard to start. Keepin’ that fob in tip-top shape is crucial, so you can keep rollin’ smooth.Replacing the battery is easier than you think, and it’s totally worth it to avoid all those annoying issues.
Plus, using the right battery is key to keepin’ your fob workin’ perfectly.
Why Replace a Kia Key Fob Battery?
A dead or weak Kia key fob battery can lead to a bunch of problems. You might find yourself locked out of your car, struggle to start it, or even lose access to some features like remote locking or unlocking. Think about the hassle of havin’ to call a locksmith or jumpstart your car. It’s way easier and cheaper to swap out that battery before things get outta hand.
Correct Battery Type for Specific Kia Key Fob Models
Usin’ the right battery type is super important. Different Kia key fob models need different battery sizes and types. Using the wrong battery could damage the fob, or it might not work at all. This can lead to unnecessary expenses and a lot of frustration. So, check your owner’s manual or the Kia website for the precise battery specs.
Tools and Materials Needed
You won’t need a whole toolbox for this job. A small flathead screwdriver, a new battery (of the correct type), and a little bit of patience are all you need. Make sure you have a well-lit area to work in. Having the right tools and materials will make the whole process smoother and faster.
Kia Key Fob Battery Requirements
| Kia Key Fob Model | Battery Type | Battery Size |
|---|---|---|
| Kia Sportage (2020-2023) | CR2032 | 2032 |
| Kia Soul (2019-2022) | CR2025 | 2025 |
| Kia Forte (2021-2023) | CR2032 | 2032 |
| Kia Optima (2020-2022) | CR2025 | 2025 |
This table shows some common Kia key fob models and their corresponding battery requirements. Always double-check the specifications for your specific model.
Identifying Your Kia Key Fob Model
Yo, fam! Figuring out which Kia key fob you’ve got is crucial for snagging the right battery. Skip the wrong size, and you’re stuck with a fob that ain’t workin’. This ain’t rocket science, just a few steps to get you sorted.Knowing your key fob model is like having a secret code to the right battery. It’s the key to makin’ sure you get the correct replacement, no fumbling around.
This section breaks down how to identify your Kia key fob model, whether you’re lookin’ at a fancy one or a basic one.
Key Fob Identification Steps
Knowing your key fob model is essential for getting the right battery. This section provides a step-by-step guide on how to identify your specific Kia key fob model.
- Visual Inspection: First things first, check the physical fob itself. Look for any markings, labels, or numbers etched into the plastic or metal. These details might be hidden under a flap or on a different part of the fob. Sometimes, you’ll find the model number printed on a sticker or label, or maybe it’s stamped directly onto the fob’s body.
- Online Resources: If the physical inspection doesn’t yield results, you can use online resources to identify your key fob model. Search the internet using s like “Kia key fob model identification,” along with the exact description of your fob. Pictures are also helpful in these searches. Many forums and communities are dedicated to Kia owners; these are great places to get help if you’re stuck.
- Kia Owner Manuals: Check the owner’s manual for your Kia vehicle. It may include a list of different key fob models and their associated features, which can help narrow down the possibilities. This manual could be useful to identify the fob if you’re sure about the car it belongs to.
- Dealer Assistance: If all else fails, reach out to a Kia dealership. They often have access to databases that can help you identify your key fob model. You could also consult a technician for advice.
Kia Key Fob Model and Battery Type
This table provides a snapshot of common Kia key fob models and their corresponding battery types. Keep in mind that this is not an exhaustive list, and different models may exist.
| Kia Key Fob Model | Battery Type |
|---|---|
| Kia K5 2022 | CR2032 |
| Kia Sorento 2021 | CR2025 |
| Kia Soul 2020 | CR2032 |
| Kia Sportage 2019 | CR2025 |
Importance of Accurate Model Identification
Accurate identification of your Kia key fob model is vital for ensuring battery compatibility.
Using the wrong battery type can lead to malfunctioning, reduced performance, or even permanent damage to your key fob. It’s crucial to get the right battery for your specific model to prevent problems later on. Different battery sizes and voltages are designed for specific electronic circuits, and using an incompatible one can create short circuits, reducing the fob’s functionality.
Choosing the correct battery ensures optimal performance and longevity of your key fob.
Gathering Necessary Tools and Materials
Yo, fam, changing a Kia key fob battery ain’t rocket science, but you gotta have the right tools. This ain’t no DIY project where you just wing it—you need the right stuff to do it right and keep yourself safe. We’ll break down the essentials, so you can handle this like a pro.
Essential Tools for the Job
To pull this off smooth, you need some basic tools. These aren’t fancy gadgets; they’re the everyday heroes for this job. Think of ’em as your key fob’s personal repair crew.
- Small Phillips Head Screwdriver: This is the workhorse for most key fob jobs. It’s crucial for opening up the key fob’s casing. A quality screwdriver is important, as a cheap one can slip or break. A magnetic tip is a plus, as it helps keep the screws in place while you’re working.
- New Battery: Duh, right? You gotta have the replacement battery. Make sure it’s the right type and voltage for your specific key fob model. Check your manual if you’re unsure. Avoid using a battery that’s been sitting around for a while; they can have reduced power.
- Tweezers or Small Pry Tool: Sometimes, the battery compartment cover is tricky to open. Tweezers or a small pry tool can help you gently pry it open without damaging the key fob. Be gentle, as you don’t want to scratch the plastic. Avoid using anything too sharp or rough.
Choosing the Right Tools for Success
Picking the right tools isn’t just about getting the job done; it’s about doing it safely and efficiently. A flimsy screwdriver can slip, and a bad pry tool can damage your key fob.
- Quality Over Quantity: A few good quality tools are better than a bunch of cheap ones. Invest in sturdy tools that won’t break or slip during the process. A good screwdriver set is a good investment.
- Safety First: Avoid using tools that are damaged or broken. A damaged tool can cause accidents and damage your key fob. If a tool doesn’t feel right, don’t use it. You’ll thank yourself later.
- Proper Fit: Ensure that the tools you select are the correct size and type for the job. Using the wrong size screwdriver can strip the screw head, and using a blunt pry tool can scratch the key fob. This is critical for a smooth operation.
Preparing the Tools and Materials, How to change a battery in a kia key fob
Having the right tools is one thing; knowing how to prep them is another.
- Battery Inspection: Check the new battery to make sure it’s not damaged or has any loose connections. You don’t want to install a faulty battery.
- Cleanliness: Ensure all tools are clean. Dirt and debris can get in the way of the process. Wipe down the screwdriver and pry tool to remove any dirt or debris.
- Gather Everything: Collect all the necessary tools and materials in one place before you start. This will save you time and effort when you’re in the middle of the process.
Disassembling the Kia Key Fob
Yo, fam, changing a Kia key fob battery ain’t rocket science, but you gotta be smooth. This part’s crucial ’cause if you mess it up, your fob’s toast. Follow these steps to avoid any drama.This section breaks down how to carefully open your Kia key fob’s casing. We’ll cover proper handling techniques to keep your fob from getting wrecked.
We’ll also address potential hiccups and how to fix ’em. So, let’s get into it!
Safe Key Fob Opening Techniques
Properly disassembling your key fob is vital to prevent damage. Careless handling can break the delicate components inside. Using the correct tools and techniques is key to avoiding any problems.
- First, inspect your key fob. Look for any signs of damage or unusual features. This initial check helps you understand the specific model and its construction.
- Use a flathead screwdriver. Gently pry the casing open. Aim for the seams or clips. Start with a very light touch. Too much force could break the plastic.
- Be careful with the clips. Some key fobs have tiny clips holding the casing together. These are fragile. If you’re unsure, take a photo of the clips’ positions before prying.
- Avoid excessive force. Once you get a little gap, use gentle pressure to continue opening the casing. If it’s stuck, take a break and try again. Don’t try to force it open. If the casing is too tight, you might need a different tool or a more precise approach.
Handling Components with Care
The internal components of your key fob are delicate. Rough handling can lead to malfunctions. This section focuses on how to handle these components with care to prevent damage.
- Identify the battery. It’s usually the obvious thing to take out, but make sure to pay attention to its placement and orientation before you remove it.
- Use tweezers or needle-nose pliers. These tools help you grab and move small parts without squeezing them too hard. If you don’t have these, try using something similar to help grab and reposition the components without applying excessive force.
- Don’t bend or twist anything. Be smooth and steady. Sharp bends or twists can damage the circuits or other delicate components. Treat each piece as if it were made of glass.
Potential Challenges and Solutions
Sometimes, opening a key fob can be tricky. This section discusses potential problems and how to troubleshoot them.
- Stuck casing. If the casing is stuck, try using a different angle with the screwdriver, or a little lubricant, like a drop of rubbing alcohol on the edges.
- Broken clips. If you find a broken clip, you might need a replacement casing. This could require taking your key fob to a locksmith.
- Damaged components. If you suspect damage to internal components, you might need to contact a professional to replace them. It’s better to be safe than sorry, especially if you’re not confident in your ability to handle these components.
Step-by-Step Key Fob Opening Guide
This table Artikels the process for opening your Kia key fob, emphasizing safety precautions.
| Step | Action | Safety Precautions |
|---|---|---|
| 1 | Inspect the key fob for damage. | Look for signs of cracks or breaks. |
| 2 | Gently pry open the casing using a flathead screwdriver. | Use minimal force to avoid breaking the plastic. |
| 3 | Handle internal components with care. | Use tweezers or needle-nose pliers for precise handling. |
| 4 | Remove the battery. | Note the battery’s position and orientation. |
Using the correct tools and techniques is essential to avoid breaking the key fob.
Replacing the Old Battery with a New One

Yo, fam! Changing that Kia key fob battery is easier than you think. Just gotta follow these steps, and you’ll be good to go. No need to stress, just chill and focus.Replacing the old battery with a new one is a straightforward process. The correct procedure ensures your key fob works perfectly, avoiding any issues like it not unlocking your ride.
Careful handling of the battery and the fob itself is crucial. It’s all about precision and avoiding any mistakes that might mess things up.
Removing the Old Battery
Before you even think about popping in a new one, you gotta get that old battery out. This part is simple, just needs a bit of finesse. The old battery is usually held in place by a tiny latch or a clip. Pay attention to how it’s secured—sometimes it’s a bit tricky.
- Carefully use a small, flat-head screwdriver or a similar tool to gently pry open the battery compartment.
- Once the compartment is open, carefully remove the old battery. Avoid bending or damaging the key fob’s internal components.
- Inspect the battery compartment for any debris or residue. Cleaning it up will prevent any future problems.
Inserting the New Battery
Now, let’s get that new battery in there. Make sure you get the right type, or else your key fob might not work. The orientation of the battery is super important; it needs to be placed correctly.
- Carefully align the new battery with the terminals in the battery compartment.
- Check the polarity (positive and negative) on both the battery and the key fob’s compartment. Match them up properly. You don’t want to mess that up.
- Gently press down on the battery until it snaps securely into place. Make sure it’s fully seated.
Potential Risks of Incorrect Battery Placement
Putting the battery in the wrong way could lead to some serious problems. It might not work at all, or worse, it could damage the key fob’s internal circuitry. Don’t take chances, follow the instructions!
- Incorrect battery polarity can short-circuit the key fob’s internal components.
- Improper battery placement can damage the sensitive electronics within the key fob.
- A misaligned battery can prevent the key fob from functioning correctly.
Step-by-Step Battery Replacement
This is the final step, and it’s pretty straightforward. Just follow these steps.
- Gather your tools and the new battery.
- Open the battery compartment of the key fob carefully.
- Remove the old battery and inspect the compartment.
- Insert the new battery, ensuring correct polarity and orientation.
- Close the battery compartment carefully.
- Test the key fob to ensure it functions correctly.
Battery Types and Compatibility
Different types of batteries might be used in Kia key fobs. It’s important to use the right kind to avoid any issues. For example, a CR2032 is pretty common, but some models might use something else. Always check your key fob’s manual or the manufacturer’s website for the recommended battery type.
- CR2032 is a common type, widely available.
- Check your Kia key fob manual for the specific battery type recommendation.
- Using the wrong battery type can lead to problems with the key fob’s functionality.
Reassembling the Kia Key Fob: How To Change A Battery In A Kia Key Fob
Yo, so you’ve got the old battery out, right? Now, putting it back together is crucial. It’s like a puzzle, but if you mess it up, your key fob might not work, or worse, break completely. This ain’t rocket science, but precision is key.Reassembling the key fob involves carefully aligning the components to ensure a secure fit and proper functionality.
This section details the steps to do it right, so you can have your key fob working like a charm again.
Reassembling the Key Fob Casing
Before you start, double-check that all the parts are there. Missing pieces can cause issues later. Make sure you have all the internal components and the casing itself. If something is missing, you might have to look for it or get a replacement.
Correct Alignment and Fitting of Key Fob Components
Proper alignment is vital for the key fob to work correctly. Each part has a specific place. Pay attention to the little notches and grooves. These are crucial for a secure fit and proper function. Imagine fitting together a Lego set – if you don’t align the pieces correctly, it won’t work.
Troubleshooting Alignment Issues
If you’re having trouble aligning the pieces, try these tips:
- Double-check all the notches and grooves to make sure they’re properly aligned.
- Use a flashlight to get a better look at the components.
- If you’re still struggling, take a break and come back to it with fresh eyes.
- Sometimes a slight nudge is all it takes. But be gentle; force can damage the components.
Reassembly Steps and Closure Confirmation
Following these steps is important for a successful reassembly:
| Step | Action | Confirmation |
|---|---|---|
| 1 | Align the key fob’s internal components with their corresponding slots in the casing. | Ensure all components are snug and there are no gaps. |
| 2 | Gently press down on the casing to secure the components. | Listen for a ‘click’ sound. If you don’t hear it, there might be a problem. |
| 3 | Close the key fob casing completely. | The casing should close securely without any gaps or play. |
| 4 | Carefully check the alignment of all the parts once more. | Visual inspection to confirm everything is in place. |
Securing All Components
Thorough and careful securing of all components is critical for the key fob’s functionality and longevity.
Paying close attention to the details is key to a successful reassembly. Don’t rush the process. A little extra care now will save you a lot of trouble later.
Testing the Functionality of the Replaced Battery
Yo, so you’ve swapped out that key fob battery, right? Now it’s time to make sure everything’s still working smooth. This ain’t no guessing game, fam. We gotta test it out properly to avoid any future drama.This section details the crucial steps to verify your key fob’s functionality after the battery replacement. Proper testing ensures your Kia is ready to roll, avoiding any frustrating hiccups.
Verifying Remote Functions
After the battery swap, thoroughly testing all key fob functions is paramount. Skipping this step can lead to major issues, like your car not starting or your remote features not working. So, let’s get down to business.
- Remote Locking and Unlocking: Press the lock and unlock buttons on the key fob. Make sure the car doors lock and unlock properly. If they don’t, check the connections inside the key fob. A loose connection can cause these issues.
- Panic Alarm: Trigger the panic alarm function by pressing the designated button. The alarm should sound loudly and consistently, indicating proper functionality. If the alarm doesn’t sound, or sounds intermittently, this might be a sign of a wiring problem within the key fob or the car itself. Double-check the button press and ensure the car’s alarm system isn’t disabled.
- Remote Trunk Release (if applicable): If your Kia key fob has a trunk release function, test it by pressing the corresponding button. The trunk should open and close correctly. A malfunctioning trunk release might point to a problem with the key fob’s internal mechanisms or the trunk’s release system itself. Verify the key fob’s button and check the car’s trunk release mechanism.
- Other Features: Test any additional features, like the proximity sensor or other specific functions on your key fob. Consult your Kia’s owner’s manual for specific instructions.
Troubleshooting
If any functions don’t work after replacement, follow these steps:
- Re-check Connections: Double-check all connections inside the key fob. A loose wire or a bad connection can often be the culprit. Carefully re-insert the battery and components to ensure a proper connection.
- Examine Battery Placement: Ensure the new battery is correctly installed. A misaligned battery could cause intermittent issues. Verify the battery’s polarity (positive and negative terminals) and its correct positioning within the key fob.
- Battery Type Verification: Ensure you used the correct battery type. Using an incorrect battery type could lead to the key fob not functioning correctly. Refer to your Kia’s owner’s manual or the key fob’s packaging to confirm the correct battery type.
- Key Fob Reset (if applicable): Some key fobs require a specific reset procedure to restore functionality. Refer to your Kia’s owner’s manual for the key fob reset instructions.
- Seek Professional Assistance: If the problem persists after these checks, it’s best to take your key fob to a qualified mechanic or locksmith. They can diagnose the issue and provide appropriate solutions.
Importance of Thorough Testing
Thorough testing of the key fob’s functionality is essential. A faulty key fob can lead to issues like not being able to lock or unlock your car, triggering a false alarm, or preventing your car from starting. This meticulous check ensures that your car is fully operational, providing a safe and reliable ride.
Preventing Future Battery Issues
Yo, fam, keeping your Kia key fob battery fresh is crucial. A dead battery can be a real pain, especially when you’re tryna get to class or the mall. Preventative measures can save you a ton of hassle and keep your key fob running smoothly for longer.
Battery Lifespan Enhancement
Proper handling and storage are key to extending your key fob battery’s life. Avoid leaving your key fob in super-hot or super-cold environments. Extreme temperatures can significantly shorten the battery’s lifespan. Think about it, like leaving your phone in the car on a scorching summer day – it’ll drain faster, right? Similarly, keeping your key fob away from magnets or strong electromagnetic fields can help maintain its performance.
For example, avoid putting it near a giant industrial magnet or a really powerful radio transmitter.
Regular Checks and Maintenance
Regularly checking your key fob battery is a must. Look for signs of wear and tear or corrosion, which can signal a problem. If you see any issues, don’t delay; get it replaced immediately. This proactive approach can help prevent unexpected battery failures and ensure your key fob stays reliable.
Environmental Impact on Battery Life
Environmental factors can play a significant role in how long your key fob battery lasts. Extreme heat, like the kind you get in Surabaya during summer, can drain a battery much faster. Similarly, freezing temperatures can also affect battery performance. Moisture and humidity can also cause corrosion, leading to faster battery degradation. So, try to keep your key fob in a relatively cool and dry place.
Avoid leaving it in your car, especially when it’s scorching hot. This will keep your key fob in optimal condition and extend its life.
Preventing Battery Issues in Detail
| Preventive Measure | Explanation |
|---|---|
| Store in a cool, dry place | Avoid extreme temperatures (hot or cold) and high humidity to maintain battery health. |
| Avoid exposure to magnets and strong EM fields | These can affect battery performance and shorten its lifespan. |
| Regularly inspect for signs of damage | Look for corrosion or any physical damage to the battery compartment. |
| Replace the battery promptly | Don’t wait for the battery to completely die. Replace it when you notice signs of weakness. |
| Keep your key fob out of direct sunlight | Prolonged exposure to sunlight can heat up the battery, decreasing its performance. |
Summary
In conclusion, replacing a Kia key fob battery is a manageable task that can be accomplished with the right knowledge and tools. This guide has provided a thorough and detailed explanation of the process, from identifying your key fob model to testing its functionality after the replacement. By following these steps, you can restore your key fob to its full operational capacity and avoid further complications.
Remember to always prioritize safety and proper techniques throughout the process. With this guide, you’re well-equipped to handle future battery replacements with confidence.
Detailed FAQs
What are the common signs that my Kia key fob battery needs replacing?
Common signs include intermittent or weak remote functions, such as unlocking or locking your car, or the key fob not responding at all. A completely unresponsive key fob often indicates a dead battery.
What type of battery is needed for my specific Kia key fob model?
The required battery type varies depending on the specific model. Refer to the table provided in the guide to determine the appropriate battery for your key fob.
What should I do if I accidentally damage the key fob during disassembly?
If you accidentally damage the key fob casing, carefully assess the damage. Consider if the damage is minor and repairable or if professional repair is necessary.
How can I prevent future battery issues with my Kia key fob?
Regularly checking the battery level and replacing it promptly can prevent issues. Also, avoid exposing the key fob to extreme temperatures or moisture.
