How to clean RV black tank effectively is crucial for maintaining a hygienic and enjoyable RV experience. Proper black tank maintenance is essential for preventing unpleasant odors and potential health risks. This guide delves into various methods, from simple flushing to chemical treatments and manual cleaning, providing a comprehensive approach to keeping your RV’s waste system clean and functional.
Understanding the different components of your RV’s black water tank system, including the role of each part in waste disposal, is key to successful cleaning. This guide also covers the types of waste that accumulate and common materials used in tank construction. Knowing these details will allow you to tailor your cleaning approach to your specific RV.
Introduction to RV Black Water Tanks
RV black water tanks are like the ultimate trash cans for your RV’s bathroom. They collect all the…ahem…liquid waste* from your toilet. It’s crucial stuff to keep separate from the rest of your RV’s water system, and it’s important to treat it with respect. Properly managing these tanks is key to a smooth and hygienic RV experience.Maintaining your black water tank is more than just a good idea; it’s essential for the health and safety of everyone on board.
Neglecting this crucial part of your RV upkeep can lead to serious issues, both for you and for the environment. Let’s dive into why this tank needs your attention.
Importance of Proper Black Tank Maintenance
Proper black tank maintenance is crucial for preventing unpleasant smells, potential health hazards, and environmental damage. It’s not just about keeping your RV clean; it’s about responsible RVing. Think of it as part of being a responsible citizen on the road.
- Preventing Foul Odors: Ignoring your black tank can lead to a smelly RV. Bacteria and decomposing waste create gases that seep into your RV, making it unpleasant to live in. This is especially true if you’re parked in close proximity to others or even in an RV park.
- Avoiding Health Risks: Unmaintained black tanks can harbor harmful bacteria and viruses. These can easily spread, potentially causing sickness for everyone in the RV. Basic hygiene in RVing is as important as it is at home.
- Protecting the Environment: Improperly disposed of black water can pollute waterways. This is not only bad for the environment but can also lead to fines and legal trouble. You wouldn’t want to be the reason a river is contaminated, would you?
Common Misconceptions About RV Black Tank Cleaning
There are a few myths floating around about RV black tank cleaning. Let’s clear the air.
- “It’s too complicated”: Cleaning your black tank doesn’t have to be rocket science. The steps are straightforward, and with a little practice, you’ll be a pro in no time. It’s all about understanding the process, just like any other RV maintenance task.
- “I can just dump it anywhere”: Dumping your black water into a random spot is illegal and harmful to the environment. Follow local regulations and designated dump stations. It’s crucial for preserving the environment and respecting your surroundings.
- “I don’t need to clean it if I don’t smell anything”: A lack of odor doesn’t mean the tank is clean. Bacteria and other harmful substances can still be present, even without a strong smell. You need to take proactive measures to ensure the safety and hygiene of your RV.
Potential Risks of Neglecting Black Tank Cleaning
Neglecting your black tank can lead to a multitude of problems, from the inconvenient to the potentially serious.
- Damage to RV Components: Bacteria and waste can corrode pipes and other components in your RV’s plumbing system. This can lead to costly repairs down the road.
- Health Issues: Exposure to harmful bacteria and viruses in a poorly maintained black tank can result in illness for occupants. Don’t compromise your health for convenience.
- Environmental Pollution: Dumping untreated black water into the environment can lead to serious ecological damage. Remember, you’re not just responsible for your RV, you’re also responsible for the environment around you.
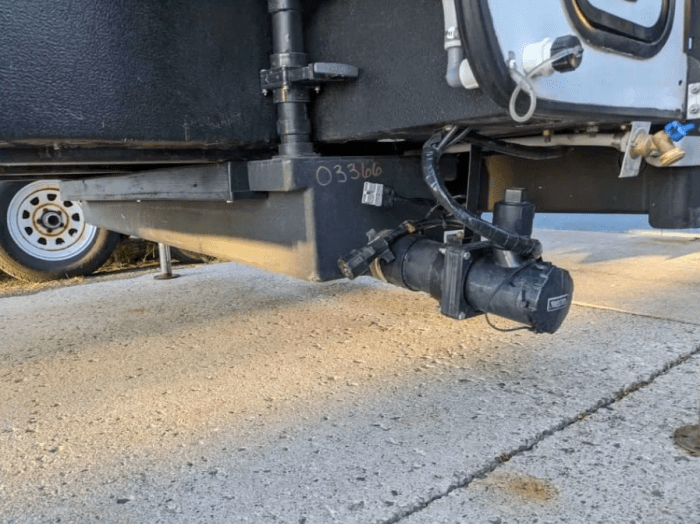
Understanding Black Tank Components
Yo, RV peeps! Let’s dive into the guts of your black tank system. Knowing these components is key to keeping your rig clean and running smoothly, especially when you’re hitting those remote campgrounds. It’s like understanding the engine of your car – you gotta know what’s going on under the hood!This section breaks down the essential parts of your RV’s black water tank system, explaining their roles in the waste disposal process.
We’ll also cover the kinds of stuff that builds up in there and the materials they’re usually made of. So, buckle up and get ready to learn!
Different Parts of a Typical RV Black Water Tank System
Understanding the parts of your black tank system is crucial for proper maintenance. Each component plays a vital role in handling waste from your RV’s toilet.
- Tank itself: This is the main container that holds the waste. Most RV black tanks are made of a durable material like fiberglass-reinforced plastic (FRP) or stainless steel. The shape and size of the tank can vary greatly depending on the RV’s model and size. Larger RVs obviously need bigger tanks. Some tanks are even designed with baffles to help keep solids from sloshing around.
- Overflow valve: This valve is a safety feature, preventing the tank from overflowing if it’s full or if there’s a blockage. It’s like a backup system for when things get a bit too full. This is important for preventing leaks and damage to your RV. Imagine a massive flood in your RV! So, a working overflow valve is essential.
- Plumbing connections: These are the pipes and fittings that connect the toilet to the black tank. They are crucial for the proper flow of waste from the toilet to the tank. Leaking connections can cause serious problems, so regular checks are vital.
- Wastegate/Dump valve: This valve is your main connection point for emptying the black tank. It’s where you’ll release the contents into the proper disposal facilities. It’s also where you want to make sure everything is sealed tight to avoid leaks. It’s like the tap that lets out all the gunk.
- Vent pipes: These pipes are often overlooked but are critical. They allow for the escape of gases generated by the waste, preventing pressure buildup in the tank. Without them, you might have some serious issues. Think of it as a pressure release valve.
Types of Waste in Black Tanks
The composition of waste in a black tank isn’t just water; it’s a complex mixture.
- Toilet waste: This is the obvious stuff – human waste, toilet paper, and other flushing materials. The consistency varies, depending on the individual’s habits and the type of toilet paper used.
- Gray water: While not as harmful, gray water (from sinks, showers, and kitchens) can also end up in the black tank if not properly separated. This water can contribute to the overall volume and odor in the tank. This means your dishwater can also contribute to your black tank’s contents.
- Food particles: Leftover food, grease, and other bits can also make their way into the tank, potentially causing clogs and odors. Be mindful of what you put down the drain, as it can affect the contents of your black tank.
Common Materials Used in RV Black Tank Construction
Different materials have different pros and cons for black tank construction.
- Fiberglass-reinforced plastic (FRP): This is a popular choice due to its strength, durability, and resistance to corrosion. It’s lightweight and easy to mold into various shapes. It’s also resistant to many common chemicals found in waste.
- Stainless steel: This material is known for its exceptional durability and resistance to corrosion, especially important in harsh environments. It’s also very strong, and it holds up to a lot of abuse. Stainless steel tanks can be very heavy.
- Polyethylene: A common plastic material, known for its low cost and ease of manufacturing. However, it might not be as durable as FRP or stainless steel in the long run. It’s lightweight and easy to work with, which keeps the costs down.
Pre-Cleaning Preparation
Getting ready to tackle your RV’s black tank is crucial for a smooth and safe cleaning process. Proper preparation minimizes the mess and maximizes your chances of a successful clean. Think of it as prepping for a big project – the right tools and a safety-first mindset are key!
Necessary Tools and Supplies
Proper tools and supplies are essential for a safe and effective black tank cleaning session. This includes more than just a bucket and a sponge. You need the right equipment to make the process easier and safer.
- Gloves: Protecting your hands from potential irritants and bacteria is paramount. Choose heavy-duty nitrile or rubber gloves for maximum protection.
- Safety Glasses: Splashes or accidental contact with chemicals can be a real hazard. Safety glasses will shield your eyes.
- Heavy-duty plastic bags: These are vital for safely containing and disposing of the black water.
- Bucket: A large, sturdy bucket is necessary for rinsing and storing collected water. Make sure it’s one that won’t easily tip over.
- Cleaning solution: A designated black tank cleaning solution is usually recommended. Follow the instructions carefully.
- Hose: A garden hose is useful for rinsing and potentially diluting the cleaning solution.
- Tongs or a long-handled tool: These tools are helpful for handling and manipulating items inside the tank without direct contact.
- Flashlight: Good visibility is important, especially in tight spaces or dimly lit areas.
Safety Precautions for Handling Black Water
Black water carries potential health risks. Following safety precautions is non-negotiable for a safe and healthy cleaning experience.
- Proper Disposal: Dispose of black water according to local regulations and guidelines. This typically involves designated dump stations.
- Personal Protective Equipment (PPE): Wearing gloves, safety glasses, and a mask is crucial for protection against potential contaminants.
- Ventilation: Ensure proper ventilation in the area where you’re working to minimize exposure to potential odors and gases.
- Avoid Ingestion: Never ingest or come into direct contact with black water. Always maintain a safe distance from the water.
- Contact Information: Always have the contact information of emergency services readily available, just in case.
Accessing the Black Tank
Safe access to the black tank is critical to avoid spills and accidents. Knowing the procedure is vital for a smooth process.
- Locate the black tank access panel: This is typically located on the underside of the RV, often in a compartment or panel area. Knowing where it is saves you time.
- Inspect the access panel for any obstructions or damage: Make sure the panel is in good condition before opening it. Any issues should be addressed before proceeding.
- Carefully open the access panel: Use caution when opening the panel to avoid any potential damage or injury.
- Ensure the tank is properly secured: Confirm that the tank is firmly in place before starting the cleaning process. This prevents accidents.
Pre-Cleaning Checklist
Having a checklist for pre-cleaning procedures helps you stay organized and ensures you don’t miss any important steps.
- Gather all necessary tools and supplies.
- Review safety precautions for handling black water.
- Locate and inspect the black tank access panel.
- Ensure proper ventilation in the work area.
- Confirm that the tank is secured.
- Put on appropriate personal protective equipment (PPE).
Methods for Cleaning RV Black Tanks

Keeping your RV black tank clean is crucial for a pleasant camping trip. A clogged or smelly black tank can ruin your vacation, so knowing how to tackle the job effectively is key. This section dives into different cleaning methods, helping you choose the best approach for your situation.
Chemical Treatment
Chemical treatment is a popular method for cleaning RV black tanks. These specialized chemicals work by breaking down waste at a molecular level. They’re designed to tackle organic matter and other substances that might be causing the problem.
Steps for chemical treatment typically include:
- Adding the recommended amount of chemical cleaner to the black tank according to the product instructions. Different chemicals have varying application methods, so always check the label.
- Allowing the chemical to sit in the tank for the specified time, often overnight, giving the chemical time to effectively work.
- Flushing the tank thoroughly with water to remove the chemical residue and any remaining waste.
Chemical treatment is often effective for frequent use, but be aware that some chemical residues might linger if not properly flushed. Always follow the manufacturer’s instructions carefully.
Water Flushing
Water flushing is a straightforward and accessible cleaning method. It’s best suited for minimal waste buildup and situations where you don’t want to use chemicals.
The process typically involves:
- Filling the black tank with water to a level that helps loosen any solidified waste.
- Using the RV’s plumbing system to flush the water through the tank, which helps to agitate and move the waste.
- Repeating the flushing process several times, if necessary, until the tank is adequately clean.
Water flushing is a simple and cost-effective approach, but it might not be effective against heavily solidified or hardened waste.
Manual Cleaning
Manual cleaning is a more intensive approach, often necessary for tackling significant waste buildup. It requires some elbow grease and the right tools, but it’s highly effective for stubborn waste.
Manual cleaning typically involves:
- Using specialized tools like tank scrapers or brushes to physically remove any solidified waste or buildup from the tank walls.
- Using a hose to flush out any loosened waste or debris that has collected at the bottom of the tank.
- Repeating the process as needed, ensuring the tank is thoroughly cleaned.
Manual cleaning is a more labor-intensive method but is the most effective way to remove even the most stubborn waste. It’s often a good choice for deep cleaning or when chemical treatment isn’t sufficient.
Chemical Treatment Procedures
Yo, RV owners! Chemical treatment is crucial for a squeaky clean black tank. It’s like giving your tank a serious spa day, but with powerful chemicals. Proper application is key to avoiding any nasty surprises or damaging your rig. Let’s dive into the nitty-gritty of chemical treatment.Chemical treatments are designed to break down organic waste, making it easier to flush and maintain your black water tank.
Choosing the right chemical and following the instructions precisely is paramount to getting the best results and preventing potential problems.
Proper Procedures for Using Black Tank Cleaning Chemicals
Using chemicals safely and effectively is essential for both the tank and your health. Always wear appropriate safety gear, like gloves and eye protection. Always follow the manufacturer’s instructions meticulously. Pour the chemical directly into the black tank, ensuring complete mixing and avoiding any contact with your skin or eyes.
Recommended Cleaning Chemicals and Their Uses
Here’s a rundown of popular and effective black tank cleaning chemicals and their specific applications:
- Bio-based enzyme cleaners: These are environmentally friendly and effective at breaking down organic matter. They’re great for regular maintenance and preventing odor buildup. These chemicals are particularly helpful in dissolving the organic materials that cause odor and sludge. They’re generally safe for your RV plumbing and the environment. Example: Enzymatic cleaners are great for preventing odor buildup.
- Alkaline cleaners: These are strong chemicals that are specifically designed to neutralize acids and break down tough clogs. Use these for stubborn clogs and buildup that enzymatic cleaners may struggle with. Use with extreme caution and follow all safety instructions.
- Acid cleaners: Acid cleaners are typically used to neutralize alkaline deposits or for heavy-duty cleaning, but they’re often less preferred due to the risk of damaging your RV’s plumbing. Extreme caution is required. These chemicals are very potent, so follow all instructions carefully to avoid any damage to your RV.
Recommended Dosage and Application
Proper dosage is crucial. Too little, and the chemical won’t work effectively. Too much, and you risk damaging your RV’s plumbing or creating harmful runoff. Always follow the manufacturer’s instructions carefully. For example, a bottle of cleaner might specify 1/2 cup per 10 gallons of water.
| Chemical Type | Recommended Dosage (Approximate) | Application Method |
|---|---|---|
| Bio-based enzyme cleaner | 1/2 cup per 10 gallons of water | Pour directly into the tank and let it sit. |
| Alkaline cleaner | 1/4 cup per 10 gallons of water | Pour directly into the tank, agitate, and let it sit. |
| Acid cleaner | Follow manufacturer instructions carefully. | Pour directly into the tank and let it sit for the recommended time. |
Importance of Following Safety Precautions
Safety first! These chemicals can be harmful if not handled correctly. Always wear appropriate safety gear, like gloves and eye protection. Keep children and pets away from the area. Never mix different chemicals, and always dispose of used chemicals properly. Proper disposal prevents environmental contamination.
Dispose of chemicals according to local regulations.
Water Flushing Techniques
Yo, RV owners! Cleaning your black tank ain’t rocket science, but knowing the right flushing techniques is key for a squeaky-clean experience. Proper water pressure and volume, along with a regular flushing schedule, are crucial for preventing nasty surprises and keeping your rig spick-and-span. Let’s dive into the details!Effective water flushing techniques are essential for maintaining a clean and functional RV black tank.
The right approach can prevent unpleasant odors and ensure proper waste disposal. Proper water pressure and volume are critical for achieving optimal results, and a consistent flushing schedule is vital for preventative maintenance. This guide provides a detailed step-by-step approach for efficient water flushing.
Effective Water Pressure and Volume
Proper water pressure and volume are key to dislodging solids and maximizing tank cleanliness. Too little pressure won’t effectively break down waste, while too much can potentially damage the tank or plumbing. A good rule of thumb is to use a moderate water pressure, enough to get the job done without causing undue stress on the system. Aim for a steady flow, not a forceful jet.
The volume of water needed depends on the size of your black tank, but a good starting point is around 20-30 gallons for a standard RV black tank.
Frequency of Flushing for Preventative Maintenance
Regular flushing is your best friend for maintaining a healthy black tank. A general guideline is to flush your black tank after every use. This helps prevent buildup of solids and odors, extending the life of your tank and making cleanup easier. Consider flushing it even if you haven’t used it for a while to prevent clogs and unpleasant surprises down the road.
Step-by-Step Guide for Water Flushing
This step-by-step guide Artikels the process for effectively flushing your RV black tank:
- Locate the black tank flush valve. This is typically near the tank’s outlet, and often features a handle that you can open and close to direct the water flow.
- Open the RV’s water supply. Ensure the water is flowing smoothly and at the desired pressure.
- Turn on the black tank flush valve. Allow the water to flow into the tank. Watch the water to make sure it’s flowing correctly.
- Allow the water to run for approximately 30 seconds to 1 minute, or until the tank is sufficiently rinsed. Adjust the time depending on the size of your tank and the amount of waste.
- Close the black tank flush valve. Turn off the water supply to the RV.
- Check for any residual waste. If needed, repeat the process to ensure complete cleaning.
By following these steps and adjusting the volume and pressure as needed, you can effectively clean your RV black tank. Remember to always prioritize safety and follow the manufacturer’s instructions for your specific RV model.
Manual Cleaning Procedures
Yo, RV owners! Dealing with stubborn gunk in your black tank? Manual cleaning might be your next move. It’s a bit more hands-on than just flushing, but it’s totally doable and often necessary for getting that tank squeaky clean. Let’s dive into the nitty-gritty of manual cleaning techniques.Manual cleaning is a crucial step for those tricky situations where flushing and chemicals just aren’t cutting it.
It’s like giving your black tank a deep clean, targeting those stubborn solids and waste that cling on. This method is especially important for maintaining a healthy RV and preventing potential issues down the road.
Tools and Equipment for Manual Cleaning
This section Artikels the essential tools and equipment needed for effective manual black tank cleaning. Having the right tools makes the process easier and more efficient.
- Gloves: Essential for protecting your hands from the yucky stuff. Think heavy-duty, waterproof gloves to prevent skin irritation. Trust me, you don’t want to be dealing with that nasty stuff barehanded!
- Long-handled brush: A sturdy brush with a long handle is key for reaching those hard-to-get-to spots in the tank. Look for a brush with stiff bristles that can effectively scrape away debris.
- Bucket: A large bucket is needed to hold the cleaning solution and to rinse the brush between strokes. A sturdy plastic bucket is ideal.
- Scoop or spatula: Helpful for scooping out solid waste. Choose one with a sturdy handle and a wide enough scoop to grab the waste efficiently.
- Safety glasses: Protect your eyes from any potential splashes or debris. Eye protection is a must for every cleaning job.
Steps for Manual Removal of Solids and Waste, How to clean rv black tank
This section provides the steps for effectively removing solid waste and stubborn gunk from your black tank. Following these steps will help you tackle the problem head-on.
- Preparation: Wear your gloves and safety glasses. Have the long-handled brush, bucket, scoop, and other necessary equipment readily available. Make sure the area is well-ventilated. This is crucial for preventing any foul odors and potential health issues.
- Removal: Use the scoop or spatula to remove as much solid waste as possible from the tank. Scoop up the visible solids and get rid of them properly.
- Scrubbing: Submerge the long-handled brush in the cleaning solution in the bucket. Gently scrub the tank walls, paying close attention to any stubborn areas. Use circular motions to loosen and remove any lingering waste.
- Rinsing: After scrubbing, rinse the tank thoroughly with water. This step is vital for removing any residual cleaning solution and debris. Make sure to rinse the entire tank surface.
- Disposal: Dispose of the waste and cleaning solution according to local regulations. Proper disposal is crucial to prevent environmental contamination.
Examples of Different Tools for Manual Cleaning
Here are some examples of different tools and their uses in manual cleaning. Knowing the different tools and their functions can make a big difference in your cleaning process.
| Tool | Description | Use |
|---|---|---|
| Stiff-bristled brush | A brush with stiff bristles for effective scraping | Removing stubborn solids and waste from the tank walls |
| Plastic scoop | A scoop with a wide opening for scooping up waste | Gathering and removing solid waste from the tank |
| Long-handled brush | A brush with a long handle for reaching hard-to-reach areas | Cleaning the entire tank, including corners and crevices |
Post-Cleaning Procedures
So, you’ve conquered the black tank beast! Now, it’s time to wrap things up right. Proper post-cleaning is crucial for preventing future problems and keeping your RV spick-and-span. Think of it as the final frontier in your RV hygiene journey.
Draining and Disposing of Cleaning Solutions
Proper disposal of cleaning solutions is vital to avoid environmental damage and potential legal issues. Always follow local regulations for chemical waste disposal. Don’t just dump it anywhere; find a designated hazardous waste collection point. If unsure, contact your local waste management office for specific guidelines. This is a must-do step to keep your area clean and safe.
- Identify the correct disposal method for your cleaning solution. Some solutions are considered hazardous waste, requiring specific disposal procedures. Do not mix different cleaning solutions before disposal. This is crucial to avoid unwanted reactions and complications during the disposal process.
- Carefully pour the used cleaning solution into the designated container, following instructions. Double-check labels to ensure the container is suitable for the type of solution you’re discarding. Improper labeling could lead to issues during disposal, potentially harming the environment or other users.
- Seal the container tightly and label it clearly with the contents and date. This helps in tracking and managing the disposal process effectively. Securely store the container until you reach the designated disposal point. This prevents leakage and exposure to the elements.
Thorough Rinsing of the Black Tank
A thorough rinse is essential to remove any lingering cleaning solution or residue, ensuring the tank is completely clean and ready for use.
- Run plenty of fresh water through the black tank until the water runs clear. This helps ensure the tank is free from any chemical residue, preventing potential issues in the future.
- Repeat the rinsing process several times, ensuring the water flow reaches all parts of the tank. Consider using a garden hose with a spray nozzle for more effective coverage.
- Inspect the tank after rinsing. If there’s any visible residue, repeat the rinsing process. Thorough rinsing is crucial to ensure the tank is truly clean, avoiding potential problems down the line.
Importance of Proper Tank Ventilation
Proper ventilation is key to preventing unpleasant odors and mold growth in the black tank. Imagine a stuffy room; that’s what a poorly ventilated black tank is like.
- Open the black tank vent. This allows fresh air to circulate and helps remove any lingering odors. This simple step significantly improves the tank’s overall hygiene.
- Ensure the vent is properly installed and unobstructed. This prevents unpleasant smells from escaping and ensures that the tank can properly ventilate.
- Consider using a dedicated RV vent or air freshener to enhance the ventilation process. This will help to keep the area around the tank odor-free.
Regular Maintenance After Cleaning
Regular maintenance after cleaning is crucial to maintaining a clean RV and preventing future issues. It’s like maintaining your car; a little upkeep goes a long way!
- Schedule regular black tank cleaning. Just like regular check-ups for your health, regular cleaning prevents problems from developing. Avoid waiting until the tank is overflowing.
- Use appropriate cleaning solutions to avoid damaging the tank’s interior. Using the right cleaning agents ensures the process is effective and prevents potential issues.
- Inspect the tank regularly for any signs of damage or wear. Early detection allows for prompt repairs, preventing further problems.
Preventing Black Tank Issues
Keeping your RV’s black tank happy is all about smart habits and a little preventative maintenance. It’s way easier to avoid problems than to fix them later, especially when you’re boondocking or camping far from a dump station. Think of it as proactive RV sanitation – a little planning goes a long way.Proper waste disposal and smart habits are key to preventing future black tank woes.
Avoiding common mistakes will help keep your RV’s plumbing system in tip-top shape, so you can focus on enjoying your trip.
Waste Disposal Habits
Following proper waste disposal procedures is crucial for minimizing black tank issues. This involves more than just emptying the tank; it’s about being mindful of what goes in.
- Don’t flush non-biodegradable items down the toilet. This includes things like wipes, feminine hygiene products, and certain medications. These items can cause clogs and blockages, leading to serious issues down the road.
- Be aware of the gray water system. It’s easy to accidentally dump items that shouldn’t be in the black tank into the gray water tank, so be careful about what you flush and dispose of.
- Use the RV’s toilet and sinks as intended. Don’t use them to dispose of anything that isn’t meant for the plumbing system. This will help prevent issues.
Preventing Build-Up
Consistent maintenance and mindful habits can prevent a buildup of waste in your black tank. Regularly emptying the tank and using appropriate cleaning solutions will help keep things flowing smoothly.
- Empty your black tank regularly, even if you only have a little bit in it. This prevents waste from solidifying and becoming harder to clean later. If you’re boondocking, plan ahead for the next dump station.
- Use appropriate cleaning solutions. These solutions can help break down waste and prevent odors. Choose products designed for RV black tanks. Don’t use harsh chemicals that can damage the tank or create harmful byproducts.
- Check your RV’s plumbing regularly. Look for any signs of clogs or blockages. Addressing these issues early on will prevent larger problems later.
Common Mistakes to Avoid
Some simple mistakes can lead to major black tank problems. Avoiding these pitfalls will help maintain a healthy RV system.
- Failing to empty the black tank regularly, even if it seems empty, can lead to the buildup of solid waste and potential clogs.
- Using harsh chemicals or improper cleaning solutions can damage the tank’s lining or create harmful odors. Always choose products designed for RV black tanks.
- Ignoring potential blockages or leaks can lead to severe black tank problems, potentially causing damage to your RV or unpleasant smells. Check your system periodically.
Troubleshooting Common Issues
Cleaning your RV’s black tank can sometimes lead to unexpected hiccups. Knowing how to identify and fix these problems is crucial for a smooth and successful cleaning process. From stubborn clogs to unusual smells, we’ll cover it all, so you can tackle any black tank trouble like a pro.Troubleshooting black tank issues is like being a detective, carefully examining the clues to pinpoint the problem.
By understanding the common pitfalls and their solutions, you can avoid frustrating delays and ensure a clean and hygienic RV experience.
Identifying Clogged Tanks
A clogged black tank can be a real pain. It’s often the culprit behind persistent odors, slow draining, or a complete blockage. Several factors contribute to this, including improper waste disposal habits, the presence of large solids, or even a buildup of grease. Understanding the symptoms is key to solving the problem. For instance, if you notice the tank draining slowly, or if there’s a lingering odor even after flushing, it might indicate a clog.
- Slow Draining: A slow drain rate is a clear indicator that something is hindering the flow. This could be anything from a large piece of debris to a build-up of solidified waste. The key is to address the blockage quickly to prevent further complications.
- Persistent Odors: Unpleasant odors lingering even after flushing often point to a blockage. The smell can be especially strong if the clog is preventing the tank from fully emptying. Don’t ignore it; this means there’s a problem that needs attention.
- Complete Blockage: If the tank refuses to drain at all, you’ve got a serious blockage on your hands. This can be caused by a large item, such as a piece of trash, or a significant buildup of solid waste. Immediate action is necessary.
Diagnosing Blockages
Diagnosing the source of the blockage is the first step in resolving it. You need to determine if the problem lies within the tank itself or if there’s an issue with the drain lines. A visual inspection of the tank’s interior is helpful but often not possible. In many cases, using tools and techniques is essential to find the source of the problem.
- Visual Inspection: While not always possible, inspecting the tank for large debris or obvious obstructions is a good starting point. If you can access the tank, look for any large pieces of waste that might be causing the blockage.
- Pressure Testing: Use a water pressure gauge to assess the blockage. If the pressure is significantly lower than expected, it suggests a restriction in the drain lines. This will help you determine if the problem lies in the tank itself or the connected pipes.
- Using a Drain Snake: A drain snake is a useful tool for snaking through the drain lines and removing clogs. Carefully follow the manufacturer’s instructions to avoid damaging the pipes.
Resolving Blockage Issues
Once the problem is diagnosed, resolving the blockage is the next step. The approach depends heavily on the type and severity of the blockage.
- Removing Debris: For small blockages, manually removing any visible debris can be a quick solution. Use tongs or a similar tool to extract the obstructing materials.
- Using a Drain Snake: If manual removal isn’t effective, a drain snake can help dislodge the clog. Carefully snake the drain snake through the drain lines to clear the obstruction.
- Chemical Treatments: In some cases, specialized black tank chemicals can help break down the blockage and make removal easier. Follow the instructions carefully to avoid damaging your RV’s plumbing.
Troubleshooting Guide
| Problem | Possible Cause | Solution |
|---|---|---|
| Slow draining | Clogged tank, debris, buildup | Manual removal, drain snake, chemical treatment |
| Persistent odors | Clogged tank, partially emptied tank | Chemical treatment, thorough flushing |
| Complete blockage | Large debris, solidified waste | Drain snake, professional assistance |
Conclusive Thoughts: How To Clean Rv Black Tank
In summary, maintaining a clean RV black tank is a vital aspect of responsible RV ownership. By following the steps Artikeld in this comprehensive guide, you can effectively clean your black tank, preventing unpleasant odors, potential health hazards, and costly repairs. Regular maintenance, using the appropriate methods, and understanding the unique needs of your RV’s system are key to a positive RV experience.
Remember, a clean RV black tank contributes to a more enjoyable and safe camping trip for everyone.
Helpful Answers
What are the common misconceptions about RV black tank cleaning?
A common misconception is that you only need to clean the tank occasionally. Regular cleaning is key to preventing buildup and unpleasant smells. Another misconception is that all cleaning methods are equally effective. This guide explores the pros and cons of different approaches.
What are the safety precautions for handling black water?
Always wear gloves and eye protection when handling black water. Proper ventilation is crucial, especially when using chemicals. Be mindful of potential spills and follow instructions carefully when using cleaning solutions.
How often should I flush my RV black tank?
The frequency of flushing depends on how frequently you use the black tank. For frequent users, weekly or bi-weekly flushing is recommended. For less frequent users, monthly or bi-monthly flushing is sufficient to prevent buildup.
What are some common mistakes to avoid when cleaning an RV black tank?
Ignoring safety precautions, using the wrong cleaning chemicals, or not properly rinsing the tank after cleaning can lead to issues. This guide Artikels the correct procedures and helps avoid common mistakes.
