How to clean RV black water tank is a crucial skill for every RV owner. A dirty black water tank poses significant health and environmental risks, not to mention potential damage to your RV’s plumbing. This guide provides a thorough, step-by-step approach to effectively and safely clean your RV’s black water tank, ensuring a pristine and functional system for years to come.
Understanding the proper procedures for cleaning your RV black water tank is essential for maintaining the integrity and longevity of your RV. This comprehensive guide will walk you through the entire process, from identifying necessary tools and supplies to troubleshooting common problems and implementing preventive measures. You’ll learn about the importance of responsible waste disposal and the proper techniques for using RV sanitation systems.
Introduction to RV Black Water Tanks
RV black water tanks are, in essence, the unsung heroes of your mobile bathroom adventures. Imagine a tiny, portable toilet system, completely contained within your RV. That’s basically what it is. These tanks are crucial for storing the less-than-pleasant byproduct of your RV bathroom escapades, keeping your RV a relatively hygienic and pleasant place to live, especially on those long, adventurous trips.These tanks are integral to the overall RV experience, silently and efficiently managing waste, allowing you to enjoy your travels without worrying about messy situations.
Think of them as the invisible guardians of your RV’s sanitation, diligently working behind the scenes to keep things clean and functional.
Definition of an RV Black Water Tank
A black water tank is a specifically designed container within an RV that collects and stores human waste. It’s designed to withstand the rigors of travel, maintaining the integrity of its contents. This specialized tank differs from grey water tanks, which collect wastewater from sinks, showers, and dishwashers.
Purpose of a Black Water Tank in an RV
The primary function of a black water tank is to safely and securely hold human waste. This allows for the storage of this material until it can be properly disposed of at designated facilities. This crucial role prevents any unpleasant leaks or spills within the RV itself, keeping the environment sanitary.
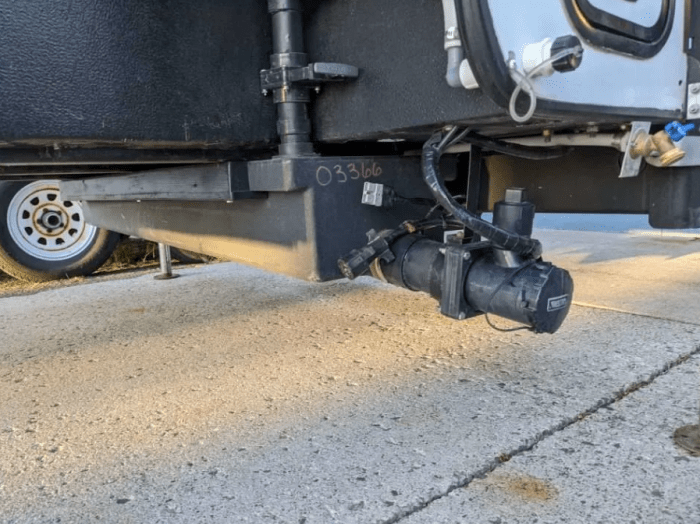
Composition and Construction of a Typical Black Water Tank
Typically, RV black water tanks are made of high-density polyethylene (HDPE) or fiberglass reinforced plastic (FRP). These materials are chosen for their durability, resistance to corrosion, and ability to withstand the pressure and temperature fluctuations during travel. The tanks are usually molded into the shape of a rectangular or cylindrical container, fitted securely within the RV’s plumbing system.
The tank often includes an access port for emptying and a valve system for controlling the flow of waste.
Typical Contents Found in a Black Water Tank
The contents of a black water tank are, well, let’s just say, not exactly gourmet cuisine. They typically consist of human waste, toilet paper, and other bathroom-related solids. The tank’s construction and the use of proper sanitation practices ensure that these materials remain contained and managed effectively.
Comparison of Different Types of RV Black Water Tanks
| Tank Type | Material | Capacity (gallons) | Other Features |
|---|---|---|---|
| Standard HDPE | High-Density Polyethylene | 20-50 | Relatively affordable, common material, good durability |
| Fiberglass Reinforced Plastic (FRP) | Fiberglass Reinforced Plastic | 25-60 | Often more durable than HDPE, can handle greater pressure, more expensive |
| Stainless Steel | Stainless Steel | 20-60 | Very durable, resistant to corrosion, very expensive |
| Composite | Combination of materials | 25-60 | Potential for improved durability and cost-effectiveness, varies in features |
Understanding the Importance of Cleaning
Hey campers! Ever feel that weird, unsettling feeling when you know your RV black water tank is, well,
- full* of…
- stuff*? It’s more than just a plumbing issue; it’s a whole can of worms, literally. Ignoring that tank can lead to a cascade of problems, from stinky surprises to serious health hazards. Let’s dive into why regular black water tank maintenance is a must-have, not a nice-to-have.
Neglecting your black water tank isn’t just about a messy campsite; it’s a ticking time bomb. Imagine a breeding ground for bacteria and viruses, lurking in the depths of your RV’s plumbing. This can lead to serious health risks for you and your crew, from mild stomach upsets to potentially more serious illnesses. Think about the last time you had food poisoning; not a fun experience, right?
Health and Safety Risks
Improperly managed black water tanks can harbor harmful pathogens like E. coli, Salmonella, and various viruses. These nasty critters can easily contaminate your RV’s water supply, leading to severe health issues. Imagine yourself sipping on a seemingly clean glass of water, only to discover a whole colony of microscopic monsters partying inside. Not exactly a refreshing experience.
Basic hygiene practices, including regular tank cleaning, are crucial for preventing such health risks.
Environmental Impact
Dumping untreated RV black water into the environment is a major ecological disaster. Imagine a pristine lake, slowly turning into a toxic soup, all thanks to a carelessly disposed RV waste. This pollution can contaminate water sources, harming aquatic life and potentially entering the food chain. It’s like throwing a party for harmful bacteria, and the entire ecosystem pays the price.
Think about the ripple effect – one careless act can create a widespread problem.
Damage to RV Plumbing Systems
Neglecting black water tank cleaning can lead to significant plumbing problems down the road. The solid waste and accumulated bacteria can cause clogs and blockages, leading to leaks and other plumbing issues that are far more expensive than a quick cleaning. Imagine a pipe slowly getting clogged with sludge, like a drain slowly getting blocked by food scraps.
It can lead to a complete system failure. This isn’t just about inconvenience; it’s about costly repairs.
Importance of Regular Maintenance for RV Longevity
Regular black water tank cleaning is crucial for maintaining the longevity of your RV. The accumulated waste and bacteria can damage the tank itself, potentially leading to leaks and other structural issues. Think about the cost of repairing a damaged tank or the frustration of dealing with a leaky RV on a camping trip. Preventing problems now will save you money and headaches later.
It’s like preventive maintenance for your RV, protecting it from long-term damage.
Common Issues Arising from Unclean Black Water Tanks
Regular black water tank maintenance is a must. Here are some common issues stemming from neglecting your tank:
- Unpleasant Odors: A lingering smell of sewage is the first sign that something’s amiss. Imagine stepping into your RV and being greeted by a pungent aroma – not exactly a pleasant start to your adventure. This isn’t just annoying; it can make living inside unpleasant.
- Plumbing Blockages: Solid waste and accumulated bacteria can cause clogs and blockages in your RV’s plumbing system. Imagine a clogged drain, but on a larger scale, throughout your RV’s plumbing system. This can lead to leaks, damage to your RV, and potential costly repairs.
- Health Risks: The presence of harmful bacteria and viruses can contaminate your RV’s water supply. Imagine drinking water that contains harmful pathogens – not exactly the most refreshing experience. This can lead to serious health issues, impacting your camping trip and potentially your overall health.
- Tank Damage: Over time, the accumulated waste and bacteria can damage the tank itself. Imagine your RV’s tank becoming weakened and potentially leaking. This can cause a variety of issues, from costly repairs to the inconvenience of having to deal with a leak on the road.
- Environmental Pollution: Improper disposal of black water can lead to environmental contamination. Imagine the harmful impact on the environment, affecting aquatic life and the ecosystem. This is a serious problem that impacts the entire environment.
Necessary Tools and Supplies
Dude, cleaning an RV black water tank is like a deep-sea dive. You gotta be prepared, or you’ll end up with more than just a smelly tank. The right tools are your trusty companions in this murky adventure. Get ready to equip yourself with the essentials for a successful, and hopefully, odor-free clean!The cleaning process demands precision and the right tools.
The wrong tool can be as useless as a paper airplane in a hurricane. Choosing the right tools and supplies is key to a successful black water tank cleaning. It’s like choosing the perfect weapon for a battle – you need the right tools to conquer the task at hand.
Essential Cleaning Tools
A good cleaning process begins with the right tools. You’ll need a variety of items to effectively tackle the job. Think of it as assembling your cleaning arsenal.
- Gloves: Essential for protecting your hands from harsh chemicals. Rubber or nitrile gloves are the best choice, providing a good barrier against the potentially caustic cleaning solutions.
- Bucket(s): You’ll need a bucket to hold the cleaning solution and another to rinse the tank thoroughly. A couple of buckets, one for the solution and one for rinsing, will make the process much smoother and prevent mixing of the cleaning solution with the rinse water.
- Flexible Hose: A flexible hose is vital for reaching into the tank and rinsing thoroughly. This is essential for flushing out any lingering residue and ensuring a proper clean.
- Long-Handled Brush: A long-handled brush, like a stiff bristle scrub brush, is ideal for scrubbing the tank’s interior, removing any stubborn clogs or deposits. A sturdy brush is essential for the thorough cleaning of the tank’s interior.
- Drain Pump: A drain pump will make the removal of the wastewater from the tank much faster and more efficient. This is a vital tool to prevent the tank from overflowing and to ensure that all wastewater is removed quickly.
- Safety Glasses: Protect your eyes from splashes of cleaning solutions and debris. Safety glasses are essential for preventing accidental splashes from entering your eyes, safeguarding your eyesight.
Cleaning Solutions
Different solutions tackle different problems. Knowing which to use is like choosing the right medicine for a specific illness. Here’s a table detailing some common solutions and their applications:
| Cleaning Solution | Application | Concentration | Safety Precautions |
|---|---|---|---|
| Baking Soda and Water | General cleaning, removing odor | 1 cup baking soda per gallon of water | Non-toxic, but can cause mild skin irritation |
| White Vinegar | Neutralizing odors, disinfecting | 1/2 cup per gallon of water | Can be irritating to skin, eyes, and respiratory system |
| Commercial RV Tank Cleaners | Removing tough stains, disinfecting | Follow manufacturer’s instructions | May contain harsh chemicals; always follow instructions |
| Hydrogen Peroxide | Disinfecting, removing stains | 3% concentration, diluted as needed | May cause skin irritation; avoid contact with eyes |
Safety Equipment
Safety should always be your top priority. It’s like a superhero’s suit, protecting you from potential harm.
- Gloves: Chemical-resistant gloves are essential for protecting your hands from the cleaning solutions.
- Eye Protection: Safety glasses or goggles are crucial to shield your eyes from splashes and irritants.
- Ventilation: Ensure adequate ventilation in the area to prevent inhaling harmful fumes.
Safe Disposal of Cleaning Solutions
Proper disposal of used cleaning solutions is crucial. It’s like recycling, but for hazardous materials. Always follow local regulations for proper disposal.
- Chemical Disposal: Dispose of used cleaning solutions according to local regulations. Don’t pour them down the drain unless specifically permitted. Check your local waste disposal guidelines.
Step-by-Step Cleaning Procedures
Cleaning your RV’s black water tank is like a deep dive into the murky depths of your campsite’s plumbing system. It’s a necessary evil, a rite of passage for every RV owner. Don’t let the ick factor deter you; a clean tank ensures a comfortable and hygienic trip. Armed with the right tools and a bit of elbow grease, you can conquer this task like a pro.Understanding the crucial steps for a thorough cleaning is key to maintaining your RV’s sanitation system.
Following a structured approach ensures you tackle the task effectively, minimizing the risk of contamination and maximizing the efficiency of your cleaning efforts.
Cleaning Procedure Overview
This detailed procedure Artikels a systematic approach to cleaning your RV black water tank. The process involves several stages, from initial preparation to final sanitization. Each stage is vital to ensure a complete and safe cleaning process.
Preparation Phase
Before diving into the tank, meticulous preparation is crucial. Gather your supplies, including gloves, safety glasses, and the appropriate cleaning solution. Choose a well-ventilated area to minimize exposure to unpleasant odors. Have a bucket ready for waste disposal and a dedicated area for cleaning materials.
Discharging the Tank
Thoroughly drain the black water tank. Use the RV’s drain valve to empty the tank completely. This is the first step to remove all the accumulated waste. Properly dispose of the wastewater according to local regulations. This step prevents backflow and ensures a clean starting point.
Tank Inspection
Inspect the tank for any debris or blockages. Look for any unusual build-up or damage that could affect the cleaning process. Any major damage may require professional assistance. Identifying potential issues early on will prevent further complications during cleaning.
Mechanical Cleaning (Optional but Recommended)
Using a stiff brush or a specialized tank cleaning tool, scrub the interior of the tank. Focus on the corners and crevices where grime tends to accumulate. This mechanical action helps loosen stubborn deposits. This step can be highly effective in removing stubborn solids, improving the overall cleaning efficiency.
Chemical Cleaning
Select a suitable chemical cleaning solution. Ensure the solution is specifically designed for RV black water tanks. Follow the manufacturer’s instructions carefully regarding mixing ratios and contact times. Pour the solution into the tank, ensuring it covers all surfaces thoroughly. Allowing the solution to work effectively and thoroughly will improve cleaning efficacy.
Rinsing and Sanitizing, How to clean rv black water tank
After the chemical solution has had adequate time to work, thoroughly rinse the tank with fresh water. Use the RV’s water system to flush the tank repeatedly until all traces of the cleaning solution are gone. This step is essential to prevent any residual chemicals from affecting the water system or causing discomfort.
Sanitizing the Tank
After rinsing, sanitize the tank using a suitable sanitizer. Follow the manufacturer’s instructions for the correct application and contact time. This final step ensures the tank is free of bacteria and other harmful microorganisms. Proper sanitation prevents the growth of bacteria and other harmful microorganisms.
Flowchart of the Cleaning Process
[Insert a flowchart here, illustrating the steps described above. The flowchart should visually depict the sequence of events, including decision points for mechanical cleaning, and the final sanitation step.]
Comparison of Cleaning Methods
| Method | Advantages | Disadvantages |
|---|---|---|
| Mechanical Cleaning | Removes visible debris and helps loosen solids | Can be time-consuming and may not remove all grime |
| Chemical Cleaning | Effective at dissolving organic matter and killing bacteria | Requires careful adherence to instructions to avoid damage to the tank or plumbing |
This table compares mechanical and chemical cleaning methods, highlighting their respective strengths and weaknesses. The choice of method depends on the severity of the contamination and the resources available. Consider your situation and choose the method that best suits your needs.
Preventing Future Issues: How To Clean Rv Black Water Tank
So, you’ve conquered the black water beast. Fantastic! But victory’s not a one-time thing, is it? Avoiding future black water tank nightmares requires more than just a good scrubdown. It’s about adopting a preventative mindset, a whole new way of thinking about your RV’s plumbing. Think of it as a proactive approach, like avoiding that spicy curry you know will give you heartburn later.Maintaining a pristine black water tank is less about brute force and more about mindful usage.
It’s about understanding the delicate ecosystem (or rather, thelack* thereof) within your RV’s plumbing and treating it with the respect it deserves. We’re not just cleaning a tank; we’re cultivating a culture of RV sanitation.
Responsible Waste Disposal
Proper waste disposal is crucial. Don’t just dump your black water anywhere. Know the local regulations and designated dump stations. Improper dumping can lead to environmental hazards and fines. A responsible RV owner is a mindful steward of the environment.
Proper RV Sanitation System Usage
Knowing how to use your RV’s sanitation system effectively prevents issues. This means understanding the capacity of your tank and avoiding overloading it. Don’t be a glutton with your waste; know your limits! This also includes being mindful of the water usage and avoiding flushing items that shouldn’t be flushed. Think of your RV’s plumbing like a delicate instrument; treat it with care.
Maintaining Tank Cleanliness
Regularly checking your black water tank for any signs of unusual odors or debris is essential for preventing future issues. This proactive approach can help you nip problems in the bud. A regular maintenance schedule is your best friend in this battle against black water problems.
- Regular Flushing: A simple flush with fresh water after each use can help to prevent the build-up of solids and odors. Imagine it as a constant rinse for your tank’s insides, like a shower for your plumbing.
- Tank Level Awareness: Avoid overfilling the tank, as this can lead to overflow issues. It’s like filling a glass to the brim; disaster awaits!
- Inspecting for Leaks: Regularly inspect your black water tank and pipes for leaks, cracks, or other signs of damage. Early detection is your ally in avoiding major problems.
- Avoiding Harsh Chemicals: Don’t use harsh chemicals to clean your tank. These chemicals can damage the tank’s lining and create more problems than they solve. Think of it like using sandpaper on your car’s paint – not ideal.
- Preventing Solids Build-up: Dispose of toilet paper and other solid waste properly. Avoid letting solids build up in the tank; they’re like a party for bacteria and foul odors.
Recognizing Potential Problems
Recognizing the early signs of a potential black water tank problem is key to preventing major headaches. Early detection allows for timely action, preventing the problem from escalating.
- Unusual Odors: A strong, unusual odor coming from your RV’s plumbing could indicate a problem with the black water tank. It’s like a bad smell in your house; it’s a sign something’s wrong.
- Leaks: If you notice any leaks around the tank or in the plumbing system, address them immediately. This is a big red flag that something is amiss.
- Water Levels: Monitor your black water tank levels regularly. An unusually high or low level can be a symptom of a problem.
- Clogs: If you notice clogs or blockages in your RV’s sanitation system, resolve them quickly. It’s like a traffic jam in your pipes; it will lead to a backup!
Troubleshooting Common Problems
Ah, the RV black water tank. A surprisingly complex ecosystem, especially when it decides to throw a wrench into your meticulously planned camping trip. Just like a grumpy old uncle, it can sometimes present unexpected challenges. Let’s dive into some common problems and how to tame them, turning those plumbing nightmares into smooth sailing.
Identifying Clogs
A surprising amount of “stuff” can get stuck in your black water tank. Food particles, insufficient flushing, and even the occasional rogue piece of, let’s say, “unintentional camping debris,” can lead to clogs. These blockages can manifest in various ways, from sluggish drainage to complete tank blockage. Recognizing these signs early is crucial to prevent further issues.
Causes of Clogs
Several factors can contribute to these clogs. Improper disposal of waste, inadequate flushing, or even the accumulation of solids over time can create a blockage. Imagine a river slowly filling with trash; eventually, the flow is disrupted. Similarly, your black water tank can get clogged. In extreme cases, even the tank’s plumbing itself could be a culprit, though this is less common.
Troubleshooting Clogs
First, try the simple stuff. Thoroughly flushing the tank with water can sometimes dislodge minor clogs. If that doesn’t work, consider using a specialized RV tank cleaning solution. These solutions are designed to break down solids and restore proper flow. If the clog is severe, a professional plumber might be needed to clear the blockage completely, or you might need to try some other specialized tools for the tank.
Don’t forget the power of patience; sometimes, these clogs require a little elbow grease (or a little more water pressure).
Dealing with Tank Leaks
Leaks in black water tanks are a real pain, potentially leading to messy spills and damage to your RV. These leaks can stem from a variety of issues, from worn-out seals to cracks in the tank itself. Think of it like a water balloon that’s lost its elasticity; eventually, it’ll leak. The problem can be even more serious if you have a leak in your tank that is hidden.
Troubleshooting Leaks
Thorough visual inspections are key. Look for any signs of leakage, such as damp spots or puddles around the tank. If you find a leak, try to identify the source. Sometimes, a simple repair, like replacing a faulty seal, can fix the problem. If the leak is more extensive, professional RV repair services are often necessary to prevent further damage and ensure a safe and functional RV.
You could need to completely replace the tank.
Table of Common Problems and Solutions
| Problem | Cause | Troubleshooting | Professional Assistance? |
|---|---|---|---|
| Tank Clogs | Improper disposal, inadequate flushing, solid accumulation | Flush with water, use cleaning solution, possibly professional intervention | Yes, for severe clogs or plumbing issues |
| Tank Leaks | Worn seals, cracks in the tank | Visual inspection, repair faulty seals, professional repair if extensive | Yes, for extensive leaks or inaccessible areas |
| Slow Drainage | Minor clogs, tank debris, low water pressure | Flush with water, use a tank cleaning solution | Possibly, for persistent slow drainage or if the source is unclear |
When Professional Help Is Needed
Sometimes, even with the best troubleshooting efforts, a problem persists. If the clog or leak is extensive, or if you lack the necessary tools or expertise, professional RV repair services are highly recommended. A plumber with RV experience is invaluable, especially for complicated situations. Consider this like a doctor’s visit—it’s often better to have a professional assess the problem.
It will save you time, money, and frustration in the long run.
Illustrative Examples

Cleaning your RV’s black water tank isn’t rocket science, but it does require a little know-how. Think of it like a delicate dance between grime and grit, where you’re the choreographer, wielding the tools of cleanliness. Knowing how to handle it correctly ensures a smooth and sanitary experience, preventing nasty surprises down the road. Plus, a clean tank is a happy tank, and a happy tank means a happier you.
A Typical Cleaning Process Scenario
Imagine this: You’ve just returned from a week-long camping trip, your RV smelling faintly of campfire smoke and adventure. The black water tank, unfortunately, is less than fragrant. The scenario plays out like this: You carefully drain the tank, ensuring nothing slips through the cracks. You then use a combination of hot water and a mild biodegradable cleaner, carefully scrubbing the tank’s interior.
Finally, you rinse thoroughly to remove all traces of the cleaner, leaving the tank spotless and ready for its next voyage.
A Detailed Cleaning Method: The Two-Bucket Approach
This method is particularly effective for tackling stubborn stains and build-up. First, fill one bucket with hot water and a suitable amount of eco-friendly cleaner. Dip a sponge or a scrub brush into the solution, and gently scrub the tank’s interior walls. Pay extra attention to corners and crevices, where grime tends to accumulate. Next, fill another bucket with clean water.
Rinse the sponge/brush in the clean water to remove the cleaning solution, then use the clean water to rinse the tank thoroughly. This ensures that no cleaning solution remains, which could cause further problems in the long run.
Safety Procedures in Action
Safety should always be paramount. Always wear gloves to protect your hands from harsh chemicals and potential irritants. Ensure adequate ventilation when using any cleaning solution to prevent inhalation of harmful fumes. Be cautious when handling hot water, as scalding is a real risk. Always follow the instructions on the product label and consult with experts if needed.
A Tank with a Specific Issue and Solution
Let’s say you notice a persistent foul odor emanating from your black water tank, even after cleaning. This could indicate a buildup of anaerobic bacteria. The solution? After draining and cleaning the tank as usual, consider adding a specific bacterial-reducing product. These products are designed to neutralize odors and prevent bacterial growth.
Always follow the manufacturer’s instructions for best results.
Step-by-Step Procedure for a Specific Cleaning Solution
Let’s say you’re using a commercial RV black water tank cleaner.
- Carefully read the product instructions to understand the recommended dilution and application procedures.
- Fill the tank with water, according to the instructions.
- Add the prescribed amount of cleaner to the water. Don’t overload the tank, as this could cause problems.
- Stir the mixture thoroughly to ensure even distribution of the cleaner.
- Allow the solution to sit for the recommended duration, usually specified in the product instructions.
- Drain the tank completely, and rinse thoroughly with fresh water to remove all traces of the cleaner.
This method provides a structured approach to cleaning your RV black water tank. By following these steps, you can effectively eliminate grime and prevent future issues.
Final Thoughts
In conclusion, maintaining a clean RV black water tank is vital for your health, safety, and the environment. By following the steps Artikeld in this guide, you can ensure a properly functioning and safe RV sanitation system. Remember to prioritize safety, use appropriate cleaning solutions, and practice responsible waste disposal. Regular maintenance will prevent potential problems and extend the life of your RV.
This guide empowers you with the knowledge and confidence to tackle this essential task effectively.
Expert Answers
What are the most common causes of black water tank odors?
Odors often stem from organic matter decomposing within the tank. Poor waste disposal habits or the presence of undissolved solids can also contribute to the problem.
What type of gloves should I wear when cleaning the black water tank?
Use heavy-duty chemical-resistant gloves to protect your hands from harsh cleaning solutions.
How often should I clean my RV black water tank?
The frequency depends on usage. For frequent travelers, cleaning every 2-3 weeks is recommended. For occasional use, a monthly cleaning is a good practice.
What should I do if I notice a leak in the black water tank?
Immediately stop using the tank and contact a qualified RV technician. A leak can cause significant damage if not addressed promptly.
