How to clean vinyl windows effectively and safely is a crucial aspect of maintaining their pristine appearance and longevity. Vinyl windows, known for their durability and low-maintenance nature, require specific cleaning techniques to prevent damage and ensure they retain their beauty over time. This guide will walk you through every step of the process, from gathering the right supplies to addressing common challenges and preventing future issues.
This comprehensive guide covers everything from the fundamental characteristics of vinyl windows to the most advanced cleaning techniques, addressing a wide range of situations and scenarios. Proper cleaning methods are essential for maintaining the aesthetic appeal and structural integrity of your vinyl windows.
Introduction to Vinyl Window Cleaning
Vinyl windows are a popular choice for homeowners due to their durability and low-maintenance nature. These windows are typically constructed from a rigid vinyl frame, often with a multi-chambered design to enhance insulation. This material’s inherent properties make it relatively resistant to warping, cracking, and rot compared to other window types. However, despite this resilience, proper cleaning is essential to maintain their appearance and longevity.Proper cleaning methods are crucial for preserving the integrity and aesthetic appeal of vinyl windows.
Ignoring these methods can lead to premature deterioration, fading, and the accumulation of dirt and grime that can negatively impact their performance and overall value. A clean window reflects light better, contributing to a more energy-efficient home and a visually appealing exterior. Furthermore, a clean window is more resistant to the buildup of pollutants, further contributing to its longevity.
Importance of Frequent Cleaning
Frequent cleaning is vital for maintaining the pristine appearance and extended lifespan of vinyl windows. Dirt, dust, pollen, and other debris accumulate over time, gradually dulling the window’s surface. This buildup can affect the window’s ability to transmit light, leading to reduced energy efficiency. Moreover, these particles can accelerate the deterioration process, potentially causing fading or discoloration over time.
Regular cleaning prevents these issues, keeping windows looking their best and maximizing their performance.
Factors Affecting Cleaning Frequency
Several factors influence how often vinyl windows need cleaning. Environmental conditions play a significant role. Homes located in areas with high pollen counts or significant industrial activity will require more frequent cleaning than those in cleaner environments. The amount of direct sunlight exposure also impacts the frequency, as sunlight can accelerate the accumulation of dirt and grime.
Finally, the level of use, such as a window that faces a busy street or a window used for frequent ventilation, also needs more frequent cleaning.
Benefits of Using the Right Cleaning Products
Choosing the right cleaning products is essential for maintaining the integrity of vinyl windows. Harsh chemicals or abrasive cleaners can damage the vinyl’s surface, leading to scratches, discoloration, or premature deterioration. Using appropriate cleaning solutions will not only effectively remove dirt and grime but also protect the window’s finish. Mild, non-abrasive cleaners are best for vinyl windows.
Comparison of Window Types
| Window Type | Cleaning Needs | Typical Cleaning Frequency |
|---|---|---|
| Vinyl | Relatively low maintenance; resistant to many cleaning agents; prone to streaking if not cleaned properly | Monthly to quarterly, depending on environmental factors |
| Wood | Requires specialized cleaning solutions; susceptible to damage from harsh chemicals; more prone to warping | Monthly to bi-monthly, depending on the type of wood and environmental factors |
| Aluminum | Relatively low maintenance; resistant to most cleaning agents; can be prone to streaks | Monthly to bi-monthly, depending on environmental factors |
| Composite | Low maintenance; resistant to many cleaning agents; requires specialized cleaners for tough stains | Monthly to quarterly, depending on environmental factors |
This table provides a general comparison of cleaning needs for various window types. Specific cleaning requirements might vary based on individual window designs and environmental conditions.
Essential Cleaning Supplies
Proper cleaning supplies are crucial for effective and safe vinyl window cleaning. Choosing the right materials ensures a streak-free shine and protects the window’s surface from damage. Selecting the correct cleaning agents and tools is paramount to a successful cleaning process.A comprehensive approach to vinyl window cleaning involves a careful selection of cleaning solutions, tools, and materials. This includes understanding the specific properties of vinyl and how different cleaning agents interact with its surface.
Using appropriate cleaning supplies not only ensures a sparkling clean but also prevents potential damage or deterioration of the vinyl.
Cleaning Solutions
A variety of cleaning solutions can be used for vinyl windows, but some are more effective and safer than others. The best choice depends on the level of dirt and grime present. Water is the most fundamental cleaning solution. However, sometimes, it needs to be supplemented with a cleaning agent for optimal results.
- Water: Distilled or filtered water is preferable to tap water, as tap water may contain minerals that can leave streaks or spots on the vinyl.
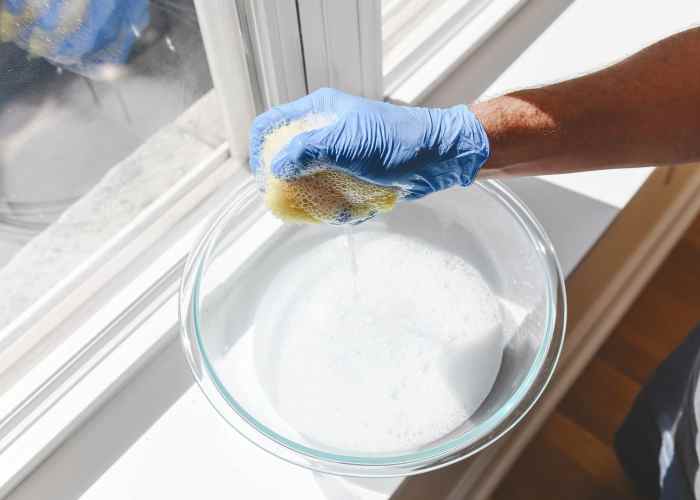
- Mild Dish Soap: A mild dish soap solution is often sufficient for everyday cleaning. Avoid using harsh or abrasive detergents, as they can damage the vinyl’s surface.
- Window Cleaner: Commercial window cleaners can be effective, but choose a cleaner specifically formulated for vinyl or glass. Read labels carefully to ensure the cleaner is safe for use on vinyl.
Microfiber Cloths
Microfiber cloths are essential for vinyl window cleaning due to their ability to absorb moisture and lift dirt without scratching the surface. Different types of microfiber cloths vary in their quality and suitability.
- Different Types: The quality of the microfiber material itself varies greatly. Look for cloths made from high-quality, tightly woven microfiber for optimal cleaning performance and scratch resistance. Avoid using rough or abrasive cloths, which can cause damage to the vinyl.
- Comparison: Consider the density of the microfiber. Denser cloths generally hold more cleaning solution and are better at lifting dirt and grime. They are also less likely to leave streaks.
Cleaning Tools
Various tools can enhance the efficiency and effectiveness of vinyl window cleaning.
- Squeegees: Squeegees are essential for removing excess water and preventing streaks. Different squeegee types are available, each with varying degrees of effectiveness. Choose a squeegee with a smooth, flexible blade for vinyl windows.
- Brushes: Soft-bristled brushes can be used to remove stubborn dirt or grime from hard-to-reach areas. A soft brush helps avoid scratching the vinyl’s surface.
- Buckets: Use separate buckets for rinsing and cleaning solutions to prevent contamination. Clean buckets regularly to maintain hygiene.
Cleaning Agent Comparison
The effectiveness and safety of various cleaning agents differ. Consider the pros and cons before choosing a cleaning agent.
| Cleaning Agent | Pros | Cons |
|---|---|---|
| Distilled Water | Safe, streak-free results, environmentally friendly | May not remove all dirt effectively on heavily soiled windows |
| Mild Dish Soap | Affordable, effective for everyday cleaning | May not be ideal for heavily soiled windows |
| Commercial Window Cleaner | Often formulated for streak-free results | May contain harsh chemicals that can damage vinyl over time |
Step-by-Step Cleaning Procedures
Proper vinyl window cleaning involves a systematic approach to ensure a streak-free, sparkling finish while protecting the window’s surface and frame. Following a consistent procedure, using the right tools, and paying attention to detail are key to achieving optimal results. This section details the pre-cleaning, cleaning, and post-cleaning steps for effective vinyl window care.
Pre-Cleaning Procedures
Preparing the window for cleaning is crucial for a successful outcome. This stage involves minimizing potential damage and maximizing cleaning efficiency. Thorough pre-cleaning prevents scratching, ensures even cleaning distribution, and reduces the risk of water spots.
- Inspect the windows for any debris or dirt buildup. Identify areas requiring special attention, such as corners, crevices, or areas with excessive grime.
- Gather all necessary supplies. Ensure the cleaning solutions, tools, and cloths are readily available to minimize interruptions during the cleaning process.
- Protect surrounding surfaces. Cover nearby plants, furniture, or other items that could be affected by water or cleaning solutions. Use drop cloths or tarps to prevent damage to the surroundings.
- Prepare the cleaning solution. Follow the manufacturer’s instructions carefully when mixing cleaning solutions. Diluting the solution properly is essential to prevent damage to the vinyl or other materials.
Cleaning Procedures
This section details the process for cleaning vinyl window glass and frames, focusing on safety and efficiency.
- Apply the cleaning solution. Use a spray bottle to apply the solution evenly to the glass surface. Avoid excessive pressure to prevent streaking or damage to the glass.
- Clean the glass. Use a soft, lint-free cloth or a squeegee to clean the glass in overlapping strokes. Move from top to bottom to ensure proper cleaning.
- Clean the window frame. Use a soft-bristled brush or a sponge to remove dirt and grime from the window frame. Focus on corners and crevices to ensure thorough cleaning.
- Rinse the window. Rinse the glass thoroughly with clean water to remove any residue from the cleaning solution. Use a garden hose or a bucket of clean water.
- Dry the window. Use a clean, dry microfiber cloth or squeegee to dry the glass. Work from top to bottom to prevent streaks. Drying immediately after rinsing is crucial to prevent water spots.
Post-Cleaning Procedures
Proper post-cleaning ensures the long-term health and appearance of the vinyl windows.
- Dispose of cleaning materials and solutions appropriately. Ensure proper disposal to prevent environmental contamination and hazards.
- Inspect the windows for any remaining residue or damage. Take note of any areas requiring additional attention for future cleaning.
- Clean up any spills or messes. Clean up any excess water or cleaning solutions to prevent damage to surrounding areas.
- Maintain the windows. Regular maintenance and cleaning are crucial for maintaining the window’s appearance and preventing damage. Consider using a sealant or protectant spray to enhance durability and ease cleaning.
Safe Handling of Cleaning Solutions and Tools
Safe handling of cleaning solutions and tools is paramount to prevent accidents and maintain a clean environment.
- Always follow manufacturer instructions for cleaning solutions. Ensure proper dilution and usage to prevent damage to the vinyl windows and surrounding surfaces.
- Use appropriate protective equipment. Wear gloves and eye protection to prevent contact with cleaning solutions and minimize the risk of injury.
- Store cleaning solutions and tools safely and securely. Keep cleaning solutions away from children and pets to prevent accidental exposure.
- Dispose of cleaning solutions and materials responsibly. Follow local regulations for proper disposal of cleaning solutions and materials to minimize environmental impact.
Comparison of Cleaning Methods
| Cleaning Method | Efficiency | Effectiveness | Safety Concerns |
|---|---|---|---|
| Using a spray bottle and microfiber cloth | Moderate | High | Low |
| Using a squeegee | High | Very High | Low |
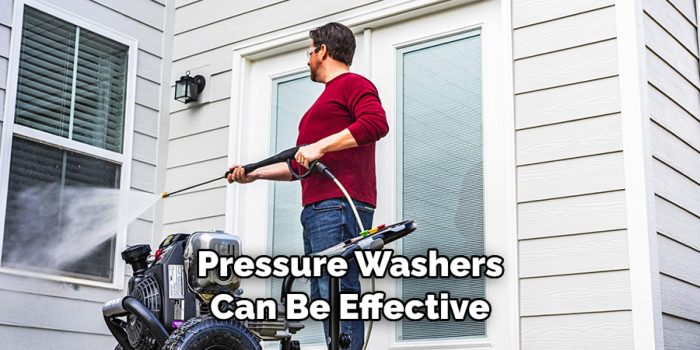
| Using a pressure washer | Very High | High (but potentially damaging to some vinyl types) | High (requires caution) |
Addressing Specific Cleaning Challenges
Vinyl windows, while low-maintenance, can sometimes present cleaning difficulties. Understanding common problems and their solutions is key to maintaining a pristine appearance. Proper techniques, tailored to the specific challenge, are crucial for achieving streak-free results and preventing future issues.Vinyl windows are susceptible to various cleaning challenges, from stubborn stains to persistent streaks. Addressing these issues effectively requires a systematic approach, combining the right tools and techniques.
The following sections provide detailed solutions for various problems encountered during vinyl window cleaning.
Streaking
Streaking is a common issue when cleaning vinyl windows. Improper rinsing or inadequate drying can leave behind unsightly streaks. To prevent streaking, use a clean, lint-free microfiber cloth, and ensure thorough rinsing of the window with clean water.
Dirt Buildup, How to clean vinyl windows
Over time, dirt and grime can accumulate on vinyl windows. This can result in a dull, opaque appearance. Regular cleaning, using appropriate cleaning solutions, can prevent this build-up. A mild detergent or window cleaner, combined with a soft-bristled brush, can effectively remove stubborn dirt.
Stubborn Stains
Stubborn stains, such as those from tree sap or bird droppings, require a more targeted approach. A solution of warm water and a mild dish soap or a specialized stain remover can be applied to the affected area. Allow the solution to sit for a few minutes before gently scrubbing with a soft brush or sponge. Thorough rinsing is essential to remove any residue.
Mildew or Mold Removal
Mildew or mold growth on vinyl window frames can be unsightly and potentially harmful. A solution of bleach and water (1:10 ratio) can be used to tackle mildew. Apply the solution to the affected area, let it sit for a few minutes, then scrub gently with a soft brush. Thorough rinsing with clean water is crucial to remove all traces of bleach.
Preventing Future Problems
Regular cleaning and preventative measures are key to maintaining a clean appearance of vinyl windows. Cleaning windows at least twice a month, especially during high-traffic seasons or after periods of heavy rainfall, can significantly reduce dirt buildup. Also, consider using window guards to protect windows from bird droppings and debris. Keeping the surrounding area free of leaves and debris will further reduce the risk of mildew and mold growth.
Prevention and Maintenance Tips
Regular cleaning and preventative measures are crucial for maintaining the aesthetic appeal and longevity of vinyl windows. Proper care extends their lifespan, reducing the need for costly repairs or replacements. Preventive measures not only preserve the appearance but also protect the window’s structural integrity.Thorough cleaning, coupled with appropriate protective measures, minimizes the impact of environmental factors, extending the life of vinyl windows and maintaining their excellent performance.
This section details essential strategies for keeping vinyl windows in pristine condition.
Significance of Regular Cleaning
Regular cleaning prevents the accumulation of dirt, grime, and other debris that can damage vinyl windows. This buildup can lead to scratches, discoloration, and premature degradation of the vinyl’s protective coating. Frequent cleaning ensures a healthy, long-lasting lifespan for your windows. Regular maintenance also helps maintain the window’s structural integrity and ensures smooth operation.
Preventive Measures for a Pristine Appearance
Maintaining a clean appearance is vital for preserving the integrity of vinyl windows. The following steps help ensure your windows remain clean and attractive:
- Use soft cloths and non-abrasive cleaners to avoid scratching the surface. This simple step significantly reduces the risk of surface damage.
- Avoid harsh chemicals or abrasive cleaners, which can damage the vinyl’s protective coating and cause discoloration. Select window cleaning products specifically designed for vinyl windows.
- Clean windows regularly, at least every two weeks, to remove dust, pollen, and other contaminants that can accumulate over time. Frequent cleaning prevents these materials from embedding in the window frame.
- Pay particular attention to corners and crevices, where dirt and debris tend to collect. Thorough cleaning in these areas ensures a complete cleaning of the window.
Protecting Vinyl Windows from Environmental Factors
Protecting vinyl windows from environmental factors like extreme temperatures, UV rays, and harsh weather conditions is essential for their longevity.
- Regularly inspect windows for any signs of damage or wear, such as cracks, warping, or discoloration. Prompt identification and addressing of such issues can prevent significant damage and maintain the integrity of the window.
- Shield windows from direct sunlight and harsh weather conditions to minimize damage from prolonged exposure. Consider installing window coverings, such as awnings or curtains, during peak sunlight hours to protect the vinyl from fading or cracking.
- Inspect and maintain window seals regularly to prevent moisture from seeping into the window frame, which can cause mildew, warping, and other damage. Regular inspections help prevent potential issues before they escalate.
- Consider applying a protective sealant to the window frames. This will provide a barrier against moisture and protect the vinyl from the damaging effects of prolonged exposure to moisture.
Importance of Window Maintenance Schedules
A structured window maintenance schedule is crucial for ensuring the longevity of vinyl windows. This schedule should be tailored to your local climate and environmental conditions.
- Developing a comprehensive schedule helps ensure the longevity of vinyl windows, reducing the risk of premature wear and tear. Regular inspections and maintenance are key to maintaining the structural integrity and aesthetic appeal of vinyl windows.
- A detailed schedule allows for proactive maintenance, addressing potential issues before they become significant problems. Proactive maintenance reduces the risk of costly repairs or replacements.
- Creating a schedule allows you to anticipate potential problems and perform preventative maintenance to keep your windows functioning at peak performance. Anticipating issues is vital in preserving the long-term functionality and value of your vinyl windows.
Seasonal Preventative Measures
The following table Artikels preventative measures for each season to maintain the integrity of vinyl windows:
| Season | Preventive Measures |
|---|---|
| Spring | Thorough cleaning to remove winter debris, inspect for any damage, and prepare for potential pollen accumulation. |
| Summer | Regular cleaning to remove dust and pollen buildup, protect from direct sunlight with window coverings, and inspect for any signs of fading. |
| Autumn | Clean windows to remove fallen leaves and debris, inspect for any signs of damage from strong winds or rain, and protect from potential moisture buildup. |
| Winter | Inspect for damage from ice or snow buildup, ensure proper drainage around the window frames to prevent water damage, and clean windows to remove any accumulated ice or snow. |
Safety Precautions
Proper safety precautions are crucial when cleaning vinyl windows, ensuring a safe and efficient cleaning process. Neglecting these precautions can lead to accidents, injuries, and damage to property. Adhering to safety guidelines minimizes risks and maximizes the overall safety of the cleaning process.Maintaining safety throughout the vinyl window cleaning procedure is paramount. This involves diligent attention to potential hazards and the appropriate use of safety equipment.
A thorough understanding of safety measures is critical for both the safety of the cleaner and the preservation of the window’s integrity.
Cleaning Solution Handling
Proper handling of cleaning solutions is essential to prevent skin irritation, eye damage, and other potential health risks. Always follow the manufacturer’s instructions for mixing and using cleaning solutions. Ensure adequate ventilation when using strong cleaning chemicals. Store cleaning solutions in properly labeled containers away from children and pets. Avoid inhaling cleaning solution vapors and always wear protective gloves when handling cleaning solutions.
Tool Usage
When using cleaning tools, always maintain a firm grip to prevent slipping and ensure stability. Be cautious when using tools with sharp edges or points to avoid accidental cuts or injuries. Store tools properly after use to avoid potential accidents or damage to the tools themselves. Use appropriate tools for the task at hand, and always follow manufacturer’s instructions for safe operation.
Working at Heights
If cleaning windows on upper floors or elevated areas, working at heights requires strict adherence to safety protocols. Employ appropriate fall protection measures such as harnesses and safety lines. Never overreach or lean excessively while working at heights. Ensure a secure and stable working platform to prevent falls or slips. Inspect all equipment regularly for any signs of damage or wear.
Have a spotter or safety partner for additional support and assistance when working at heights.
Personal Protective Equipment (PPE)
Wearing appropriate personal protective equipment (PPE) is vital for protecting against chemical exposure, accidental injuries, and falls. Always wear safety glasses or goggles to protect your eyes from splashes and debris. Use gloves to protect your hands from chemical irritation and abrasion. Consider using waterproof clothing to prevent water damage.
Potential Safety Hazards and Mitigation Strategies
| Potential Safety Hazard | Mitigation Strategy |
|---|---|
| Chemical burns from cleaning solutions | Always follow manufacturer’s instructions for mixing and using cleaning solutions. Wear appropriate protective gloves and eye protection. Use well-ventilated areas. |
| Falls from heights | Use appropriate fall protection equipment (e.g., harnesses, safety lines). Employ a spotter or safety partner. Ensure a stable and secure working platform. Inspect equipment regularly. |
| Cuts or injuries from sharp tools | Handle tools with care. Use tools appropriate for the task. Store tools properly after use. |
| Slips or trips on wet surfaces | Wear appropriate footwear. Work in a well-lit area. Wipe up spills immediately. Use caution on wet surfaces. |
| Inhalation of cleaning solution fumes | Use cleaning solutions in well-ventilated areas. Avoid inhaling vapors. |
Troubleshooting Cleaning Issues: How To Clean Vinyl Windows
Vinyl window cleaning, while generally straightforward, can sometimes present challenges. Understanding potential problems and their solutions is crucial for achieving a streak-free, sparkling finish. This section details common issues and provides effective troubleshooting steps.
Identifying Streaks and Water Spots
Streaks and water spots are common problems in vinyl window cleaning. They can be caused by improper cleaning techniques, inadequate drying, or using unsuitable cleaning solutions. Proper identification of the cause is essential for effective remediation.
- Streaks: Streaks are often the result of using insufficient or dirty cleaning solutions, or an inadequate rinsing process. Using a clean, microfiber cloth or squeegee, ensuring thorough rinsing, and wiping in a consistent direction can help avoid streaks. If streaks persist, using a separate, clean cloth or squeegee, and a different cleaning solution can help determine if the initial solution is the cause.
- Water Spots: Water spots are often caused by insufficient drying. If the water dries unevenly on the window surface, it can leave behind hard-to-remove mineral deposits or water spots. Using a squeegee and a microfiber cloth, or a window drying cloth, for rapid drying can minimize the formation of water spots. If spots remain, a specialized water spot remover, or a cleaning solution designed for hard water deposits, might be needed.
Addressing Cleaning Solution Damage
Cleaning solutions, if not carefully chosen, can potentially damage the vinyl window’s surface. Using an inappropriate cleaning solution can lead to discoloration, etching, or other surface imperfections.
- Discoloration: If the cleaning solution causes discoloration, immediately rinse the affected area with clean water. Using a mild detergent solution, and rinsing thoroughly, can help remove the discoloration. If the discoloration persists, professional cleaning services might be required to determine the underlying cause and avoid further damage.
- Etching: Etching occurs when a cleaning solution reacts chemically with the vinyl, causing pitting or a rough surface. If etching is detected, immediately rinse the affected area with water. Avoid further use of the solution and seek professional cleaning advice. Avoid abrasive cleaning agents that can further damage the window.
- Other Surface Imperfections: Other imperfections like clouding or dulling can occur from improper cleaning methods. Rinsing with clean water and repeating the cleaning process with a different solution, using a gentle method, can help remove these imperfections. If the issue persists, professional help might be needed.
Troubleshooting Table
| Problem | Possible Cause | Solution |
|---|---|---|
| Streaks | Insufficient rinsing, dirty cleaning solution, or improper wiping | Use a clean microfiber cloth, clean water, and a squeegee. Ensure consistent wiping direction. Consider a different cleaning solution if the problem persists. |
| Water Spots | Insufficient drying, hard water deposits | Use a squeegee and a microfiber cloth or a window drying cloth. Consider using a water spot remover. |
| Discoloration | Incompatible cleaning solution | Rinse immediately with clean water. Try a mild detergent solution and rinse thoroughly. |
| Etching | Chemical reaction with cleaning solution | Rinse immediately with clean water. Avoid further use of the solution and seek professional cleaning advice. |
Cleaning Different Vinyl Window Types
Vinyl windows come in various styles, each with unique features that require specific cleaning techniques. Understanding these differences is crucial for effective and efficient cleaning, ensuring optimal window performance and longevity. Proper cleaning methods not only maintain the aesthetic appeal but also protect the window’s structural integrity.
Double-Hung Windows
Double-hung windows, characterized by two sashes that slide vertically, often present a straightforward cleaning process. First, remove any loose debris or dirt from the window frame using a soft-bristled brush or a vacuum cleaner. Then, clean the window panes using a squeegee or a microfiber cloth, working from top to bottom to avoid streaking. Pay close attention to the tracks and channels where the sashes move, ensuring they are free of any accumulated dirt or debris that could hinder smooth operation.
Casement Windows
Casement windows, which open outward or inward on hinges, require a slightly different approach. Carefully remove any screens or accessories. Clean the window panes with a cleaning solution and a microfiber cloth, paying attention to the window frame and the hinges. If there are any crevices or corners, use a small brush or cotton swab to thoroughly remove any dirt or grime.
Ensure that the window frame and hinges are completely dry after cleaning to prevent rust or corrosion.
Sliding Windows
Sliding windows, with sashes that slide horizontally, require cleaning of the tracks and the panes. Start by removing any obstructions from the tracks, then use a soft brush or vacuum to clean the tracks. Wipe down the window panes with a cleaning solution and a squeegee, working from the center outwards to avoid streaking. Take care to clean the seals and gaskets between the sashes to maintain proper window function and prevent water leakage.
Windows with Screens
Screens on vinyl windows can be cleaned separately or as part of the overall cleaning process. Remove the screens carefully and wash them with mild soap and water. Alternatively, clean the screens with a garden hose, ensuring that all debris is thoroughly removed. Allow the screens to dry completely before reinstalling them on the windows.
Windows with Decorative or Textured Frames
Vinyl windows with decorative or textured frames might require a more delicate approach. Focus on using a soft-bristled brush or a soft cloth to remove dirt from the textures. Avoid harsh scrubbing or abrasive cleaners that could damage the frame’s surface. A gentle cleaning solution is best for maintaining the aesthetic appeal of the frame while preventing damage.
Comparison of Cleaning Procedures for Different Window Types
| Window Type | Cleaning Steps | Specific Considerations |
|---|---|---|
| Double-Hung | Clean panes, tracks, and channels. | Focus on smooth operation of sashes. |
| Casement | Clean panes, frame, and hinges. | Handle screens and accessories carefully. |
| Sliding | Clean panes, tracks, seals, and gaskets. | Maintain smooth sliding action. |
| With Screens | Clean screens separately or with windows. | Dry screens completely before reinstalling. |
| Decorative/Textured Frames | Use soft brushes and cloths. | Avoid harsh cleaners and scrubbing. |
Ending Remarks
In conclusion, maintaining the cleanliness and beauty of your vinyl windows is achievable with the right knowledge and approach. By following the steps Artikeld in this guide, you can ensure your windows remain in excellent condition for years to come. Remember to prioritize safety, use appropriate cleaning products, and schedule regular maintenance for optimal results.
Commonly Asked Questions
What is the best type of cleaning solution for vinyl windows?
Mild dish soap mixed with water is generally recommended. Avoid harsh chemicals, abrasive cleaners, or ammonia-based solutions, as these can damage the vinyl surface.
How often should I clean my vinyl windows?
Regular cleaning, at least once every two to four weeks, is recommended to prevent dirt buildup and maintain the windows’ appearance. More frequent cleaning might be necessary depending on your environment and usage.
What should I do if a cleaning solution damages my vinyl window?
Immediately rinse the affected area with clean water. If the damage persists, contact a professional window cleaner for assessment and repair.
Can I use a pressure washer to clean my vinyl windows?
Using a pressure washer on vinyl windows is generally not recommended. The high-pressure water stream can potentially damage the window frame or glass, leading to streaks or other imperfections.
