How to fix c0267 pump motor circuit open? This comprehensive guide will walk you through the process of diagnosing and resolving this common error code. We’ll explore the underlying causes, from simple wiring issues to more complex component failures, and provide step-by-step instructions for troubleshooting and repair. Get ready to tackle that pesky pump motor problem!
Understanding the error code C0267, often indicating a broken connection in the pump motor circuit, is the first step. This guide delves into the function of the pump motor circuit, explaining its role in the overall system and potential scenarios where the C0267 error might arise. Common causes, such as faulty wiring, damaged components, or external factors, are explored, helping you identify the source of the problem.
Understanding the Error Code C0267 Pump Motor Circuit Open
The error code C0267, signifying a “pump motor circuit open,” indicates a critical malfunction within the electrical system controlling the pump motor. This disruption in the circuit’s continuity can range from minor inconveniences to significant system failures, depending on the severity and location of the fault. Understanding the implications of this code is crucial for effective troubleshooting and prompt repair.
Detailed Explanation of Error Code C0267
The error code C0267 specifically points to a break in the electrical path that powers the pump motor. This “open circuit” prevents the flow of electrical current necessary to operate the motor, halting its function. The pump motor circuit is a vital component in numerous systems, including water supply, industrial processes, and HVAC systems. A disruption in this circuit can have wide-ranging consequences, from a simple inability to operate the pump to potentially damaging the system components.
Function of the Pump Motor Circuit, How to fix c0267 pump motor circuit open
The pump motor circuit is responsible for delivering the electrical power required to drive the pump motor. This circuit includes the wiring, connectors, relays, and other components that facilitate the flow of electricity from the power source to the motor. The circuit is meticulously designed to ensure safe and efficient operation of the motor, maintaining the required voltage and amperage levels.
Proper functionality is crucial for the pump’s ability to perform its intended tasks, such as pumping water or fluids in industrial or domestic applications.
Potential Scenarios Where Error Code C0267 Might Occur
This error code can manifest in various situations. For example, a faulty wire connection could cause an open circuit, or a damaged component like a relay or contactor could disrupt the electrical flow. The specific location of the open circuit determines the extent of the disruption. A minor break in a less critical section of the circuit might only result in the pump failing to start.
In contrast, a significant break in a crucial section could lead to complete system failure.
Common Causes of a Circuit Open in the Pump Motor Circuit
Several factors can contribute to a circuit open in the pump motor circuit. The most common causes include:
- Damaged Wiring: Physical damage to the wiring, such as cuts, kinks, or corrosion, can create an open circuit. Overheating or exposure to harsh environmental conditions can also degrade the insulation and lead to a break in the circuit.
- Loose Connections: Loose or corroded connections between wires, terminals, and components can disrupt the continuity of the circuit. This is often a result of poor installation or inadequate maintenance.
- Faulty Components: Malfunctioning components like relays, contactors, or circuit breakers can lead to an open circuit. These components are essential for the operation of the pump motor circuit and their failure can interrupt the flow of electricity.
- External Factors: Environmental factors such as water ingress or foreign objects entering the circuit can create open circuits. Improper handling or installation can also contribute to these external causes.
Error Code Analysis Table
| Error Code | Description | Potential Impact | Possible Causes |
|---|---|---|---|
| C0267 | Pump motor circuit open | Failure to operate the pump motor, potential system malfunction, possible component damage | Damaged wiring, loose connections, faulty components, environmental factors |
Troubleshooting the Pump Motor Circuit
The error code C0267, indicating a pump motor circuit open, necessitates a systematic approach to pinpoint the exact cause. This involves careful examination of the wiring connections, components, and potential external factors that could disrupt the electrical flow. A methodical troubleshooting process is crucial to restore the pump’s functionality effectively and efficiently.Identifying the root cause of a circuit open requires a deep dive into the electrical system.
A simple visual inspection can often reveal loose connections, damaged wires, or faulty components. Furthermore, external influences like environmental damage or accidental physical impact can contribute to the problem. Thorough testing and analysis are essential to ensure the safety and reliability of the system.
Wiring Connection Checks
Proper wiring connections are fundamental to the smooth operation of any electrical system. Faulty connections, such as loose wires, corroded terminals, or damaged insulation, can lead to an open circuit. Identifying and rectifying these issues is a critical first step in troubleshooting the problem. Visual inspection and continuity checks are essential tools in this process.
- Visual Inspection of Wiring Connections: A comprehensive visual inspection of all wiring connections is the initial step. Look for signs of damage, such as frayed wires, exposed conductors, or loose connections. Corrosion at the connection points should also be noted. This is often overlooked but is a common cause of open circuits.
- Tightening Connections: After identifying loose connections, carefully tighten them using appropriate tools. Over-tightening should be avoided to prevent damage to the wires or terminals. Ensure all wire nuts or connectors are properly applied.
- Checking for Corrosion: Inspect the wire terminals and connectors for corrosion. Corrosion can impede the flow of electricity and create an open circuit. If corrosion is present, clean the affected areas using appropriate cleaning solutions.
Component Integrity Testing
Beyond the wiring, testing the integrity of circuit components is crucial. Faulty components like relays, fuses, or circuit breakers can contribute to the open circuit. The appropriate testing methods are critical for identifying the faulty element.
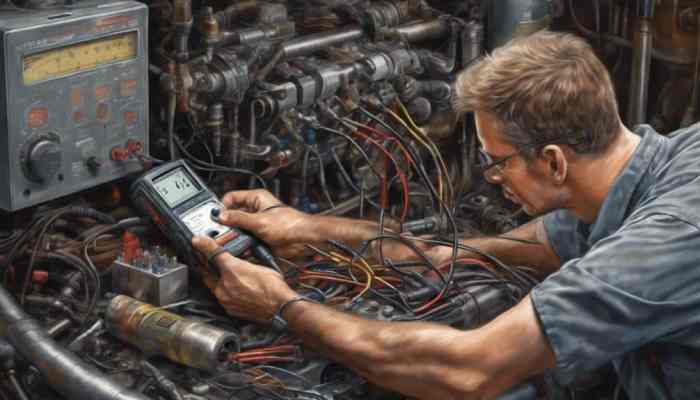
- Testing Electrical Continuity: Using a multimeter set to the continuity mode, check the electrical continuity between the pump motor and the power source. A continuous beep indicates a complete circuit, while a lack of beep indicates an open circuit in the path.
- Fuse/Circuit Breaker Inspection: Examine fuses and circuit breakers for any signs of damage or blown elements. Replace any damaged or blown fuses or circuit breakers with correctly rated components.
- Relay Functionality Check: If the system utilizes relays, verify their proper functionality. Check for proper electrical connections to the relay and test its switching action. Malfunctioning relays can also lead to open circuits.
Wiring Harness Inspection
A thorough visual inspection of the wiring harness is crucial for identifying potential problems. Inspecting the harness can help find issues like damaged wires, chafing, or pinched wires that might not be immediately obvious.
- Unplug the pump from the power source to ensure safety.
- Carefully trace the wiring harness from the power source to the pump motor.
- Inspect the harness for any signs of damage, such as cuts, abrasions, or kinks. Look for any areas where the harness might be pinched or chafed against other components.
- Pay close attention to any areas where the harness passes through tight spaces or around sharp edges.
Comparison of Testing Methods
Different testing methods provide varying levels of detail and can be used to complement each other in the troubleshooting process. A comparison table can help visualize the effectiveness of each method.
| Testing Method | Description | Effectiveness |
|---|---|---|
| Visual Inspection | Checking for visible damage to wires, connections, and components. | High for identifying obvious issues. |
| Continuity Test | Using a multimeter to check for electrical flow between points. | High for identifying open circuits. |
| Component Testing | Testing individual components like fuses and relays. | High for isolating component failures. |
Electrical Diagnostics and Testing
Pinpointing the root cause of a pump motor circuit open, like error code C0267, necessitates a systematic approach to electrical diagnostics. This involves carefully checking various components within the circuit to isolate the faulty element. A methodical process of voltage and current measurements, combined with continuity checks, helps pinpoint the precise location of the open circuit.Effective troubleshooting requires understanding the electrical pathways within the pump motor circuit.
This understanding enables targeted testing, ensuring efficient identification of the problem area. The following sections Artikel the specific electrical tests, providing a detailed approach to identifying and resolving the open circuit issue.
Voltage and Current Measurements
To begin the electrical diagnostic process, accurate voltage and current measurements are crucial. These measurements provide critical data to determine if the circuit is functioning as expected. Using a multimeter, measure the voltage at key points within the circuit, including the power supply, the motor terminals, and any intermediate points.
Continuity Checks
A critical aspect of electrical diagnostics is verifying continuity. A multimeter’s continuity test function assesses the presence of a complete electrical path. Using the multimeter’s continuity test function, check the continuity of the circuit components, including the wires, connections, and the motor windings. A lack of continuity indicates a break in the circuit.
Fuse and Relay Checks
Fuses and relays play a critical role in protecting the circuit from overcurrent conditions. A blown fuse or a malfunctioning relay can manifest as a circuit open. Inspect the fuses for any physical damage or signs of melting. If a fuse is blown, replace it with a fuse of the correct amperage rating. Inspect relays for proper connections and signs of damage.
If the relay is faulty, replace it with a new one.
Motor Winding Checks
The motor windings are essential components of the pump motor. A break or short in the windings can result in an open circuit condition. To check the motor windings, use a multimeter set to the resistance measurement mode. Measure the resistance between each winding and the ground. Any significant deviation from the expected resistance values suggests a potential winding issue.
This method can help diagnose a short circuit or an open circuit within the windings.
Expected Readings Table
| Component | Condition (Open) | Condition (Closed) | Measurement Method ||————————|——————–|——————–|——————–|| Power Supply Voltage | 0V | Expected voltage | Multimeter Voltage || Motor Terminal Voltage | 0V | Expected voltage | Multimeter Voltage || Wiring Continuity | No Continuity | Continuity | Multimeter Continuity || Fuse | Blown | Intact | Visual Inspection || Relay | Malfunctioning | Functioning | Visual Inspection/Testing|| Motor Winding | High Resistance | Expected Resistance | Multimeter Resistance |The table above provides a general guideline for expected readings.
Specific values may vary depending on the pump motor model and the electrical system’s configuration. Always consult the manufacturer’s specifications for accurate expected readings.
Component Replacement and Repair

Troubleshooting a pump motor circuit open (C0267) often requires replacing or repairing components. This involves careful procedure, proper identification of faulty parts, and meticulous execution of repair steps. Safety is paramount throughout the entire process. Incorrect handling can lead to further damage or personal injury.
Safe Power Disconnection
Ensuring the safety of the technician and the equipment is crucial. Disconnecting the power supply to the pump motor circuit is the first and most critical step in any repair procedure. Improper disconnection can lead to electric shock or further damage.
- Locate the circuit breaker or fuse box associated with the pump motor circuit. Identify the specific breaker or fuse controlling the pump motor.
- Turn off the breaker or remove the fuse. This isolates the pump motor circuit from the power source, preventing any electrical flow to the motor.
- Verify the power is completely off by using a non-contact voltage detector to check for any residual voltage on the circuit wires.
- Document the location of the breaker or fuse for future reference and to prevent accidental reconnection.
Identifying and Replacing Faulty Components
A systematic approach to identifying faulty components is essential. This can involve visual inspection, continuity testing, and component checks.
- Wiring: Inspect the wiring for any signs of damage, such as fraying, cuts, or exposed wires. Damaged wiring is a common cause of open circuits. Use appropriate tools to repair or replace damaged sections. Crimp connections securely to prevent further issues.
- Fuses: Check the fuse for any physical damage or discoloration. Replace blown fuses with fuses of the correct amperage rating. Incorrect amperage can lead to overheating or further damage.
- Relays: Inspect relays for physical damage or improper operation. A malfunctioning relay may cause the pump motor to not receive power. Replacing the relay with a compatible part is necessary.
Replacing the Pump Motor
Replacing the pump motor itself might be necessary in more severe cases. This often involves careful disassembly and reassembly to avoid damaging the pump or surrounding components.
- Disconnect all connections to the pump motor, including power wires and any other associated components.
- Carefully remove the old pump motor, ensuring not to damage any surrounding parts.
- Install the new pump motor, ensuring proper alignment and secure connections.
- Reconnect all connections to the new pump motor.
- Verify that all connections are secure and free of any potential short circuits.
Fuse Comparison Table
The correct amperage rating is crucial for fuse selection. Improper fuse selection can lead to the fuse blowing or the circuit overheating.
| Fuse Type | Typical Amperage Ratings | Applications |
|---|---|---|
| Glass Cartridge Fuses | 1A to 30A | General purpose circuits |
| Ceramic Cartridge Fuses | 1A to 63A | Higher current applications |
| Blade Fuses | 0.5A to 10A | Smaller circuits in panels and enclosures |
Repairing Damaged Wiring
Damaged wiring needs to be addressed carefully to avoid further issues.
- Assessment: Carefully assess the extent of the damage. Determine if the wire needs to be repaired or replaced.
- Repair Techniques: Use appropriate wire connectors and tools to repair or replace damaged sections. Ensure a secure connection to prevent future issues.
- Insulation: Ensure that all repaired sections are properly insulated to prevent short circuits or electrical hazards.
Checking Motor Operation After Repair
Thorough testing is crucial to ensure the repaired pump motor is functioning correctly.
- Power On: Turn the power back on to the circuit, ensuring the breaker or fuse is properly installed.
- Motor Start: Observe if the motor starts correctly and runs without any unusual noises or vibrations.
- Pump Function: Test the pump to ensure it is functioning as expected and delivering the required flow.
- Safety Check: Verify that no sparks or unusual heat are present during operation.
Preventive Maintenance
Proactive measures are crucial for extending the lifespan of any pump system and preventing costly repairs. Implementing a robust preventive maintenance schedule minimizes the likelihood of encountering critical issues like pump motor circuit opens. A well-maintained system not only reduces downtime but also safeguards equipment, ensuring consistent performance and efficiency.Effective preventive maintenance hinges on a combination of regular checks, meticulous wiring harness care, and adherence to proper insulation practices.
Understanding the potential environmental factors that can impact the system’s integrity is also key. This proactive approach helps in identifying and addressing potential problems before they escalate into major malfunctions.
Regular Checks on the Pump Motor Circuit
Regular inspections of the pump motor circuit are essential for identifying early signs of potential issues. This includes verifying the integrity of connections and checking for any signs of damage or deterioration. Consistent monitoring prevents small problems from growing into larger, more costly repairs.
- Visual inspection for any signs of damage or wear on the wiring harness, including frayed wires, exposed insulation, or corrosion.
- Verify the tightness of all electrical connections and terminals, ensuring a secure and reliable connection.
- Check for any signs of overheating or unusual smells emanating from the motor or wiring.
- Monitor the pump’s performance indicators such as pressure, flow rate, and energy consumption.
Maintaining the Wiring Harness and Connections
Proper maintenance of the wiring harness is crucial for maintaining electrical integrity. A well-maintained harness is less susceptible to damage from external factors and ensures reliable operation. Regular cleaning and inspection are essential.
- Regularly inspect the wiring harness for any signs of damage or deterioration, such as frayed wires, broken insulation, or exposed wires.
- Clean connections and terminals using appropriate cleaning solutions to remove dust, debris, and corrosion. Use a non-conductive brush for this purpose.
- Ensure all connections are secure and properly tightened. Use the correct tools for tightening bolts and screws.
- Protect the wiring harness from physical damage by ensuring it’s routed away from sharp edges, moving parts, and potential sources of stress.
Importance of Insulation and Environmental Protection
Proper insulation is critical to preventing electrical faults. Environmental factors like moisture, extreme temperatures, and chemicals can significantly impact the integrity of the insulation and wiring. Protection from these factors is crucial for long-term reliability.
- Ensure that all wiring is properly insulated, and that insulation is intact and undamaged.
- Use appropriate protective measures to shield the wiring harness from moisture, chemicals, and extreme temperatures. This could include using waterproof or heat-resistant enclosures.
- Implement measures to prevent water ingress, particularly in outdoor or humid environments. Use appropriate seals and gaskets.
- Protect the wiring harness from physical damage. Routing the harness away from potential hazards is an important preventive measure.
Cleaning and Inspecting the Pump Motor
Regular cleaning and inspection of the pump motor itself are vital for optimal performance and early fault detection.
- Regularly clean the pump motor to remove dust, debris, and any other contaminants that could impact its operation.
- Visually inspect the motor’s bearings for any signs of wear or damage. Listen for unusual noises during operation.
- Check for any signs of overheating. Overheating is a clear indication of potential issues.
- Inspect the motor’s casing for any signs of damage or corrosion.
Illustrative Examples and Case Studies: How To Fix C0267 Pump Motor Circuit Open
Understanding the intricacies of electrical systems, particularly those related to pump motors, often requires practical examples to solidify theoretical knowledge. Real-world scenarios highlight the nuances of troubleshooting and the importance of meticulous diagnostics in resolving error codes like C0267. These examples provide a tangible understanding of how to apply theoretical concepts to practical situations.
A Case Study of a Failed Pump Motor
A commercial water pump in a manufacturing facility exhibited error code C0267. Initial checks revealed no obvious damage to the pump housing or visible wiring issues. A systematic approach, focusing on the pump motor circuit, was implemented. Using a multimeter, the technician verified voltage readings at key points in the circuit, noting a significant voltage drop across a particular wire leading to the motor windings.
Further investigation traced the problem to a corroded wire connection within a junction box, a common source of intermittent issues. Replacing the corroded wire segment and tightening all connections resolved the error code, restoring the pump to full operational capacity.
Using Diagrams and Schematics
Understanding the pump motor circuit is significantly aided by diagrams and schematics. These visual representations depict the flow of electricity, showing the components, their interconnections, and the expected current paths. A detailed schematic provides a clear roadmap for diagnosing issues and pinpointing the source of the C0267 error. Examining the circuit diagram is a crucial step before initiating any troubleshooting procedures.
A Typical Pump Motor Circuit Diagram
A typical pump motor circuit diagram consists of several key components: the power source (typically AC), a circuit breaker, a contactor, a capacitor (if applicable), and the motor itself. These components are connected in series or parallel, depending on the specific design. The circuit diagram illustrates the path electricity takes from the power source, through the control components, and to the motor.
+-----------------+     +---------+     +-------+
|     Power      |-----| Contactor|-----| Motor|
|     Source     |     +---------+     +-------+
+-----------------+     |
                    |     |
                    |     |
                    |     |
                    |     |
+-----------------+     +-------+
|    Circuit     |-----| Capacitor|
|     Breaker    |     +-------+
+-----------------+
Common Wiring Errors and Their Impact
Several wiring errors can lead to open circuits and trigger error code C0267.
Incorrect wire connections, loose connections, and damaged wires are frequent culprits.
- Incorrect wire connections: Connecting wires to the wrong terminals can disrupt the electrical flow, leading to an open circuit and triggering the error code.
- Loose connections: Loose wire connections can create intermittent issues, resulting in an open circuit when vibration or movement occurs. This is a common cause of the C0267 error.
- Damaged wires: Damaged wires, such as those with exposed insulation or breaks, can create a complete open circuit and prevent the motor from functioning.
Different Types of Pump Motor Circuit Designs
Pump motor circuits can vary based on the application and specific requirements. Understanding these variations is crucial for effective troubleshooting.
- Single-phase circuits: These circuits are simpler and often used in residential or smaller commercial applications. They typically employ a capacitor to assist with motor starting.
- Three-phase circuits: Used in industrial settings or high-power applications, three-phase circuits provide higher torque and efficiency than single-phase circuits.
Summary
So, there you have it – a complete roadmap to resolving the C0267 pump motor circuit open error. By following the troubleshooting steps and preventive maintenance tips, you can effectively diagnose and fix the issue, ensuring your pump motor functions optimally and preventing future problems. Remember, safety is paramount when working with electrical systems. Always disconnect the power before starting any repair work.
FAQ Explained
What tools are needed for troubleshooting the C0267 error?
You’ll need a multimeter to test voltage, current, and continuity, and possibly screwdrivers, pliers, and wire strippers, depending on the specific repair.
How long will it take to fix a C0267 error?
The time required to fix the C0267 error depends greatly on the cause. Simple wiring issues can be resolved quickly, but more complex problems, such as a damaged motor, might take longer.
What should I do if I’m not comfortable working with electrical components?
If you’re not confident in your electrical skills, it’s best to consult a qualified technician. Safety is key when dealing with electrical systems.
Are there any safety precautions I should take when working on the pump motor circuit?
Always disconnect the power supply before starting any work. Use appropriate safety equipment, such as gloves and eye protection.
