How to lower humidity in incubator? This is a super important thing to know, especially if you’re dealing with eggs or cell cultures. Maintaining the right humidity level is crucial for successful incubation. Too much humidity can lead to mold or other problems. This guide breaks down the essentials to get you set for the perfect humidity level.
We’ll cover everything from the basics of humidity control to troubleshooting common issues. From simple adjustments to advanced techniques, we’ve got you covered. Let’s dive in and learn how to master incubator humidity!
Introduction to Incubator Humidity Control
Maintaining the right humidity levels in incubators is crucial for successful hatching and growth. This delicate balance impacts everything from embryo development to the health of cell cultures. Understanding the ideal humidity range and the potential consequences of deviations is key to successful outcomes. Precise control of humidity is an essential part of any incubator’s function.Humidity, essentially the amount of water vapor in the air, plays a vital role in the development of organisms within incubators.
It affects the rate of evaporation, embryo hydration, and overall environmental comfort. The precise humidity level is often species-specific and directly impacts the success of the incubation process.
Ideal Humidity Ranges for Different Incubators
The optimal humidity level varies significantly based on the type of organism being incubated. Different developmental stages also necessitate adjustments. A consistent and appropriate humidity environment is essential for successful outcomes.
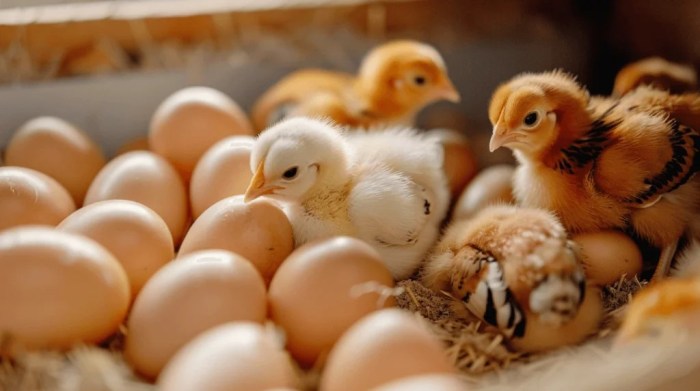
- Bird Eggs: Maintaining the correct humidity is paramount for proper embryonic development. Too low, and the embryo may dry out; too high, and it could experience fungal or bacterial issues. Ideal humidity ranges typically fall between 50% and 70% relative humidity (RH) during incubation, adjusting as the embryo develops. Different bird species may have slightly different requirements.
- Cell Cultures: Precise humidity control is critical for maintaining the viability and health of cell cultures. Variations in humidity can significantly impact cellular function, growth, and overall health. Optimal humidity levels for cell cultures are generally in the range of 40% to 60% RH.
- Other Organisms: For other organisms, like reptiles or amphibians, the ideal humidity range may be quite different. Proper research into the specific requirements of the species being incubated is necessary.
Potential Consequences of Improper Humidity
Variations in humidity can lead to various detrimental effects within incubators. A consistent environment is vital for the health and development of the organism.
- Embryo Death: Dehydration or excessive moisture can lead to embryo death in various species. An inadequate moisture environment can cause the embryo to dry out, whereas excessive humidity can promote mold and fungal growth.
- Growth Inhibition: Improper humidity can lead to inhibited growth in cell cultures, impacting their function and viability.
- Contamination: Excessive humidity creates a favorable environment for mold, fungi, and bacteria, leading to contamination of the incubator and potential harm to the organisms.
Comparative Humidity Ranges
The following table provides a concise overview of ideal humidity ranges for various types of incubators.
| Type of Incubator | Ideal Humidity Range (RH) |
|---|---|
| Bird Eggs (various species) | 50-70% |
| Cell Cultures | 40-60% |
| Reptiles | Variable, species-dependent (e.g., 60-80%) |
Methods for Lowering Humidity
Controlling humidity in incubators is crucial for optimal embryo development. Maintaining the correct moisture level is vital for various biological processes within the developing organism. Different methods are employed depending on the specific needs and resources available. Choosing the appropriate technique impacts the cost-effectiveness and efficiency of the entire process.
Common Humidity Reduction Techniques
Various methods are used to reduce humidity levels in incubators, each with its own set of advantages and disadvantages. Understanding these methods allows for a more informed decision when selecting the most suitable approach for a given situation.
- Using Desiccant Packs: Desiccants are hygroscopic materials that absorb moisture from the surrounding air. These are often used in enclosed spaces to maintain low humidity levels. They are relatively inexpensive and easy to use. However, they need regular replacement and can be less effective in very high humidity environments. The effectiveness of desiccant packs depends on the material and quantity used.
Some examples include silica gel and activated alumina. Replacing them when they become saturated prevents the build-up of condensation within the incubator.
- Increasing Airflow: Increasing the rate of airflow within the incubator helps to circulate the air and remove moisture. A more effective air circulation can help reduce the humidity by removing the moisture-laden air and replacing it with drier air. This method can be quite cost-effective, particularly if it involves modifying existing ventilation systems. However, it might not be sufficient to address high humidity levels or in cases where the incubator’s design limits airflow modification.
- Adjusting Temperature: Higher temperatures typically lead to lower humidity. By adjusting the incubator’s temperature slightly upwards, you can reduce the amount of moisture in the air. This approach is a common method in various environments. The benefit is its simplicity. However, excessive temperature increases could negatively affect the development process.
A subtle increase might be sufficient to lower the humidity, while a significant rise could compromise the growth and development of the embryos.
- Using Dehumidifiers: Specialized dehumidifiers are designed to remove moisture from the air. They are often effective and can maintain a consistent humidity level. They are often more expensive than other methods, and the energy consumption can be a significant factor in the overall cost of operation. Dehumidifiers offer the advantage of precision control and can handle high humidity conditions effectively, which makes them suitable for larger incubators or those in environments with consistently high moisture.
Comparative Analysis of Humidity Control Methods
This table summarizes the key characteristics of the different methods for lowering humidity in incubators, considering cost, ease of use, and effectiveness.
| Method | Cost | Ease of Use | Effectiveness |
|---|---|---|---|
| Desiccant Packs | Low | High | Moderate (dependent on environment and type) |
| Increased Airflow | Low to Moderate | Moderate | Moderate (dependent on system modification and environment) |
| Adjusting Temperature | Low | High | Moderate (can be less effective than other methods) |
| Dehumidifiers | High | Moderate | High (often more effective and precise) |
Environmental Factors Affecting Humidity
Incubators, crucial for delicate life stages, require precise humidity control. Factors beyond the deliberate adjustments of humidity sources significantly impact the final environment. Understanding these external influences is vital for maintaining consistent and optimal conditions.Environmental variables like temperature, air pressure, and ventilation patterns all play a role in the humidity levels within an incubator. Changes in these factors can disrupt the delicate balance needed for healthy development.
Temperature Fluctuations and Humidity
Temperature variations directly influence the incubator’s humidity. Warmer temperatures increase the rate at which water evaporates. Conversely, cooler temperatures decrease evaporation. These changes can cause significant swings in relative humidity, especially if the incubator’s temperature control isn’t precise. For example, a sudden temperature drop can condense moisture in the air, leading to an increase in humidity.
This, in turn, may affect the growth and development of the organisms within. Likewise, a sudden increase in temperature can quickly reduce the humidity, leading to desiccation and potential harm.
Air Pressure and Humidity Regulation
Air pressure significantly affects the moisture content of the air. Higher air pressure typically means more moisture the air can hold. Conversely, lower air pressure reduces the air’s capacity to retain moisture. Changes in air pressure, such as those associated with weather patterns, can affect the humidity inside the incubator, requiring adjustments to maintain the target level.
Ventilation and Humidity
Ventilation plays a crucial role in regulating humidity. Proper ventilation helps to remove excess moisture from the incubator. If ventilation is insufficient, moisture accumulates, increasing humidity. Conversely, excessive ventilation can lead to rapid moisture loss, lowering humidity levels to a detrimental degree. This is particularly important in closed systems where the air within the incubator is recirculated.
The effectiveness of ventilation systems varies depending on their design and the type of incubator used.
Examples of Environmental Impacts
The interplay of these environmental factors can result in complex and unpredictable changes in incubator humidity. For example, a sudden drop in barometric pressure, often associated with approaching storms, can lead to a significant increase in the incubator’s humidity. Conversely, a sustained period of high temperatures and low humidity can cause a rapid decrease in incubator humidity, leading to desiccation in the organisms inside.
Maintaining Consistent Conditions
To mitigate the impact of environmental factors on humidity, incubators should be located in stable environments whenever possible. Monitoring and adjusting the incubator’s humidity control system based on external conditions is critical to maintaining a stable and consistent environment. Monitoring temperature, pressure, and ventilation patterns allows for proactive adjustments to ensure the most favorable environment for the organisms within.
Equipment for Humidity Control
Maintaining precise humidity levels in incubators is crucial for optimal growth and development of various organisms. Choosing the right equipment is key to achieving and sustaining these conditions. This equipment must be reliable, accurate, and capable of adjusting to varying needs. Proper selection and use directly impact the success of the incubation process.
Common Humidity Control Equipment
A variety of equipment is used to regulate humidity within incubators. These devices employ different mechanisms and have varying degrees of precision. Their selection depends on the specific requirements of the incubation environment and the budget constraints.
- Humidity Control Systems: These systems are sophisticated units often integrated into the incubator itself. They typically include a built-in hygrometer to monitor humidity, and a mechanism to adjust moisture levels, such as a water reservoir or humidifier. The system automatically maintains the desired humidity by adjusting the water delivery. This automation ensures consistent humidity throughout the incubation period. Examples include automatic humidifiers, which are capable of maintaining humidity levels within a narrow range, ensuring consistent results in the incubator.
- Hygrometers: These instruments are used to measure the moisture content of the air. Analog hygrometers, which use a material that changes in response to humidity, are still employed, but digital hygrometers, offering precise and fast readings, are more common. These provide real-time humidity data for monitoring and adjustments. A critical feature is accuracy, ensuring the measurement accurately reflects the actual humidity level.
- Water Reservoirs and Humidifiers: These components provide a controlled supply of moisture to the incubator environment. Water reservoirs are often simple containers placed within the incubator, while humidifiers may involve more complex mechanisms for vaporizing and dispersing water. The reservoir size influences the incubator’s capacity to maintain consistent humidity over time. Proper maintenance of reservoirs, including regular cleaning and filling, is crucial for the effective operation of the humidity control system.
- Desiccators: These sealed containers are used to maintain extremely low humidity levels. They contain a desiccant, a substance that absorbs moisture from the air. Desiccators are essential for maintaining extremely dry environments, crucial for specific research or storage purposes. These are typically used in specialized settings requiring exceptionally low humidity levels. For example, they’re vital for preserving certain biological samples or sensitive equipment.
Features and Specifications of Humidity Control Devices
The performance of humidity control equipment depends on various factors. These factors include accuracy, range of humidity control, and ease of operation.
- Accuracy: The accuracy of a humidity control device is expressed as a percentage point or as a ± range. A ±1% accuracy means that the measured humidity value can deviate from the actual value by up to 1%. This precision is crucial for maintaining consistent growth conditions.
- Range: The range of humidity control specifies the minimum and maximum humidity levels the device can maintain. Different applications require different humidity ranges. For instance, a device capable of maintaining 40% to 80% relative humidity is suitable for a wider range of applications than one with a narrower range.
- Ease of Operation: The user interface of the equipment should be intuitive and straightforward. Easy-to-understand controls and displays minimize the risk of errors and ensure simple operation. Automatic control systems, with their programmable settings, enhance ease of use.
Table of Humidity Control Equipment
This table provides a concise overview of some commonly used humidity control equipment.
| Equipment Type | Brand | Model | Capabilities |
|---|---|---|---|
| Humidity Control System | Thermo Scientific | Forma Steril-Flo 100 | Maintains 10-95% RH with ±1% accuracy |
| Hygrometer | Vaisala | HMP45 | Measures humidity with ±1% accuracy; fast response time |
| Water Reservoir | Custom-built | Various sizes | Provides water supply for humidifiers; simple design |
| Desiccator | Labconco | Desiccator | Maintains extremely low humidity; typically used for dry storage |
Procedures for Adjusting Humidity Levels: How To Lower Humidity In Incubator
Fine-tuning incubator humidity is crucial for optimal embryo development and chick hatching. Slight variations in humidity can significantly impact the success rate. Precise adjustment procedures, coupled with diligent monitoring, ensure consistent and ideal conditions.
Step-by-Step Procedure for Lowering Humidity
This systematic approach ensures a gradual and controlled reduction in humidity, minimizing stress on the developing embryos.
- Initial Assessment: Record the current humidity level using the calibrated hygrometer. Note any unusual conditions within the incubator that might influence the humidity. This includes factors like the presence of excess water in the humidifier, or if the incubator has been recently opened.
- Gradual Reduction: Reduce the water level in the humidifier tray or water reservoir. Avoid drastic changes; aim for a decrease of 2-5% per hour. This approach is more stable and minimizes stress on the embryos.
- Regular Monitoring: Continuously monitor the humidity levels every hour, using the calibrated hygrometer. Adjust the water level accordingly, ensuring a steady decrease in humidity toward the desired level.
- Target Humidity Achieved: Once the desired humidity level is reached, maintain the water level to prevent further fluctuations.
- Verification and Documentation: Confirm the stability of the new humidity level by monitoring for 24 hours. Record the final humidity level and the adjustments made throughout the process. This comprehensive documentation is essential for future reference and troubleshooting.
Calibration of Humidity Control Equipment
Accurate humidity measurement is paramount for effective adjustments.
- Hygrometer Calibration: Use a known standard humidity chamber or a calibrated reference hygrometer to verify the accuracy of the instrument. The process usually involves comparing the readings against the standard. Ensure the hygrometer is positioned correctly within the incubator to avoid errors.
- Equipment Maintenance: Regular maintenance, including cleaning and checking for any damage, is crucial for accurate readings. Damaged or poorly maintained equipment will produce unreliable data.
- Environmental Factors: Consider environmental factors like temperature and pressure when calibrating equipment. Temperature fluctuations can significantly affect the accuracy of the readings. Ensure the temperature is stable and within the range for the hygrometer’s specifications.
Monitoring Humidity Levels During Adjustments
Consistent monitoring ensures adjustments are effective and safe.
- Frequency of Monitoring: Regular monitoring, at least hourly, is essential during humidity adjustments. This frequency provides real-time data for immediate corrective action.
- Consistency in Procedure: Maintaining consistent monitoring procedures ensures reliability of the collected data. Following a standardized approach allows for comparisons across different experiments and incubations.
- Documentation of Readings: Record all humidity readings, including the time of measurement, alongside any adjustments made. This detailed record helps track trends and identify potential problems.
Flowchart for Humidity Adjustment
A visual representation of the steps involved in adjusting humidity levels. 
Note: The image above represents a general flowchart for humidity adjustment. The specific details and steps might vary depending on the type of incubator being used.
Troubleshooting Humidity Issues
Incubator humidity control, while crucial for optimal development, can sometimes encounter hiccups. Understanding common problems and their solutions is vital for maintaining a consistent and healthy environment for your specimens. This section delves into troubleshooting common humidity issues, equipping you with the tools to identify and resolve them effectively.
Common Humidity Control Problems
Several factors can disrupt the delicate balance of humidity within an incubator. These range from simple equipment malfunctions to more complex environmental influences. Identifying the root cause is the first step in resolving any issue.
Causes of Humidity Fluctuations
Humidity fluctuations can stem from various sources. Faulty humidifiers or inadequate water reservoirs can lead to insufficient moisture. Conversely, excessively powerful humidifiers, clogged water lines, or malfunctioning sensors can lead to excessive humidity. Environmental factors, such as temperature changes, drafts, and even variations in atmospheric pressure, can influence humidity levels.
Solutions for Resolving Humidity Issues
Addressing humidity problems often involves a systematic approach. First, meticulously check the equipment for any visible signs of damage or malfunction. Second, ensure that the water reservoir is correctly filled and that the humidifier is functioning correctly. Finally, evaluate the incubator’s environment to rule out any external factors impacting humidity.
Troubleshooting Table
| Problem | Possible Cause | Troubleshooting Steps |
|---|---|---|
| Low Humidity | Insufficient water supply, malfunctioning humidifier, clogged water lines, insufficient water reservoir capacity | Ensure water reservoir is full. Inspect humidifier for blockages. Clean water lines and ensure proper water flow. Increase water reservoir size if necessary. Check the humidity sensor calibration. |
| High Humidity | Overly powerful humidifier, clogged water lines, condensation buildup, malfunctioning sensor | Reduce humidifier output. Inspect and clean water lines for blockages. Ensure adequate ventilation to prevent condensation. Check and calibrate the humidity sensor. |
| Unstable Humidity | Temperature fluctuations, drafts, environmental changes, faulty sensor, inadequate water reservoir | Maintain a stable room temperature around the incubator. Seal the incubator to minimize drafts. Ensure the incubator is placed on a stable, level surface. Check and calibrate the humidity sensor. Increase water reservoir capacity if necessary. |
| No Humidity Change | Faulty humidifier, malfunctioning sensor, power issues, improper water supply | Inspect the humidifier for proper operation. Check the sensor for calibration and proper placement. Ensure power supply to the incubator is stable. Verify that the water reservoir is correctly filled and the water level is sufficient for the desired humidity. |
Maintaining Optimal Humidity
Maintaining consistent humidity levels in an incubator is crucial for successful embryonic development and overall health of the specimens. Slight fluctuations can have a significant impact on the growth and survival rate, requiring meticulous attention to detail. This section focuses on strategies for preserving optimal humidity levels over time, emphasizing the importance of preventative measures.Maintaining optimal humidity requires a proactive approach, not just initial setup.
Regular checks, meticulous cleaning, and precise monitoring are essential for preventing issues and ensuring the incubator consistently provides the ideal environment for your specimens.
Regular Maintenance and Cleaning, How to lower humidity in incubator
Proper maintenance and cleaning are vital for preserving incubator efficiency and preventing the buildup of contaminants that can affect humidity levels. Regular cleaning prevents the growth of mold, mildew, and bacteria, which can alter the incubator’s humidity control and potentially harm the specimens. A buildup of these contaminants disrupts the balance within the incubator, making it difficult to maintain the target humidity.
- Cleaning Frequency: Incubators should be cleaned and disinfected at least weekly, and more frequently if needed, depending on usage and the nature of the specimens.
- Specialized Cleaning Solutions: Use appropriate cleaning solutions and disinfectants specifically designed for laboratory equipment. Avoid harsh chemicals that can damage the incubator’s internal components or affect the delicate balance of the humidity control system.
- Detailed Cleaning Procedures: Follow the manufacturer’s instructions for cleaning and disinfecting the incubator. This includes specific instructions for cleaning trays, humidifiers, and other components relevant to humidity control. Failure to follow the specific instructions can lead to inaccurate humidity readings and even equipment malfunction.
Monitoring and Recording Humidity Readings
Regular monitoring and recording of humidity levels are essential for maintaining optimal conditions. Consistent data provides insights into trends and potential problems. Maintaining a detailed log of readings allows for the identification of patterns or deviations from the expected range, allowing for timely interventions and adjustments.
- Frequency of Readings: Monitor humidity levels at least twice daily, and more frequently during critical periods of development.
- Record Keeping: Maintain a logbook or digital spreadsheet to document all humidity readings, along with any adjustments made and the reason for any deviations from the set point.
- Analyzing Trends: Regularly review the recorded data to identify any patterns or trends in humidity fluctuations. This will help in understanding the underlying causes and implementing appropriate corrective measures.
Cleaning and Disinfection Procedures
Thorough cleaning and disinfection of incubator components directly involved in humidity control are crucial to maintain accurate humidity levels and prevent contamination. Contamination compromises the reliability of the readings, impacting the incubator’s ability to maintain the optimal environment for the specimens.
- Humidifier Cleaning: Thoroughly clean the humidifier reservoir and any other components according to the manufacturer’s instructions. Use appropriate disinfectants and rinse thoroughly to avoid residues that can affect the humidity level.
- Tray Cleaning: Clean the incubator trays and any other surfaces that come into contact with water or solutions used to maintain humidity. Use a solution of appropriate cleaning and disinfecting agent, ensuring to avoid harsh chemicals that can damage the surfaces.
- Disinfection Process: Apply a suitable disinfectant to all surfaces after cleaning. Allow the disinfectant to remain on the surface for the recommended contact time as specified by the manufacturer before thoroughly rinsing and drying.
Case Studies of Humidity Issues
Incubator humidity control is crucial for successful embryonic development and chick rearing. Variations in humidity levels can significantly impact the health and survival rates of developing embryos. Understanding real-world examples of humidity problems in incubators, their impact, and how they were resolved provides valuable insights for maintaining optimal conditions. These case studies illustrate the importance of precise humidity management in the incubator environment.Real-world humidity control issues in incubators are not uncommon.
These problems can manifest in various ways, from suboptimal hatch rates to chick mortality. Analyzing these cases reveals common pitfalls and effective solutions. Learning from these experiences allows for the development of robust strategies for maintaining the ideal humidity levels, ultimately improving the success rates of the incubation process.
High Humidity Case Study
High humidity within an incubator can lead to a variety of issues. One such issue is the development of fungal or bacterial growth, particularly if the incubator is not properly ventilated. This can result in compromised chick health, respiratory distress, and even mortality. Another consequence of excessive humidity is an increased risk of water contamination within the incubator, which can further exacerbate the problem.A specific case study involved a commercial hatchery experiencing consistently high humidity levels in their incubator.
The initial problem was detected through monitoring of the humidity readings, which consistently showed values exceeding the optimal range. This high humidity resulted in increased mortality rates among the chicks, particularly during the first few days of incubation.The root cause analysis revealed that a faulty humidity control system was responsible for the issue. The humidity sensor was malfunctioning, consistently reading higher than the actual humidity.
The solution involved replacing the faulty humidity sensor with a new, calibrated sensor. Simultaneously, the ventilation system was checked and optimized to ensure proper air circulation, which helped to maintain the correct humidity levels.The impact of this resolution was significant. The mortality rate among chicks dropped dramatically after the faulty sensor was replaced. The hatchery saw a considerable increase in hatch rates and a marked improvement in chick quality.
This case highlights the importance of regular maintenance and calibration of humidity control equipment to prevent and address potential issues effectively.
Wrap-Up

So, there you have it—a comprehensive guide on how to lower humidity in an incubator. By understanding the factors affecting humidity, employing the right methods, and troubleshooting potential issues, you can create the ideal environment for successful incubation. Remember regular maintenance and monitoring are key for consistent results. Now go forth and incubate with confidence!
FAQ Summary
What’s the ideal humidity range for bird eggs?
It typically ranges from 50% to 60%.
How often should I check the humidity levels?
Regularly, at least once a day, and more often during critical stages.
What are some common causes of high humidity in an incubator?
Issues with ventilation, condensation from the inside of the incubator, or inadequate equipment can contribute.
Can I use a dehumidifier to lower the humidity in my incubator?
Sometimes, but you need to ensure it’s safe and compatible with your incubator design. It’s best to consult the manufacturer’s guidelines.
