How to protect oil paint on metals? This isn’t just about slapping some paint on a piece of metal and calling it a day. It’s a delicate dance between the vibrant hues of your masterpiece and the often-unforgiving nature of the metal beneath. Imagine a beautiful oil painting on a rusty old metal gate, weathering the elements gracefully, a testament to the meticulous preparation and protective measures you’ve taken.
This guide is your roadmap to achieving that very dream.
From meticulous surface preparation to selecting the right primers and paints, and finally, safeguarding your masterpiece from the elements, this guide covers all the bases. We’ll explore the secrets to making your oil paintings on metal last a lifetime, resisting the ravages of time and the elements.
Surface Preparation
Oil paint, a glorious, pigment-laden liquid, deserves a pristine canvas. Metal, with its inherent stubbornness, demands meticulous preparation. Imagine applying paint to a greasy surface—a disaster waiting to happen. Proper surface preparation is the key to achieving a beautiful, long-lasting finish, transforming your metal from a drab canvas to a vibrant masterpiece.
Metal Surface Treatments for Optimal Adhesion
Metal surfaces, whether gleaming steel or weathered copper, must be primed for oil paint. This involves removing contaminants, imperfections, and any pre-existing coatings that might hinder the paint’s bonding. Various treatments, each with its own strengths and weaknesses, ensure a strong, lasting bond.
Cleaning Methods for Metal Surfaces
Preparing metal for oil paint is akin to scrubbing the grime from a precious artifact. Several methods are available, each with its own approach to achieving a clean, receptive surface.
- Degreasing: Often the first step, degreasing tackles oils, grease, and other contaminants. Solvent-based degreasers are powerful, but handle with care due to their volatile nature. For gentler cleaning, dish soap and water might suffice, but for tougher jobs, specialized degreasers are essential.
- Sanding: Sanding removes surface imperfections, creating a rougher texture that improves paint adhesion. Different grit sandpaper is crucial for achieving the right level of roughness, from coarse for significant imperfections to fine for subtle ones. Start with a coarse grit and progressively refine to a fine grit for a smooth finish.
- Etching: Etching creates microscopic pits in the metal surface, providing a better mechanical key for paint adhesion. Acidic solutions are used in this process. However, be cautious, as improper etching can weaken the metal, requiring careful monitoring and safety precautions.
Metal Type-Specific Preparation
Different metals react differently to preparation methods. Consider the metal’s inherent characteristics when choosing your approach.
- Steel: Steel, with its common presence in structures and objects, often needs thorough degreasing and sanding. Rust removal is paramount, and etching might be necessary for optimal adhesion, depending on the severity of the rust.
- Aluminum: Aluminum’s inherent reactivity necessitates careful cleaning. Degreasing and mild sanding are generally sufficient. Avoid harsh chemicals that could corrode the surface.
- Copper: Copper, with its beautiful patina, requires a delicate touch. Degreasing and light sanding are ideal. Avoid excessive abrasion that might damage the surface’s integrity.
Comparative Effectiveness of Surface Cleaning Methods
A table outlining the effectiveness of various methods can provide a useful guide:
| Method | Effectiveness | Pros | Cons |
|---|---|---|---|
| Degreasing | High (removes contaminants) | Removes oils, grease | May require specialized solvents |
| Sanding | Medium (creates texture) | Increases surface roughness | Can damage surface if not handled carefully |
| Etching | High (creates microscopic pits) | Significant improvement in adhesion | Potentially harmful chemicals, requires expertise |
Preparing a Rusty Metal Surface
Rust, a formidable foe of paint adhesion, necessitates a specific approach.
- Thorough Cleaning: Use a wire brush or sandpaper to mechanically remove loose rust. Consider chemical rust removers for stubborn areas, following safety guidelines meticulously.
- Degreasing: Ensure the surface is completely free of rust particles and any residual oils.
- Etching: For maximum adhesion, consider etching the surface, if appropriate for the metal type.
- Priming: Applying a suitable primer before oil paint application is crucial to promote better adhesion and provide a uniform surface for the final paint coat.
Primer Selection and Application
Protecting your metal masterpieces from the ravages of oil paint requires more than just a brush and a can. Think of primer as the unsung hero, the invisible shield that prevents your paint from peeling like a sunburnt sunburn victim. It’s the crucial intermediary layer that ensures your oil paint adheres beautifully and lasts for decades, not just days.
Choosing the right primer is paramount for a long-lasting, aesthetically pleasing finish.Oil paint primers are designed to provide a strong and durable base for oil paint, ensuring lasting beauty and preventing costly repairs. They are like a super glue for metal, bonding the paint to the surface and making it resistant to the elements. A well-chosen and properly applied primer is a cornerstone of a successful oil painting project.
Primer Types and Suitability
Different metal types have different needs, and this influences the primer selection. Zinc, for example, tends to oxidize easily, demanding a primer with excellent corrosion resistance. Steel, while more forgiving, might benefit from a primer with enhanced adhesion. Aluminum, with its unique properties, may require a primer formulated for its particular surface characteristics. Ultimately, understanding the metal’s nature dictates the primer’s characteristics.
Importance of Using a Primer, How to protect oil paint on metals
Primers are essential for several reasons. They create a uniform surface, ensuring even paint application. This uniformity significantly impacts the final aesthetic appeal. Critically, primers offer superior adhesion, preventing paint from bubbling, cracking, or peeling. This is especially important for outdoor applications or projects that will endure significant weathering.
Without a primer, your oil paint job might end up as a short-lived spectacle.
Primer Advantages and Disadvantages
Primers, like any product, come with their pros and cons. Some might offer exceptional adhesion but have a lengthy drying time. Others might have a low cost but not as robust a barrier against moisture. Ultimately, the best primer for your project depends on the specific needs of your metal and your project. The ideal primer balances the qualities you need most.
Comparison of Primer Types
| Primer Type | Adhesion | Drying Time | Cost |
|---|---|---|---|
| Zinc-rich primer | Excellent | Moderate | Medium |
| Epoxy primer | Very Good | Fast | High |
| Acrylic primer | Good | Fast | Low |
| Alkyd primer | Good | Moderate | Medium |
This table offers a glimpse into the world of primers. It’s important to remember that cost doesn’t always equate to quality, and a fast-drying primer might not be ideal for all projects. Carefully consider the table in light of your specific circumstances.
Application Techniques
Proper application of oil paint primers is crucial for achieving a durable and beautiful finish. Use a quality brush, ensuring it’s the right size for the job. Apply the primer in thin, even coats, avoiding excessive buildup. Brush strokes should be consistent and overlapping to create a smooth, uniform surface. This will prevent runs and ensure optimal coverage.
Thorough coverage is critical for the primer to function as a protective layer.
Oil Paint Selection and Application: How To Protect Oil Paint On Metals
Transforming a metal surface from drab to fab requires more than just a coat of paint. It’s a delicate dance of pigments, binders, and application techniques. Choosing the right oil paint and mastering its application is key to achieving a stunning, durable finish. Think of it as a culinary masterpiece – you need the right ingredients and the right recipe to create a truly delicious result.
Oil Paint Types for Metal
Oil paints come in a variety of formulations, each tailored for different effects. Understanding these differences allows you to choose the perfect paint for your project. Some paints are better suited for achieving a smooth finish, while others excel at creating textured effects. The key is knowing what your metal masterpiece needs!
- Alkyd-modified oil paints offer a balance between the flexibility of traditional oil paints and the quicker drying time of alkyd resins. This makes them ideal for those who value speed without sacrificing quality. They often provide excellent adhesion to metal surfaces, making them a popular choice for outdoor applications.
- Linseed oil-based paints, a classic choice, are known for their rich colours and exceptional durability. Linseed oil, derived from flaxseed, acts as the binder, offering a strong bond to the metal surface. The slow drying time of these paints allows for meticulous layering and blending, but requires patience.
- Artists’ oil paints, often used for artistic expression, are known for their vibrant pigments and versatility. These paints can be thinned with solvents to achieve different effects, and their ability to be layered and blended makes them perfect for creating complex designs.
Mixing Oil Paints for Desired Effects
Mixing oil paints is an art in itself. It’s a creative process, akin to composing music. Each colour and pigment contributes to the final result. Experimentation is key to achieving the perfect shade.
- Color Mixing Techniques: The process involves carefully combining different colours to create the desired shade. Start with small quantities of paint and gradually add more until the desired hue is achieved. Using a palette knife or a mixing palette can help prevent the paint from getting too thick.
- Achieving Specific Finishes: Different mixing techniques can lead to various finishes. For a smooth finish, mix the paints thoroughly. For a textured finish, incorporate different textures or mediums into the mix.
Application Techniques for Metal
Proper application is crucial for a professional finish. Brush strokes, layering, and blending techniques will affect the overall aesthetic.
- Brush Strokes: Varying brush strokes can create different visual effects. Broad, sweeping strokes can create a bold look, while delicate strokes produce a subtle effect. Experiment with different brush types and sizes for different results.
- Layering: Applying multiple thin layers of oil paint allows for a smooth and even finish. Each layer should be allowed to dry completely before applying the next. This technique allows for a more nuanced and refined look. Think of it like building a beautiful, layered cake!
- Blending: Blending oil paints creates smooth transitions between colours. Using a soft brush and blending mediums, carefully blend the colours to achieve seamless transitions. This technique is particularly important for creating realistic effects.
Oil Paint Comparison Table
A concise overview of common oil paint types.
| Paint Type | Durability | Drying Time | Colour Options |
|---|---|---|---|
| Alkyd-modified oil paints | Good | Medium | Wide range, including both traditional and modern colors |
| Linseed oil-based paints | Excellent | Slow | Rich, deep colors |
| Artists’ oil paints | Good | Slow | Vast array of vibrant pigments |
Achieving a Smooth Finish
A smooth finish is the hallmark of a professional-looking painted metal surface. It’s all about precision and attention to detail.
- Preparation: Ensure the metal surface is clean, smooth, and free of any imperfections. This is paramount for a beautiful finish.
- Thinning: Thinning the oil paint with appropriate solvents can help create a smoother application. This helps to control the flow and prevent runs.
- Even Application: Apply the paint in even strokes, avoiding runs or drips. Smooth the paint out with a soft brush to remove any brush marks.
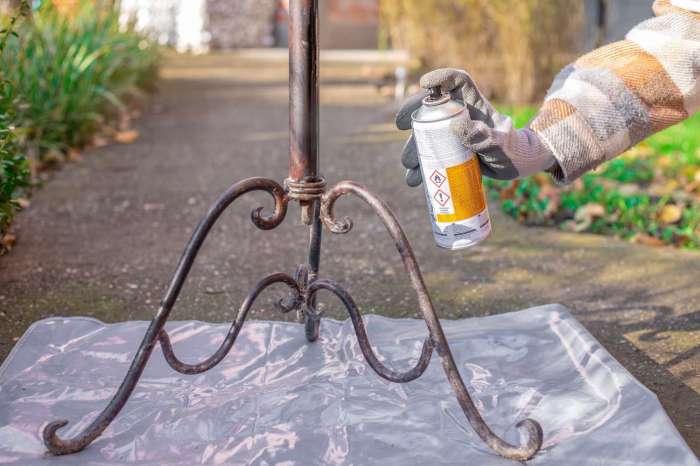
Protecting the Painted Surface
Oil paint on metal, a beautiful blend of artistry and durability, needs a little TLC to stay looking its best. Just like a prized vintage car, your metal masterpiece deserves a protective layer to fend off the elements and maintain its stunning sheen. Let’s explore how to keep your painted metal masterpiece looking fabulous for years to come!
Environmental Protection Measures
Protecting oil paint on metal from the ravages of time requires a multi-pronged approach. Ignoring environmental factors is like leaving a priceless painting outside in a torrential downpour – disaster is inevitable! These precautions are essential to ensure your artwork retains its vibrancy and longevity.
- Regular Cleaning: A gentle washing with a mild soap and water solution, followed by a thorough drying, is a cornerstone of preventative care. This simple step removes dust, grime, and other pollutants that can harbor moisture and accelerate degradation. Avoid harsh chemicals, as they can damage the paint.
- Shelter from the Elements: When possible, provide shelter from direct sunlight, heavy rain, and extreme temperature fluctuations. A porch, awning, or even a well-ventilated shed can make a significant difference in preserving the integrity of your painted metalwork.
- Protecting from Moisture: Moisture is the enemy of any painted surface. Regularly inspect for any signs of water damage, and address any leaks or condensation promptly. Proper ventilation and appropriate sealing measures can dramatically reduce the risk of moisture intrusion.
- UV Protection: Ultraviolet (UV) rays are relentless paint-faders. Applying a UV-resistant protective coating, like a high-quality varnish, significantly minimizes the impact of sun exposure, preserving the paint’s color and brilliance. Consider the location of the metalwork and choose a varnish that is tailored to the level of UV exposure.
- Temperature Control: Avoid exposing the metal to extreme temperature swings. Rapid temperature changes can cause expansion and contraction, potentially leading to cracking and peeling of the paint. Creating a stable environment is key.
The Role of Varnish and Sealants
Varnishes and sealants act as a protective shield, safeguarding your oil paint from the elements. They form a transparent layer over the paint, creating a barrier against moisture, UV radiation, and even some forms of physical damage. Think of them as a super-powered invisible force field for your artwork!
- Varnish Selection: Choose a varnish specifically formulated for oil paints on metal. Consult with an expert or research reputable brands known for their compatibility with oil paint and metal surfaces. Selecting the right varnish is crucial for long-term protection.
- Application Technique: Proper application is just as important as the varnish itself. Follow the manufacturer’s instructions meticulously. Thin, even coats are best, allowing the varnish to penetrate and create a protective layer without obscuring the original paint’s beauty. Multiple thin coats are usually better than one thick coat.
- Sealant Considerations: Sealants can offer additional protection against moisture and other environmental factors. Consider using sealants in areas prone to water or humidity damage. They often work well in conjunction with varnish to create a complete protective system.
Impact of Environmental Factors
Moisture, UV rays, and temperature fluctuations are the trifecta of paint-destroying forces. Understanding their impact is critical to formulating a sound preservation strategy.
- Moisture’s Toll: Moisture intrusion leads to paint degradation, flaking, and eventual deterioration. The water molecules literally break down the paint’s structure, like a hungry insect devouring a prized flower. Addressing moisture issues promptly is paramount.
- UV’s Fading Touch: Prolonged exposure to UV radiation gradually fades and degrades the paint’s color, making it appear dull and lifeless. Imagine a vibrant sunset slowly losing its hue over time; UV rays have a similar effect on paint. Protecting against UV damage is crucial.
- Temperature’s Role: Extreme temperature changes can cause paint to crack and peel, creating unsightly blemishes. This is akin to putting a hot object in the freezer—it will surely crack. A consistent temperature environment is key to preserving the integrity of your painted metalwork.
Protective Coatings Effectiveness
The following table Artikels the effectiveness of various protective coatings against environmental damage. Choosing the right coating is essential for long-term protection.
| Coating | Protection against Moisture | Protection against UV | Protection against Temperature Fluctuation |
|---|---|---|---|
| High-quality varnish | Good | Excellent | Good |
| Acrylic sealant | Very Good | Moderate | Fair |
| Epoxy primer | Excellent | Good | Excellent |
Maintenance and Touch-ups
Regular maintenance is crucial for keeping your painted metalwork in pristine condition. It’s like taking your favorite sports car for routine maintenance – preventing problems before they start.
- Regular Inspections: Inspect the painted surface for any signs of damage, such as cracks, peeling, or discoloration. Early detection is key to prompt action.
- Prompt Touch-ups: Address any damage promptly. A small touch-up now can prevent a major repair later, saving you time and money.
Troubleshooting Issues
Oh dear, a mishap with your oil-painted metal masterpiece? Fear not, intrepid artist! This section is your troubleshooting manual, a guide to navigating the occasional hiccups that can plague even the most meticulous painter. We’ll dissect common problems, delve into their causes, and equip you with the solutions to get your metal back on track. From stubborn chips to unsightly cracks, we’ll cover it all, ensuring your artwork remains a testament to your talent, not a victim of its own creation.
Common Painting Issues on Metal
Identifying the source of a problem is key to finding the right fix. A chipped paint job could stem from a multitude of issues, including inadequate surface preparation, the wrong type of primer, or even the weather. Understanding the cause allows you to tackle the problem head-on, rather than just applying a band-aid. Different solutions are required for different problems.
A touch-up might fix a small chip, while a complete repainting might be necessary for extensive damage.
Causes and Solutions for Painting Issues
| Issue | Cause | Solution |
|---|---|---|
| Chipping | Insufficient surface preparation, using a poor quality paint, or mechanical impact. | For minor chips, use a touch-up paint that matches the original precisely. For larger chips, carefully remove the damaged paint with a scraper or sanding block. Apply a fresh coat of primer and then paint. |
| Cracking | Poor adhesion between the primer and the metal, or improper drying of the paint layers. Changes in temperature and humidity can also contribute. | Address the underlying cause. Ensure proper surface preparation and allow each coat to dry completely before applying the next. Consider a more flexible paint if cracking is a recurring issue. If the cracks are extensive, consider a complete repainting. |
| Peeling | Poor adhesion between layers of paint, improper surface preparation, or using incompatible paints. | Carefully remove the loose paint. Sand the area thoroughly and apply a fresh coat of primer. Select a paint that is compatible with the metal and previous layers. Ensure that the surface is completely clean and dry before application. |
Handling Chipping, Cracking, and Peeling
Chipping, cracking, and peeling are common issues that can occur with oil paint on metal. The solutions often involve targeted repair, from touch-ups to complete repainting. For instance, a small chip can be addressed with a touch-up using a matching shade of paint. However, extensive cracking or peeling may necessitate a more thorough approach, including complete removal of the old paint, surface preparation, and reapplication of a fresh coat of paint.
Remember, a meticulous approach in these situations is essential to maintain the integrity and aesthetic appeal of your artwork.
Final Summary

In conclusion, achieving lasting beauty with oil paint on metal involves more than just brushstrokes. It demands a deep understanding of metal types, surface preparation, primer selection, and, crucially, protective measures. By following the steps Artikeld in this guide, you’ll be well-equipped to create stunning metal artwork that withstands the test of time, each layer of paint a testament to your artistic vision and meticulous craftsmanship.
FAQ Section
What are some common issues when painting oil paint on metal?
Common issues include paint chipping, cracking, peeling, and rusting, often stemming from improper surface preparation, incorrect primer selection, or environmental factors. Addressing these issues promptly through touch-ups or repainting is key.
How do I prepare a rusty metal surface for oil paint?
Thorough rust removal is essential. Aggressive methods like wire brushing or sanding are often necessary, followed by careful cleaning and degreasing to ensure optimal adhesion.
What are the best protective coatings for oil paint on metal?
Varnishes and sealants play a vital role in safeguarding your painted metal from environmental damage. Choosing the right type based on the specific environment is key to preserving the beauty and longevity of your artwork.
Can I use acrylic paints over oil paints on metal?
While possible, it’s generally not recommended. The different chemical compositions and drying times may lead to incompatibility and reduced durability.
