How to rebuild a hydraulic cylinder is a critical process for maintaining the functionality and safety of hydraulic systems. This comprehensive guide provides a step-by-step approach to effectively rebuild a hydraulic cylinder, encompassing everything from initial identification of the need for rebuilding to final verification of functionality. Understanding the different types of hydraulic cylinders and the potential consequences of neglect is paramount to the successful completion of the task.
The process begins with a thorough assessment of the cylinder’s condition, identifying potential damage and failure modes. Proper tools and materials are crucial, along with meticulous disassembly and component inspection. Accurate reassembly, emphasizing proper alignment and torque specifications, is followed by rigorous testing to ensure the cylinder’s operational integrity. Throughout the entire process, prioritizing safety protocols is essential to prevent potential hazards.
Introduction to Hydraulic Cylinders
Hydraulic cylinders are essential components in numerous industrial applications, transforming hydraulic pressure into linear mechanical force. They are a crucial part of machinery ranging from construction equipment to automotive systems, and even in less obvious places like automated assembly lines. Their ability to exert substantial force over a considerable distance makes them indispensable in tasks requiring high power and precision.Understanding the various types of hydraulic cylinders and their specific applications is crucial for effective maintenance and optimal performance.
Proper maintenance and rebuilding procedures are critical for preventing costly downtime and ensuring the longevity of these vital systems. Neglecting maintenance can lead to catastrophic failures, resulting in expensive repairs, potential injuries, and even equipment damage.
Hydraulic Cylinder Types and Applications
Different types of hydraulic cylinders cater to various needs and applications. Choosing the right cylinder depends on factors like the required force, stroke length, and operating environment. The following table provides a comparison of common hydraulic cylinder types and their typical applications:
| Cylinder Type | Description | Typical Applications |
|---|---|---|
| Single-Acting Cylinder | These cylinders generate force in one direction only, requiring an external mechanism to return the piston. | Gate valves, simple lifting mechanisms, and some types of automated doors. |
| Double-Acting Cylinder | These cylinders generate force in both directions, with pressure on either side of the piston providing the force for extension and retraction. | Forklifts, excavators, and most industrial presses; applications requiring controlled retraction and extension. |
| Telescopic Cylinder | These cylinders consist of multiple stages, allowing for a significant stroke length in a compact design. | Construction equipment like excavators, telescopic handlers, and similar machinery where extended reach is necessary. |
| Pneumatic Cylinder | These are similar to hydraulic cylinders but utilize compressed air instead of hydraulic fluid. | Applications where the need for hydraulic fluid is undesirable, like environments with risk of contamination. |
Importance of Proper Maintenance
Regular maintenance is paramount for the reliability and longevity of hydraulic cylinders. Preventive measures, such as routine inspections and lubrication, can significantly reduce the risk of failures. This includes checking for leaks, ensuring proper lubrication, and inspecting seals for wear and tear. By addressing potential issues proactively, you can prevent costly repairs and ensure consistent performance.
Consequences of Neglecting Maintenance
Neglecting maintenance procedures can lead to severe consequences. Leaks can lead to loss of hydraulic fluid, impacting system pressure and potentially causing catastrophic failure. Failing to replace worn seals can lead to leakage, reduced efficiency, and ultimately, equipment breakdown. Ignoring potential issues early on can result in costly repairs and prolonged downtime, affecting production schedules and overall operational efficiency.
For example, a construction company that neglects maintenance on its excavators may face significant delays and increased costs due to breakdowns and repairs.
Identifying the Need for Rebuilding
Hydraulic cylinders, vital components in countless machinery, can experience deterioration over time. Understanding the signs of impending failure is crucial for proactive maintenance and avoiding costly downtime. Proper identification of issues allows for timely intervention, preventing more extensive damage and maximizing equipment lifespan.
Symptoms Indicating Rebuilding Needs
Identifying the need for rebuilding a hydraulic cylinder hinges on recognizing specific symptoms. Leaks, both internal and external, are a primary indicator. A consistent hissing sound, or a sudden, significant drop in pressure, signals internal leakage. External leaks manifest as fluid pooling around the cylinder or noticeable fluid trails. Reduced force output, despite adequate pressure, suggests internal component damage or wear.
Sticking or binding of the cylinder rod indicates issues with seals or lubrication. A grinding or scraping sound during operation is a strong indication of mechanical damage within the cylinder. Finally, irregular or inconsistent movement patterns also signify potential problems.
Common Causes of Cylinder Failure
Cylinder failure often stems from a combination of factors. Over time, internal seals degrade due to exposure to high temperatures and pressures, leading to leaks and loss of function. Abrasion from contaminants within the hydraulic fluid or improper maintenance procedures also contribute to seal damage. Excessive load beyond the cylinder’s design capacity causes premature wear on internal components, including the rod and cylinder barrel.
Corrosion due to environmental factors like moisture and contaminants in the fluid can compromise the cylinder’s integrity. Improper lubrication, resulting in excessive friction, leads to rapid wear and tear.
Failure Modes of Hydraulic Cylinders, How to rebuild a hydraulic cylinder
Different failure modes manifest in various ways. Internal leakage, a common failure mode, can cause reduced output and premature seal wear. External leakage, often due to seal damage, results in fluid loss and potential environmental contamination. Sticking or binding, caused by worn seals or lubrication issues, leads to impaired functionality and potential mechanical damage. Complete failure, such as catastrophic cylinder rupture, results from severe internal damage and can be highly dangerous.
Understanding these failure modes is crucial to predicting potential issues and implementing preventative measures.
Visual Inspection Steps
A thorough visual inspection of a hydraulic cylinder involves a systematic approach. First, inspect the cylinder barrel for visible signs of damage, such as dents, scratches, or corrosion. Assess the rod for any bending, kinking, or damage to the threads. Carefully examine the seals and packing for cracks, wear, or tears. Look for any signs of leakage around the seals, fittings, and cylinder ends.
Evaluate the condition of the mounting brackets and any associated components for potential damage. Inspect the entire system for any signs of contamination or debris. Finally, visually check for signs of excessive wear on the piston rod or the cylinder barrel.
Damage Types and Repair Strategies
| Damage Type | Repair Strategy ||—|—|| Minor surface scratches | Light sanding or polishing, followed by repainting/protective coating || Seal damage | Replacement of damaged seals with appropriate, high-quality seals || Internal leakage | Repairing or replacing the damaged internal components, potentially including the piston or cylinder bore || External leakage | Repairing the damaged seals or fittings; in severe cases, replacement of the entire cylinder section || Rod bending/kinking | Straightening the rod, potentially requiring specialized tools or replacement of the rod if severe || Corrosion | Removing the corrosion with appropriate cleaning agents, followed by rustproofing measures; replacement if severe || Excessive wear | Replacement of the worn components, such as the piston or cylinder bore |
Gathering Required Tools and Materials
Rebuilding a hydraulic cylinder demands meticulous attention to detail and a comprehensive toolkit. Proper selection of tools and high-quality replacement parts is paramount to achieving a reliable and long-lasting repair. This section details the essential tools and materials, their specifications, and the crucial role of quality components in the process.
Essential Tools
Careful selection of tools is critical to ensure precision and safety during the rebuilding process. Improper tools can lead to damaged parts and compromised performance. A well-equipped toolkit provides the necessary precision for disassembly, cleaning, and reassembly, reducing the risk of errors.
- Hydraulic Cylinder Press: A hydraulic cylinder press is essential for compressing and expanding the cylinder components. The press’s capacity must be sufficient to handle the cylinder’s bore diameter and stroke length. Ensure the press has the correct specifications for the specific cylinder type. For instance, a 50-ton press might be suitable for a medium-sized cylinder, while a larger 100-ton press is needed for heavier-duty cylinders.
- Precise Measuring Tools: Micrometers, calipers, and dial indicators are crucial for accurate measurements of piston rod diameters, bore sizes, and other critical dimensions. These tools help ensure that all parts are properly aligned and fit within the specified tolerances. A micrometer with a 0.001mm accuracy is ideal for measuring piston rod diameter, ensuring a tight fit.
- Hydraulic Fittings and Connections: Appropriate hydraulic fittings and connections are necessary for maintaining the hydraulic system’s integrity. The type of fitting used depends on the cylinder’s specific design and the hydraulic fluid employed. Ensure the correct thread sizes and materials for the fittings match the cylinder’s requirements. For example, using metric fittings on a US-standard cylinder will lead to incompatibility.
- Cleaning Supplies: High-quality cleaning agents, including degreasers and solvents, are essential for removing contaminants from the cylinder components. Appropriate solvents will prevent damaging the components and the surfaces.
- Safety Equipment: Safety glasses, gloves, and appropriate protective gear are vital for preventing injuries during the dismantling and assembly process. Always prioritize safety to avoid accidents.
Replacement Parts
High-quality replacement parts are essential for a successful rebuild. Using inferior components can lead to premature failure and costly repairs in the future. Carefully selecting the correct parts with appropriate specifications is critical.
- Piston Rod: The piston rod must be of the correct material and diameter to maintain the cylinder’s operational efficiency. It must meet the manufacturer’s specifications for strength and dimensional tolerances.
- Cylinder Body: The cylinder body must be inspected for any damage or wear that could affect the sealing or operation of the cylinder. The material should align with the original cylinder, ensuring the right structural integrity.
- Gaskets and Seals: These components ensure a leak-proof seal. Using substandard seals will compromise the cylinder’s hydraulic function. The seals should be precisely fitted to the cylinder bore and piston rod.
- O-Rings: O-rings are critical seals. They must be of the correct material, dimensions, and hardness to maintain a proper seal. The correct material selection will ensure that the O-rings do not degrade under pressure and temperature conditions.
Material Specifications and Tolerances
Precise tolerances are crucial for ensuring proper cylinder function. Deviations from the manufacturer’s specifications can lead to leakage, decreased performance, or even catastrophic failure.
| Part | Specification | Tolerance | Importance |
|---|---|---|---|
| Piston Rod | Material: Steel | ± 0.005 inches | Ensures consistent load capacity and prevents premature wear. |
| Cylinder Body | Material: Steel Alloy | ± 0.002 inches | Maintains precise alignment of the piston rod and ensures proper sealing. |
| Gaskets | Material: Buna-N | ± 0.001 inches | Critical for leak-proof sealing under hydraulic pressure. |
Disassembly Procedures
Mastering the disassembly of a hydraulic cylinder is crucial for successful rebuilding. Careful, methodical steps prevent damage to internal components and ensure a precise reassembly. Proper handling of disassembled parts guarantees minimal wear and tear, preserving their integrity and facilitating a smooth rebuild.
Step-by-Step Disassembly
Thorough disassembly is vital for a successful rebuild. Each step, from initial separation to component isolation, plays a critical role in the overall process. This detailed guide will Artikel the sequence, enabling a precise and efficient procedure.
- Initial Separation: Begin by carefully disconnecting all external connections, including hydraulic lines and mounting brackets. Ensure all fasteners are loosened or removed, avoiding any forceful or jarring movements that might damage delicate parts. This initial step prevents unintended damage and sets the stage for a safe and controlled disassembly.
- Cylinder Body Removal: Carefully remove the cylinder body from its mounting location. If there are any retaining clips or pins, identify them and note their position for later reassembly. Proper identification ensures a precise reinstallation and prevents misalignment.
- Piston Rod Extraction: Carefully extract the piston rod, taking note of any potential damage to the rod or the cylinder bore. Use appropriate tools to avoid scratching or damaging the rod. The rod extraction method should be tailored to the specific cylinder design to prevent damage. A specific tool or method might be necessary to remove the piston rod smoothly and efficiently.
- Piston Assembly Removal: Remove the piston assembly from the cylinder body. This step often involves carefully disassembling the piston seals, rings, and other components. Note the position and orientation of each part for accurate reassembly. Proper identification of each part prevents mistakes in reassembly and ensures optimal cylinder performance.
- Detailed Component Separation: Once the piston assembly is out, meticulously separate all its components. Carefully inspect each part for wear or damage. Document any discrepancies for reference during the rebuild process. Proper inspection of each part ensures a thorough evaluation of wear and tear.
Proper Handling and Storage of Disassembled Parts
Safe handling and storage of disassembled parts are critical to prevent damage. This ensures the parts remain in optimal condition for reassembly. Proper handling prevents scratches, dents, or other damage that could compromise the cylinder’s functionality.
- Cleanliness: Clean each part thoroughly with a suitable solvent. This eliminates any contaminants or debris that might have accumulated during disassembly. Proper cleaning ensures optimal functioning and longevity of the parts.
- Part Identification: Label each part clearly for easy identification during reassembly. Use markers or labels to indicate the original position of each part. Accurate labeling simplifies the reassembly process and prevents mistakes.
- Storage Conditions: Store disassembled parts in a clean, dry environment to prevent corrosion or damage. Use appropriate containers to prevent parts from getting mixed up or damaged. Proper storage maintains the quality and integrity of the parts for optimal reassembly.
Disassembly Sequence Table
This table Artikels the disassembly sequence and the required tools for each step.
| Step | Description | Tools Required |
|---|---|---|
| 1 | Disconnect external connections | Wrench set, pliers |
| 2 | Remove cylinder body | Lifting tools, jack |
| 3 | Extract piston rod | Special rod extraction tool |
| 4 | Remove piston assembly | Pliers, screwdrivers |
| 5 | Separate piston components | Tweezers, picks |
Inspection and Repair of Components

Rebuilding a hydraulic cylinder involves a meticulous inspection of every component. A thorough examination reveals the extent of wear and tear, guiding informed decisions on repairs. Identifying and addressing issues early minimizes the risk of further damage and ensures optimal performance post-rebuilding. This process is crucial for the cylinder’s longevity and the safety of the system it serves.
Inspecting the Cylinder Barrel
The cylinder barrel, the heart of the hydraulic system, is assessed for cracks, dents, or significant corrosion. A visual inspection is the first step, looking for irregularities. If corrosion is present, the extent of damage is determined, as some corrosion may be superficial, while other instances may necessitate replacement. Furthermore, any signs of scoring or galling, indicating potential metal-to-metal contact, are noted.
The internal surface is examined for scoring or imperfections, which could affect the cylinder’s sealing.
Inspecting the Piston Rod
The piston rod is crucial for transmitting force. Its condition is evaluated for wear, scoring, or any deformation. Surface irregularities, such as scratches or pitting, indicate the presence of friction and potential leaks. A visual examination is combined with a careful measurement of the rod’s diameter to determine the extent of wear. Significant wear necessitates replacement to ensure smooth operation.
Inspecting the Seals
The condition of the seals directly impacts the cylinder’s functionality. Damaged seals lead to leakage, reducing efficiency and potentially causing system failure. The seals are inspected for cracks, tears, or excessive wear. The seal’s ability to maintain a proper seal is verified by visual inspection and pressure tests. If a seal shows signs of damage, a complete replacement is recommended to prevent leakage and ensure proper functionality.
Inspecting the Piston
The piston is inspected for scoring, distortion, or significant wear. Any damage to the piston will impact the efficiency of the cylinder. Additionally, the piston’s ability to move smoothly within the cylinder barrel is assessed. The piston’s alignment and any signs of friction or sticking are noted, as these can affect the cylinder’s overall performance.
Inspecting the Mounting Hardware
Mounting hardware, such as bolts, nuts, and brackets, should be inspected for signs of damage or stress. This includes checking for corrosion, breakage, or loose fasteners. Worn or damaged hardware may compromise the cylinder’s structural integrity, potentially affecting the cylinder’s performance or leading to premature failure.
Inspection Checklist
| Component | Inspection Criteria | Repair/Replacement |
|---|---|---|
| Cylinder Barrel | Cracks, dents, corrosion, scoring, galling, internal imperfections | Repair or replacement as needed |
| Piston Rod | Wear, scoring, deformation, surface irregularities | Replacement if significant wear is detected |
| Seals | Cracks, tears, excessive wear | Complete replacement |
| Piston | Scoring, distortion, wear, smooth movement | Replacement if damaged or showing significant wear |
| Mounting Hardware | Corrosion, breakage, loose fasteners | Repair or replacement as needed |
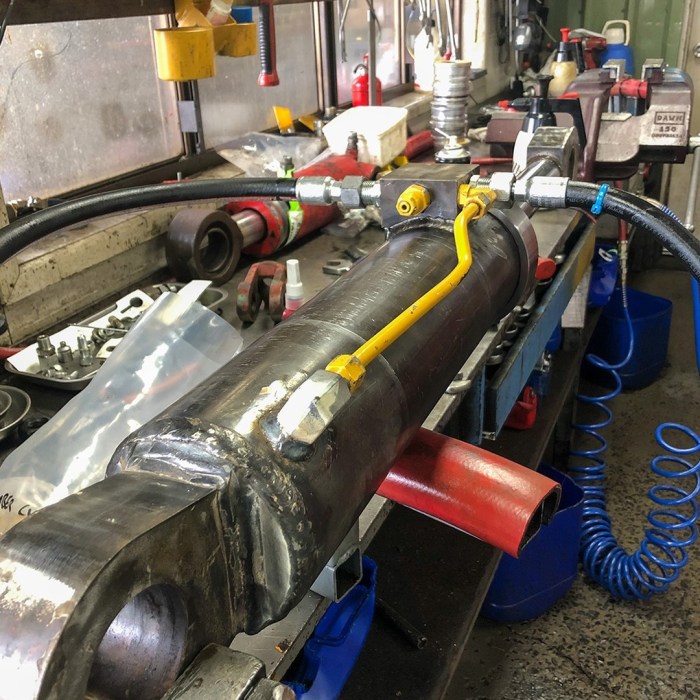
Reassembly Procedures
Reassembling a hydraulic cylinder demands meticulous attention to detail and adherence to precise specifications. Incorrect procedures can compromise the cylinder’s functionality and longevity, potentially leading to costly repairs or even accidents. This section Artikels the critical steps involved in reassembling a hydraulic cylinder, from component placement to final functional checks.
Step-by-Step Reassembly Procedure
Proper reassembly ensures optimal cylinder performance and longevity. Each step requires careful handling and adherence to torque specifications. Failure to follow these procedures can lead to leaks, reduced pressure, or premature component failure.
- Step 1: Preparing the Components: Ensure all components are clean, free of debris, and lubricated according to manufacturer specifications. This includes the piston rod, piston, cylinder barrel, and seals. Visual inspection of each part is crucial to identify any damage or defects that might compromise the cylinder’s performance. This step also involves checking the condition of the O-rings, seals, and other gaskets.
- Step 2: Installing the Piston: Carefully align the piston within the cylinder barrel, ensuring it sits squarely and evenly. Excessive force should be avoided to prevent distortion or damage to the piston or cylinder barrel. A properly fitted piston is critical for smooth operation. (Visual: An image of the piston being inserted into the cylinder barrel, showcasing proper alignment. Note the gap between the piston and the barrel, which should be minimal.)
- Step 3: Installing the Piston Rod: The piston rod must be carefully guided into the piston, ensuring proper alignment and secure seating. Over-tightening can damage the rod or piston. Proper lubrication at the piston rod-piston interface is vital. (Visual: A close-up image demonstrating the piston rod being inserted into the piston. The image should show the rod entering the piston with a smooth, even motion.
Note the lubrication around the rod-piston joint.)
- Step 4: Installing the Seals and Gaskets: The seals and gaskets are crucial for preventing leakage. Install them precisely according to the manufacturer’s instructions, ensuring proper sealing and alignment. Incorrect installation can result in leaks and reduced pressure. (Visual: A close-up image showcasing the installation of seals and gaskets. The image should illustrate the proper placement of seals and gaskets around the piston and piston rod.)
- Step 5: Assembling the Cylinder Head: Carefully assemble the cylinder head, ensuring all mounting bolts are properly aligned and tightened to the correct torque specifications. Tightening in stages and in a crisscross pattern is crucial. Improper torque can cause premature failure of the cylinder head or damage to the threads. (Visual: A photo of the cylinder head being bolted onto the cylinder barrel, highlighting the correct tightening pattern.
Note the precise positioning of the bolts.)
- Step 6: Final Checks and Tightening: Thoroughly inspect all connections and components for any signs of misalignment or looseness. Re-tighten any loose components to ensure proper functionality. This step is critical for achieving a leak-free and reliable system. (Visual: A panoramic image showcasing the fully assembled cylinder, with attention to detail on all connections. Note the uniformity and alignment of all components.)
Importance of Alignment and Torque Specifications
Precise alignment and torque specifications are crucial for the reliable operation of the hydraulic cylinder. Deviation from these specifications can lead to significant issues.
- Alignment: Misaligned components can cause friction, reduced efficiency, and potential leaks. Proper alignment ensures smooth operation and longevity.
- Torque: Incorrect torque values can lead to excessive stress on components, resulting in breakage, leaks, or reduced functionality. Adherence to torque specifications is essential for safety and optimal performance.
Functional Check Procedure
A thorough functional check verifies the integrity of the reassembled hydraulic cylinder. This procedure ensures the cylinder operates as intended.
- Pressure Test: Apply a controlled pressure to the cylinder and monitor for any leaks. A leak-free system indicates proper sealing and alignment.
- Movement Test: Initiate the cylinder’s movement and observe for smooth, consistent operation. Any resistance or unusual sounds signal potential issues that need to be addressed.
Reassembly Sequence Table
The table below Artikels the sequence of reassembly steps and the tools required for each.
| Step | Description | Tools Required |
|---|---|---|
| 1 | Preparing the Components | Cleaning supplies, Lubricant, Screwdrivers, Pliers |
| 2 | Installing the Piston | Alignment tools, Safety glasses |
| 3 | Installing the Piston Rod | Torque wrench, Lubricant, Screwdrivers |
| 4 | Installing the Seals and Gaskets | Gloves, Seal installation tool |
| 5 | Assembling the Cylinder Head | Torque wrench, Allen wrenches, Safety glasses |
| 6 | Final Checks and Tightening | Torque wrench, Lubricant, Screwdrivers |
Testing and Verification: How To Rebuild A Hydraulic Cylinder
Bringing your hydraulic cylinder back to life involves more than just reassembly. Thorough testing ensures proper function and safety, guaranteeing optimal performance and longevity. Correctly executed tests validate the integrity of seals, components, and the overall system, preventing potential failures down the line.
Functional Testing Procedure
After reassembly, the hydraulic cylinder must undergo a comprehensive functional test to confirm its operational efficiency. This procedure involves a series of steps designed to evaluate the cylinder’s ability to extend and retract under various conditions. Start with a low-pressure test, progressively increasing the pressure to simulate typical operating conditions. Observe the cylinder’s movement, ensuring smooth and consistent extension and retraction without any unusual noises or resistance.
Pressure Rating Verification
Verifying the cylinder’s pressure rating is critical. Using a calibrated pressure gauge, apply a pressure slightly below the maximum specified rating for the cylinder. Monitor the gauge readings during both extension and retraction phases. Record the pressure readings and compare them to the cylinder’s specifications. Ensure that the cylinder operates reliably and safely within its rated pressure limits.
Sealing Integrity Evaluation
Ensuring the sealing integrity of the cylinder is paramount. A leak test is essential to detect any potential leaks in the seals, piston rod, or other components. Inspect the cylinder for any signs of leakage, such as drips or noticeable fluid loss. This step involves carefully observing the cylinder and its surroundings for any signs of fluid accumulation.
Leak Tests and Pressure Tests
Leak tests and pressure tests are crucial in verifying the cylinder’s operational efficiency. Leak tests, performed under low-pressure conditions, detect small leaks that might not be apparent during visual inspection. Pressure tests, conducted at progressively increasing pressures, help determine the cylinder’s ability to withstand the required operating pressure. Record the test parameters, including pressure levels and observations, for future reference.
Safety Precautions During Testing
Safety precautions are non-negotiable during testing. Always wear appropriate personal protective equipment (PPE), including safety glasses, gloves, and sturdy footwear. Ensure the surrounding area is clear of obstructions and personnel. Properly handle the hydraulic fluid, following established safety protocols and procedures. Disconnect the power supply and ensure all connections are secure before initiating any test.
Test Parameters and Results
| Test Parameter | Expected Result | Actual Result |
|---|---|---|
| Initial Leak Test (Low Pressure) | No visible leaks | [Insert observation here] |
| Pressure Test (Step 1) | Cylinder extends and retracts smoothly | [Insert observation here] |
| Pressure Test (Step 2) | Cylinder extends and retracts smoothly, pressure holds | [Insert observation here] |
| Pressure Test (Step 3) | Cylinder extends and retracts smoothly, pressure holds | [Insert observation here] |
| Pressure Test (Step 4) | Cylinder extends and retracts smoothly, pressure holds | [Insert observation here] |
Safety Precautions
Rebuilding hydraulic cylinders involves working with potentially hazardous high-pressure systems. Prioritizing safety throughout the entire process is paramount. Failure to adhere to safety protocols can lead to serious injuries or equipment damage. This section details crucial safety precautions and best practices to ensure a safe and efficient rebuilding procedure.
Personal Protective Equipment (PPE)
Proper personal protective equipment (PPE) is essential for safeguarding against potential hazards. This includes more than just basic safety glasses. A comprehensive approach is necessary to mitigate risks effectively.
- Eye Protection: Safety glasses or goggles with side shields are required to protect the eyes from flying debris, hydraulic fluid splashes, and potential impacts during disassembly and reassembly. Impact-resistant face shields are recommended for added protection in case of unexpected occurrences.
- Hand Protection: Heavy-duty work gloves, preferably made of leather or reinforced materials, should be worn to protect hands from sharp edges, potential cuts, and exposure to hydraulic fluids. Gloves must be appropriate for the specific tasks being performed.
- Body Protection: A long-sleeved shirt, long pants, and closed-toe shoes are essential to protect the skin from hydraulic fluid exposure and accidental contact with sharp components. Steel-toed safety shoes provide foot protection from falling objects and debris.
- Respiratory Protection: If working with hydraulic fluids that produce harmful fumes or vapors, a respirator appropriate for the specific contaminants must be used. Consult the Material Safety Data Sheet (MSDS) for the hydraulic fluid to determine the necessary respiratory protection.
High-Pressure System Handling
Working with hydraulic systems requires meticulous attention to high-pressure procedures. Negligence in this area can lead to serious accidents.
- Pressure Relief: Always ensure that the hydraulic system pressure is completely relieved before starting any disassembly or maintenance tasks. Use the appropriate pressure-relief valves and procedures to avoid unexpected pressure surges. Verify that the pressure relief valve is functioning correctly before beginning work.
- Proper Handling of Components: Use appropriate tools and techniques to handle high-pressure components. Avoid forceful movements that could lead to accidental component damage or releases of pressure.
- Fluid Handling: Use appropriate containers for collecting hydraulic fluid and follow proper disposal procedures. Proper disposal is crucial to prevent environmental contamination and to comply with local regulations.
Safety Protocols for Hydraulic Cylinder Maintenance
Adherence to established safety protocols is critical for preventing accidents and ensuring the safety of the work environment.
- Lockout/Tagout Procedures: Implement lockout/tagout procedures for all hydraulic systems to prevent unexpected activation or operation during maintenance. This is critical to ensure that no one can inadvertently energize the system.
- Emergency Procedures: Establish and clearly communicate emergency procedures in case of spills, leaks, or other accidents. The location of emergency equipment, such as fire extinguishers and first-aid kits, should be clearly marked.
- Proper Training: Ensure all personnel involved in the rebuilding process have received adequate training on safe practices and procedures for working with hydraulic cylinders and high-pressure systems. Regular safety training sessions are crucial.
Outcome Summary
In conclusion, rebuilding a hydraulic cylinder is a multifaceted undertaking requiring a systematic approach. From initial diagnosis to final testing, each step plays a crucial role in restoring the cylinder’s operational efficiency and safety. Adherence to the Artikeld procedures, coupled with a keen eye for detail and a commitment to safety protocols, will ensure a successful and lasting outcome.
This guide provides a robust framework for understanding and executing this critical maintenance procedure.
Frequently Asked Questions
What are the common symptoms indicating a hydraulic cylinder needs rebuilding?
Leaks, unusual noises, reduced pressure, or erratic movement are all possible indicators of a cylinder requiring rebuilding.
What are the most important safety precautions to take during the rebuilding process?
Using appropriate safety gear, such as eye protection and gloves, is paramount. Proper handling of high-pressure components and adherence to safety protocols for hydraulic systems are also critical.
How can I identify the specific type of damage to a hydraulic cylinder?
A thorough visual inspection, along with a detailed understanding of the potential failure modes, can help determine the specific type of damage.
What tools are essential for the disassembly and reassembly of a hydraulic cylinder?
A comprehensive list of tools, including wrenches, sockets, and specialized hydraulic tools, is essential. Consult the appropriate specifications for each tool to ensure compatibility and precision.
