How to reinforce an opening in durable vinyl? This guide breaks down the process, from identifying damage to long-term maintenance. Vinyl is used in lots of construction, and knowing how to reinforce it is crucial for longevity and safety. Different vinyl types have varying needs, so we’ll cover those too.
From common damage to specific reinforcement methods, this guide walks you through the essential steps for strengthening your vinyl openings. We’ll cover materials, techniques, and even safety precautions to help you confidently handle this project.
Introduction to Vinyl Reinforcement
Yo, so vinyl openings in buildings, especially in Bandung, can get wrecked if not properly reinforced. Think about it – heavy rain, strong winds, even just the normal wear and tear over time. This reinforcement is crucial for keeping everything looking fresh and functional, preventing leaks, and making sure your place is solid as a rock. It’s a no-brainer, really.Vinyl, while durable, isn’t invincible.
Different types of vinyl have varying levels of resistance to stress and weather. Knowing the type of vinyl you’ve got is key to picking the right reinforcement strategy. Plus, some areas in Bandung are known for having more extreme weather than others, which further emphasizes the need for proper reinforcement.
Types of Vinyl and Their Susceptibility to Damage
Vinyl comes in various forms, each with its own strengths and weaknesses. Common types used in construction include PVC (polyvinyl chloride), which is super common, and other types, each with varying degrees of resistance to things like UV rays, impacts, and weathering. Understanding the specific properties of the vinyl you’re working with is vital for choosing the right reinforcement solution.
This helps avoid unnecessary costs and ensures that the chosen reinforcement is truly effective.
Examples of Crucial Reinforcement Situations
Reinforcing vinyl openings is a must in a bunch of situations. Imagine a leaky balcony during a downpour – that’s a major problem! Or maybe a cracked window frame that could compromise the whole structure. Also, imagine a windy day, with vinyl doors flapping around like crazy. These are situations where reinforcement is not just a good idea, it’s a necessity to keep your property safe and sound.
These examples highlight the importance of proactively addressing potential vulnerabilities.
Comparison of Vinyl Types and Reinforcement Needs
| Vinyl Type | Common Uses | Susceptibility to Damage | Recommended Reinforcement |
|---|---|---|---|
| PVC (Polyvinyl Chloride) | Windows, doors, siding | Can be brittle in extreme cold or heat, prone to cracking with impact. | Reinforced frames, impact-resistant coatings, weatherstripping. |
| Vinyl with added UV stabilizers | Exterior applications like siding | More resistant to UV degradation compared to standard PVC. | Regular inspection and maintenance, protective coatings. |
| Specialty Vinyl (e.g., impact-resistant) | High-risk areas like hurricane-prone regions | Exceptional resistance to impact and weathering. | Typically needs less reinforcement, but specific needs depend on the project. |
This table provides a basic overview. Specific reinforcement requirements will vary depending on the specific application, environmental conditions, and the manufacturer’s recommendations. Always consult with professionals for personalized advice.
Identifying Damage and Weak Points
Nah, so you wanna reinforce your vinyl opening? First things first, you gotta know what you’re lookin’ at. Damage and weak spots can sneak up on ya, so a thorough inspection is key. It’s like lookin’ for cracks in a wall before you paint it—you don’t wanna waste your time and effort on a problem that’s already there, right?This section breaks down how to spot common problems and structural weaknesses in your vinyl openings.
We’ll cover everything from visual cues to hands-on checks, so you can be totally prepared for any repair work.
Common Signs of Damage
Knowing the telltale signs of trouble is crucial. Lookin’ for visual clues like cracks, splits, or even just loose panels is a good starting point. Sometimes, the vinyl might show signs of warping or bulging, or you might notice a difference in the color or texture, like discoloration or unevenness. These subtle hints can point to underlying structural issues.
Inspecting for Structural Weaknesses
Don’t just look—feel! Carefully examine the seams, corners, and joints of the vinyl opening. Run your hand along the edges, and check for any give or looseness. Listen for any unusual noises—a creaking sound could indicate stress points. Remember, even seemingly minor issues can lead to major problems if ignored. Pay extra attention to areas that are prone to impact, like near doors or windows.
Look for areas with past damage or repairs.
Repair Methods Based on Damage
| Type of Damage | Repair Method |
|---|---|
| Small Cracks or Splits | Repair with a suitable vinyl patching compound. |
| Loose Panels | Secure loose panels with appropriate fasteners, making sure they’re properly aligned. |
| Warping or Bulging | Assess the cause and address it. It might involve replacing sections of the vinyl or reinforcing the frame. |
| Significant Damage | Professional repair or replacement of the entire opening may be necessary. |
Thorough Examination Procedure
This step-by-step guide will help you thoroughly check the condition of your vinyl opening:
- Visually inspect the entire opening for any signs of damage, such as cracks, splits, warping, or discoloration.
- Carefully examine all seams, joints, and corners for signs of looseness or gaps.
- Check for any signs of bowing or unevenness in the vinyl.
- Run your hand along the edges of the opening to feel for any give or looseness.
- Listen for any unusual noises, like creaking or groaning, which might indicate stress points.
- Note any previous repairs or areas of concern.
- Document any findings for future reference, including photos or sketches.
Reinforcement Materials and Techniques
Gak usah bingung lagi soal nguatin bukaan vinyl yang udah mulai rapuh. Ini nih, tips dan triknya biar tetep awet dan anti jebol! Kita bakal bahas bahan-bahan apa aja yang bisa dipake, dan gimana cara pasang yang bener biar hasil maksimal.Nah, ini penting banget buat ngecek kekuatan vinyl, sebab kalo salah pasang, bisa malah bikin tambah rusak.
Jadi, kita harus pinter milih bahan dan teknik yang pas biar awet dan kuat.
Reinforcement Materials
Bahan-bahan buat nguatin bukaan vinyl banyak banget pilihannya. Dari yang murah meriah sampe yang premium, semuanya bisa dipake. Yang penting, disesuaikan sama kondisi vinyl dan budget.
- Epoxy Resin: Epoxy resin dikenal kuat dan tahan lama. Cocok banget buat perbaikan yang serius. Tapi, harga relatif mahal.
- Fiberglass Mesh: Bahan ini ringan tapi kuat, jadi cocok buat memperkuat bagian yang perlu di-support.
- Fiberglass Reinforced Polymer (FRP): Bahan ini kokoh dan tahan lama, cocok buat area yang rawan getaran atau benturan.
- Metal Strips/Plates: Buat masalah yang lebih berat, metal strips atau plates bisa jadi solusi. Kuatannya super, tapi bisa agak berat.
- Wood Strips: Kalau mau yang natural, wood strips juga bisa dipake. Tapi perlu di-coating biar tahan lama.
Reinforcement Techniques
Setelah tau bahan-bahannya, kita juga harus tau teknik pemasangan yang tepat. Setiap teknik punya kelebihan dan kekurangan masing-masing, jadi perlu dipertimbangkan.
- Bonding: Teknik bonding cocok buat nggabungin bahan reinforcement ke vinyl dengan lem khusus. Prosesnya relatif mudah, tapi butuh keahlian biar hasilnya rapi.
- Welding: Welding cocok buat material yang membutuhkan kekuatan ekstra. Tapi, prosesnya agak rumit dan butuh alat khusus.
- Screwing/Bolting: Teknik ini pas buat nge-support frame vinyl dengan kuat. Tapi, perlu dipastiin lubang baut pas sama material yang dipake.
- Using Adhesive Strips: Cara paling praktis, pake adhesive strips yang ditempel langsung ke vinyl. Mudah dipasang dan cepat kering.
Comparing Effectiveness and Durability
Setiap bahan dan teknik punya kelebihan dan kekurangan. Epoxy resin sangat kuat, tapi harganya mahal. Fiberglass mesh ringan dan mudah dipasang, tapi mungkin kurang kuat untuk kasus yang berat.
| Material | Effectiveness | Durability | Cost |
|---|---|---|---|
| Epoxy Resin | Excellent | Very High | High |
| Fiberglass Mesh | Good | High | Medium |
| FRP | Excellent | Very High | High |
| Metal Strips | Excellent | Very High | Medium to High |
| Wood Strips | Good | Medium | Low |
Installation Steps (Example: Bonding with Epoxy Resin)
Berikut langkah-langkah untuk ngerjain reinforcement dengan epoxy resin.
- Clean the Area: Bersihkan area vinyl yang mau diperkuat dari kotoran dan debu.
- Prepare the Material: Potong fiberglass mesh sesuai ukuran yang dibutuhkan.
- Apply Epoxy Resin: Oleskan epoxy resin ke vinyl dan fiberglass mesh dengan merata.
- Align and Press: Sesuaikan fiberglass mesh ke vinyl dan tekan kuat-kuat.
- Cure: Biarkan epoxy resin mengeras sesuai waktu yang ditentukan dalam petunjuk penggunaan.
Reinforcement Techniques for Specific Issues
Nah, dealing with a cracked or busted vinyl opening ain’t no walk in the park. But fear not, we’ll break down the reinforcement techniques so you can get that opening back in tip-top shape. It’s all about knowing the right tools and the right moves, just like a pro.
Reinforcing Openings with Cracks
Cracks in vinyl openings can be a real pain, but they’re often fixable with the right approach. A simple crack might just need a patch, but a wider fissure could need a more extensive repair. Properly addressing the crack is key to preventing further damage and ensuring a long-lasting fix.
- Identify the crack’s depth and width. A tiny hairline crack might only need a bit of patching compound, but a gaping chasm will require more robust reinforcement. Visual inspection is crucial. If the crack is significant, don’t try to patch it yourself; call a pro.
- Prepare the crack area. Clean the area around the crack thoroughly. Remove any loose debris or old sealant. This ensures the reinforcement material adheres properly.
- Choose the right reinforcement material. For small cracks, a patching compound specifically designed for vinyl is ideal. For larger cracks, consider fiberglass mesh or a similar reinforcing material, bonded with a suitable adhesive.
- Apply the reinforcement material. Follow the manufacturer’s instructions carefully for application. Ensure the material is properly adhered to both sides of the crack for maximum strength.
Strengthening Vinyl Openings with Missing or Damaged Components
Missing or damaged components, like window frames or trim pieces, weaken the overall structure of the vinyl opening. Replacing these parts is essential for maintaining the opening’s integrity and preventing further damage. This is like patching a hole in your wall – you need to replace the broken part for a sound fix.
- Identify the missing or damaged component. Determine the precise component that needs replacing. Match the dimensions and material to ensure a proper fit.
- Acquire replacement components. Find suitable replacements from a reputable supplier. Check for compatibility and quality.
- Prepare the area. Clean the area around the damaged component thoroughly. Ensure the surface is ready for bonding.
- Install the replacement component. Use the appropriate fasteners and adhesives to secure the new part. Follow the manufacturer’s instructions meticulously.
Reinforcing Vinyl Openings with Compromised Seals
Compromised seals are a significant concern in vinyl openings, as they impact both aesthetics and functionality. Addressing seal issues promptly is crucial for preventing water damage, drafts, and energy loss.
- Identify the type of seal issue. Determine if the issue is with the caulking, weatherstripping, or the underlying structure. Visual inspection and a thorough examination are key.
- Prepare the seal area. Clean the area thoroughly, removing any debris or old sealant. Ensure the surface is clean and dry for optimal adhesion.
- Replace or repair the seal. For caulking issues, apply a fresh bead of appropriate sealant. If weatherstripping is damaged, replace the damaged section. Ensure a proper and consistent seal around the entire opening.
- Check for proper seal function. After installation, test the seal by applying pressure to the area. This ensures a snug fit and prevents any leaks or gaps.
Summary of Solutions for Common Vinyl Opening Issues
| Issue | Solution |
|---|---|
| Cracked Vinyl | Patching with appropriate compound, or reinforcing with fiberglass mesh and adhesive, depending on the crack’s severity. |
| Missing/Damaged Components | Replace the missing/damaged components with compatible replacements using appropriate fasteners and adhesives. |
| Compromised Seals | Repair or replace caulking and weatherstripping, ensuring a tight seal around the entire opening. |
Tools and Equipment Needed
Wah, reinforcing vinyl takes more than just brawn, bro! You need the right tools and gear to avoid making things worse. Proper equipment is key for a smooth, durable repair, keeping your vinyl looking fresh for years to come. Think of it like building a house; you wouldn’t use a spoon to lay bricks, right?This section covers the essential tools and safety gear for vinyl reinforcement, from the basics to the must-haves.
Knowing what to use and how to use it safely is crucial for a successful repair.
Essential Tools for Vinyl Reinforcement
Knowing what tools to use is crucial for a successful vinyl repair. The right tools make the job easier and prevent mistakes. Choosing the right tools for the job is like choosing the right weapon for a fight.
- Utility knife: A sharp utility knife is essential for precise cuts. A dull blade will cause more damage than help. A good blade is a necessity.
- Measuring tape and ruler: Accurate measurements are vital for precise cutting and application of reinforcement materials. Don’t guess; measure twice, cut once!
- Scissors: For cutting smaller pieces of reinforcement material, or intricate shapes. Sharp scissors are necessary for detailed cuts.
- Putty knife or spreader: For smoothing and spreading adhesives or sealants evenly. This tool ensures a smooth finish.
- Gloves: Protect your hands from adhesives, solvents, and debris. Rubber gloves are the best, as they offer good protection.
- Scrapers: For removing old or damaged vinyl or adhesive residue. Scrape away the old stuff, and prepare the surface for the new!
Safety Precautions and Equipment
Safety first, guys! Working with vinyl reinforcement can involve some hazards. You gotta protect yourself. Think of it like driving a car; you need your seatbelt and everything else, right?
- Safety glasses or goggles: Protect your eyes from flying debris, solvents, or chemicals. Keep your eyes safe!
- Gloves: Protect your hands from chemicals, adhesives, and rough edges. Wear the right gloves for the job.
- Dust mask or respirator: Protect your lungs from dust, fumes, or airborne particles. Breathing problems are not fun.
- Work gloves: Protect your hands from abrasion, cuts, or contact with sharp objects. Protect your hands, and they’ll protect you.
- Proper Ventilation: Ensure adequate ventilation in the work area to prevent inhalation of harmful fumes or dust. A well-ventilated area is key to a safe repair.
Proper Use of Each Tool
Using tools correctly is key to a smooth repair. Improper use can cause more problems than it solves.
Using a utility knife: Hold the blade at a 45-degree angle to the vinyl and apply firm, controlled pressure to make clean cuts. Avoid excessive pressure, which could damage the vinyl.
Using a putty knife: Apply adhesive evenly and smoothly onto the vinyl surface. Use the putty knife to spread the adhesive, ensuring a uniform application.
Using gloves: Always wear appropriate gloves when handling adhesives, solvents, or other chemicals. Protect your skin and avoid contact with hazardous materials.
Examples of Safety Equipment and Their Importance
These examples will show you the importance of safety gear.
| Safety Equipment | Importance |
|---|---|
| Safety glasses | Prevent eye injuries from flying debris, chemicals, or dust. |
| Gloves | Protect hands from cuts, abrasions, and contact with hazardous materials. |
| Respirator | Prevent inhalation of harmful dust, fumes, or vapors. |
Preparation and Installation Procedures
Alright, so you wanna beef up that vinyl opening? First things first, proper prep is key, like gettin’ your tools ready before you start a big project. Skipping this step is a recipe for disaster, so let’s dive into the nitty-gritty details.
Preparing the Vinyl Opening
To ensure a smooth reinforcement process, meticulous preparation is essential. This involves inspecting the existing vinyl for any existing damage or weak points. Visualize the opening as a canvas, and you need a clean canvas to paint on. Remove any loose debris, dirt, or old adhesive residue. This step is crucial for the new adhesive to stick properly.
A clean surface guarantees a stronger bond.
Installation Process Overview
The reinforcement installation process is like putting together a puzzle. Each step builds on the previous one, and getting one wrong can mess up the whole thing. Follow these steps to ensure a seamless and durable reinforcement:
- Thorough Cleaning: Give the vinyl a good scrub with a cleaner specifically designed for vinyl. This will remove any contaminants that might hinder adhesion. Dry thoroughly to avoid moisture affecting the bond.
- Surface Preparation: Inspect the vinyl surface for any imperfections like cracks or bubbling. Repair any damage as needed. If necessary, use a vinyl patching compound to fix minor issues. This will prevent stress points from developing, and the reinforced area will feel stronger.
- Applying Primer (If Necessary): If the vinyl surface is porous or has a rough texture, applying a primer before the adhesive can enhance the adhesion. This step is often needed for older vinyl or if you’re using a new type of adhesive. A primer creates a smoother, more consistent surface, ensuring that the adhesive bonds well to the vinyl.
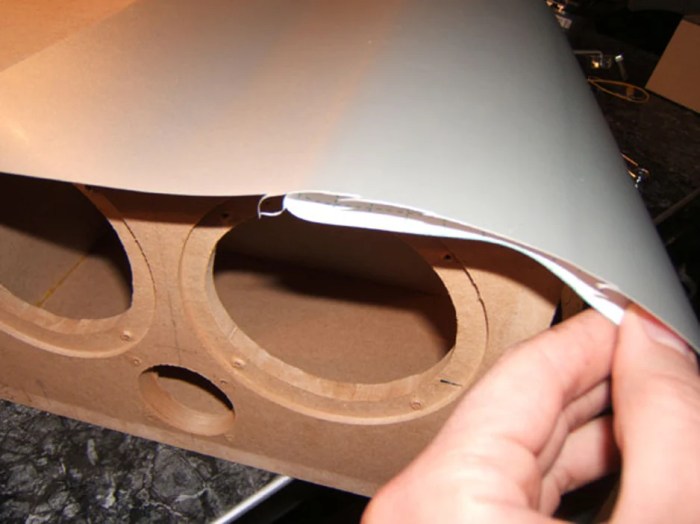
- Adhesive Application: Apply the chosen adhesive to both the reinforcement material and the vinyl surface. Use a squeegee or a similar tool to spread the adhesive evenly, ensuring no air pockets are trapped. Follow the adhesive manufacturer’s instructions carefully. Applying adhesive evenly is crucial for a strong and durable bond.
- Reinforcement Placement: Position the reinforcement material precisely over the damaged area. Ensure the reinforcement material covers the damaged section completely and is correctly aligned. Alignment is key; if it’s off, it can weaken the area. Align the reinforcement carefully.
- Securing the Reinforcement: Use appropriate tools and techniques to secure the reinforcement material to the vinyl surface. This could involve using clamps, weights, or specialized vinyl tools, depending on the material and adhesive used. Secure the reinforcement material correctly to avoid it shifting or moving during the curing process.
- Curing and Finishing: Allow the adhesive to cure completely according to the manufacturer’s instructions. This step is vital; rushing it can lead to the reinforcement material not bonding properly. Inspect the area after the curing process to ensure everything is properly bonded.
Importance of Proper Preparation, How to reinforce an opening in durable vinyl
Proper preparation is the bedrock of a successful reinforcement job. It’s like laying a strong foundation for a house; without it, the whole structure will eventually crumble. A good foundation will last for a long time, so proper preparation is crucial for the longevity of the reinforcement. It’s the most important step; without a strong foundation, the whole project will fail.
Adhering and Securing Reinforcement Materials
Choosing the right adhesive and employing the correct techniques are paramount to ensure the reinforcement material bonds firmly to the vinyl. Adhesives vary in their application methods and curing times. Use a tool to spread the adhesive evenly over both the reinforcement material and the vinyl surface. Use clamps or weights to hold the reinforcement material in place while the adhesive cures.
Follow the manufacturer’s instructions carefully for the specific adhesive and curing time. Always use appropriate safety precautions when handling chemicals.
Maintenance and Long-Term Durability
Keeping your reinforced vinyl opening lookin’ fresh and strong is crucial, fam. Just like any good investment, a little TLC goes a long way in extending its lifespan. Proper maintenance is key to avoiding future problems and keeping your vinyl lookin’ its best.
Long-Term Maintenance Procedures
Regular upkeep is the name of the game for long-term durability. Think of it like a gym routine for your vinyl – consistent effort yields the best results. Consistency is key to preventing problems down the road.
- Routine Inspections: Regularly check the reinforced areas for any signs of damage, like cracks, gaps, or discoloration. Look closely, bro. A little problem now can become a big headache later. This early detection is essential for maintaining a strong, lasting seal.
- Cleaning and Sealing: Keeping the vinyl clean and sealed is vital. Use a mild soap and water solution to wipe down the surface, then apply a quality sealant specifically designed for vinyl. This helps to prevent water damage and keep the reinforcement material in good condition. This is like giving your reinforced vinyl a protective shield.
- Addressing Minor Issues: Don’t ignore small problems. A tiny crack can become a major issue if left unattended. Repair minor damage promptly to prevent it from escalating. This is about preventing bigger problems.
Inspecting for Wear and Tear
Knowing the signs of trouble is essential for maintaining a durable opening. Visual inspections are crucial. If you see something, say something!
- Visual Inspection: Look for any signs of cracking, peeling, or buckling around the reinforcement areas. A visual inspection can save you from a lot of headaches later. Sharp eyes are important here.
- Checking for Gaps: Inspect for gaps or spaces between the reinforced sections and the frame. These gaps can allow moisture to seep in, leading to rot and weakening of the structure. Be vigilant for these little openings.
- Evaluating Seal Integrity: Check the seals around the reinforced area to ensure they are still intact. A compromised seal is a gateway for problems. Ensure the seals are still functioning as they should.
Preventing Future Damage
Proactive measures are your best defense against costly repairs. It’s always better to prevent damage than to fix it later.
- Protecting from the Elements: Protect the reinforced opening from extreme weather conditions. For example, consider using protective covers during harsh weather. This is essential for long-term maintenance.
- Maintaining Proper Ventilation: Good ventilation helps to prevent moisture buildup. This is important for preserving the integrity of the reinforced vinyl. Proper airflow is key to avoiding moisture.
- Regular Maintenance Schedule: Establish a regular maintenance schedule. Consistency in this area will greatly improve the longevity of your reinforced opening. A schedule is a roadmap to keeping your vinyl healthy.
Preventive Maintenance Procedures
Following a schedule will help maintain your reinforced vinyl opening.
- Establish a Schedule: Create a schedule for regular inspections, cleaning, and sealing. This schedule should be tailored to your specific climate and environment. A schedule is a necessity.
- Document Findings: Document any issues or maintenance performed. This documentation is essential for tracking the condition of your opening over time. Keeping records is crucial.
- Seek Professional Help When Needed: If you encounter a problem beyond your abilities, don’t hesitate to contact a professional. This is especially true for complex repairs. Sometimes, professional help is necessary.
Case Studies and Examples
Wah, reinforcement vinyl openings, it’s a whole ‘nother level. Lots of ways to do it, and what works best depends on the situation. We’ll break down some successful projects, showing you the ins and outs of different approaches and why certain methods are chosen for specific problems. This ain’t just theory, it’s real-world examples.
Successful Reinforcement Projects
Different vinyl opening reinforcement projects have various outcomes. Understanding these outcomes helps in planning for similar situations. Successful projects often depend on a precise assessment of the damage and a well-chosen reinforcement method.
- Project A: The Sagging Sill – This project involved a sagging vinyl window sill. The initial assessment showed significant bowing and cracking in the sill, indicating structural weakness. A composite reinforcement solution was employed, involving strategically placed fiberglass mesh and epoxy resin. The mesh provided strength, while the epoxy ensured proper bonding and adhesion. The results were excellent, with the sill returning to its original shape and maintaining its structural integrity.
The project was a success because of the precise application of the chosen materials.
- Project B: The Damaged Door Jamb – This project involved a damaged vinyl door jamb. The jamb had a substantial crack and some significant splitting. Reinforcement was achieved using a combination of wood strips and polyurethane adhesive. The wood strips were precisely fitted into the cracks and gaps, and then glued in place with polyurethane. This method provided both strength and stability.
The jamb’s structural integrity was restored, making the door operate smoothly and securely. The project highlights the efficacy of combining different reinforcement methods for a comprehensive solution.
- Project C: The Weather-Damaged Window Frame – This project dealt with a window frame compromised by prolonged exposure to harsh weather conditions. The frame exhibited signs of warping and deterioration. The solution involved using a combination of fiberglass mesh reinforcement and a sealant specifically designed for vinyl. This process provided both strength and water resistance, protecting the frame from further damage. The reinforcement technique was successful because it addressed both the structural and weather-related issues.
Reasoning Behind Reinforcement Method Choices
Choosing the right reinforcement method is crucial for achieving a durable and long-lasting solution. Factors like the severity of the damage, the type of vinyl, and the overall structure of the opening play a key role.
- Severity of Damage – The extent of damage dictates the complexity and type of reinforcement required. Minor cracks might be addressed with simple repairs, while significant structural issues may necessitate more substantial reinforcement techniques.
- Type of Vinyl – Different types of vinyl have varying levels of strength and elasticity. The chosen reinforcement material should be compatible with the specific type of vinyl being reinforced. Some materials might not bond properly with certain vinyl types.
- Opening Structure – The specific design and construction of the opening influence the reinforcement strategy. The geometry of the opening, presence of supporting structures, and other related factors need consideration.
Illustrative Examples of Vinyl Reinforcement Projects
These examples highlight the importance of careful planning and execution.
| Project | Damage | Reinforcement Method | Outcome |
|---|---|---|---|
| Window Sill Repair | Sagging and cracking | Fiberglass mesh and epoxy resin | Complete restoration of structural integrity |
| Door Jamb Reinforcement | Crack and splitting | Wood strips and polyurethane adhesive | Improved door operation and structural stability |
| Window Frame Restoration | Warped and deteriorated | Fiberglass mesh and sealant | Enhanced structural integrity and weather resistance |
Final Wrap-Up
In conclusion, reinforcing vinyl openings is a straightforward process if you follow these steps. Remember to assess the damage thoroughly, choose the right materials, and install them properly. Proper maintenance will ensure the reinforcement lasts for years. With this guide, you’re well-equipped to handle any vinyl opening reinforcement project.
Helpful Answers: How To Reinforce An Opening In Durable Vinyl
What are some common signs of damage to vinyl openings?
Cracks, gaps, sagging, or loose seals are common signs. Pay close attention to areas that show stress or strain.
What tools are needed for reinforcement?
Depending on the project, you might need a screwdriver, drill, sealant, measuring tape, safety glasses, and gloves.
What’s the best way to prevent future damage?
Regular inspections and prompt repairs are key. Proper sealing and reinforcement techniques help prevent further issues.
How do I choose the right reinforcement material?
Consider the type of vinyl, the extent of damage, and the desired durability when selecting reinforcement materials. Different materials offer varying levels of strength and flexibility.
