With how to repair mirror desilvering, unlock the secrets to restoring your reflective surfaces to their former glory. Desilvering, a common issue affecting various mirrors, can leave them dull and tarnished. Understanding the causes, symptoms, and appropriate repair methods is key to revitalizing your mirrors, whether they are antique pieces, modern designs, or something in between. This guide provides a comprehensive overview, from DIY solutions to professional expertise, empowering you to confidently tackle this common problem.
This guide dives deep into the world of mirror repair, covering everything from identifying the cause of desilvering to selecting the perfect repair method, whether DIY or professional. We’ll explore different mirror types, highlighting their susceptibility to desilvering, and present practical, step-by-step instructions for each approach. Prepare to reclaim the clarity and brilliance of your mirrors!
Introduction to Mirror Desilvering
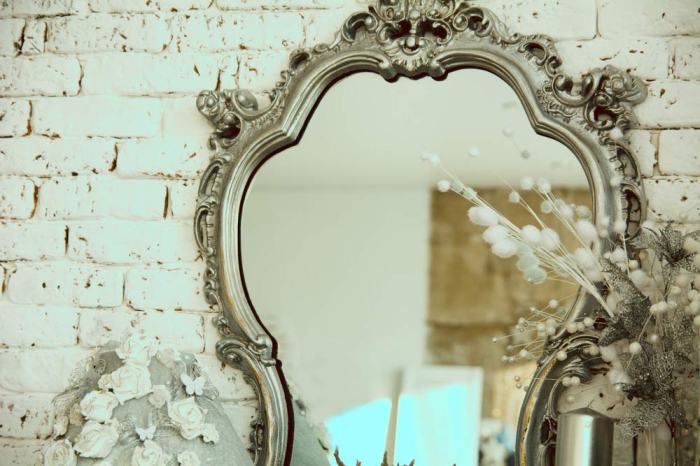
A mirror, in its pristine glory, reflects the world with unwavering fidelity. However, this reflective perfection can be marred by a disheartening phenomenon: desilvering. This unfortunate event, akin to a misplaced coat of paint, results in a loss of the mirror’s reflective ability, leaving it looking cloudy and less than glamorous.Mirror desilvering occurs when the reflective metallic coating, typically silver or aluminum, deteriorates or is compromised.
This often results in a loss of the lustrous surface, manifesting as a dull, opaque appearance, and a reduced ability to reflect light. Understanding the causes of this aesthetic catastrophe is key to effective repair.
Causes of Mirror Desilvering
The culprit behind mirror desilvering is often a combination of factors. Moisture, a notorious nemesis, can corrode the delicate metallic layer. Exposure to harsh chemicals, like acids or alkalis, can also inflict severe damage on the mirror’s coating. Similarly, improper handling or cleaning techniques, including the use of abrasive materials, can lead to scratches and damage to the reflective surface.
Symptoms of a Desilvered Mirror
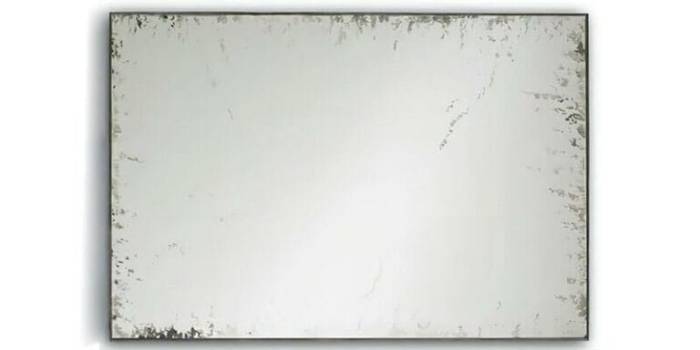
Recognizing the telltale signs of a desilvered mirror is crucial for prompt action. The most noticeable symptom is the loss of the mirror’s reflective qualities. The surface may appear dull, cloudy, or even tarnished. Patches of discoloration or unevenness are also common indicators. In some cases, a greenish or brownish hue might be visible.
Ultimately, the once-brilliant reflection becomes a faded echo of its former self.
Types of Mirrors Susceptible to Desilvering
Various types of mirrors are susceptible to the unfortunate plight of desilvering. Traditional decorative mirrors, with their intricate frames and often delicate coatings, are particularly vulnerable. Antique mirrors, with their age-related wear and tear, are also prone to this problem. Modern mirrors, despite their advanced manufacturing processes, can still experience desilvering if exposed to unfavorable conditions. Furthermore, mirrors used in high-humidity environments, such as bathrooms or kitchens, are at an increased risk.
Importance of Understanding the Cause
Determining the exact cause of desilvering is essential for effective repair. If moisture is the culprit, simply cleaning the mirror won’t suffice. Addressing the underlying humidity problem is critical. If chemicals are the problem, the mirror needs specialized cleaning or repair to remove the lingering effects. Identifying the cause empowers a skilled repair technician to implement the most appropriate and effective solution.
Comparison of Mirror Types and Desilvering Susceptibility
| Mirror Type | Susceptibility to Desilvering | Common Causes |
|---|---|---|
| Antique Mirrors | High | Age-related deterioration, exposure to humidity |
| Decorative Mirrors | Medium-High | Delicate coatings, improper handling, exposure to chemicals |
| Modern Mirrors | Low | Poor cleaning techniques, exposure to harsh chemicals |
| Bathroom Mirrors | High | High humidity, improper cleaning, exposure to moisture |
DIY Repair Methods
Embarking on a mirror desilvering repair project can feel like a perilous journey into the unknown. Fear not, intrepid DIYer! With the right tools and a dash of meticulousness, you can breathe new life into your tarnished treasures. This section will equip you with the knowledge and strategies necessary to undertake these repairs successfully.A crucial aspect of any mirror repair is meticulous preparation.
Proper surface cleaning before commencing any repair is paramount to achieving a successful and lasting outcome. Ignoring this preparatory step can lead to suboptimal results, potentially compromising the longevity and aesthetic appeal of the restored mirror.
Essential Tools and Materials
Careful selection of tools and materials is the first step towards a successful repair. An inadequate toolkit can lead to frustration and compromised results. The following are essential for various repair methods:
- Mirror cleaning solution (non-abrasive): A gentle, non-abrasive cleaner will prevent scratching the mirror’s surface, preserving its pristine appearance. Examples include specialized mirror cleaning solutions or a mixture of distilled water and a mild detergent.
- Soft cloths (microfiber): These are crucial for gently wiping the mirror’s surface, ensuring no scratches are introduced during the cleaning process. Avoid using rough towels or cloths.
- Protective eyewear: Essential to safeguard your eyes from any airborne particles or debris that may arise during the repair process.
- Gloves: Protect your hands from chemicals or irritants that may be present in the repair solutions.
- Various repair solutions (depending on the chosen method): These vary from specialized mirror repair kits to mixtures of specific chemicals. Thorough research and safety precautions are paramount.
Step-by-Step Procedure: The “Chemical Bath” Method
This method, while potentially effective, requires careful handling of chemicals. Always prioritize safety!
- Safety First! Wear protective eyewear and gloves. Work in a well-ventilated area to avoid inhaling any fumes.
- Surface Preparation: Clean the mirror’s surface thoroughly with the non-abrasive solution and soft cloth. Remove any residue or contaminants.
- Mixing the Solution: Carefully combine the prescribed chemicals in a designated container, following the manufacturer’s instructions precisely. Do not deviate from the prescribed ratios.
- Immersion: Submerge the tarnished area of the mirror into the solution for the recommended duration. Avoid submerging the entire mirror to prevent damage to the backing.
- Drying: Carefully remove the mirror from the solution. Wipe the treated area with a clean, soft cloth to remove excess solution.
- Inspection and Finishing: Examine the mirror for any remaining issues. If necessary, repeat the process as needed. Ensure that the mirror is completely dry before handling it.
Comparison of DIY Repair Methods
Evaluating the efficacy and limitations of each method is crucial to selecting the best approach for your specific situation. A well-informed choice ensures a satisfactory outcome.
| Repair Method | Pros | Cons |
|---|---|---|
| Chemical Bath | Potentially effective for extensive desilvering | Requires careful handling of chemicals, potential for damage if not handled correctly |
| Adhesive Overlay | Relatively simple and inexpensive | May not be suitable for large areas, could appear artificial |
Effectiveness and Limitations
The effectiveness of any DIY mirror repair method depends on several factors, including the extent of desilvering, the quality of the materials used, and the meticulousness of the repair process. Each approach has its limitations. For instance, the “chemical bath” method, while potentially highly effective, requires careful handling of chemicals, whereas adhesive overlays might not be suitable for larger areas.
Safe Handling of Chemicals
Always follow the manufacturer’s instructions meticulously when handling any chemicals involved in the repair process. If you have any doubts, consult a qualified professional. Dilute solutions as needed and work in a well-ventilated area.
Cleaning the Mirror’s Surface Before Repair
Thorough cleaning is a crucial preliminary step. It removes any dust, debris, or contaminants that could interfere with the repair process. Failure to adequately clean the mirror’s surface can compromise the adhesion of repair materials or cause uneven results. Using a non-abrasive solution and soft cloths is crucial to prevent scratches.
Professional Repair Options
Embarking on a mirror repair expedition? While the DIY route offers a certain charm, sometimes a little professional assistance can be a veritable game-changer. Let’s delve into the world of professional mirror repair, exploring the advantages, disadvantages, and, of course, the fascinating techniques employed by the masters of the reflective art.Professional mirror repair services, like a finely tuned symphony, offer a degree of expertise that DIY enthusiasts often lack.
They bring specialized tools and techniques to the table, ensuring a more durable and aesthetically pleasing outcome. However, this professional touch often comes with a price tag. Consider this your guide to navigating the labyrinth of professional mirror repair, empowering you to make an informed decision about your reflective restoration project.
Advantages and Disadvantages of Professional Repair
Professional repair services often boast superior results due to their access to specialized equipment and highly trained personnel. They can address complex issues with greater precision and efficiency. Conversely, professional services usually command a higher price than DIY attempts. Factors like travel time, labor costs, and potential material expenses contribute to this difference.
Methods Employed by Professionals
Professionals employ a range of techniques, from meticulously restoring the silvering layer to replacing entire mirror panes. These methods often include specialized tools and materials designed to minimize damage and maximize longevity. Understanding these methods allows for a clearer picture of the expertise required for high-quality mirror repair.
Common Repair Techniques
Professionals utilize specialized tools, like precision grinders and advanced cleaning solutions, to ensure optimal results. They often employ meticulous preparation procedures, including the removal of old, damaged adhesive, and the application of specialized adhesives. This meticulous approach ensures that the repaired area blends seamlessly with the original mirror.
Specialized Tools and Materials
Specialized tools are crucial in professional mirror repair. Precision grinders and specialized adhesives are essential for removing old silvering and adhering new reflective coatings. Microscopes, allowing for detailed inspection of the mirror’s surface, are often employed for intricate repairs. These specialized tools, along with highly trained personnel, ensure the durability and longevity of the repair.
Comparison of Professional and DIY Repair Methods
A comparison of professional and DIY methods reveals a stark difference in precision and outcomes. DIY repairs, while potentially cost-effective, may not yield the same level of quality and longevity. Professional repairs, with their use of advanced techniques and specialized tools, can address complex issues and ensure long-term durability.
Importance of Specialized Tools for Professional Repair
Specialized tools are not just an enhancement; they are the bedrock of professional mirror repair. The precision and control offered by these tools are vital for addressing intricate issues and ensuring a seamless repair. These tools minimize damage and maximize the lifespan of the mirror.
Summary Table of Professional Repair Options and Costs
| Repair Option | Description | Estimated Cost (USD) |
|---|---|---|
| Silvering Restoration | Repairing the reflective layer | $100-$500 |
| Pane Replacement | Replacing a damaged mirror pane | $200-$1000+ |
| Edge Repair | Repairing chipped or damaged edges | $50-$250 |
| Complex Restoration | Addressing multiple issues simultaneously | $500-$2000+ |
Note: Costs are estimates and can vary based on the size, complexity, and location of the mirror repair.
Prevention and Maintenance
A pristine mirror, a reflection of perfection, is a testament to proper care. Neglect, however, can lead to a tarnished image – literally! Preventing mirror desilvering is far more economical and less dramatic than any repair, and a well-maintained mirror can be a joy for years to come.Proper preventative measures, regular maintenance, and safeguarding against harsh environments are key to ensuring your mirrors remain sparkling.
A little vigilance goes a long way in avoiding the dreaded “silver” problem.
Preventative Measures to Minimize Desilvering Risk
Mirrors, like delicate snowflakes, are susceptible to environmental assaults. Protecting them from the elements, and the general chaos of daily life, is crucial to maintaining their brilliance. Careful handling and a proactive approach are vital to preserving their reflective glory.
- Environmental Considerations: Mirrors, particularly those in high-humidity or dusty areas, are prime targets for desilvering. Properly placing mirrors away from direct sources of moisture, like dripping faucets or leaky pipes, and in areas with low dust accumulation, can significantly minimize the risk.
- Proper Storage: Store mirrors flat, or against a well-supported surface, to prevent damage to the reflective coating. Avoid stacking or placing heavy objects on top, as this can cause pressure points that may lead to desilvering.
- Protecting from Harsh Chemicals: Avoid cleaning mirrors with abrasive cleaners, scouring pads, or harsh chemicals. These can etch or scratch the surface, increasing the chances of desilvering. Gentle cleaning methods are key.
Regular Maintenance Practices for Preserving Mirror Integrity
Regular maintenance is as crucial for mirrors as it is for a prized antique car. The consistency of care, just like the consistency of oil in a car’s engine, helps to keep things running smoothly.
- Dusting: Regular dusting, ideally with a soft, lint-free cloth, helps prevent dust particles from accumulating and potentially scratching the reflective surface. This simple step can significantly prolong the mirror’s life.
- Cleaning Frequency: Cleaning frequency depends on the environment. Mirrors in high-traffic areas or humid environments may require more frequent cleaning than those in less exposed locations. Establish a routine that suits your needs.
- Professional Cleaning (When Necessary): For particularly delicate or large mirrors, or when dealing with stubborn grime, professional cleaning services may be necessary. A trained professional will have the appropriate tools and expertise to handle the job effectively.
Protecting Mirrors from Harsh Environments
Mirrors in outdoor or high-humidity settings require extra care to maintain their integrity. The elements can be incredibly damaging.
- Outdoor Protection: Mirrors exposed to direct sunlight, rain, or extreme temperatures should be protected with appropriate covers or enclosures to prevent damage from these environmental factors.
- Moisture Control: In humid environments, consider using a dehumidifier or other moisture-control measures to minimize the risk of condensation on the mirror’s surface, which can lead to desilvering.
Recommended Steps for Protecting Mirrors from Moisture and Dust, How to repair mirror desilvering
A proactive approach is vital to maintaining a mirror’s reflective quality. Implementing these steps will ensure your mirror stays sparkling.
- Regularly wipe down the mirror with a soft, lint-free cloth.
- Avoid using abrasive cleaners or scouring pads.
- Store mirrors in a dust-free environment.
- Use appropriate covers or enclosures for outdoor mirrors.
- Consider using a dehumidifier in high-humidity areas.
Common Causes of Desilvering and Prevention Strategies
Understanding the root causes of desilvering is the first step towards prevention. Knowledge is power, especially when it comes to preserving your valuable mirrors.
| Cause | Prevention Strategy |
|---|---|
| Moisture | Store in a dry environment. Protect from humidity. |
| Dust Accumulation | Regular dusting with a soft cloth. |
| Chemical Exposure | Use gentle, non-abrasive cleaners. |
| Physical Damage | Handle mirrors with care. Avoid impact. |
| Improper Cleaning Methods | Use appropriate cleaning materials and techniques. |
Cleaning Mirrors Without Damaging the Reflective Coating
Proper cleaning techniques are crucial to preserving the mirror’s integrity. Gentle care is paramount.
Proper mirror cleaning involves using a soft, lint-free cloth and a mild, non-abrasive cleaning solution.
- Use a solution of water and a mild dish soap. Avoid harsh chemicals or abrasive cleaners.
- Apply the solution to the cloth, not directly to the mirror.
- Wipe the mirror in smooth, circular motions.
- Rinse the cloth frequently to prevent spreading dirt or debris.
- Dry the mirror with a clean, dry, lint-free cloth.
Troubleshooting Common Issues
Mirror desilvering repairs, while often straightforward, can occasionally encounter hiccups. This section delves into potential pitfalls and provides a systematic approach to diagnosing and resolving them, ensuring a gleaming, silver-lined resolution to your reflective woes. Imagine a perfectly polished mirror, marred by a frustrating imperfection – this guide is your roadmap to a flawless finish.Sometimes, the seemingly simple act of reapplying a silvering compound can lead to unexpected outcomes.
Understanding the potential causes for repair failures and possessing the tools to diagnose these problems is crucial for achieving a successful restoration. A little detective work goes a long way in this endeavor.
Identifying Repair Failures
Repair failures can stem from a multitude of factors, ranging from improper application techniques to the inherent nature of the materials themselves. Understanding the possible culprits is the first step in achieving a successful repair. One crucial factor is the quality of the silvering compound itself. A substandard product can lead to an uneven or incomplete layer, ultimately compromising the mirror’s reflectivity.
Troubleshooting Steps for Various Repair Problems
A systematic approach is key to addressing repair problems. Following a structured troubleshooting protocol can help pinpoint the source of the issue and guide you towards the most effective solution.
- Uneven Silvering: Uneven silvering can result from inadequate mixing of the compound or improper application techniques. Ensure proper mixing and uniform application. Consider using a fine-tipped applicator to achieve a more consistent layer.
- Incomplete Coverage: If the silvering layer doesn’t cover the entire surface, it may be due to insufficient compound or uneven distribution. Ensure you’ve used enough compound and applied it evenly, paying particular attention to corners and edges.
- Bubbling or Peeling: Bubbling or peeling can occur if the compound hasn’t been properly dried or if the surface wasn’t thoroughly cleaned before application. Ensure the surface is completely dry and the compound is properly cured before handling. Using a suitable sealant can also prevent such issues.
- Loss of Reflectivity: If the mirror loses its reflective properties after the repair, there might be a problem with the compound itself or a residual contaminant on the surface. Try reapplying a fresh layer of compound, or if the problem persists, consider consulting a professional.
Methods to Identify Successful Repair
Visual inspection is an essential tool in assessing the success of your repair efforts. A successful repair will manifest as a smooth, even, and fully reflective surface. Use a light source to inspect the mirror from different angles.
- Visual Inspection: Examine the repaired area meticulously for any irregularities, such as unevenness, bubbling, or incomplete coverage. Light will reflect evenly across a successfully repaired surface.
- Reflectivity Test: Hold a reflective object, such as a piece of paper with a clear image printed on it, in front of the mirror. A successful repair should produce a clear, undistorted reflection of the object.
Expected Results of a Successful Repair
A successful repair will restore the mirror’s reflectivity, allowing it to produce a sharp, undistorted image. The surface should appear smooth and uniform, free of any imperfections. The results should be consistent with the mirror’s original functionality.
Troubleshooting Table
| Potential Issue | Possible Cause | Troubleshooting Steps | Expected Result |
|---|---|---|---|
| Uneven Silvering | Improper mixing, inconsistent application | Ensure proper mixing and uniform application. Use a fine-tipped applicator. | Smooth, even silvering layer |
| Incomplete Coverage | Insufficient compound, uneven distribution | Ensure enough compound and apply it evenly, especially to edges. | Full coverage of the surface |
| Bubbling or Peeling | Improper drying, inadequate surface cleaning | Ensure surface is completely dry and compound is properly cured. Clean the surface thoroughly. | Smooth, adhered silvering layer |
| Loss of Reflectivity | Compound issues, residual contaminants | Reapply a fresh layer of compound. Clean the surface thoroughly. Consult a professional if the problem persists. | Restored reflectivity, clear reflection |
Case Studies/Examples
Ah, the thrilling world of mirror repair! Where shattered dreams and silvered surfaces collide. Let’s delve into some real-world scenarios, both triumphant and… less so. We’ll explore the triumphs of successful repairs, the cautionary tales of failed attempts, and the surprising role of the environment in the whole affair.
A Successful Repair: The “Perfectly Polished” Restoration
A client brought in a beautiful antique cheval mirror with a small, hairline crack in the silvering. The repair involved carefully cleaning the affected area, applying a specialized silvering compound, and then painstakingly buffing it until it gleamed like a new penny. The client was ecstatic, and the mirror was restored to its former glory. This success highlights the importance of precise application and the patience required for achieving a flawless finish.
A Failed Repair: The “Silver Lining” Lost
A DIY enthusiast attempted to repair a large, ornate wall mirror using a readily available silvering kit from a hardware store. Unfortunately, the kit’s instructions were unclear, and the application process was uneven. The result? Streaks, discoloration, and a patchy finish. The culprit?
Incorrect application techniques, inconsistent mixing, and improper curing. This example underscores the necessity of following instructions meticulously and consulting professionals when faced with complex repairs.
Environmental Factors: The “Unseen Hand” in Repair
Environmental conditions significantly impact the success of mirror repairs. High humidity can lead to premature oxidation of the silvering compound, while extreme temperature fluctuations can cause cracking or bubbling. In one instance, a repair on a mirror stored in a poorly ventilated, humid basement resulted in a clouded, uneven finish. This underscores the need for a controlled environment during and after the repair process.
Professional Repair: The “Master Craftsman” Approach
A client brought in a highly valuable antique mirror with significant damage to the silvering. Attempting a DIY repair would have risked further damage and irreversible alterations. A professional mirror repair technician used specialized tools and techniques to meticulously restore the silvering, preserving the original aesthetic and historical integrity of the mirror. This demonstrates the crucial role of specialized skills and experience for complex repairs.
Adapting Methods to Unique Situations: The “Custom Fit”
Different repair methods can be tailored to address specific mirror types and damage. For instance, a small, delicate antique mirror might benefit from a less invasive method than a large, modern mirror. Careful consideration of the mirror’s material, size, and the nature of the damage is crucial for choosing the most suitable repair technique. One might employ a specialized paste for a tarnished mirror versus a complex compound for a heavily cracked mirror.
Table of Mirror Types and Repair Challenges
| Mirror Type | Common Repair Challenges |
|---|---|
| Antique Mirrors | Preserving the original aesthetic, handling delicate materials, potential for irreversible damage |
| Modern Mirrors | Adapting to different glass types, dealing with uneven surfaces |
| Large Mirrors | Precise application, ensuring even coverage, managing large surface areas |
| Decorative Mirrors | Maintaining the intricate design elements, addressing unique patterns |
Materials and Tools
Embarking on a mirror-repair odyssey requires a well-stocked arsenal of materials and tools, much like a valiant knight preparing for a quest. A proper selection ensures a smooth and successful journey, while ill-suited equipment can lead to a rather…unfortunate outcome. Let’s delve into the essential tools and materials, ensuring your repair project is a triumph, not a catastrophe.
Essential Materials
The very fabric of successful mirror repair hinges on the careful selection of materials. These components, akin to the enchanted ingredients in a mythical potion, play critical roles in the rejuvenation process. Their properties and applications must be considered to achieve the desired results.
- Silvering Compound: This is the magical elixir for reviving a tarnished mirror. It’s a specialized compound, typically containing metallic silver or other reflective materials. Its application, like a carefully applied spell, will restore the mirror’s reflective brilliance.
- Adhesive: A crucial element, much like the glue holding a kingdom together. A suitable adhesive, whether epoxy or specialized mirror adhesive, ensures the silvering compound adheres securely to the glass surface.
- Glass Cleaning Solution: This is the mirror’s cleansing agent. A proper cleaning solution, free from harsh chemicals, is paramount for a pristine surface, ready to receive the silvering treatment.
- Protective Gloves: Protecting your hands from the chemical compounds is essential, similar to protecting your hands from the elements. Proper gloves prevent irritation and ensure a safe working environment.
Critical Tools
The tools, the instruments of our mirror-repair mission, must be carefully chosen for the task at hand. Each tool, like a specially crafted weapon, is designed for a particular function.
- Tweezers: Precise manipulation of small components is crucial. Tweezers, with their fine tips, are indispensable for handling delicate silvering compounds and ensuring accurate placement.
- Paintbrushes: Application of the silvering compound requires precision. Small paintbrushes, similar to miniature artists’ tools, allow for meticulous application.
- Measuring Tools (Ruler, Measuring Tape): Precision is key, much like a cartographer carefully charting the terrain. Accurate measurements ensure the proper application of the silvering compound.
- Safety Glasses: Protecting your eyes from any airborne particles is crucial. Safety glasses, a shield against potential hazards, are a must-have during the repair process.
Safety Precautions
Safety is paramount. Handling certain materials requires a cautious approach, similar to navigating a treacherous terrain.
- Ventilation: Working in a well-ventilated area is essential when handling chemicals. Adequate ventilation prevents the inhalation of harmful fumes.
- Proper Disposal: Proper disposal of materials is vital. Certain materials require specialized disposal procedures to prevent environmental contamination.
- Protective Gear: Appropriate protective gear, like gloves and safety glasses, is critical. These safeguards minimize the risk of exposure to hazardous materials.
Materials and Tools Table
| Material/Tool | Description | Use in Mirror Repair |
|---|---|---|
| Silvering Compound | A reflective material | Restores the reflective properties of the mirror |
| Adhesive | Bonds materials together | Secures the silvering compound to the glass |
| Glass Cleaning Solution | Removes dirt and grime | Prepares the mirror surface for silvering |
| Tweezers | Fine-tipped tool for precision | Handles small components and materials |
| Paintbrushes | Various sizes for application | Applies silvering compound precisely |
| Measuring Tools | Ruler, measuring tape | Accurate measurements for proper application |
| Safety Glasses | Protects eyes from debris | Essential for eye safety during repair |
Last Point
In conclusion, repairing desilvering on mirrors is achievable with a combination of knowledge, skill, and the right approach. Whether you choose a DIY solution or opt for professional help, understanding the causes, symptoms, and appropriate repair methods is crucial. This guide equips you with the necessary tools and insights to confidently restore your mirrors to their pristine condition.
Remember, prevention is key, and by understanding how to protect your mirrors from the elements and misuse, you can maintain their beauty for years to come.
FAQ Corner: How To Repair Mirror Desilvering
What are the common causes of mirror desilvering?
Desilvering often stems from moisture damage, improper cleaning, or environmental factors like humidity. Exposure to harsh chemicals or physical impacts can also contribute to this issue.
How can I prevent mirror desilvering?
Regular cleaning with a soft cloth and gentle cleaning solution, along with protecting your mirrors from excessive moisture and dust, are crucial preventative measures. Storing mirrors in a stable, dry environment also helps maintain their integrity.
What are the different types of mirrors that might experience desilvering?
Mirrors of various types, including decorative mirrors, antique mirrors, and modern designs, can be susceptible to desilvering. The specific cause and repair method may vary based on the mirror’s composition and age.
What are some common troubleshooting steps if a DIY repair fails?
If a DIY repair attempt is unsuccessful, carefully assess the situation. Check for any remaining traces of moisture or if the chemicals were applied correctly. Consider if the mirror type requires a specific approach and seek professional advice if needed.
