How to reseat a spring on an IBM Model M? This ain’t your grandma’s typewriter repair. We’re diving deep into the intricate world of these legendary machines, tackling the delicate dance of reseating those crucial springs. From disassembly to reassembly, we’ll show you how to get your Model M back to typing top form. Get ready to geek out!
This guide breaks down the entire process, from identifying the specific spring needing attention to ensuring proper reassembly. We’ll cover everything you need to know to confidently tackle this vintage mechanical marvel.
Introduction to Reseating a Spring on an IBM Model M
Proper reseating of springs in an IBM Model M typewriter is crucial for maintaining its operational integrity and preventing malfunctions. Incorrectly reseating a spring can lead to uneven keystroke response, sticky keys, or, in severe cases, irreparable damage to the mechanism. A precise and methodical approach is essential to ensure the spring’s proper engagement with its corresponding components, thereby maintaining the optimal typing experience.The IBM Model M’s intricate design necessitates meticulous attention to detail during spring replacement.
Failure to adhere to the specific procedures Artikeld for each spring type can compromise the keyboard’s reliability. Understanding the different spring types and their associated reseating procedures is fundamental for successful repair. This detailed guide will provide a comprehensive overview of the task, including the necessary tools, materials, and procedures for reseating various springs.
Necessary Tools and Materials
The following tools and materials are commonly required for reseating springs on an IBM Model M typewriter:
- Spring reseating tool kit (specialized pliers, tweezers, spring compressors, etc.)
- Fine-tipped precision screwdriver
- Needle-nose pliers
- Magnifying glass (optional but helpful)
- Appropriate lubrication (e.g., graphite, typewriter lubricant)
- Clean cloths or cotton swabs
- Replacement springs (if needed)
Types of Springs and Reseating Procedures
Different springs on an IBM Model M perform specific functions, requiring tailored reseating procedures. The table below Artikels common spring types and their respective procedures.
| Spring Type | Description | Reseating Procedure |
|---|---|---|
| Key Cap Spring | These springs are typically small and hold the key cap onto the key stem. | Carefully remove the old spring. Inspect for damage. Insert the new spring into the key cap, ensuring it engages properly with the key stem. |
| Key Stem Spring | These springs are crucial for the keystroke mechanism, providing the necessary force for actuating the key. | Gently remove the old spring. Ensure that the spring’s coils are aligned correctly with the key stem. Apply a small amount of lubrication to the spring and key stem interface. |
| Actuator Spring | These springs activate the key mechanism when pressed, often located beneath the key. | Remove the actuator spring and carefully examine the spring’s condition. Replace if necessary, ensuring the spring engages correctly with the key mechanism. |
| Return Spring | These springs return the key to its neutral position after a keystroke. | Carefully remove the old spring. Ensure the new spring is correctly positioned to provide smooth and consistent return. |
Disassembly and Spring Identification
Properly reseating a spring within an IBM Model M typewriter mechanism necessitates meticulous disassembly and precise identification of the target spring. Failure to adhere to these steps could lead to further damage or incorrect reassembly, rendering the machine inoperable. Careful attention to detail and a systematic approach are crucial throughout this process.
Disassembly Procedure
Thorough documentation of the disassembly procedure is paramount for successful reassembly. Each step should be meticulously recorded, including the precise location of each component and any unique characteristics. This documented record ensures the machine’s components are restored to their original positions, maximizing the longevity and operational efficiency of the typewriter. This proactive approach minimizes the potential for errors and frustration during reassembly.
- Initial Inspection: Carefully examine the mechanism for any obvious damage or loose components. Note any unusual features or modifications that might affect the disassembly process.
- Lever Removal: Carefully detach the lever mechanisms, ensuring not to apply excessive force that might distort the surrounding parts. Use appropriate tools like small screwdrivers or tweezers to manipulate the levers.
- Spring Retention Component Removal: Carefully remove the spring retention components, if present, by using small, fine-tipped tools. This step involves potentially delicate parts and requires a gentle approach.
- Mechanism Separation: Once the levers and retention components are removed, gently separate the various sections of the mechanism to expose the spring housing. Avoid using excessive force to prevent damage to the mechanism.
- Component Isolation: Once the mechanism is separated, isolate each component, ensuring not to mix or misplace parts. Document the arrangement of each component.
Spring Identification
Precise identification of the target spring is critical for successful reseating. Incorrect spring installation can lead to improper operation and potential damage to the typewriter mechanism.
| Component | Description | Diagrammatic Representation |
|---|---|---|
| Spring Housing | The compartment that holds the spring. | (Imagine a rectangular box with an opening) |
| Target Spring | The spring needing replacement. Note its shape, size, and any unique markings. | (Imagine a coiled spring of a particular size and shape.) |
| Spring Retention Mechanism | The mechanism that secures the spring within the housing. | (Imagine a small bracket or hook) |
| Lever Assemblies | The mechanical arms that interact with the spring. | (Imagine a series of interconnected levers.) |
Proper spring identification is essential for ensuring compatibility and optimal function.
Part Labeling, How to reseat a spring on an ibm model m
A systematic method for labeling parts during disassembly is crucial for reassembly. This technique involves using unique identifiers for each part, such as stickers, labels, or sketches in a detailed log. This method allows for the unambiguous identification of each component, which is vital for a correct reassembly.
- Unique Identification: Assign a unique identifier to each component during disassembly, using a labeling system that’s easy to understand and use for reassembly.
- Visual Documentation: Take photographs or sketches of the disassembled components and their locations, including the labeled identifiers. This visual record is an important supplement to written documentation.
- Detailed Documentation: Maintain a detailed log of each step of the disassembly process, noting the sequence and any specific observations made. Include all unique identification labels and visual details in the log.
Spring Reseating Procedure
The precise reseating of the spring within an IBM Model M keyboard mechanism is critical for optimal key performance and longevity. Improper reseating can lead to sticking keys, uneven key travel, and premature wear. This section details the meticulous steps for reseating the spring, encompassing crucial considerations regarding tension and the utilization of appropriate tools.The spring’s tension is paramount in determining the key’s responsiveness and tactile feedback.
A correctly seated spring ensures consistent force application, preventing both excessive pressure and inadequate response. This section guides the user through the process of gauging and maintaining the appropriate spring tension.
Spring Reseating Steps
Proper spring reseating involves a systematic approach, ensuring minimal force is exerted to avoid damaging the spring or the surrounding components. The following steps detail the procedure.
- Preparation and Identification: Thoroughly examine the spring and the housing mechanism where it will be inserted. Precisely identify the specific spring, ensuring compatibility with the intended key. This step ensures proper functionality and prevents damage from mismatched components.
- Spring Insertion: Carefully align the spring’s eyelet with the corresponding housing aperture. Gently guide the spring into the housing, taking care not to bend or deform it. Ensure smooth and complete insertion without any binding or catching. Avoid forcefully pushing the spring into the housing, which can damage it or the mechanism.
- Tension Adjustment: Once the spring is seated, gently test the key’s actuation force. The key should have a consistent and appropriate tactile response. If the key is too stiff or too light, the spring tension needs adjustment. Tools like spring tension gauges or a digital scale can assist in quantifying the tension. Fine-tune the spring position within the housing to achieve the desired tension.
Use a light touch and avoid excessive force.
- Verification and Finalization: Thoroughly test the key’s function and responsiveness across its entire travel range. This includes pressing the key slowly, then quickly, and with varying levels of force. Verify that the key’s operation is smooth and consistent. If any issues are detected, repeat the reseating process, focusing on precise alignment and tension adjustments. Ensure the key functions without any sticking, binding, or uneven travel.
Tools and Techniques for Reseating
A variety of tools can enhance the efficiency and accuracy of the spring reseating process.
- Spring Tension Gauge: A spring tension gauge is a vital tool for measuring the spring’s force. This allows for precise adjustments to achieve the desired tension for optimal key performance. The gauge’s readings provide a reliable method for consistency.
- Tweezers: Fine-tipped tweezers are crucial for handling the spring, preventing accidental damage or bending. These tools offer precision control during the insertion process, ensuring the spring is positioned correctly and without force.
- Magnifying Glass: A magnifying glass is essential for inspecting the spring and its insertion point, ensuring proper alignment and avoiding potential issues. This visual aid enhances accuracy and allows for detailed examination of the spring.
- Digital Scale: In some cases, a digital scale can provide a more accurate measurement of the spring’s force compared to a tension gauge. This tool ensures greater precision and repeatability.
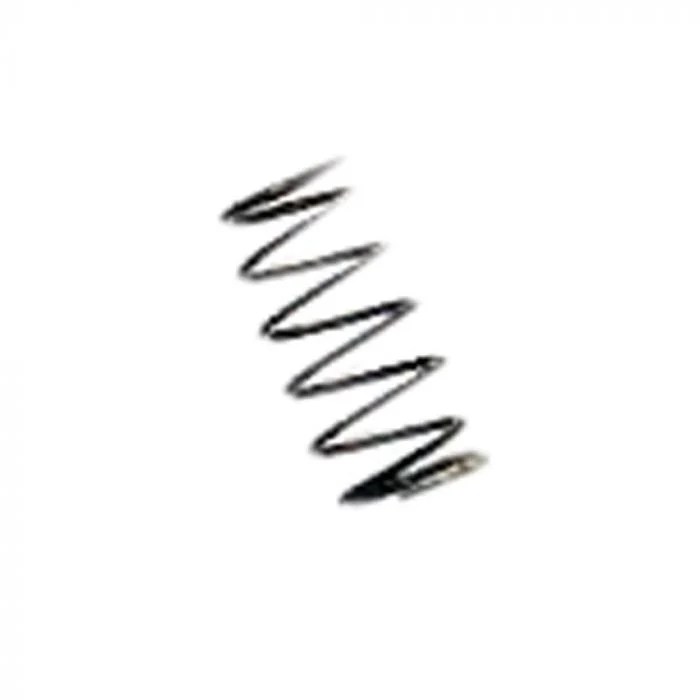
Illustration of the Spring Reseating Process
The following table illustrates the spring reseating procedure, showcasing the spring and its insertion into the housing.
| Step | Description | Image (Conceptual) |
|---|---|---|
| 1 | Spring and Housing | A close-up view of a spring, showcasing its components, including the eyelet and coils, along with the housing component into which it will be inserted. |
| 2 | Alignment | A magnified view of the spring being carefully aligned with the housing’s aperture, highlighting the precision required for correct positioning. |
| 3 | Insertion | A detailed image of the spring being gently inserted into the housing, emphasizing the smooth and controlled insertion process. |
| 4 | Tension Check | A depiction of the spring in the housing, with the key resting on top. This image demonstrates the key’s actuation, highlighting the spring’s tension and its impact on the key’s feel. |
Reassembly and Testing
Precise reassembly of the IBM Model M typewriter mechanism is crucial to restoring its functionality. Careful attention to detail and proper alignment of components during the reassembly process ensures a smooth and reliable operation. Verification of proper functioning after reassembly is paramount to confirming the successful reseating of the spring and the overall operational integrity of the machine.
Reassembly Procedure
The reassembly process should be executed in reverse order of disassembly, meticulously following the steps Artikeld in the disassembly section. Each component should be positioned precisely in its designated location, ensuring a snug fit without undue force. Misalignment of components can lead to malfunctions and reduced lifespan of the typewriter mechanism. Ensuring proper alignment during reassembly is essential to maintain the intended mechanical action.
Alignment Verification
Accurate alignment of critical components is essential for proper operation. Particular attention should be paid to the alignment of the carriage return lever, the typebar mechanism, and the platen. Misalignment can manifest as skipping keys, jamming of the typebars, or inconsistent spacing. Visual inspection and careful manual testing during reassembly will help in maintaining the alignment of all components.
Functional Verification
Thorough testing is necessary to confirm the spring is correctly seated and the typewriter operates as expected. The verification process must cover all aspects of the machine’s operation. Functional verification is essential to ensure that the spring is correctly seated, and the typewriter mechanism operates as intended.
Verification Checklist
- Verify the proper seating of the spring in the housing.
- Check the alignment of the carriage return lever, typebars, and platen.
- Test all keys for smooth and consistent operation.
- Ensure the carriage returns and advances accurately.
- Verify the spacing between characters is consistent and even.
- Inspect the platen for smooth and uniform movement.
- Test the operation of the paper feed mechanism (if applicable).
- Conduct a test print of a standard document to assess the overall functioning of the machine.
The checklist above serves as a guide to verify the correct seating of the spring and the overall functionality of the typewriter. Each item must be meticulously reviewed to guarantee the reliability of the typewriter’s mechanical operation.
Functional Tests
Comprehensive functional tests are essential to confirm the proper functioning of the typewriter. These tests should include a variety of keystrokes, carriage returns, and other operations. Repeated testing is crucial to confirm consistency and reliability.
- Keystroke Test: Press each key repeatedly to ensure smooth and consistent actuation of the corresponding typebar.
- Carriage Return Test: Initiate carriage return several times to confirm accurate and reliable return action of the carriage.
- Spacing Test: Type a text sample and carefully inspect the spacing between characters to ensure consistent spacing. Any irregularities in spacing may indicate alignment issues.
- Platen Test: Manually advance the platen and verify smooth and consistent movement. Any sticking or jamming points should be addressed.
- Full-Document Test: Type a longer document to evaluate the overall functioning of the machine, including continuous typing, returns, and the operation of the paper feed mechanism.
These specific tests will help identify any issues and ensure that the typewriter operates as expected after the spring has been reseated. Any discrepancies found during these tests should be carefully analyzed to identify and rectify the root cause.
Troubleshooting and Common Issues: How To Reseat A Spring On An Ibm Model M

Proper reseating of the spring in an IBM Model M keyboard is crucial for optimal performance and longevity. Incorrect procedures can lead to a variety of issues, from a noticeable loss of tactile feedback to complete malfunction. Thorough troubleshooting is essential to identify and rectify any problems encountered during the reseating process.
Potential Problems During Spring Reseating
Several issues can arise during spring reseating, ranging from the spring failing to seat correctly to damage to the spring or other components. These problems may manifest as inconsistent key response, a lack of tactile feedback, or even a complete failure of the key mechanism. Understanding these potential issues allows for proactive identification and resolution.
Common Mistakes and How to Avoid Them
Several mistakes can lead to issues with spring reseating. Improper handling of the spring, such as applying excessive force or dropping it, can result in damage. Incorrect alignment during reassembly can also prevent proper seating and functionality. Carefully examining the spring’s dimensions and ensuring proper alignment during reassembly are crucial to avoid these mistakes. Furthermore, improper lubrication can also cause problems with the spring’s movement.
Solutions for Common Issues
Addressing issues such as a spring not seating properly requires a methodical approach. First, ensure the spring is the correct size and shape for the specific key. Mismatched springs can lead to improper seating. Second, verify the spring is correctly aligned with the key’s housing and the appropriate components within. Third, gently guide the spring into its seat while avoiding excessive force.
If the spring still won’t seat, carefully check for obstructions in the key mechanism.
Troubleshooting Steps
| Step | Action | Expected Result | Troubleshooting |
|---|---|---|---|
| 1 | Verify spring size and shape match the key. | Spring matches the key dimensions. | If not, replace with correct spring. |
| 2 | Ensure spring is correctly aligned in the key’s housing. | Spring aligns smoothly into the housing. | Reorient spring; use a magnifying glass if necessary. |
| 3 | Gently guide the spring into its seat; avoid excessive force. | Spring seats smoothly into the housing. | Apply gentle, controlled pressure; if resistance, identify and remove obstruction. |
| 4 | Check for obstructions in the key mechanism. | No obstructions found. | Remove any debris or misaligned components. |
| 5 | Check for bent or damaged spring coils. | Spring is undamaged. | Replace the spring if damaged. |
Determining Spring Damage
Inspecting the spring for damage is critical. Visual inspection for bent, broken, or missing coils is the first step. A bent or broken spring will not seat properly and may cause inconsistent key response. A spring with missing coils may not provide sufficient resistance or tactile feedback. If any damage is observed, the spring should be replaced.
The replacement spring should be identical in dimensions to the original to maintain the intended function of the key mechanism.
Alternative Methods (if applicable)
Reseating the spring on an IBM Model M keyboard, while often successful with the standard procedure, may present challenges in certain scenarios. This section explores alternative methods, particularly for instances where the standard procedure proves ineffective or when the spring exhibits damage requiring specific repair techniques. These alternative approaches are crucial for maintaining the optimal functionality and longevity of the keyboard mechanism.Alternative methods for reseating a spring should be considered as a last resort, only after the standard procedure has failed or when the spring itself is severely damaged.
Carefully evaluating the specific issues and the condition of the spring is paramount before attempting any alternative approach. Improper application of these methods can lead to further damage to the keyboard mechanism.
Alternative Spring Reseating Techniques
Various approaches exist for reseating the spring, including specialized tools and techniques. The choice of method depends on the specific nature of the problem, the tools available, and the user’s skill level.
- Using a spring-seating tool: Specialized tools designed for reseating springs offer precision and control, minimizing the risk of damaging the spring or the keyboard mechanism. These tools often feature a mechanism for applying even pressure, preventing bending or breakage of the spring during the reseating process. Care must be taken to ensure proper tool selection for the specific spring size and type.
- Using a small vise or pliers with precision grips: A small vise or pliers with precision grips can provide the necessary clamping force to reposition the spring. This method requires precise application of force to avoid damaging the spring or the surrounding components. The spring should be manipulated gently, and care must be taken not to apply excessive force.
Repairing a Damaged Spring
A damaged spring might require repair or replacement, depending on the extent of the damage.
- Partial repairs: If the damage is localized, such as a minor bend or a small crack, the spring might be repairable. Careful straightening or reinforcement using appropriate materials (e.g., epoxy or a similar adhesive) can be considered. The repair method should be tailored to the specific type of damage, ensuring structural integrity and preventing further damage.
- Complete replacement: If the damage is extensive or the spring is structurally compromised, replacement is necessary. Choosing a replacement spring with identical dimensions and material properties is critical to maintain the keyboard’s functionality and tactile response. Using a spring with an incorrect material or shape can lead to unintended consequences.
Spring Material Comparison
The choice of spring material is crucial for optimal keyboard performance. Different materials exhibit varying characteristics, impacting the spring’s resilience, durability, and tactile feel.
| Material | Advantages | Disadvantages | Suitability for IBM Model M |
|---|---|---|---|
| Stainless Steel | High resilience, durability, and corrosion resistance. | Can be stiff, potentially reducing the tactile feedback. | Generally suitable, but the stiffness might require adjustment to the keyboard’s specific requirements. |
| Phosphor Bronze | Good balance between resilience and tactile feedback. | Slightly less durable than stainless steel. | Excellent choice for maintaining a good balance between durability and the tactile feel expected from the IBM Model M. |
| Music Wire | Offers a smooth and consistent feel, potentially offering a better tactile experience. | May not be as durable as other materials. | May be a suitable option for those seeking a smoother, more consistent tactile experience, but durability should be considered. |
Safety Precautions
Properly reseating a spring on an IBM Model M typewriter requires meticulous attention to safety. Neglecting precautions can lead to personal injury or irreversible damage to the delicate mechanisms. Adherence to these procedures is crucial for a successful and safe repair process.Careful handling and adherence to established safety protocols are paramount during any repair process. Improper techniques can lead to cuts, abrasions, or more serious injuries.
Likewise, mishandling components can damage the typewriter’s intricate parts, rendering further repair or restoration more complex and expensive.
Essential Safety Equipment
Adhering to established safety measures is crucial to mitigate potential risks during the repair process. The following equipment is essential for a safe and efficient work environment.
- Eye protection (safety glasses or goggles): Protecting the eyes from flying debris or small parts is vital. This precaution safeguards against potential eye injuries that could result from the handling of small components during disassembly or reassembly.
- Work gloves: Protecting hands from cuts or abrasions is critical. Gloves prevent potential injuries from sharp edges or rough surfaces encountered during the disassembly and reassembly of the typewriter.
- A well-lit workspace: Clear visibility is essential for precise work. Adequate lighting minimizes the risk of errors or mishaps.
- A sturdy work surface: A stable and level surface prevents accidental slippage or movement of the typewriter during the repair process.
Workspace Considerations
A well-organized and well-lit workspace minimizes the risk of accidents and promotes efficiency during the repair process. Proper preparation is essential for a safe and successful repair.
- Proper lighting: Ensure adequate lighting to clearly see the intricate components of the typewriter. Dim or inadequate lighting can lead to mistakes and accidents.
- Organized workspace: Keep the workspace clear of unnecessary items. Clutter can lead to tripping hazards and accidental damage to the typewriter or other tools.
- Proper ventilation: Ensure proper ventilation, particularly when using solvents or other chemicals. Proper ventilation helps to minimize the risk of inhalation of harmful fumes or vapors.
Handling of Components
Handling the typewriter’s components with care is crucial to prevent damage to the delicate mechanisms. Gentle manipulation and controlled movements minimize the risk of injury and damage.
- Use appropriate tools: Employ the right tools for each task. Using the wrong tools can lead to damage to components.
- Avoid forceful movements: Avoid applying excessive force when manipulating components. Gentle pressure is more effective.
- Secure components: Secure the components as necessary during the repair process. This prevents accidental movement or dropping.
Epilogue
So, you’ve conquered the reseating of your IBM Model M spring! You’ve successfully navigated the intricate world of vintage typewriters, learned the importance of precision, and emerged victorious. Now, go forth and type with pride, knowing you’ve mastered the art of keeping these iconic machines humming. Your Model M will thank you.
FAQ Corner
Q: What kind of tools do I need?
A: You’ll need a variety of tools, including tweezers, screwdrivers (likely Phillips and flathead), and potentially a spring compressor (if the spring is particularly stubborn). Also, good lighting and a steady hand are your best friends!
Q: What if I accidentally break a part during disassembly?
A: Document everything! Take detailed photos or videos of each step before disassembling. This will be your lifeline during reassembly. Also, consider labeling parts as you go. A little prep work goes a long way.
Q: How do I know which spring needs replacing?
A: Carefully inspect all springs for damage, such as bends, cracks, or missing coils. Refer to the detailed diagrams and tables in the guide to identify the specific spring requiring attention.
Q: My spring won’t seat properly. What should I do?
A: Double-check the reseating procedure. Ensure the spring is oriented correctly. Make sure the spring isn’t damaged or deformed. If the spring is still problematic, review the troubleshooting steps provided in the guide. If you still have issues, consult a professional repair technician.
