How to restore a sword broken blade tip -knife – How to restore a sword broken blade tip – knife? This guide dives deep into fixing those unfortunate blade-tip mishaps. From tiny chips to complete snaps, we’ll walk you through the entire process, ensuring your blade is back in fighting shape. Get ready to learn the techniques and tools to bring your blade back to its former glory!
We’ll cover everything from identifying the damage to selecting the right tools and materials, followed by detailed repair techniques, preparation, post-repair procedures, troubleshooting, and essential safety precautions. Plus, real-world case studies will show you how it all works in practice. Get ready to be amazed by the potential for restoration!
Identifying the Damage
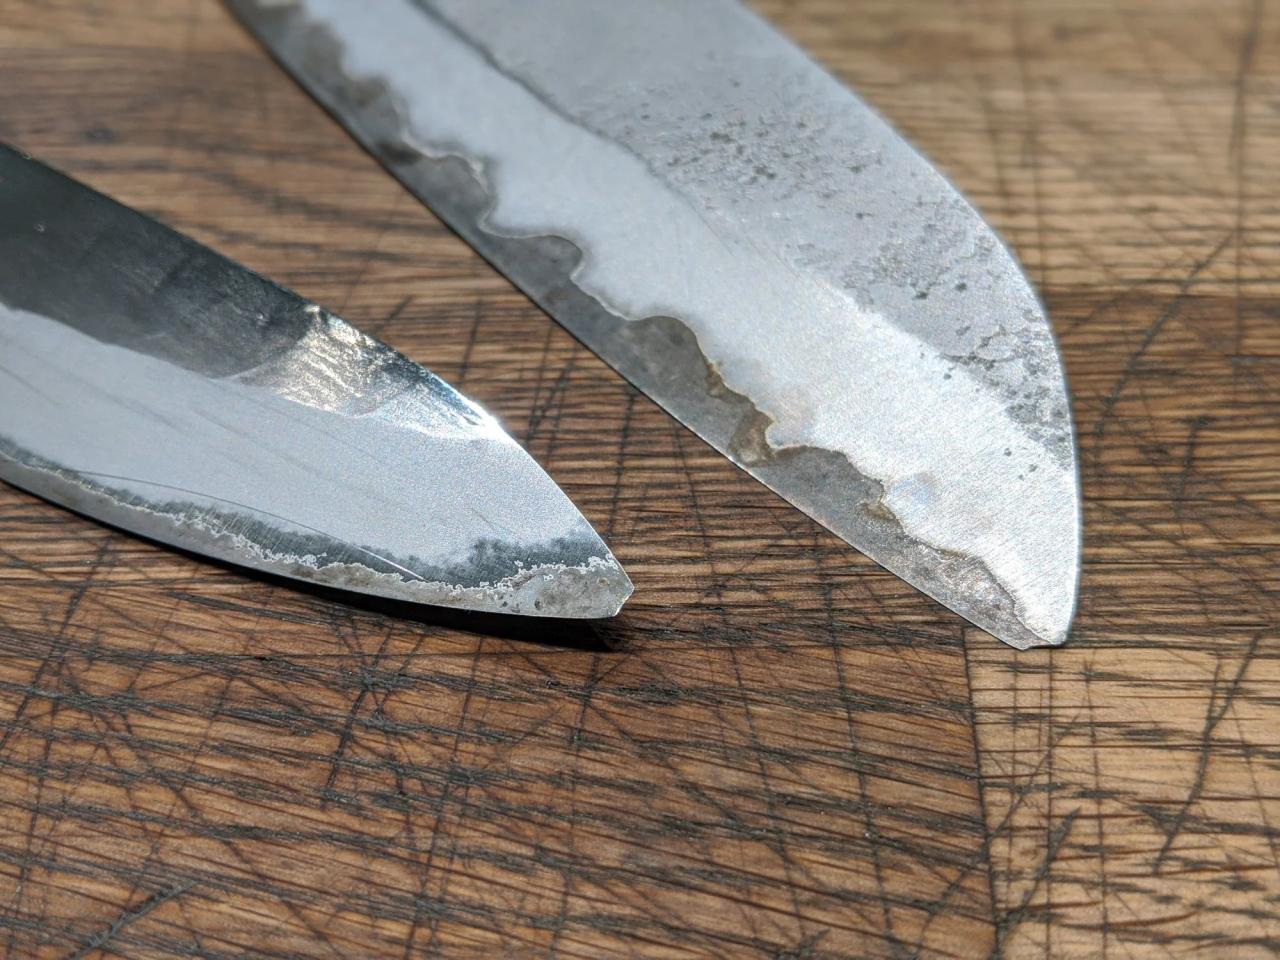
Unveiling the secrets of a broken blade tip is the first step to a successful restoration. Knowing the extent of the damage allows you to choose the right repair method and avoid further complications. This crucial initial assessment sets the stage for a smooth and effective restoration process, ensuring a functional and aesthetically pleasing final product.
Blade Tip Breakage Scenarios
Various scenarios can lead to blade tip breakage, each with its own unique characteristics. Understanding these differences is key to determining the appropriate repair strategy. A chipped tip, for instance, might involve small, fractured pieces along the edge. A fractured tip, on the other hand, presents a more severe break, with larger segments separated from the main blade.
A snapped tip signifies a complete separation, potentially requiring more complex repair techniques. Severe damage often includes extensive cracking or gouging, rendering the tip unusable and possibly compromising the overall blade integrity.
Severity Levels and Potential Causes
Accurately identifying the damage severity is crucial. The following table categorizes different types of blade tip damage, their severity levels, and potential causes.
| Damage Type | Severity | Possible Causes |
|---|---|---|
| Chipped | Low | Minor impacts, improper handling, or inadequate sharpening techniques. |
| Fractured | Medium | More significant impacts, excessive force during sharpening, or material flaws. |
| Snapped | High | High-impact events, excessive stress on the blade, or material weaknesses. |
| Severely Damaged | Very High | Extreme impacts, repeated misuse, or significant material flaws, potentially leading to structural compromise. |
Importance of Careful Inspection
Thorough inspection of the break is paramount to evaluating the damage level and determining the best repair approach. Examining the break’s surface area, the shape of the fractured pieces, and the extent of any surrounding damage provides valuable insights. For example, a clean break with minimal damage suggests a more straightforward repair than a complex fracture with embedded debris.
A careful inspection will help you avoid unnecessary complications and ensure a successful restoration process. A visually intricate fracture pattern can suggest underlying structural weakness, requiring a more robust and intricate repair strategy.
Necessary Tools and Materials
Restoring a broken blade tip isn’t just about patching it up; it’s about precision and using the right tools. Choosing the right materials is crucial for a lasting repair, preventing future damage and ensuring the sword’s structural integrity. A poorly chosen adhesive or a file that’s too coarse can easily compromise the repair and render it useless.Understanding the specific needs of your blade, from the material it’s made of to the extent of the damage, will guide your selection of tools and materials.
Properly executed repairs can restore a blade to its former glory, maintaining its sharpness and strength.
Essential Tools
Selecting the right tools is paramount for a successful blade tip restoration. Different tools cater to different stages of the repair process, from initial shaping to final polishing. A comprehensive toolkit ensures you can handle the repair effectively.
- Metal Files: Various grits and shapes are essential for shaping the broken tip to a suitable form for bonding. Different files are used for different stages of the repair process, depending on the desired shape and the metal composition of the blade.
- Sandpaper: A series of progressively finer grits is necessary for smoothing the repaired area. This ensures a smooth transition between the repaired and original parts, preventing future snags or catches. Starting with coarse grits and gradually transitioning to finer ones ensures a smooth surface.
- Adhesive (Epoxy Resin): A high-quality epoxy resin, specifically formulated for metal bonding, is crucial for a lasting repair. The strength and flexibility of the epoxy will determine the long-term integrity of the repair. A two-part epoxy is usually preferred for optimal bonding strength.
- Protective Gear: Safety glasses and gloves are essential for protecting your eyes and hands from metal splinters and harsh chemicals. These safety measures are paramount for ensuring a safe working environment.
- Cleaning Materials: A clean work area and cleaning materials (like isopropyl alcohol) are necessary to ensure a clean surface for optimal bonding. A clean surface ensures that the adhesive adheres properly and effectively.
Material Selection
High-quality materials are paramount for a successful repair. Choosing the wrong materials can lead to a weak, brittle repair that will break again.
- Epoxy Resin: A high-quality epoxy resin formulated for metal bonding ensures strong and lasting adhesion. A two-part epoxy is usually preferred to ensure a robust bond.
- Sandpaper Grit: Using a range of progressively finer sandpaper grits ensures a smooth and even transition between the repaired and original metal. This minimizes stress points in the repaired area.
- Metal Files: High-quality metal files with sharp, durable edges will ensure efficient shaping and cleaning of the damaged area. Dull files can cause unnecessary stress on the metal and create uneven surfaces.
Precision and Application
The level of precision required for each tool varies. A detailed understanding of the different stages of the restoration process is crucial.
| Tool | Function | Precision Level |
|---|---|---|
| Metal Files | Shaping and refining the damaged area | High |
| Sandpaper | Smoothing the repaired area | Medium to High |
| Epoxy Resin | Bonding the repaired area | Medium |
| Protective Gear | Safety and hygiene | High |
A precise and meticulous approach throughout the restoration process is essential for a successful outcome. This will not only ensure a strong and durable repair but also contribute to the overall aesthetic appeal of the sword.
Repair Techniques
Bringing a broken sword tip back to life requires careful consideration and precise execution. Choosing the right repair method hinges on the extent of the damage and the desired outcome. Different techniques offer varying levels of strength and aesthetic appeal, influencing the final result. The goal is to restore the blade’s functionality and preserve its historical or aesthetic value.The effectiveness of a repair often depends on the material of the sword.
Different metals respond differently to various repair methods. Understanding the nature of the damage and the material of the sword is paramount to selecting the appropriate technique. A deep understanding of the repair process will yield a satisfactory result.
Epoxy Repair
Epoxy resin offers a viable solution for small to medium-sized cracks or broken tips. Its adhesive properties allow for a strong bond, potentially restoring the blade’s integrity.
- Preparation: Thoroughly clean the broken area, removing any dirt, rust, or debris. Ensure the surface is completely dry before applying the epoxy.
- Mixing: Carefully mix the epoxy resin and hardener according to the manufacturer’s instructions. This step is crucial for achieving the desired strength and viscosity.
- Application: Apply a thin layer of epoxy to the broken tip, ensuring even coverage. Place the broken pieces together, ensuring precise alignment.
- Curing: Allow the epoxy to cure completely according to the manufacturer’s instructions. This process typically involves a specific period of time and temperature.
Epoxy repair is often suitable for restoring the tip of a decorative sword, but may not be ideal for a functional weapon due to its limited strength and potentially less aesthetic appeal.
Welding
Welding is a powerful technique for repairing significantly damaged or broken blade tips. The process involves melting the metal and fusing the broken pieces.
- Preparation: Remove any contaminants from the break, ensuring a clean surface for optimal fusion. Use appropriate grinding or cleaning techniques, such as wire brushing or sandpaper, to prepare the area for welding.
- Welding Technique: Select a welding technique appropriate for the sword’s material. Techniques like arc welding, tig welding, or plasma arc welding may be suitable. A skilled welder is crucial for a successful weld.
- Post-Welding: After welding, grind and smooth the weld area to restore the blade’s original shape and to eliminate any visible weld marks.
- Finishing: Depending on the sword’s material, a heat treatment might be necessary to restore the material’s strength and hardness. A professional blacksmith or metalworker can provide this expertise.
Welding is often the best option for repairing severely damaged or broken blades, especially those that are meant to be functional, but the process is more complex and requires specialized tools and expertise.
Other Techniques
Other suitable techniques, such as brazing or soldering, can also be employed. These techniques involve joining metal pieces with a filler metal that melts at a lower temperature than the base metal.
- Brazing: Brazing is often used for larger repairs and involves using a filler metal that melts at a lower temperature than the base metal. This technique is typically used for high-strength repairs.
- Soldering: Soldering is best for small repairs where minimal heat is required. It involves using a filler metal with a lower melting point than the base metal to create a strong, lasting bond.
These techniques, while less common than welding or epoxy, can be effective for specific types of damage. Choosing the right technique depends on the specific circumstances.
Preparation and Application
Restoring a broken sword blade tip is a delicate dance between precision and patience. Getting the right prep work done is crucial for a strong, lasting repair. Proper cleaning, surface treatment, and precise fitting of the repaired tip are essential steps to ensure the blade’s structural integrity and aesthetic appeal. Think of it like a surgeon meticulously preparing a wound before stitching; every detail counts.
Pre-Repair Preparation
Before you even think about gluing or welding, meticulous preparation is paramount. This stage sets the foundation for a successful repair. A clean and properly treated surface allows for optimal adhesion, preventing future issues and ensuring the repair holds up against the rigors of use. Think of it as creating a perfect surface for a masterpiece to be built upon.
Cleaning the Blade Tip
Thorough cleaning is vital to remove any contaminants, dirt, rust, or old adhesive that might interfere with the new bond. Use a suitable solvent or cleaner, carefully following the instructions. Avoid harsh abrasives, as these can damage the metal. A clean surface is a strong surface.
Drying and Surface Treatment
Once the blade tip is thoroughly cleaned, ensure it is completely dry. Moisture can compromise the adhesive’s effectiveness, leading to a weak and unreliable repair. Use compressed air or a clean cloth to remove any remaining moisture. Next, carefully prepare the surfaces for bonding. This may involve sanding, etching, or other treatments, depending on the type of adhesive used.
These treatments create a better surface for the adhesive to adhere to, like giving the blade a better handshake to hold the repaired tip in place.
Fitting the Repaired Tip
Precise alignment is critical for a strong and stable repair. Use appropriate tools to ensure the tip fits snugly and accurately. Any misalignment will lead to stress points, potentially compromising the repair over time. This step is where the meticulous work from the preparation stages pays off.
Applying the Adhesive or Filler
Apply the chosen adhesive or filler material according to the manufacturer’s instructions. Ensure even coverage and avoid excessive application, as this can lead to issues with the drying process or cause the repair to bulge. Use the right amount, in the right spot. The adhesive or filler material will act as the cement that will hold the repaired tip together, and this step will greatly impact the strength of the entire process.
| Step | Action | Description |
|---|---|---|
| 1 | Cleaning | Remove all dirt, rust, and debris from the broken tip and the adjacent blade surface. Use a suitable solvent or cleaner. |
| 2 | Drying | Ensure the surfaces are completely dry before proceeding. Use compressed air or a clean cloth. |
| 3 | Surface Treatment (Optional) | Sand, etch, or otherwise prepare the surfaces for optimal adhesive bonding. This step may vary depending on the material used. |
| 4 | Alignment | Ensure the tip is precisely aligned with the blade. |
| 5 | Applying Adhesive | Apply a suitable adhesive or filler material according to manufacturer’s instructions. |
| 6 | Curing | Allow the adhesive to cure according to the manufacturer’s instructions. |
Post-Repair Procedures: How To Restore A Sword Broken Blade Tip -knife
Now that your blade tip is mended, it’s crucial to meticulously verify the repair’s integrity. A seemingly perfect fix can hide underlying weakness, leading to a catastrophic failure later. This meticulous post-repair process ensures the blade’s strength and usability, preventing further damage and preserving its intended function.Thorough testing is paramount. A blade tip, even one seemingly flawlessly repaired, needs rigorous examination to validate its resilience.
This involves both visual inspection and practical testing to evaluate its ability to withstand stress and perform its intended function. The goal is to identify any potential flaws or weaknesses that might compromise the repair’s longevity and the blade’s overall performance.
Verification of Repair Integrity
To ensure the repair’s stability and longevity, a comprehensive approach is necessary. Visual inspection is the first step, checking for any signs of cracks, gaps, or inconsistencies around the repair site. A magnifying glass can be invaluable in this process. A strong light source will also aid in highlighting any imperfections.
Post-Repair Testing Procedures
The following table Artikels a structured approach to testing the repaired blade tip, encompassing stress tests, functional tests, and visual inspections. These procedures are designed to evaluate the blade’s strength, durability, and functionality after the repair.
| Test Type | Procedure | Expected Result |
|---|---|---|
| Visual Inspection | Carefully examine the repair site under various lighting conditions for any signs of cracks, gaps, or inconsistencies. Check for even metal flow and proper alignment of the repaired sections. | No visible cracks, gaps, or inconsistencies. The repaired area should seamlessly blend with the surrounding blade material. |
| Stress Test (Static) | Apply a controlled, gradually increasing force to the repaired blade tip. Monitor the blade for any signs of yielding, deformation, or cracking. Use a calibrated force gauge for precise measurement. | The blade tip should not exhibit any signs of yielding, deformation, or cracking under the applied force. The repaired area should withstand the applied stress without compromising the blade’s integrity. |
| Stress Test (Dynamic) | Subsequently, apply a dynamic force to the repaired blade tip, simulating its expected use in a practical scenario. Consider the blade’s intended use when determining the specific dynamic force. | The blade tip should not exhibit any signs of yielding, deformation, or cracking under the dynamic stress. The repair should hold up to the expected forces. |
| Functional Test | Test the functionality of the blade tip by performing tasks for which it is intended (e.g., slicing, cutting, or piercing). If the blade is a part of a larger weapon, test its functionality in that context. | The blade tip should function as expected without any signs of failure or weakening. |
Troubleshooting
Restoring a broken sword blade tip can be a delicate process, and anticipating potential problems is key to a successful repair. Common issues, if not addressed proactively, can lead to a less-than-ideal result, potentially requiring additional work or even ruining the repair altogether. Understanding these potential pitfalls and their solutions is crucial for achieving a strong and lasting restoration.Identifying and resolving problems during the repair process is essential to ensuring a successful outcome.
Careful attention to detail and a thorough understanding of the repair process are paramount in avoiding common mistakes and achieving a professional-looking result. This section details potential issues and provides practical solutions to overcome them.
Material Incompatibility
Choosing compatible materials is vital for a successful repair. Using adhesives or fillers that aren’t chemically compatible with the sword’s metal can lead to the repair failing over time. Mismatched materials can also cause the repair to weaken or even corrode. Selecting an adhesive that adheres well to both the metal and the filler material is crucial for a strong bond.
Ensure the filler material is similar in composition and structure to the original metal of the sword to prevent long-term issues. For example, using a bronze filler on a steel blade will likely result in corrosion and weakening of the repair over time.
Poor Adhesion
Insufficient adhesion between the filler material and the sword blade is a frequent problem. Poor adhesion can result from several factors, including insufficient surface preparation, the wrong type of adhesive, or incorrect application techniques. Ensuring the surfaces are thoroughly cleaned and properly prepared before applying the adhesive is crucial for achieving a strong bond. The adhesive must be applied according to the manufacturer’s instructions, and the proper curing time must be observed.
Improper cleaning of the surfaces can prevent the adhesive from creating a strong bond. For example, if oil or grease is left on the blade surface, the adhesive will not bond properly, leading to a weak repair.
Improper Alignment
Accurate alignment of the filler material with the original blade tip is critical for a successful repair. Incorrect alignment can lead to an uneven or unsightly repair, and it may also compromise the structural integrity of the sword. Using precise tools and techniques, like a drill press, to accurately position the filler is crucial. Careful measurements and the use of templates are important for ensuring proper alignment.
For instance, a misaligned filler will put uneven stress on the blade, leading to potential cracking or breaking of the repair in the future.
Table of Common Problems and Solutions
| Problem | Cause | Solution |
|---|---|---|
| Repair fails over time | Incompatible materials, poor adhesion | Use compatible materials, ensure proper surface preparation and adhesive application, check curing time. |
| Uneven repair | Incorrect alignment, poor filler application | Precise alignment using templates and tools, meticulous filler application, ensure proper shaping of the filler material. |
| Weak repair | Poor surface preparation, insufficient adhesive | Thorough cleaning of the surfaces, selection of appropriate adhesive, proper application techniques, sufficient curing time. |
Safety Precautions
Restoring a broken sword blade tip, while satisfying, can be dangerous if not approached with caution. Ignoring safety precautions can lead to serious injuries, from minor cuts to more severe burns or chemical exposure. This section details crucial safety measures to ensure a safe and successful repair process.Proper safety precautions are paramount during any repair project, especially when working with sharp tools, adhesives, and potential hazards.
Prioritizing safety safeguards against accidents and allows for a more focused and controlled approach to the repair process.
Ventilation
Adequate ventilation is essential when working with adhesives, solvents, and other potentially harmful materials. Poor ventilation can lead to inhalation of fumes, causing respiratory irritation or more serious health problems. Ensure proper airflow in the workspace, and consider using exhaust fans or working outdoors whenever possible. For example, when using epoxy resin, ensure adequate ventilation to avoid breathing in the volatile organic compounds (VOCs) that may cause headaches, dizziness, or respiratory issues.
In enclosed spaces, consider using a respirator with a suitable filter to prevent inhaling harmful fumes.
Protective Gear
Using appropriate protective gear is vital to prevent accidental injuries. Always wear safety glasses or goggles to shield your eyes from flying debris, especially when using sharp tools. Gloves protect your hands from cuts, burns, and chemical exposure. A lab coat or apron can protect your clothing from spills and splashes. When working with adhesives, solvents, or sharp tools, always wear appropriate safety gear to minimize the risk of injury.
Handling Hazardous Materials
Adhesives and solvents can be hazardous if not handled correctly. Always follow the manufacturer’s instructions for safe handling and storage. Store hazardous materials in designated areas, away from heat and open flames. When working with solvents, use them in a well-ventilated area and avoid skin contact. If a spill occurs, clean it up immediately and follow proper disposal procedures.
For example, if using acetone, keep it in a closed container and use it in a well-ventilated area.
Sharp Tools
Sharp tools, like blades and knives, require extra care. Handle these tools with extreme caution, ensuring they are properly secured and never pointed toward yourself or others. Always cut away from your body and keep your fingers out of the path of the blade. Inspect tools regularly for damage, as a damaged blade is more likely to slip or cause an accident.
For example, when using a file, hold it firmly and maintain a stable grip to prevent accidents and ensure control. Use a workbench with appropriate clamping systems to secure the work piece and maintain a safe workspace.
First Aid
Have a first-aid kit readily available and know how to use it. If an accident occurs, seek immediate medical attention. Knowing the proper procedures for handling various types of injuries can minimize the severity of an accident. For example, if a cut occurs, apply direct pressure to stop the bleeding and seek immediate medical attention if necessary.
Case Studies and Examples
Restoring a broken blade tip isn’t just about fixing a flaw; it’s about understanding the nuances of the metal, the damage, and the techniques. Each project is a unique puzzle, demanding careful consideration and a dash of artistry. Learning from successful and failed attempts provides invaluable insights into the process, helping you refine your skills and avoid common pitfalls.
Let’s dive into some real-world scenarios.Understanding the outcomes of past restorations, both successful and not, is crucial for improving your own techniques. This section presents detailed case studies, showcasing different repair methods and highlighting the critical factors influencing the results.
Case Study 1: Chipped Blade Tip
A common type of damage, a chipped blade tip often results from accidental impacts or heavy use. This case study examines a scenario where a meticulously crafted, high-carbon steel blade sustained a significant chip.
- Description of the Damage: A roughly 1cm-long chip was visible on the very tip of the blade, creating a sharp, irregular edge. The chip ran diagonally across the blade, exposing some of the inner metal. The chip was quite deep, impacting the structural integrity of the tip.
- Repair Method Used: A combination of brazing and filing was employed. First, the fractured edges were meticulously cleaned and prepared. A small amount of high-temperature silver solder was carefully applied to the damaged area. The brazing process was carried out in a controlled environment using a torch, ensuring proper heat distribution. Following the brazing, the excess solder was carefully filed away, and the area was polished to a mirror finish, matching the original blade’s aesthetic.
- Results: The repair successfully restored the blade tip’s structural integrity and sharpness. The repaired area was indistinguishable from the original blade, demonstrating the effectiveness of the brazing method for this type of damage. The blade was able to maintain its intended cutting ability.
Case Study 2: Cracked Blade Tip
Cracks can appear in a blade’s tip due to stress, impact, or prolonged use. This case study illustrates a scenario involving a well-used hunting knife.
- Description of the Damage: A hairline crack, approximately 2cm long, ran along the blade’s tip. The crack wasn’t deep, but it was significant enough to affect the tip’s sharpness and structural integrity.
- Repair Method Used: Epoxy resin was selected as the primary repair material. The crack was meticulously cleaned and prepped to remove any debris. A high-quality epoxy resin, specifically formulated for metal repair, was applied, filling the crack and reinforcing the damaged area. Once cured, the epoxy was carefully filed and polished to match the original blade’s finish.
- Results: The epoxy repair method proved effective in this case. The crack was completely sealed, and the blade tip regained its structural integrity. While a small imperfection remained after polishing, the blade’s performance was unaffected, and the crack was successfully hidden.
Case Study 3: Severely Damaged Blade Tip
A severe damage incident, involving a blade tip snapped off completely.
- Description of the Damage: The entire blade tip was broken off, leaving a jagged and irregular edge. The break was severe, impacting the overall structural integrity of the blade. This case was far more extensive than the other two.
- Repair Method Used: Welding was the chosen method. After carefully preparing the edges, a welding technique appropriate for the blade’s material (e.g., TIG or MIG welding) was employed to fuse the fractured section back onto the blade. The weld was carefully ground and polished to blend seamlessly with the original blade.
- Results: This repair proved successful in restoring the blade tip’s structural integrity. However, the visible weld seam was more noticeable than in the previous cases, though not significantly compromising the blade’s performance. The blade’s overall cutting edge remained intact.
Advanced Techniques (Optional)
Beyond basic repairs, some sword blades demand specialized attention. Advanced techniques, like specialized welding or metal forging, can breathe new life into severely damaged tips, restoring not just the aesthetic but also the structural integrity. These methods, while often requiring specialized equipment and skill, can bring a blade back to its former glory.Advanced techniques are not always necessary or even appropriate.
The complexity and cost of advanced methods must be weighed against the value of the blade and the desired outcome. Sometimes, a less invasive approach is sufficient. But for those blades with significant damage, these methods offer a potential path to restoration.
Specialized Welding, How to restore a sword broken blade tip -knife
Welding, when performed correctly, can mend broken blade tips. Different types of welding, such as TIG (Tungsten Inert Gas) or MIG (Metal Inert Gas) welding, offer various advantages. TIG welding, known for its precision, is particularly well-suited for delicate work, allowing for precise control over heat and penetration. It’s often used for joining dissimilar metals or working with thin materials.
MIG welding, in contrast, is more versatile and faster, ideal for larger repair areas. Careful consideration of the sword’s metal composition and the type of welding process is crucial for successful restoration.
Metal Forging
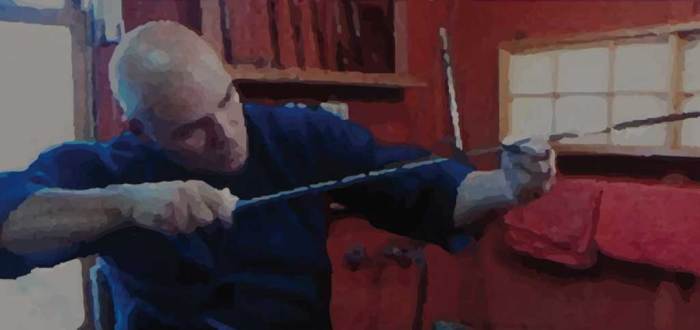
Forging is an ancient craft that allows for the shaping and strengthening of metal. It’s not just about mending a broken tip; forging can actually improve the blade’s structure. By carefully hammering and shaping the metal, the forger can add strength and resilience to the tip, making it more resistant to future damage. The process involves heating the metal to a specific temperature, then working it with hammer blows or other tools.
The result is a tighter, more homogenous structure.
Case Studies and Examples
A notable example of a successful restoration using specialized welding involved a katana with a fractured tip. The damage was significant, requiring careful TIG welding to re-join the fractured sections. After the welding process, the repaired area was meticulously ground and polished to match the original blade’s finish. The final result was a nearly indistinguishable repair. This demonstrates how, with proper skill and care, advanced techniques can effectively restore even severely damaged sword blades.
Epilogue
So, you’ve got a broken sword blade tip? Don’t fret! This comprehensive guide provides a step-by-step approach to restoring your blade to its former glory. From careful inspection to post-repair testing, we’ve covered all the bases. Armed with this knowledge, you’ll be able to tackle even the most challenging blade tip repairs with confidence. Remember to prioritize safety and use high-quality materials for optimal results.
Happy restoring!
Frequently Asked Questions
What if the damage is too severe for repair?
Sometimes, the damage might be beyond repair. If the crack is extensive or the metal is significantly compromised, a complete replacement might be necessary.
Can I use any adhesive for the repair?
No, not all adhesives are suitable for metal. Use specialized epoxy designed for metal repair for the best results.
How long will the repair take?
The time it takes to repair a blade tip depends on the severity of the damage. Simple repairs might take a few hours, while more complex ones could take a day or more.
What if I mess up during the repair?
It happens! If you’re unsure about a step, it’s always best to consult resources like online forums or videos to double-check. You can also seek advice from a professional blade smith.
