How to tell if your heater core is bad? This guide provides a comprehensive overview of identifying, diagnosing, and resolving heater core issues. Understanding the symptoms, visual inspection techniques, and testing methods can save you time and money in the long run. From common symptoms to advanced troubleshooting, we’ll equip you with the knowledge to tackle this car maintenance task with confidence.
This comprehensive guide explores the various ways to diagnose a failing heater core, from subtle signs to more obvious indications. We’ll discuss visual inspection methods, leak testing, and how to distinguish between heater core problems and other potential causes. By following the detailed steps Artikeld, you’ll gain a better understanding of your vehicle’s heating system and be able to determine if your heater core needs replacement.
Identifying Symptoms of a Bad Heater Core
A failing heater core is a clandestine saboteur, silently undermining your comfort and potentially wreaking havoc on your vehicle’s internal systems. Recognizing the subtle and overt symptoms is crucial for timely intervention, preventing further damage and costly repairs. Understanding the nuances of these telltale signs, from the faintest chill to the roaring inferno of overheating, can save you considerable time and money.This insidious foe can manifest in various ways, often mimicking other, more common issues.
Differentiating a malfunctioning heater core from a simple thermostat problem or low coolant level demands keen observation and a discerning eye. The progression of symptoms, from mild discomfort to a catastrophic failure, provides invaluable clues. Pay close attention to these indicators; they are your early warning system.
Common Symptoms of a Failing Heater Core
Identifying the specific symptoms of a failing heater core can be tricky, as the signs often overlap with other issues. A systematic approach, focusing on the nuances of the symptoms, is key to diagnosis. Mild symptoms might initially go unnoticed, but escalating issues can lead to severe problems if not addressed promptly.
- Faint Warmth or No Warmth at All: A subtle lack of warmth, or the complete absence of heat, especially during cold weather, can be a crucial early indicator. This could be a minor issue or a more serious problem depending on the severity. Imagine a frosty morning; the car’s interior should be a comforting oasis of warmth, not a frigid wasteland.
- Uneven Heating: Air blowing from the vents might feel hot in one area but cold in another. This uneven distribution suggests a blockage or restricted flow of heated air, a possible symptom of a failing heater core. This is akin to trying to heat a room with a blocked radiator; the effect is inconsistent and inefficient.
- Cold Air from the Defroster: When you activate the defroster, instead of warm air, you get a blast of frigid air. This is a strong indicator of a failing heater core, as the defroster relies on the same system for heat distribution. This could signal a complete blockage in the core, akin to a dam collapsing and obstructing water flow.
- Steam or Vapor Emitting from the Heater Core Area: This symptom is often a late stage indicator, but a crucial one. The heater core is essentially a miniature steam engine; a leak in the core will release steam, indicating a severe problem and a potential need for immediate action. Imagine a pressure cooker releasing steam, signaling imminent danger if not addressed promptly.
- Visible Leaks or Corrosion: A more direct, but less common, sign. Physical inspection might reveal leaks or corrosion around the heater core, especially in older vehicles. A compromised core is like a broken pipeline, allowing the vital fluids to leak out.
Symptom Progression and Vehicle Type Considerations
The progression of symptoms varies based on the age and type of vehicle. Older cars might exhibit gradual deterioration, while newer models might show sudden and dramatic changes. Understanding these differences can help diagnose the issue more efficiently.
- Older Vehicles: Symptoms in older vehicles often start subtly, with a gradual decrease in heating efficiency. This can be mistaken for other issues, such as low coolant levels or a dirty heater core. Think of an aging infrastructure; the system might slowly deteriorate without noticeable cracks or gaps at first.
- Newer Vehicles: Newer vehicles may experience a sudden and drastic drop in heating, or they might display uneven heating or the release of steam. This often indicates a more severe issue requiring immediate attention. This is akin to a modern building system experiencing a sudden failure due to unforeseen stress.
Comparing Heater Core Symptoms with Other Causes
Differentiating a failing heater core from other potential causes of heating problems requires a methodical approach. The table below provides a concise comparison, highlighting the key differences between heater core issues and other common problems.
| Symptom | Bad Heater Core | Thermostat Problem | Low Coolant |
|---|---|---|---|
| Uneven Heating | Yes | No | Sometimes |
| Cold Air from Defroster | Yes | No | No |
| Steam/Vapor | Yes (Severe) | No | Yes (Severe) |
| No Warm Air | Yes | Yes (Severe) | Yes (Severe) |
| Visible Leaks | Yes (Severe) | No | Yes |
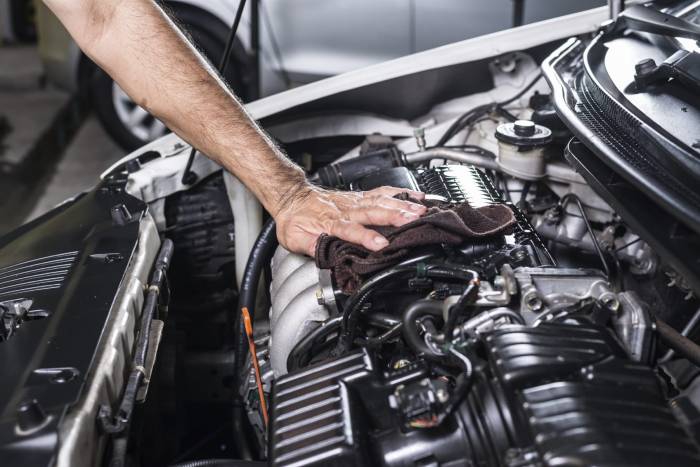
Visual Inspection Techniques
Unmasking the insidious betrayals of a failing heater core demands a keen eye and a resolute approach. Visual inspection, while not always definitive, provides a crucial first step in diagnosing this automotive ailment. It allows for a rapid assessment of the core’s condition without resorting to invasive procedures. The following techniques offer a structured approach to this vital diagnostic step.A crucial element in assessing a heater core is understanding the potential visual cues it presents.
A faulty heater core often reveals its distress through telltale signs, from subtle leaks to outright ruptures. The visual inspection must be thorough and systematic, covering all potential areas of vulnerability. Diligent observation is paramount in uncovering these subtle indicators.
Accessing the Heater Core
The location of the heater core varies significantly depending on the vehicle’s make and model. A precise understanding of the vehicle’s architecture is critical for safe and effective access. Failure to recognize the correct procedures can lead to significant damage and injury. Each vehicle type requires unique precautions.
Inspecting Different Vehicle Types
- Compact Cars: Access is often achieved by removing the dashboard’s lower trim panels or components. Care must be taken to avoid damaging delicate wiring or fragile plastic parts. A systematic approach, starting with the least intrusive components, is advisable.
- Sedans: Similar to compact cars, the process might involve detaching dashboard panels and components. It is essential to locate and disconnect any electrical connections to avoid short circuits or electrical hazards.
- SUVs/Trucks: Often, access is gained by removing components under the dashboard or by working through the engine compartment. Special attention must be paid to the potential presence of hot components or fluids. Safety gear, including gloves and eye protection, is absolutely essential.
Disassembling Components for Access
Safe disassembly is crucial for visual inspection. Improper procedures can lead to severe consequences. A structured approach, using the appropriate tools and following the correct sequence, minimizes the risk of damage.
- Locate the heater core: Identify the heater core’s precise location within the vehicle. Refer to the vehicle’s repair manual for precise diagrams and locations.
- Disconnect Electrical Connections: Carefully disconnect any electrical components connected to the heater core. This will prevent potential short circuits and ensure safe work.
- Remove Trim Panels: Remove trim panels or components strategically positioned to provide access to the heater core. Utilize the correct tools and proceed methodically to avoid damage.
- Safety Precautions: Always wear appropriate safety gear, including gloves, eye protection, and a dust mask. Work in a well-ventilated area. Ensure that the vehicle’s battery is disconnected to prevent accidental electrical shock.
Potential Manifestation Areas of a Bad Heater Core
| Vehicle Area | Potential Visual Issues |
|---|---|
| Under the Dashboard | Leaks, corrosion, discolored components, and a noticeable odor. |
| Engine Compartment | Leaks, coolant stains, and visible damage to the core’s metal casing. |
| HVAC Ducts | Leaks, moisture buildup, and the presence of unusual debris. |
Testing for Leaks and Blockages
Unveiling the hidden betrayals of a failing heater core demands a keen eye and methodical investigation. Leaks and blockages, insidious foes, can manifest as subtle symptoms or erupt in a torrent of misfortune. This section delves into the rigorous techniques required to diagnose these treacherous flaws.The heater core, a vital conduit for warmth, can harbor silent enemies – leaks and blockages.
These internal adversaries can render your vehicle’s heating system useless, plunging you into a frigid winter’s embrace or a sweltering summer’s discomfort. Understanding how to identify and rectify these issues is paramount.
Pressure Testing for Leaks
A pressure test is a crucial diagnostic tool for pinpointing leaks within the heater core. This method involves pressurizing the coolant system and meticulously monitoring for any pressure drops. A sudden decrease in pressure unequivocally signals a leak. This technique is instrumental in isolating the specific location of the leak. A steady pressure reading, on the other hand, suggests the core is intact.
A skilled mechanic will apply pressure, often with specialized equipment, and scrutinize for any signs of fluid escape.
Identifying and Troubleshooting Blockages
Blockages, often the silent culprits of inefficient heating, are as insidious as leaks. These obstructions impede the flow of coolant, preventing heat from reaching the cabin. The core’s passages, if clogged, can lead to a variety of issues, from weak heating to a complete absence of warmth. A thorough examination, often including visual inspection and specialized tools, is crucial for detecting these impediments.
Examples of Leaks and Blockages
Numerous factors can contribute to leaks and blockages. Corroded or damaged sections of the heater core are frequent culprits, leading to pinhole leaks that may only manifest under pressure. Foreign objects, such as debris or sediment, can accumulate and obstruct the coolant flow. Corrosion within the core’s metal structure can weaken it over time, resulting in leaks.
Furthermore, mineral deposits or rust can build up, creating a formidable blockage. These are just a few scenarios.
Comparison of Leak Detection Methods
| Method | Description | Advantages | Disadvantages |
|---|---|---|---|
| Visual Inspection | Directly examining the heater core for visible damage. | Simple, inexpensive, and readily available. | May not detect subtle leaks or blockages. |
| Pressure Test | Pressurizing the system and monitoring for pressure drops. | Effective in identifying leaks, especially pinholes. | Requires specialized equipment and trained personnel. |
| Dye Test | Injecting a dye into the coolant and tracing its path. | Can pinpoint the exact location of leaks. | More complex and time-consuming than visual or pressure testing. |
Each method offers a unique approach to identifying these hidden problems. A comprehensive diagnosis typically combines several techniques, providing a more reliable assessment.
Troubleshooting Common Problems
A faulty heater core isn’t always the culprit. A cascade of seemingly unrelated issues can masquerade as a failing heater core, leading to frustrating delays and unnecessary repairs. This section delves into the deceptive mimics, highlighting the crucial steps to distinguish between a truly problematic heater core and other, often simpler, problems within the vehicle’s heating system.A comprehensive diagnostic approach is paramount.
Ignoring seemingly minor symptoms or rushing to conclusions can lead to significant financial and time losses. Properly identifying the root cause ensures efficient and cost-effective repairs, restoring your vehicle’s warmth and comfort.
Identifying Mimicking Issues
Common problems can mimic a bad heater core, requiring a methodical approach to pinpoint the true source of the issue. These deceptive symptoms often involve issues with the radiator or coolant system, potentially leading to inaccurate diagnoses.
- Radiator Problems: A failing radiator can impede proper coolant flow, resulting in insufficient heat reaching the heater core. A compromised radiator may leak coolant, causing a loss of pressure and inadequate heating. For example, a small crack in the radiator can lead to a slow but steady coolant leak, resulting in insufficient heating and a false impression of a bad heater core.
Such a crack may only be visible after prolonged operation and close inspection.
- Coolant System Leaks: Leaks in the coolant system, regardless of their location, can reduce the coolant volume, affecting the system’s ability to properly heat the cabin. These leaks can occur in hoses, the radiator, or even the water pump. A persistent coolant leak will decrease the system’s pressure and reduce heating efficiency, potentially mistaken for a heater core failure.
For example, a pinhole leak in a hose, seemingly insignificant, can lead to a gradual coolant loss and the subsequent symptom of insufficient heat output.
Checking Coolant Level and Condition
Before jumping to conclusions about a bad heater core, rigorously assess the coolant level and condition. A low coolant level can drastically affect the system’s ability to generate heat. Similarly, a compromised coolant condition, such as contamination or deterioration, can impede proper function.
- Visual Inspection: Examine the coolant reservoir for the correct level. Ensure it’s within the specified range. Any deviation from the normal level indicates a potential leak. Look for unusual discoloration or unusual debris, which may indicate contamination. For example, a rusty coloration in the coolant may indicate corrosion within the system, reducing efficiency and leading to potential leaks.
- Coolant Quality Assessment: Inspect the coolant’s appearance. Discolored, foamy, or excessively bubbly coolant suggests a problem. The coolant’s quality and viscosity are crucial for proper heat transfer. If the coolant is excessively thick or thin, it won’t circulate correctly, leading to insufficient heating.
Inspecting Radiator Pressure Cap and Hoses
A faulty pressure cap or compromised hoses can cause issues with coolant circulation and pressure. These components play a critical role in maintaining the proper coolant pressure within the system, and any problem can lead to inaccurate heating.
- Pressure Cap Functionality: Verify the radiator pressure cap’s ability to maintain pressure. A malfunctioning pressure cap won’t allow proper pressure buildup, which is essential for efficient heat transfer. A pressure cap that doesn’t hold pressure effectively may indicate an incorrect pressure or a malfunctioning component.
- Hose Integrity: Inspect the radiator hoses for cracks, bulges, or leaks. Damaged hoses can impede coolant flow and cause pressure loss, leading to insufficient heating. A cracked hose may not be immediately obvious, but it can lead to a gradual loss of coolant, affecting the heating system’s performance.
Determining the Root Cause
Once the coolant level, condition, and the radiator pressure cap and hoses have been checked, the diagnostic process will determine if the problem lies within the heater core or another system component. Systematic testing is crucial to prevent misdiagnosis.
- Comprehensive System Evaluation: Thorough checks on the coolant system components, combined with the initial symptoms, help isolate the true source of the heating problem. A systematic approach to the entire system ensures no component is overlooked.
Replacement Procedure Overview
The failing heater core, a silent saboteur of cabin comfort, demands a surgical intervention. This perilous undertaking, while seemingly daunting, is conquerable with meticulous planning and adherence to precise steps. Proper replacement ensures the restoration of your vehicle’s heating system to its former glory, banishing the frigid air and embracing the warmth.
Essential Tools and Parts
A comprehensive toolkit is paramount to a successful replacement. Failure to acquire the necessary instruments can lead to complications and further damage. Essential tools include a socket set, wrenches, pliers, a drain pan, rags, and gloves. Furthermore, the replacement necessitates acquiring a new heater core, compatible with your vehicle’s make and model.
Disconnecting the Heater Core Lines
Before commencing the dismantling process, ensure the engine is turned off and the vehicle’s cooling system is adequately cooled. Improper handling of the heater core lines can lead to leaks and system contamination. Locate the heater core lines, carefully identifying the inlet and outlet points. Employ appropriate wrenches to disconnect the lines, catching any drips in the drain pan.
Removing the Old Heater Core
The removal of the old heater core is a crucial step. This procedure demands careful maneuvering, preventing damage to surrounding components. Carefully disconnect all connections, including the coolant lines, hoses, and any associated components. Then, cautiously remove the old heater core from its mounting position, using the appropriate tools.
Installing the New Heater Core
The installation of the new heater core necessitates meticulous precision. The new core must be aligned correctly with the vehicle’s mounting points. Ensure the lines are connected securely and the core is properly seated. Use the appropriate tools to tighten all connections.
Reconnecting the Heater Core Lines and Hoses
Reconnect the heater core lines and hoses, carefully securing them with appropriate fittings. Tighten the connections firmly to prevent leaks and ensure a proper seal. This meticulous step is critical for the system’s functionality.
Verifying the System
After the installation is complete, thoroughly inspect the entire system for any leaks or loose connections. Fill the cooling system with coolant, following the manufacturer’s specifications. Start the engine and monitor the heater core’s performance, ensuring proper heat distribution throughout the cabin.
Important Safety Precautions, How to tell if your heater core is bad
Prioritizing safety is paramount during this process. Always disconnect the battery terminals before beginning any work involving the vehicle’s electrical system. Use appropriate personal protective equipment (PPE) such as gloves and safety glasses to prevent injuries. Handle coolant with extreme caution, as it can cause skin irritation and burns.
Potential Causes and Risk Factors: How To Tell If Your Heater Core Is Bad

The delicate heater core, a vital component in your vehicle’s heating system, can succumb to insidious failures. Understanding the potential culprits behind these breakdowns is crucial for preventative measures and swift action. Ignoring these factors can lead to a frigid cabin and a significant repair bill.Corrosion, a silent adversary, relentlessly attacks the heater core’s thin metal walls. Over time, this insidious process weakens the structure, leading to potential leaks and eventual failure.
Damage from road debris or collisions can introduce irreparable stress, compromising the core’s integrity.
Corrosion and Degradation
Corrosion, a relentless enemy, gradually erodes the heater core’s metal. This slow but certain process weakens the core’s structure, making it susceptible to leaks and complete failure. The corrosive nature of coolant, combined with the vehicle’s operating environment, contributes to this deterioration. Examples include exposure to salt, moisture, and harsh chemicals.
Mechanical Damage
Mechanical damage, a more dramatic threat, can occur from impacts or collisions. These events can introduce cracks or perforations into the heater core, leading to coolant leakage and irreparable damage. A forceful impact, even a seemingly minor one, can cause significant harm to the intricate structure of the heater core.
Over Time Wear
The relentless cycle of heating and cooling, coupled with the constant pressure of the coolant, inevitably takes its toll on the heater core over time. Repeated expansion and contraction weaken the core, increasing the likelihood of leaks and eventual failure. The long-term wear can be compounded by poor maintenance practices.
Coolant Quality and Maintenance
The quality of coolant significantly impacts the health of the heater core. Contaminated coolant, lacking proper additives, accelerates corrosion and accelerates the heater core’s deterioration. Regular coolant flushes and proper maintenance schedules are vital in preserving the heater core’s lifespan. Neglecting these tasks can lead to severe problems, making preventative maintenance a critical aspect of vehicle care.
Vehicle Age and Risk
The age of a vehicle plays a significant role in the likelihood of heater core problems. Older vehicles, with their accumulated mileage and exposure to various environmental factors, often face an increased risk of heater core failure. Years of use and exposure to various weather conditions contribute to the deterioration of the heater core. For instance, a 10-year-old vehicle is far more likely to have a problematic heater core than a newer model.
The accumulated wear and tear associated with aging vehicles are a key contributing factor to heater core failures.
Preventing Heater Core Problems
A failing heater core can transform a comfortable drive into a frigid ordeal. Neglecting preventative measures can lead to costly repairs and discomfort. Understanding the crucial role of proactive maintenance is paramount in extending the life of your heater core and avoiding the dreaded cold blast.Proactive measures are far more economical and convenient than dealing with a catastrophic heater core failure.
By implementing simple preventative maintenance strategies, you can significantly extend the lifespan of your heater core and avoid the agony of a malfunctioning system.
Coolant System Maintenance
Proper coolant management is the cornerstone of heater core longevity. A neglected coolant system can lead to corrosion, sediment buildup, and ultimately, heater core failure.Regular coolant flushes are essential to remove contaminants and prevent these issues. This proactive approach significantly reduces the risk of premature heater core deterioration. The coolant, acting as the system’s lifeblood, must be maintained for the system to operate effectively.
- Regular coolant flushes, ideally every two years or as recommended by the vehicle manufacturer, remove accumulated contaminants and prevent corrosion that can compromise the heater core.
- Using the correct type of coolant, as specified in your vehicle’s owner’s manual, is vital. Improper coolant can cause premature corrosion and component degradation, significantly impacting the heater core.
- Checking coolant levels regularly and topping them off as needed prevents the system from operating under stress, reducing the likelihood of overheating and heater core damage. Maintaining proper coolant levels is essential for optimal heater core performance.
Temperature Monitoring and Maintenance
Maintaining a vigilant eye on your vehicle’s temperature is crucial for preventing heater core damage. Overheating is a leading cause of heater core failure. A properly functioning thermostat and a healthy cooling system are fundamental to preventing these problems.Monitoring your vehicle’s temperature gauge is essential. A consistently high temperature indicates an issue requiring immediate attention. A malfunctioning thermostat, for instance, can lead to severe overheating and heater core damage.
- Regularly check your vehicle’s temperature gauge. A consistently high temperature reading signifies a potential overheating issue that needs immediate attention to prevent heater core damage.
- Ensure the thermostat is functioning correctly. A malfunctioning thermostat can prevent the engine from reaching its optimal operating temperature, potentially leading to overheating and heater core damage.
- Inspect the radiator hoses and coolant hoses for any signs of damage, leaks, or unusual wear. These are key components in the cooling system, and damage to them can lead to significant problems for the heater core.
End of Discussion
In conclusion, diagnosing a bad heater core involves a systematic approach. By carefully examining the symptoms, conducting visual inspections, and performing leak tests, you can effectively determine the cause of your heating problems. Remember to prioritize safety precautions throughout the process, and if you’re unsure about any step, seek professional assistance. This guide has provided you with the tools to tackle this common car maintenance task confidently.
Now you’re equipped to handle your heater core issues!
Question & Answer Hub
What are the initial signs of a bad heater core?
Initial signs can range from lukewarm air to no heat at all. You might notice inconsistent temperature output or a lack of heat in certain areas of the car.
How can I tell if the issue is a blocked heater core?
A blocked heater core often results in uneven heating, with some areas receiving more heat than others. You might also notice the heater blowing cold air, despite the engine running at a normal temperature.
Can a bad heater core cause other problems?
Yes, a failing heater core can lead to coolant leaks, which can damage other engine components. Addressing the heater core problem promptly is crucial for preventing further complications.
What are some preventive measures to extend the life of a heater core?
Regular coolant flushes and replacements, as well as proper temperature monitoring, can help prevent heater core damage. Using high-quality coolant and adhering to the manufacturer’s recommendations are also important.
