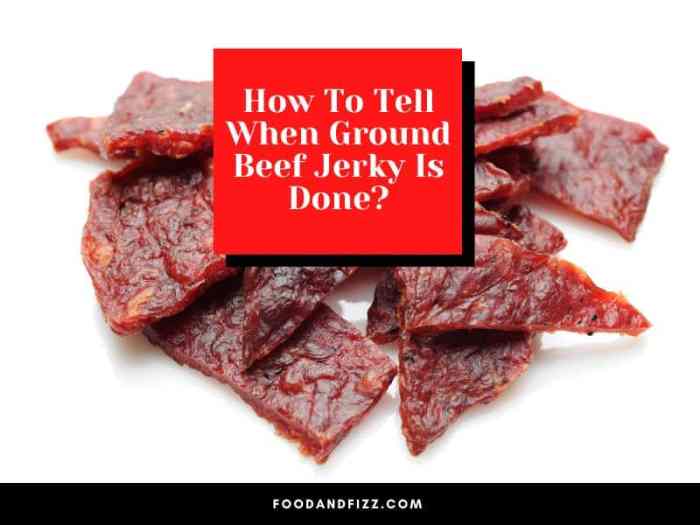
How to tell when jerky is done? This ain’t no easy task, fam! From initial dehydration to perfectly crispy, we’re diving deep into the world of jerky perfection. We’ll break down all the visual cues, internal moisture checks, and even different drying methods to get your jerky just right. Get ready to level up your jerky game!
This guide will walk you through the essential steps to ensure your jerky is perfectly done, from the initial stages of drying to achieving the ideal texture and flavor. We’ll explore various methods, from air drying to dehydrator drying, and analyze the key indicators to watch out for.
Identifying the Stages of Jerky Drying: How To Tell When Jerky Is Done
Mastering the art of jerky-making involves understanding the subtle shifts in texture and appearance as the meat dehydrates. Precisely gauging these stages is crucial for achieving the perfect balance of flavor and texture, preventing dryness or under-drying. The following guide will illuminate the distinct stages of jerky drying, equipping you with the knowledge to consistently produce mouthwatering results.The journey of jerky from a moist cut of meat to a delectable, chewy snack is marked by progressive dehydration.
Each stage reveals specific visual and tactile cues, providing clear indicators for your drying process. These cues allow you to fine-tune your drying process, ensuring consistent quality and preventing mistakes.
Initial Dehydration Stage
The initial phase of jerky drying is characterized by a significant reduction in moisture content. The meat loses its initial plumpness, becoming firmer and noticeably less pliable. Visual cues include a slight tightening of the meat’s surface. A slight sheen or gloss may still be present. Tactile feedback reveals a noticeable increase in firmness, a transition from a soft to a slightly firmer texture.
This initial phase requires consistent monitoring to prevent the jerky from becoming too dry. Methods like visually inspecting the jerky’s surface and feeling its firmness are crucial for determining the moisture level. A gentle squeeze should reveal a slight give but no significant water pooling.
Intermediate Dehydration Stage
The meat continues to lose moisture, leading to a noticeable reduction in overall weight and volume. The surface of the jerky will begin to exhibit a matte appearance, losing the gloss or sheen present in the initial stage. The jerky feels noticeably firmer. Tactile feedback confirms a substantial increase in firmness and a decrease in flexibility. This stage involves monitoring the jerky’s consistency and the rate of moisture loss.
The jerky should not crumble when squeezed, yet should show significant resistance to bending. Methods for assessing moisture content during this phase include checking the surface appearance and the jerky’s elasticity.
Advanced Dehydration Stage
As the drying process continues, the jerky approaches its final state of dryness. The meat will show a dull, matte finish and will be significantly less pliable. Tactile feedback reveals a substantial firmness, with the jerky exhibiting minimal flexibility. The jerky should break rather than bend when pressed gently. This is where experienced jerky makers will often use methods like the “bend test,” checking the jerky’s ability to be bent without breaking.
The jerky should show minimal give when pressed. The moisture content is at a critical level, so consistent monitoring is essential to avoid over-drying. Accurate assessments are essential at this stage to prevent the jerky from becoming brittle.
Complete Dryness Stage
At this final stage, the jerky has achieved its desired dryness. The meat will have a completely matte finish, showing no signs of moisture. The jerky will be noticeably firm and brittle, breaking easily when pressed or bent. The jerky’s weight will be significantly lower than its initial weight. The “snap test” is a valuable technique for determining complete dryness, where a crisp sound indicates proper dryness.
Methods like visual inspection and the tactile test (feeling the jerky’s hardness) are essential to determine when the jerky is ready.
Assessing Internal Moisture Content
Mastering the art of jerky creation hinges on accurately gauging its internal moisture content. Precise measurement ensures the perfect balance of flavor, texture, and safety, preventing under-drying or over-drying. Knowing the moisture level allows you to achieve the ideal level of dryness, resulting in a delectable jerky snack that is both delicious and safe to consume.Understanding the internal moisture content is crucial for achieving the perfect jerky.
Various methods exist for determining this vital parameter. Each method offers a unique perspective on the moisture level within the jerky, allowing you to tailor your drying process for optimal results. Factors such as the type of meat, the drying environment, and the jerky’s thickness can all affect the moisture content and the time required for proper drying.
Methods for Measuring Internal Moisture Content, How to tell when jerky is done
Precise measurement of internal moisture content is vital for achieving the perfect jerky. Several methods are available, each with its own set of advantages and disadvantages. These methods can be used to effectively evaluate the moisture level of your jerky during the drying process.
- Moisture Meters: These handheld devices are designed to measure the moisture content of various materials, including jerky. They use a variety of methods, including electrical conductivity or near-infrared (NIR) spectroscopy, to determine the moisture percentage. Moisture meters offer a quick and relatively accurate way to assess the internal moisture content of your jerky. They are generally easy to use and provide immediate feedback, making them a practical tool for monitoring the drying process.
- Oven Drying Method: This method involves placing a small sample of the jerky in a pre-heated oven at a specific temperature for a predetermined time. After the drying period, the weight of the sample is measured. By comparing the initial weight to the final weight, the percentage of moisture loss can be calculated. The oven drying method provides a more precise measurement than simply checking for dryness with a finger, but it requires more time and equipment.
- Microwave Drying Method: A smaller sample of the jerky can be placed in a microwave oven and subjected to controlled microwave energy for a defined period. The weight change during this process is then used to determine the moisture content, although this method is less precise than the oven drying method. The microwave method is quicker, however.
Comparison of Moisture Measurement Techniques
A comparative analysis of the effectiveness and accuracy of different moisture measurement techniques can assist in selecting the optimal method for jerky production.
| Method | Effectiveness | Accuracy | Ease of Use | Cost |
|---|---|---|---|---|
| Moisture Meters | High | Good | High | Medium |
| Oven Drying Method | High | High | Medium | Low |
| Microwave Drying Method | Medium | Medium | High | Low |
Factors Influencing Measurement Accuracy
Several factors can affect the accuracy of internal moisture content measurements. Understanding these factors is essential for ensuring reliable results. These factors can influence the precision of the measurement and affect the final outcome of the jerky.
- Sample Size: The size of the sample used for measurement directly impacts the accuracy. A larger sample size can provide a more representative measure of the overall moisture content of the jerky. A small sample size may not be representative of the entire jerky product.
- Temperature Fluctuations: Variations in temperature during the drying process can alter the moisture content of the jerky and affect the measurement. Consistent temperature control is essential for accurate results.
- Instrument Calibration: Proper calibration of moisture meters and other measuring devices is critical for achieving accurate results. Regular calibration ensures that the measurements reflect the true moisture content of the jerky. Calibration checks ensure consistent and accurate readings.
- Sample Preparation: How the sample is prepared before measurement can impact the accuracy of the results. Ensuring uniformity in sample preparation is essential for reliable measurements. Proper sample preparation minimizes errors in the results.
Using External Indicators for Doneness
Unlock the secrets to perfectly dried jerky with our guide to external indicators. Mastering these visual cues allows you to achieve the ideal texture and flavor, avoiding both under-dried and over-dried jerky. Properly identifying the doneness of your jerky is crucial for maximizing its enjoyment.Visual cues are powerful tools for assessing the readiness of your jerky. By carefully examining the color, texture, and other physical characteristics, you can accurately determine when your jerky has reached the perfect level of dryness.
This proactive approach ensures a consistently delicious and satisfying jerky experience.
Visual Cues for Jerky Doneness
Understanding the visual changes during the drying process is paramount. The progression of color and texture offers clear signals for achieving optimal results. By observing these external signs, you gain the ability to precisely determine when your jerky is ready for enjoyment.
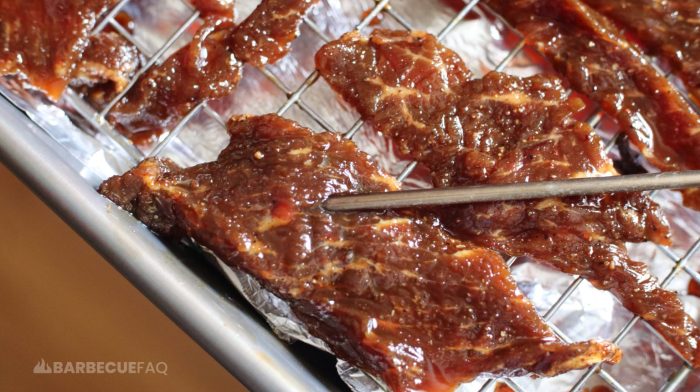
- Color Changes: Jerky transitions through a spectrum of colors, each representing a different stage of drying. A consistent, deep brown color signifies that the jerky is adequately dried, while a light or grayish color might indicate insufficient drying. Over-drying can result in a burnt, darker brown hue. Color changes are a vital aspect in determining the right level of dryness.
- Texture Transformations: As the jerky dries, its texture undergoes a significant shift. Initially, it might have a slightly moist and pliable feel. Properly dried jerky will exhibit a firm, slightly chewy texture. Over-drying leads to a brittle and hard texture, making it less enjoyable. The transition from moist to firm is a critical indicator of the drying process.
- Other Physical Characteristics: Inspect the jerky for any remaining moisture. A completely dried jerky should feel light and free from excess moisture. Examine the surface for any stickiness or dampness. Look for the absence of any visible moisture or wetness. Any remaining moisture could result in bacterial growth, which could be detrimental to the quality and safety of your jerky.
Drying Time, Color, and Texture Correlation
Predicting jerky doneness involves understanding the relationship between drying time, color, and texture. This table provides a visual representation of these correlations.
| Drying Time (approximate) | Jerky Color | Jerky Texture |
|---|---|---|
| 12-24 hours | Light to Medium Brown | Slightly moist, pliable |
| 24-48 hours | Medium to Dark Brown | Firm, slightly chewy |
| 48+ hours | Dark Brown, potentially with darker spots | Brittle, hard |
The table provides a general guideline. Actual drying time can vary based on factors such as the thickness of the jerky, the ambient temperature, and the humidity level. Adjust drying times accordingly to ensure optimal results.
Comparing Different Jerky Drying Methods
Unlocking the perfect jerky requires understanding the nuances of various drying techniques. Each method yields a distinct product, varying in texture, flavor, and overall quality. This section delves into the intricacies of air drying, dehydrator drying, and oven drying, providing crucial insights for achieving exceptional jerky.Different drying methods significantly influence the final product’s characteristics. The choice of method impacts the jerky’s moisture content, texture, and the overall sensory experience.
This comparison helps you understand the trade-offs and optimize your jerky-making process.
Air Drying
Air drying is a traditional method, often favored for its natural approach. It’s a slow, controlled process that allows the jerky to gradually dehydrate, preserving its natural flavors and textures. The prolonged drying time contributes to a nuanced flavor profile.
- Drying Time: Air drying is typically the slowest method, ranging from 24 to 72 hours or even longer, depending on the thickness of the meat and ambient conditions. Factors such as temperature and humidity play a significant role in the drying duration. A low-humidity environment and consistent temperature will significantly reduce drying time.
- Visual and Sensory Differences: Air-dried jerky often exhibits a richer, more complex flavor profile. Its texture can range from firm to chewy, depending on the drying time. The product often retains a slightly more “raw” appearance and natural hue.
- Potential Effects of Temperature: Maintaining a consistent temperature is crucial for even drying. Fluctuations in temperature can lead to uneven moisture content, resulting in jerky with areas that are under-dried or over-dried. This method is less susceptible to extreme temperature fluctuations, as the drying is not concentrated in a single enclosed space.
Dehydrator Drying
Dehydrator drying offers a controlled, consistent environment for jerky production. It’s an efficient method that produces results in a fraction of the time compared to air drying.
- Drying Time: Dehydrator drying significantly shortens the drying process compared to air drying. Drying time can range from 4 to 8 hours, depending on the dehydrator model, the meat thickness, and the temperature setting. A properly calibrated dehydrator ensures consistent drying across the meat.
- Visual and Sensory Differences: Dehydrator-dried jerky tends to be more uniform in texture and moisture content. The flavor profile can be comparable to air-dried jerky, but the process’s speed can impact the subtle nuances of flavor development.
- Potential Effects of Temperature: The temperature setting in a dehydrator is critical. Higher temperatures can lead to a quicker drying time, but may also affect the texture and flavor of the jerky. Precise temperature control is essential for achieving optimal results. Adjustments to temperature should be based on the thickness of the meat and desired final texture.
Oven Drying
Oven drying is a versatile method suitable for home kitchens. However, precise temperature control and careful monitoring are essential for preventing over-drying.
- Drying Time: Oven drying time is typically faster than air drying but slower than dehydrator drying. The time required can vary significantly based on the oven’s heat output, the thickness of the meat, and the oven’s temperature setting. Oven drying times are generally between 6 and 12 hours.
- Visual and Sensory Differences: Oven-dried jerky can develop a slightly crispier texture compared to other methods. The jerky’s flavor profile can be impacted by the oven’s internal environment, and temperature fluctuations within the oven can affect the final product.
- Potential Effects of Temperature: Over-drying in an oven is a significant risk. High temperatures can result in a tough, dry jerky. Adjusting the oven temperature based on the meat thickness is crucial for consistent drying. A lower temperature and extended drying time will result in a more tender product.
Addressing Common Mistakes and Misconceptions
Perfect jerky demands meticulous attention to detail throughout the drying process. Understanding potential pitfalls and misconceptions is crucial to achieving the desired texture and flavor. Common errors can lead to jerky that’s under-dried, resulting in a chewy, potentially unsafe product, or over-dried, leading to a brittle, unappetizing final result. By recognizing these pitfalls, you can master the art of jerky-making.
Common Mistakes in Determining Doneness
Improperly assessing doneness is a frequent source of frustration for jerky makers. Several techniques can lead to inaccurate judgments. For instance, relying solely on visual cues, like appearance, can be unreliable. Jerky can appear “done” visually, yet still contain enough moisture to support bacterial growth.
Misconceptions About Jerky Drying
Many misconceptions surround the optimal drying process for jerky. Understanding these inaccuracies can help you focus on reliable methods.
- Misconception: A longer drying time always yields a better jerky. Reality: Excessively long drying periods can result in over-drying, compromising the texture and potentially reducing the overall flavor. Optimizing drying time is critical to producing flavorful, perfectly tender jerky.
- Misconception: High temperatures are always best for drying. Reality: While high temperatures can speed up the drying process, they can also result in over-drying. Maintaining a controlled, moderate temperature is essential to prevent this. Adjusting the temperature to the specific characteristics of your jerky will result in a superior final product.
- Misconception: The moisture content is the sole indicator of doneness. Reality: Moisture content is essential but not the only indicator. Consider the internal structure and consistency alongside the moisture level. Monitoring both external and internal cues is vital for achieving the perfect jerky.
Avoiding Mistakes and Ensuring Proper Drying
By addressing these common errors and misconceptions, you can significantly improve your jerky-making process. Always employ a combination of methods to gauge doneness, ensuring the jerky reaches the ideal moisture content while maintaining the desired texture.
- Utilize Multiple Indicators: Relying solely on one indicator, such as appearance, is unreliable. Combine visual inspection with moisture content testing, ensuring you don’t miss subtle changes.
- Control the Environment: Consistent temperature and humidity are essential for a uniform drying process. Monitoring these factors helps avoid jerky that’s too dry in some areas and too moist in others.
- Invest in Proper Equipment: A reliable moisture meter or hygrometer is an investment that will yield significant returns in terms of consistency and quality. Accurate moisture measurements are crucial for precise jerky drying.
Creating a Guide for Determining Jerky Doneness
Mastering the art of perfectly dried jerky involves more than just time. Understanding the precise stages of drying is crucial for achieving that ideal balance of texture and flavor. This guide provides a comprehensive approach to determining when your jerky is ready, encompassing visual cues, internal moisture checks, and the impact of various drying methods.
A Step-by-Step Guide to Jerky Doneness
This guide provides a structured approach to ensuring your jerky reaches the perfect level of dryness. Following these steps ensures consistent results, regardless of the specific method you employ.
- Initial Inspection: Begin by visually assessing the jerky. Observe the color and texture. Early stages of drying often display a moist, slightly translucent appearance. As drying progresses, the color deepens, and the texture becomes more opaque and firm. This initial visual inspection provides a preliminary idea of the drying process’s stage.
- Internal Moisture Check (Critical): Using a moisture meter is the most precise method to determine the ideal internal moisture content. This tool measures the water content of the jerky. The target moisture level for most jerky recipes ranges from 20% to 30% depending on the desired final texture and the drying method. Achieving this target ensures that the jerky is adequately dried to prevent bacterial growth and maintain a satisfyingly chewy texture.
- External Indicators: Beyond the moisture meter, external indicators offer valuable clues. The jerky should feel firm to the touch, yet not brittle. The surface should appear glossy or slightly sticky in the initial drying stages, gradually becoming drier and more matte as the drying process continues. If it feels gummy or sticky, the drying process needs more time.
If it’s extremely brittle, the drying process might have been excessively prolonged.
- Drying Method Considerations: The method used to dry the jerky impacts the drying time and the expected texture. Oven-dried jerky, for example, tends to dry faster than air-dried jerky. Therefore, consistent monitoring of the external indicators and the internal moisture content is crucial to ensure that jerky is adequately dried, regardless of the method used.
Visual Guide: Stages of Jerky Drying
A visual representation aids in understanding the progression of jerky drying. This table helps you anticipate the appearance of your jerky at different stages of the process.
| Stage | Description | Appearance |
|---|---|---|
| Initial | Jerky is still moist, slightly translucent, and flexible. | Shiny, slightly sticky surface, flexible texture. |
| Intermediate | Jerky is becoming firm, and its color deepens. | Matte surface, firm texture, less sticky. |
| Final | Jerky is firm, and the color is fully developed. | Dry matte surface, firm and slightly chewy texture. |
Describing the Ideal Texture and Flavor
Unlock the secrets to perfectly seasoned jerky, from its satisfying chew to its tantalizing taste. Achieving the ideal texture and flavor profile is crucial to a truly exceptional jerky experience. The right balance of ingredients and drying methods is key to transforming your meat into a mouthwatering treat.The perfect jerky should possess a delightful balance of textures and flavors, a harmonious blend that tantalizes the taste buds.
This section delves into the specifics of achieving this balance, highlighting the ideal texture, the key flavor characteristics, and the impact of different ingredients and seasonings.
Ideal Jerky Texture
The ideal texture of jerky is a crucial component of its overall appeal. It should be firm yet tender, with a satisfying chew that doesn’t require excessive effort to break down. Avoid jerky that is too tough, which can be a deterrent, or too mushy, suggesting insufficient drying. The ideal jerky should offer a balance between these two extremes.
The consistency should provide a pleasant and rewarding eating experience, not a frustrating one.
Ideal Jerky Flavor Profile
A delectable jerky boasts a well-rounded flavor profile, encompassing a harmonious blend of savory, umami, and potentially sweet notes. A balanced flavor profile is essential to elevate the jerky from merely edible to truly exceptional. The depth and complexity of the flavor should captivate the palate, creating a memorable culinary journey.
Impact of Ingredients and Seasonings
The ingredients and seasonings play a significant role in determining the final texture and flavor of the jerky. Different ingredients contribute unique characteristics to the end product. For example, soy sauce and garlic powder impart a savory taste, while spices like paprika and cumin add warmth and complexity. Experimenting with different flavor combinations allows for unique and personalized jerky creations.
Comparing Jerky Recipes and Flavor Profiles
| Recipe Name | Ingredients | Primary Flavor Profile | Texture Description |
|---|---|---|---|
| Spicy Korean Jerky | Soy sauce, gochujang, garlic, ginger, sesame oil | Savory, spicy, sweet | Firm, slightly chewy, with a pleasant bite |
| Sweet & Savory BBQ Jerky | BBQ sauce, brown sugar, onion powder, garlic powder | Sweet, savory, smoky | Tender, slightly sticky, easy to chew |
| Classic Beef Jerky | Salt, pepper, garlic powder, onion powder | Savory, umami | Firm, satisfyingly chewy, with a classic taste |
| Mediterranean Jerky | Olive oil, oregano, rosemary, lemon juice | Savory, herbaceous, tangy | Firm, slightly tender, with a pleasant aroma |
The table above provides a glimpse into the wide array of jerky recipes and their resulting flavor profiles. Each recipe provides a distinct culinary experience, highlighting the importance of ingredient selection. Further exploration of various recipes can lead to personalized jerky creations, tailored to individual preferences.
Illustrating Jerky Drying Stages
Mastering the art of perfect jerky involves understanding the subtle transformations during the drying process. Each stage presents unique visual cues and textural changes, guiding you towards a delicious final product. Knowing these stages empowers you to confidently predict doneness and achieve optimal results.
Raw Jerky: The Initial Stage
The initial stage begins with the raw, unprocessed meat, typically sliced thinly to maximize surface area for drying. The meat maintains its original color and texture, potentially with visible marbling. This stage marks the starting point for the drying process, crucial for developing the characteristic jerky flavor and texture.
Early Drying Stage: Developing Flavor and Texture
As drying progresses, the meat starts to lose moisture, resulting in a slight tightening of the texture. The color begins to darken, showing subtle changes in the tone, potentially exhibiting a lighter shade at the edges. This early drying stage is critical for the development of the jerky’s unique flavor profile. The moisture loss creates a noticeable change in the overall weight and consistency of the meat.
Intermediate Drying Stage: Approaching Desired Doneness
At this stage, the jerky exhibits significant shrinkage and the color deepens further. The texture becomes firm and less pliable. The internal structure of the meat has transitioned significantly, and the surface will likely show a noticeable change in appearance, with a concentrated darkening. This stage provides a clear visual indication of the drying progress. The meat will be substantially lighter in weight than the initial raw product.
Final Drying Stage: Achieving Perfection
The final stage is characterized by a significant reduction in moisture content. The jerky appears dry and leathery, with a deep color and a noticeably firm, chewy texture. The surface of the jerky is typically smooth and without any excess moisture. The final stage showcases the completion of the drying process and signifies that the jerky is ready for consumption.
The meat is now significantly lighter in weight and will have a noticeably different structure from the initial raw product. The texture has shifted from soft to firm and chewy.
Visual Summary of Stages
| Stage | Description | Visual Appearance |
|---|---|---|
| Raw Jerky | Fresh, unprocessed meat, thinly sliced. | A slice of meat with its original color and texture. |
| Early Drying | Moisture loss begins; color changes slightly, texture tightens. | A slice of meat with a slight darkening, a slightly tightened texture, and a lighter shade at the edges. |
| Intermediate Drying | Significant shrinkage and color deepening; texture firming. | A significantly shrunken slice of meat with a deeper color and a firm, less pliable texture. |
| Final Drying | Low moisture content; dry, leathery, deep color, chewy texture. | A completely dry, leathery slice of meat with a deep color and a firm, chewy texture. |
Final Summary
So, there you have it! Mastering the art of jerky perfection isn’t rocket science, but it does require attention to detail. By understanding the drying stages, internal moisture content, and external indicators, you can confidently create delicious, perfectly seasoned jerky every time. Now go forth and make some amazing jerky!
Essential Questionnaire
How long does jerky take to dry?
Drying time depends on the method and your desired level of dryness. Air drying can take several days, while a dehydrator might finish in a few hours. Always check the specific guidelines for your method and desired result.
What’s the best way to tell if my jerky is too dry?
Overdrying can result in a very brittle jerky. Look for a texture that’s chewy but not too hard. If it crumbles easily, it’s probably overdone.
Can I use a meat thermometer to check jerky doneness?
While a meat thermometer isn’t the primary method for jerky, you can use it as a secondary check in conjunction with other indicators. The internal temp of jerky should be lower than for cooked meat.
What if my jerky is still a little wet after the drying time?
If your jerky is still a bit wet after the estimated drying time, you might need to continue the drying process, checking it frequently. Make sure you aren’t overpacking the drying rack.
