How to turn off lighted nocks is a total game-changer for archers. These lit-up nocks are super cool, but knowing how to shut ’em off is crucial, especially if you’re not a pro. This guide breaks down everything you need to know, from different types of nocks to troubleshooting common problems. Getting your lighted nocks to chill out is easier than you think, and this guide’s got you covered.
Lighted nocks are becoming increasingly popular among archers, especially in low-light conditions. They offer a clear target for the archer, enhancing visibility and improving accuracy. Knowing how to safely and effectively turn them off is a key part of archery maintenance.
Introduction to Lighted Nocks
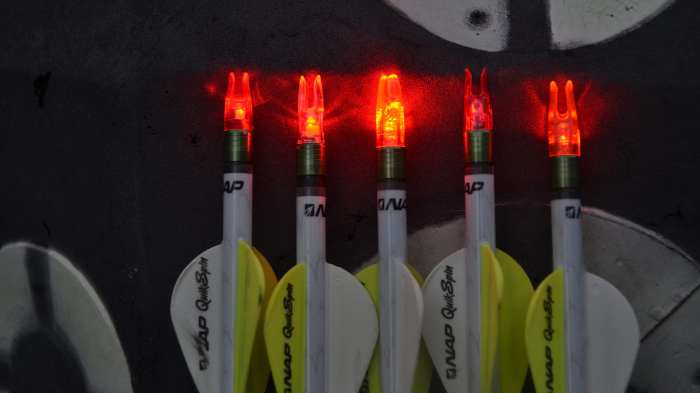
Lighted nocks, a relatively recent addition to the archer’s arsenal, have revolutionized the sport, especially in low-light conditions. These innovative devices illuminate the arrow’s nock, providing a clear visual cue during crucial moments of the shot, thus enhancing safety and precision. Their bright illumination makes the nock clearly visible, preventing accidental collisions with other archers or equipment, thereby reducing the risk of injury and enhancing overall safety during practice and competitions.Lighted nocks come in various forms, each designed to maximize visibility and performance.
These devices are designed to be an integral part of an archer’s equipment, enabling clear target identification, and increasing overall efficiency. They utilize different technologies to achieve illumination, ranging from the familiar LED lights to more subtle, yet effective, incandescent options.
Types of Lighted Nocks
Lighted nocks are available in a range of types, each with its own unique characteristics. The choice often depends on the specific needs and preferences of the archer, considering factors such as budget, desired brightness, and battery life. Different technologies provide distinct benefits, influencing the overall performance of the arrow and the archer’s experience.
LED Lighted Nocks
LED lighted nocks utilize light-emitting diodes, a modern and energy-efficient lighting technology. They are known for their compact size, impressive brightness, and extended battery life, compared to incandescent counterparts. This technology has become very popular due to its efficiency, durability, and the wide variety of brightness levels and colors available.
Incandescent Lighted Nocks
Incandescent lighted nocks, while less common than LEDs, still provide a functional and affordable option for archers. They use a filament that heats up and emits light. While often not as bright as LEDs, they offer a simple and reliable lighting solution, especially for archers seeking a more affordable and durable option. Their simplicity translates into lower maintenance costs and easier replacement of the bulb.
Comparison of Lighted Nock Types
| Feature | LED | Incandescent |
|---|---|---|
| Brightness | High, adjustable | Moderate |
| Battery Life | Long, typically several hours or more | Shorter, requiring more frequent replacement |
| Durability | Generally durable, resistant to impacts | Potentially less durable, susceptible to filament breakage |
| Cost | Typically higher initial cost | Generally lower initial cost |
This table provides a concise comparison of the key characteristics of LED and incandescent lighted nocks. These factors play a crucial role in choosing the right lighted nock for individual needs and preferences. The features Artikeld above will allow the archer to make an informed decision that suits their specific requirements and budget.
Identifying Lighted Nock Models
Knowing your lighted nock model is crucial for troubleshooting and ensuring proper operation. Different manufacturers use unique designs and components, leading to variations in how they function. Understanding the specific model of your lighted nock can save you time and frustration when encountering issues.Precise identification allows you to find the right troubleshooting guides, replacement parts, or firmware updates tailored to your specific nock.
This process helps maintain peak performance and prevents potential complications down the road.
Model Identification Techniques
Accurate identification often involves checking physical markings on the nock itself. Look for etched or printed numbers, letters, or symbols. These identifiers typically include the manufacturer’s name, model number, and potentially a batch or serial number. Thorough inspection is essential to avoid misidentification.
Manufacturer-Specific Models
Numerous manufacturers produce lighted nocks, each with their own range of models. Understanding the different models and how to identify them from various manufacturers is essential.
- Easton: Easton often uses a numerical system for their lighted nocks, with model numbers typically containing letters and digits. The Easton website or product manuals can help in identifying the specific model of your nock.
- Gold Tip: Gold Tip lighted nocks often incorporate unique color schemes or patterns in their design. Referring to Gold Tip’s website, brochures, or customer service can help in identifying the exact model.
- Carbon Express: Carbon Express lighted nocks often feature specific markings, such as laser-etched model numbers. Consulting the Carbon Express website, or a Carbon Express retailer’s product database, could help in confirming the model number.
- Other Manufacturers: Many other manufacturers produce lighted nocks, each with their own specific identifiers. These identifiers may include model numbers, unique markings, or combinations of letters and numbers.
Importance of Correct Model Identification
Correct identification of your lighted nock model is essential for several reasons. Troubleshooting is significantly easier when you know the exact model. Incorrect identification can lead to unnecessary steps, wrong diagnostics, and potentially costly repairs.
Model Identification Table
| Manufacturer | Common Lighted Nock Models |
|---|---|
| Easton | e.g., Easton X7 Lighted Nock, Easton XT Lighted Nock |
| Gold Tip | e.g., Gold Tip Lighted Nock, Gold Tip Pro Lighted Nock |
| Carbon Express | e.g., Carbon Express Lighted Nock, Carbon Express Elite Lighted Nock |
| Other Manufacturers | Model names and numbers vary widely; refer to manufacturer websites or documentation. |
Powering Off the Nocks
Unleashing the silent power of lighted nocks involves more than just snapping them onto your arrows. Proper power management ensures longevity and optimal performance. Knowing how to turn them off is as crucial as knowing how to activate them. This section will guide you through the process of powering down your lighted nocks, regardless of their specific power source.
Power Source Variations, How to turn off lighted nocks
Different lighted nock models employ various power sources. Some utilize replaceable batteries, while others leverage the sun’s energy through solar panels. Understanding the power source for your specific nock model is essential for correct shutdown procedures. Battery-powered nocks require removing the batteries, while solar-powered nocks simply need no action to turn off.
Battery Removal Procedures
Battery-powered nocks often house the batteries within a compartment. Carefully inspect the nock for a small access panel or latch, usually located on the side or bottom of the nock. A screwdriver or small tool might be needed to open the compartment and access the batteries. Once you’ve located the batteries, carefully remove them according to the polarity markings printed on the compartment.
Properly storing the batteries in a secure location is always recommended. Always be mindful of battery polarity when reinstalling them. Incorrect polarity can damage the nock’s internal circuitry.
Power Switch Locations
Some models incorporate a power switch to enable or disable the LED lights. These switches are usually small, often a button or slider. The location of the power switch varies by model. The switch can be found on the side, top, or bottom of the nock, or sometimes even integrated within the battery compartment. Carefully examine the nock’s design to identify the power switch.
If no power switch is present, this indicates that the nock is either solar-powered or battery-powered with automatic activation.
Step-by-Step Power-Off Guide (Battery-Powered Example)
- Locate the battery compartment. This is usually a small, recessed area on the nock.
- Use a small tool, like a screwdriver or a similar object, to open the compartment.
- Identify the positive (+) and negative (-) terminals on the batteries.
- Carefully remove the batteries from the compartment, ensuring not to mix up the polarity.
- Close the battery compartment and ensure it is secure.
Step-by-Step Power-Off Guide (Solar-Powered Example)
- Solar-powered nocks do not require any action to turn off the lights. The lights will automatically shut off when the nock is not exposed to sufficient sunlight.
Troubleshooting Issues
Sometimes, even the best-designed lighted nocks can experience hiccups. Understanding common problems and their solutions is crucial for maintaining a smooth archery experience. This section will guide you through identifying and resolving various issues you might encounter.Troubleshooting lighted nocks isn’t rocket science, but it does require a methodical approach. By systematically checking potential causes, you can quickly pinpoint the source of the problem and get your nocks back in working order.
Common Lighted Nock Problems
Knowing the signs of trouble is the first step to effective troubleshooting. Common issues include the nock failing to illuminate, a flickering light, or an excessively dim glow. These problems can stem from various factors, including battery issues, internal component failures, or even environmental conditions. Identifying the root cause will lead to the most effective solution.
Battery-Related Problems
Battery life is crucial for lighted nocks. Weak or dead batteries are a frequent cause of illumination problems.
- Weak or Dead Batteries: A common problem is weak or dead batteries. This is often the first thing to check. Replace the batteries with fresh ones of the correct type and voltage. Using the wrong battery type or a battery nearing its end of life can cause a dim or intermittent light. Always refer to the manufacturer’s specifications for the recommended battery type and voltage.
Internal Component Malfunctions
In some cases, the issue might lie within the nock’s internal components. These issues are less common, but can occur.
- Faulty Circuitry: Sometimes, the circuitry inside the nock might malfunction. This could lead to no light at all, a flickering light, or a constantly dim light. If this is suspected, it’s recommended to contact the manufacturer for troubleshooting or repair guidance.
Environmental Factors
External factors can also play a role in lighted nock performance. Extreme temperatures or moisture can affect the battery’s performance and the internal components of the nock.
- Extreme Temperatures: Extremely high or low temperatures can affect battery life and internal component operation. Storing nocks in a controlled environment can prevent these issues. Avoid leaving nocks in direct sunlight or extreme cold.
- Moisture: Moisture can damage the internal components. Storing nocks in a dry environment is essential to maintain their performance.
Troubleshooting Table
This table summarizes common lighted nock issues and their corresponding solutions:
| Issue | Possible Causes | Solutions |
|---|---|---|
| No light | Dead/weak batteries, faulty circuitry | Replace batteries, contact manufacturer |
| Flickering light | Faulty circuitry, weak battery, loose connection | Replace batteries, check connections, contact manufacturer |
| Dim light | Weak battery, internal component malfunction | Replace batteries, contact manufacturer |
Troubleshooting Tips
Following these tips can help you resolve issues more effectively:
- Verify Battery Type: Ensure you use the correct battery type and voltage specified by the manufacturer.
- Inspect Connections: Double-check that all internal connections are secure and not corroded.
- Clean the Nock: Occasional cleaning of the nock with a soft cloth can remove dust and debris that might be affecting performance.
Safety Precautions: How To Turn Off Lighted Nocks
Handling lighted nocks safely is paramount. Neglecting proper procedures can lead to accidents, from minor burns to more serious injuries. This section Artikels crucial safety measures for responsible operation and maintenance of your lighted nocks. Understanding these precautions will ensure a safe and enjoyable shooting experience.Proper handling and careful attention to detail are essential for safe battery replacement and operation.
Ignoring these precautions can result in unexpected consequences. Knowing the potential hazards and taking preventative measures is crucial to maintaining a safe shooting environment.
Battery Replacement Safety
Replacing batteries in lighted nocks requires careful attention to avoid electrical hazards. Incorrect handling can lead to short circuits or electrical shocks. Always ensure the nock is powered off before attempting any battery replacement. Using the correct battery type and voltage is critical; mismatched batteries can damage the nock’s internal components. Always consult the manufacturer’s instructions for specific battery replacement procedures.
Preventing Accidents During Power-Off
Ensuring the lighted nock is completely powered off before handling is critical. A residual charge can cause minor burns or electrical shocks if not properly addressed. Carefully follow the power-off procedures Artikeld in the previous sections to avoid any potential hazards. Double-checking that the power switch is in the “off” position and the nock is completely unresponsive will ensure safe handling.
General Safety Considerations
Safe operation of lighted nocks depends on understanding and following these crucial precautions:
- Always disconnect the power source before performing any maintenance or cleaning procedures.
- Ensure the lighted nock is securely attached to the arrow before use.
- Keep lighted nocks out of reach of children and untrained individuals.
- Never attempt to disassemble or modify the nock without consulting the manufacturer’s instructions.
- Use only the recommended battery type and voltage specified by the manufacturer. Using incorrect batteries can damage the nock and pose a safety risk.
- Store lighted nocks in a cool, dry place to prevent damage and maintain optimal performance.
- If the lighted nock exhibits any unusual behavior or malfunctions, discontinue use immediately and contact the manufacturer for assistance.
- Inspect the nock for any signs of damage or wear before each use. Cracked housings or exposed wires are serious safety concerns.
Maintenance and Care
Keeping your lighted nocks in pristine condition is crucial for optimal performance and a longer lifespan. Proper maintenance ensures consistent illumination and reliable operation, preventing frustrating malfunctions during critical moments. This section details the essential steps for cleaning, inspecting, and maintaining your lighted nocks, enabling you to enjoy years of accurate and dependable performance.Maintaining lighted nocks involves regular cleaning and inspection, much like any precision tool.
Preventive measures are key to extending their service life, while prompt attention to any signs of damage can prevent costly replacements. By understanding these maintenance practices, you can ensure your lighted nocks remain a reliable part of your archery setup.
Cleaning Procedures
Regular cleaning is vital to maintain the illumination and prevent dust and debris from accumulating, potentially impacting the light output or causing malfunctions. Use a soft, lint-free cloth and a compressed air canister. Avoid using harsh chemicals or abrasive materials. Remove any visible dirt or debris, paying particular attention to the lens and light source. Gently wipe the surface with the cloth, ensuring the light path remains unobstructed.
Preventive Measures for Longevity
Implementing preventive measures significantly extends the life of your lighted nocks. Store the nocks in a cool, dry environment away from direct sunlight or extreme temperatures. Avoid exposing them to moisture or humidity, as this can lead to corrosion and damage to internal components. Periodically check for any signs of damage or wear, especially after use.
Inspection for Damage
Regular inspection for signs of damage is paramount. Visually inspect the nock for any cracks, scratches, or warping. Check the lens for any significant scratches or clouding that could affect light transmission. Examine the light source for any signs of discoloration, damage, or malfunction. If any damage is detected, take immediate action to prevent further deterioration.
Replacing Worn or Damaged Components
Replacing worn or damaged components is essential to maintain optimal performance. If you notice any degradation in light output, inconsistent illumination, or any signs of internal damage, consider replacing the light source or the entire lighted nock. Replacing parts with authentic components ensures the same level of performance and reliability as the original equipment. Consult your manufacturer’s instructions for guidance on proper replacement procedures.
Comparison with Traditional Nocks
Stepping into the realm of archery, you’ll encounter a fascinating choice: traditional nocks versus the illuminated advancements of lighted nocks. Understanding the nuances between these two types allows archers to make informed decisions based on their specific needs and shooting conditions.Traditional nocks, the tried-and-true stalwarts of archery, serve their purpose effectively, but modern technology brings a fresh perspective. Lighted nocks, with their illuminating capabilities, offer a significant edge, especially in situations where visibility is a challenge.
Traditional Nocks: A Timeless Design
Traditional nocks are typically made from materials like plastic or wood. Their simple design focuses on functionality: securely gripping the arrow and allowing smooth passage through the string.
- Pros: Cost-effective and readily available, traditional nocks are a budget-friendly option for archers. Their straightforward design ensures a reliable and consistent arrow flight.
- Cons: In low-light conditions, the lack of illumination can hinder visibility, potentially leading to mishaps during the draw or release.
Lighted Nocks: Enhanced Visibility in Challenging Conditions
Lighted nocks integrate an embedded light source, transforming the shooting experience in low-light environments.
- Pros: The primary advantage is enhanced visibility, crucial for archers in twilight, dawn, or heavily shadowed areas. This improved visibility translates into more precise aiming and a greater chance of success.
- Cons: Lighted nocks come with a higher price tag compared to traditional nocks. They require battery maintenance, which is an extra consideration for archers.
Advantages of Lighted Nocks in Low-Light Conditions
Imagine a crisp autumn morning, the sun barely peeking over the horizon. Traditional nocks would struggle to provide the necessary visibility, potentially causing delays and mistakes. However, lighted nocks would illuminate the arrow, allowing the archer to quickly and accurately draw and release the arrow.
- Improved Accuracy: The enhanced visibility allows for pinpoint accuracy, especially in low-light scenarios, crucial for target practice, hunting, or competing in events under less-than-ideal conditions.
- Increased Confidence: Knowing that the arrow is clearly visible, regardless of the light conditions, instills greater confidence in the archer, reducing hesitation and improving performance.
Scenarios Where Lighted Nocks Excel
Numerous scenarios benefit from the advantages of lighted nocks. Archery competitions held in dimly lit venues or outdoor hunts during twilight or early morning hours become significantly more manageable.
- Outdoor Hunting at Dawn/Dusk: The soft light of dawn and dusk often presents a challenge for archers. Lighted nocks provide the crucial visibility needed to accurately aim and shoot without hesitation.
- Indoor Archery Competitions: Archery ranges often have limited lighting. Lighted nocks ensure the archer can clearly see the arrow, contributing to improved precision and a more enjoyable experience.
Illustrations and Visual Aids
Unlocking the mysteries of lighted nocks involves a visual journey. Understanding their intricate designs and functionalities is crucial for safe and effective use. Visual aids, from detailed model descriptions to diagrams of battery compartments and power switch layouts, will equip you with the knowledge needed to handle these innovative accessories with confidence.
Lighted Nock Models
Various lighted nock models are available, each with its own unique design. Consider the differences in shape and size when choosing a model to complement your archery equipment. A compact, streamlined nock might suit a lightweight bow, while a more robust model could be better suited for a heavier compound bow. The aesthetic appeal and integration with your bow’s design are equally important.
Battery Types and Placement
Understanding battery types and their placement is essential for proper operation. Different lighted nocks may use various battery sizes, such as CR2032 or LR44. Illustrations depicting these different batteries, along with their appropriate orientation within the nock, are vital. Accurate placement ensures optimal light output and prevents short circuits.
Lighted Nock System Structure
The lighted nock system incorporates several components that work in harmony to produce the desired illumination. A diagram illustrating the LED light source, the circuit board, and the battery compartment provides a clear picture of the inner workings. Understanding the path of the electrical current is crucial for troubleshooting potential issues.
Power Switch Layouts (If Applicable)
Some lighted nock models feature a power switch for controlling the illumination. Illustrations showcasing the location and design of the switch for different models are essential. These diagrams highlight the position of the switch in relation to other components, facilitating easy on/off operation. Examples of various switch designs, such as a small button or a sliding lever, are necessary for user comprehension.
| Model | Battery Type | Switch Location | LED Configuration |
|---|---|---|---|
| Model A | CR2032 | Small button on the side | Single, bright LED |
| Model B | LR44 | Sliding lever under the nock | Dual LED, adjustable brightness |
| Model C | CR2025 | No switch, constant illumination | Diffuse, soft LED ring |
Final Wrap-Up
So, there you have it! Turning off your lighted nocks is a breeze once you understand the basics. From identifying your specific model to troubleshooting potential issues, this guide has you covered. Remember safety precautions, and you’ll be rocking those lit-up nocks in no time. Happy shooting!
Detailed FAQs
Q: What if my lighted nock isn’t turning off?
A: First, double-check the battery compartment. If the batteries are dead or loose, replace them. If the power switch is present, make sure it’s properly engaged. If the problem persists, consult the manufacturer’s instructions or contact customer support.
Q: How do I replace the batteries in my lighted nocks?
A: Refer to the specific model’s instructions. Look for a diagram or a detailed description that will show you how to remove the old batteries and install the new ones.
Q: My lighted nock is flickering. What’s wrong?
A: A flickering light often indicates a loose connection or a low battery. Try replacing the batteries or re-inserting them securely in the battery compartment. If the problem continues, there might be an issue with the nock itself.
Q: What are some safety tips for handling lighted nocks?
A: Always handle batteries with care, and be sure to keep them away from children. Make sure you have a sturdy grip on the nocks when working on them, especially when replacing batteries. Avoid short-circuiting the nocks, and always disconnect the power source before performing any maintenance.
