Sam 2017009911 how to replace filter? Gila, nih! Replacing the filter is crucial for keeping your SAM 2017009911 running smoothly. Ignoring it can lead to major problems, like overheating or worse. This guide breaks down the whole process, from prepping the tools to checking everything’s working after the swap. Let’s get this filter replacement done right, so you can keep your SAM 2017009911 in tip-top shape!
This guide provides a step-by-step walkthrough of replacing the filter in your SAM 2017009911 unit. We’ll cover everything from the essential tools and materials to the safety precautions you need to take. Get ready to dive into the world of filter replacement!
Introduction to Filter Replacement in SAM 2017009911
Regular filter replacement in the SAM 2017009911 unit is crucial for maintaining optimal performance and preventing potential system failures. A compromised or clogged filter can impede airflow, leading to decreased efficiency and potentially damaging internal components. This document Artikels the importance of filter replacement, its potential consequences, and a procedure for proper replacement.The SAM 2017009911, like many similar systems, relies on a clean filter for effective operation.
A dirty filter restricts airflow, increasing energy consumption and potentially shortening the unit’s lifespan. Failure to replace the filter regularly can result in substantial operational costs, system downtime, and reduced overall system reliability.
Importance of Filter Replacement
Properly functioning filters are essential for maintaining optimal system performance. A clean filter allows for efficient airflow, ensuring the unit operates at its designed capacity and reduces strain on internal components. This leads to lower energy consumption and extended system life.
Potential Consequences of Neglecting Filter Replacement
Neglecting regular filter replacement can lead to a cascade of negative consequences. Reduced airflow can result in overheating of internal components, causing malfunctions, and potentially triggering safety mechanisms to shut down the system. This downtime translates into increased operational costs and loss of productivity. Accumulated dust and debris can also clog the system’s ventilation pathways, impacting the overall system efficiency and increasing maintenance requirements.
Benefits of a Correctly Functioning Filter, Sam 2017009911 how to replace filter
A correctly functioning filter ensures several key advantages. Optimal airflow leads to enhanced system performance and reduced energy consumption. The unit operates at peak efficiency, leading to decreased operational costs and minimal wear and tear on internal components. This, in turn, prolongs the unit’s lifespan, reducing the frequency of costly repairs and replacements.
Steps Involved in the Filter Replacement Process
The filter replacement process in the SAM 2017009911 typically involves the following steps:
- Turn off the unit and disconnect it from the power source.
- Carefully access the filter housing. Consult the unit’s maintenance manual for specific instructions and safety precautions.
- Remove the old filter, ensuring no debris is introduced into the system.
- Inspect the filter housing for any damage. Replace the housing if necessary.
- Install the new filter, ensuring it is properly seated and aligned.
- Reconnect the unit to the power source and verify proper operation.
These steps are crucial to prevent potential damage and ensure a smooth replacement.
Filter Type Comparison
Different filter types have varying characteristics that affect their suitability for the SAM 2017009911.
| Filter Type | Pros | Cons |
|---|---|---|
| HEPA (High-Efficiency Particulate Air) | Excellent filtration of fine particles, reducing allergens and pollutants. | Higher initial cost and potential for increased resistance to airflow, possibly impacting the system’s efficiency. |
| Electrostatic Pre-filter | Initial cost-effectiveness, good for coarse particles. | Lower filtration efficiency compared to HEPA, and may require more frequent replacement. |
| Standard Cellulose | Affordable, good for basic filtration. | Less effective at removing fine particles, may require more frequent replacement compared to HEPA. |
The optimal filter type depends on the specific needs and operational conditions of the SAM 2017009911 unit. Consider factors like the environment the unit operates in and the desired level of filtration when selecting the appropriate filter.
Tools and Materials Needed
Proper filter replacement necessitates meticulous preparation and the use of appropriate tools and materials. Careless handling or the use of inadequate tools can lead to damage to the system and compromise the efficiency of the replacement process. Furthermore, safety precautions are paramount during this procedure to prevent potential injuries.
Essential Tools
The selection of tools for filter replacement is critical, ensuring both efficiency and safety. Incorrect tools can damage the filter housing, the filter itself, or surrounding components. Precise measurements and the correct tool application are essential for a successful replacement.
- Screwdrivers: Various types of screwdrivers, including Phillips and flathead, are essential for removing and reinstalling fasteners. The appropriate size screwdriver is critical to avoid stripping the screw heads or damaging the surrounding components.
- Wrench Set: A comprehensive wrench set, including adjustable wrenches and open-end wrenches, is necessary for loosening and tightening various connections and fittings. Proper sizing is crucial to avoid over-tightening or cross-threading.
- Pliers: Needle-nose pliers, slip-joint pliers, and possibly channel-lock pliers are required for manipulating small parts, wires, or components during the replacement process. The correct type of pliers prevents damage to delicate parts and ensures efficient handling.
- Torque Wrench: Essential for ensuring fasteners are tightened to the correct torque specifications. Using a torque wrench minimizes the risk of over-tightening, which can damage components or lead to premature failure.
- Filter Housing Opening Tool: A specialized tool designed to open the filter housing. This tool often features specific designs to ensure the housing is opened correctly without causing damage. Its absence could necessitate significant time and effort to open the housing manually.
Specific Tool Sizes and Types
The correct size of tools is vital to avoid damage during the replacement process. For example, an incorrectly sized wrench can strip a nut or bolt. Precise tool selection based on the specific model and design of the filter system is crucial.
| Tool | Type | Size(s) | Function |
|---|---|---|---|
| Screwdriver | Phillips, Flathead | Various | Removing and installing fasteners |
| Wrench | Adjustable, Open-End | Various | Loosening and tightening connections |
| Pliers | Needle-nose, Slip-Joint, Channel-Lock | Various | Handling small parts and wires |
| Torque Wrench | Specific to system | Specified by manufacturer | Ensuring correct torque values for fasteners |
| Filter Housing Opening Tool | Specialized | Specific to model | Opening the filter housing without damage |
Necessary Materials
A comprehensive list of materials is necessary for a successful filter replacement. This includes not only the replacement filter but also any associated consumables. Using the correct filter type is essential for maintaining optimal performance and preventing system issues.
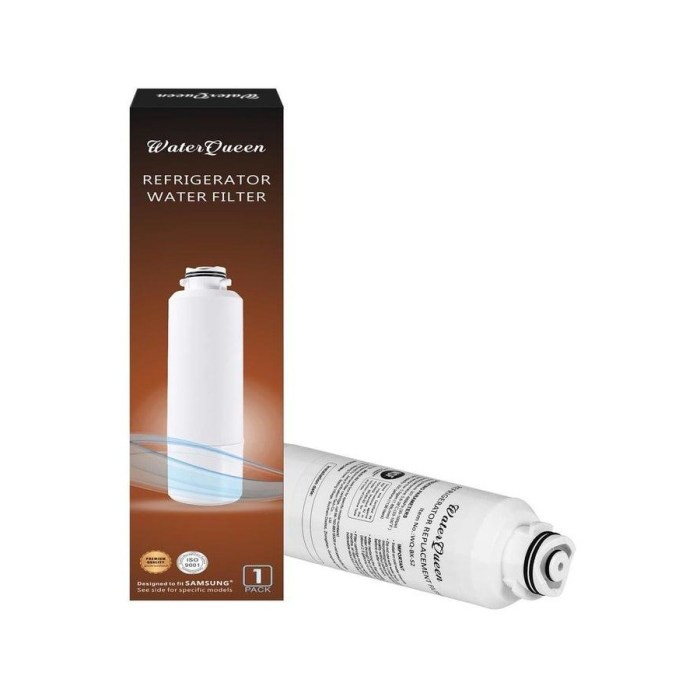
- Replacement Filter: The correct filter type, size, and specifications are paramount. Using an incorrect filter can lead to reduced efficiency, increased wear on other components, and potential system failure. Ensure the filter is compatible with the specific model of the system.
- Cleaning Materials: Solvent and cleaning cloths are needed for thorough cleaning of the filter housing before installation. This helps maintain the integrity of the system and prevents contamination.
- Lubricant: Lubricant is sometimes required for specific components. Improper lubrication can result in friction and wear. Following the manufacturer’s instructions for lubricant type and application is essential.
Safety Equipment
Appropriate safety equipment is essential for preventing injuries during the filter replacement process. Eye protection, gloves, and appropriate clothing are necessary to protect the technician from potential hazards.
Using safety glasses, gloves, and appropriate clothing is paramount for protecting personnel during the filter replacement procedure.
Safety Precautions
Properly replacing filters in SAM 2017009911 requires meticulous attention to safety protocols to prevent accidents and ensure the well-being of personnel. Neglecting safety precautions can lead to injuries ranging from minor cuts to severe incidents. Adhering to the Artikeld safety procedures is paramount to a successful and secure filter replacement process.Adherence to safety measures is critical during filter replacement.
Understanding potential hazards and implementing appropriate safety precautions minimizes risks and protects personnel from injuries. A comprehensive safety checklist and detailed explanation of hazards and mitigation strategies will ensure a secure work environment. Proper ventilation is essential for maintaining safe air quality during the procedure.
Potential Hazards
Several potential hazards can arise during filter replacement, including physical harm, exposure to harmful substances, and equipment malfunction. Understanding these potential hazards is the first step in implementing effective safety protocols. The risk of injury is directly correlated with the degree of awareness and adherence to safety procedures.
Safety Measures
Implementing appropriate safety measures is crucial to mitigating potential hazards. These measures range from personal protective equipment (PPE) to environmental controls, ensuring a safe working environment. The following checklist details necessary safety protocols to be strictly adhered to.
- Personal Protective Equipment (PPE): Wearing appropriate PPE is essential. This includes safety glasses or goggles, gloves (preferably chemical-resistant), and a dust mask or respirator, depending on the specific filter type and potential airborne contaminants. Proper selection of PPE is paramount for effective protection.
- Equipment Inspection: Thoroughly inspect all equipment before initiating the filter replacement process. Look for any signs of damage, wear, or malfunction. Damaged equipment can lead to unforeseen hazards during operation.
- Environmental Controls: Ensure proper ventilation in the work area to prevent the buildup of hazardous substances. Adequate ventilation, ideally with an exhaust system, is crucial to maintain safe air quality.
- Emergency Procedures: Establish clear emergency procedures in case of accidents or incidents. This includes knowing the location of emergency exits, first aid supplies, and emergency contact numbers.
Safety Checklist
This checklist Artikels the crucial safety protocols to be followed during the filter replacement procedure. Strict adherence to this checklist will minimize risks and ensure the safety of personnel.
- Confirm the power source is disconnected.
- Inspect the equipment for damage.
- Wear appropriate PPE (safety glasses, gloves, respirator).
- Ensure adequate ventilation.
- Isolate the area for maintenance.
- Follow the manufacturer’s instructions carefully.
- Dispose of old filters properly.
- Check for any leaks or spills.
- Report any safety concerns immediately.
- Conduct a post-maintenance check.
Hazard and Mitigation Table
The table below Artikels potential hazards and corresponding safety measures. Understanding these correlations is critical to preventing accidents and maintaining a safe work environment.
| Potential Hazard | Safety Measure |
|---|---|
| Exposure to dust or debris | Wear a dust mask or respirator. |
| Equipment malfunction | Inspect equipment before use. |
| Spills or leaks | Wear chemical-resistant gloves and eye protection. |
| Electrical shock | Disconnect power source before maintenance. |
| Entanglement | Ensure proper use of safety equipment. |
Importance of Ventilation
Proper ventilation is essential during the filter replacement process to maintain safe air quality. Adequate ventilation prevents the buildup of hazardous substances, ensuring personnel are not exposed to harmful contaminants. In cases where dust or debris are generated during filter replacement, a strong exhaust system is necessary. Failure to maintain proper ventilation can lead to respiratory problems or other health issues.
Disassembly Procedure
The disassembly procedure for accessing the filter in SAM 2017009911 requires careful attention to detail and adherence to established safety protocols. Improper handling can lead to damage to the unit and/or personal injury. This section Artikels the steps involved in safely and effectively disassembling the unit to replace the filter.
Detailed Steps for Disassembly
The following steps detail the process of disassembling the unit for filter replacement. Each step is crucial for maintaining the integrity of the system and ensuring safe access to the filter.
- Initial Preparation and Safety Check: Before commencing any disassembly, ensure the unit is powered off and completely disconnected from any electrical sources. Verify that the unit is securely grounded. This prevents electrical shocks and ensures a safe working environment. Record the current unit configuration, if possible, for reference during reassembly.
- Exterior Component Removal: Carefully remove any external components, such as covers, panels, or protective casings, following the manufacturer’s instructions. This step allows access to internal components and prevents accidental damage to the unit.
- Component Decoupling: Disconnect any electrical connections, tubing, or other components that are connected to the unit. Note the position and configuration of these components for proper reassembly. Document any relevant connections or configurations.
- Filter Housing Access: Carefully remove any components that are in the way of accessing the filter housing. This may involve removing brackets, clips, or other fasteners. Proper identification of the fasteners is essential to prevent misplacement during reassembly. Ensure all fasteners are marked or documented for proper placement during reassembly.
- Filter Removal: Once the filter housing is accessible, carefully remove the filter. Take note of the filter’s orientation and any securing mechanisms that may be present. If the filter has any markings or labels, record these for proper placement during reassembly. Record the condition of the filter and note any unusual observations.
Disassembly Procedure Summary
The table below summarizes the disassembly procedure, outlining each step and the necessary actions.
| Step Number | Description | Visual Aid (Description) |
|---|---|---|
| 1 | Initial Preparation and Safety Check | Ensure power is off, unit is grounded, and any relevant configurations are recorded. |
| 2 | Exterior Component Removal | Carefully remove exterior components like covers or panels. Visual inspection to ensure the integrity of the components and the absence of any damage. |
| 3 | Component Decoupling | Disconnect all electrical connections, tubing, or components. Carefully document the positions and configurations for reassembly. |
| 4 | Filter Housing Access | Remove components obstructing the filter housing. Mark and record the position of all removed components. |
| 5 | Filter Removal | Remove the filter carefully, noting its orientation and any securing mechanisms. Document any markings or labels on the filter. |
Filter Replacement
The filter replacement process in SAM 2017009911 is critical for maintaining optimal system performance and preventing potential equipment damage. Proper execution ensures the system’s longevity and adherence to safety protocols. Carefully following the Artikeld steps minimizes risks and guarantees a successful outcome.
Removing the Old Filter
This section details the procedure for safely and effectively removing the old filter. Proper removal prevents damage to the system and ensures a smooth transition to the new filter.
- Preparation: Ensure the system is powered down and the area is clear of obstructions. This prevents accidents and allows for a safe work environment.
- Access: Locate the filter housing. Access to the housing will vary depending on the specific system design. Note any specific tools or procedures for opening the housing.
- Disengagement: Carefully disconnect any hoses or connections attached to the filter housing. This step prevents accidental spillage or damage to the system.
- Removal: Using appropriate tools, remove the old filter. Carefully follow any specific instructions provided in the system’s manual. Note the orientation of the filter for proper installation of the new filter.
- Disposal: Dispose of the old filter according to local environmental regulations. Ensure proper waste management procedures are followed.
Installing the New Filter
This section details the procedure for correctly installing the new filter. Careful installation is critical for a proper seal and optimal system performance.
- Preparation: Ensure the new filter is the correct type and size for the system. Verify compatibility to avoid any issues during installation.
- Alignment: Align the new filter with the housing, ensuring correct orientation. This is crucial for proper functionality and to avoid potential leaks.
- Connection: Carefully reconnect all hoses or connections to the filter housing. Ensure secure connections to prevent leaks and ensure a tight seal.
- Securement: Secure the filter in its housing using the appropriate fasteners or clamps. This step ensures the filter is firmly in place and will not move during operation.
- Verification: Visually inspect the filter and connections for any leaks or damage. Ensure a complete and secure seal around the filter to prevent air leaks and maintain system pressure.
Critical Points for a Proper Seal
Ensuring a proper seal around the filter is paramount for preventing air leaks and maintaining system pressure.
- Filter Housing: The filter housing should be clean and free of debris. Any debris can compromise the seal and lead to leaks.
- Filter O-rings/Gaskets: Inspect the condition of any O-rings or gaskets. Replace them if they show signs of damage or wear. A damaged O-ring can cause leaks.
- Tightening: Ensure all fasteners and clamps are properly tightened to the manufacturer’s specifications. Insufficient tightening can lead to leaks, while excessive tightening may damage the system.
Troubleshooting
This section Artikels potential issues during filter replacement and the steps to resolve them.
- Leakage: If leakage is detected, check for loose connections, damaged O-rings, or improper filter alignment. Tighten connections, replace O-rings, or realign the filter as necessary.
- Filter Damage: If the new filter shows signs of damage, discard it and install a new, undamaged filter. Damaged filters can compromise the system’s performance and safety.
- System Malfunction: If the system shows signs of malfunction after the filter replacement, consult the user manual or contact a qualified technician. A malfunction may indicate an issue beyond the filter replacement process.
Reassembly Procedure
The reassembly procedure for SAM 2017009911 involves carefully placing each component back into its original position, ensuring proper alignment and secure connections. Adherence to the prescribed sequence is crucial to prevent damage and ensure optimal functionality of the filter unit. Proper torque application for fasteners is vital to avoid loosening or over-tightening.Thorough inspection of all components during reassembly is essential to detect any damage or misalignment.
This proactive approach minimizes the risk of future malfunctions and extends the operational lifespan of the filter unit. Following the detailed instructions in the subsequent sections is paramount to a successful reassembly.
Component Placement and Alignment
Careful placement of components is essential to prevent damage and ensure proper functionality. Misalignment can lead to leaks, reduced efficiency, or complete failure. Components must be meticulously aligned with their designated mounting points. Using a visual guide, like a schematic diagram, aids in ensuring accurate placement.
Fastener Tightening Sequence
Correct tightening sequence is critical for achieving the required torque and avoiding potential damage. Over-tightening can strain internal components, while under-tightening can lead to loose connections and leaks. A methodical approach, following a specific torque sequence, is crucial for optimal performance. Using a torque wrench is recommended to ensure consistent torque application.
Critical Steps for Proper Functioning
Several critical steps need meticulous attention to guarantee optimal performance. These steps include checking the seals for any damage or misalignment before installation. Ensuring proper gasket placement and alignment is vital. Thoroughly inspecting the filter housing for any damage or debris before proceeding with the reassembly process is also critical.
Detailed Reassembly Steps
- Position the filter housing on a stable surface.
- Carefully align the filter element with the housing.
- Install the gasket(s), ensuring proper seating and alignment.
- Secure the filter housing using the designated fasteners.
- Apply the appropriate torque to each fastener, using a torque wrench.
- Check all connections for tightness and integrity.
- Inspect the filter unit for any signs of damage or misalignment.
- Test the filter unit for leaks, ensuring a proper seal.
- Verify the proper functioning of all components.
Comparison of Reassembly Methods
Different reassembly methods can vary in terms of efficiency and safety. For instance, a method involving a step-by-step procedure, as described in this document, offers a clear path and minimizes the risk of errors. A more complex approach, potentially involving specialized tools, might offer faster reassembly times but could increase the risk of mishandling or component damage. The chosen method should consider the complexity of the unit and the expertise of the personnel involved.
Testing and Verification
Post-replacement testing of the filter unit in SAM 2017009911 is crucial for ensuring optimal performance and preventing potential issues. Proper functionality depends on the accurate installation and the integrity of the new filter. This section details the testing procedure, focusing on critical points to check for proper operation.Thorough verification after filter replacement is essential to guarantee the unit’s continued reliable operation.
Identifying and rectifying any issues early in the process minimizes potential downtime and prevents costly repairs down the line. The checklist provided ensures a comprehensive assessment of the unit’s functionality after the filter replacement procedure.
Functional Checks Post-Reassembly
The following steps detail the verification procedure to ensure the filter replacement was successful. A systematic approach to testing guarantees the unit operates as expected.
- Power-On Check: Initial power-on is a fundamental check. Verify that the unit powers on and displays the expected startup messages or indicators. This initial check confirms the unit’s basic functionality after reassembly. Failure to power on might indicate a connection issue or a more significant electrical problem within the unit.
- Pressure Monitoring: Accurate pressure readings are vital for optimal performance. Use a calibrated pressure gauge to verify the unit’s output pressure. The pressure should fall within the established operating parameters. Significant deviations from the expected pressure could signal issues with the filter or other components within the system.
- Flow Rate Assessment: The flow rate of the unit is another critical aspect to verify. Measure the flow rate at the unit’s output to ensure it meets the required specifications. Deviations from the expected flow rate might indicate issues with the filter, pump performance, or other connected components.
- Leak Detection: Visually inspect all connections and seals for any signs of leaks. This visual inspection should include all connections, both internal and external to the unit. Leaks could compromise the integrity of the system and necessitate further investigation and repair.
Verification Checklist
A structured checklist facilitates a thorough assessment of the unit’s performance after the filter replacement. This checklist ensures all critical aspects are considered.
- Power-on sequence confirmed.
- Pressure readings within acceptable parameters.
- Flow rate matches specifications.
- No leaks detected.
- All indicators function correctly.
- Unit operates smoothly without unusual noises or vibrations.
- System temperature within operating range.
- Confirm proper operation of any safety features.
Importance of Thorough Testing
Thorough testing is critical for ensuring the replacement process was successful and that the unit functions as intended. This includes confirming that the filter is correctly installed, the unit powers on, and that all critical parameters are within acceptable limits. Failure to conduct a comprehensive test could lead to unexpected issues and potential safety hazards.
Troubleshooting and Maintenance
Proper troubleshooting and maintenance of the filter replacement process in SAM 2017009911 are crucial for optimal system performance and longevity. Addressing potential issues promptly can prevent costly repairs and downtime. A proactive approach to maintenance minimizes the risk of filter-related complications and ensures the system operates within its intended parameters.Effective maintenance strategies encompass both the identification of common problems and the implementation of appropriate solutions.
This section details troubleshooting procedures, emphasizing the importance of regular maintenance to maintain the integrity of the system.
Common Problems and Solutions
A systematic approach to troubleshooting common problems arising during or after filter replacement is essential. Properly identifying the issue and implementing the correct solution are vital to restoring system functionality.
- Leaking Filter Housing: A leaking filter housing indicates a potential seal failure or improper reassembly. Solutions include checking for cracks or damage to the housing, inspecting the gasket for proper seating, and ensuring all O-rings and seals are correctly installed and undamaged. Carefully reassemble the filter housing, ensuring a tight seal around the filter. If the issue persists, consult the manufacturer’s documentation for specific repair procedures.
- Reduced Airflow: A decrease in airflow suggests a clogged filter or a problem with the airflow path. Solutions include inspecting the filter for excessive debris accumulation and replacing it if necessary. Ensure that the airflow path is unobstructed, and there are no blockages in the ductwork or associated components. Check for obstructions around the filter housing or air intake/outlet points.
If airflow remains low, consult the manufacturer’s specifications for optimal air pressure and airflow values.
- Unusual Noises: Unanticipated noises during operation may indicate problems with the filter mechanism or other components. Solutions include carefully inspecting the filter assembly for any loose parts or unusual vibrations. Verify that the filter is securely seated and not causing any rubbing against other components. Check for any rattling or grinding sounds from moving parts. If noises persist, isolate the source of the sound by systematically checking each component involved in the airflow process.
Importance of Regular Maintenance
Proactive maintenance is essential for preventing filter-related issues and extending the life of the SAM 2017009911 system.Regular maintenance, including periodic filter inspections and replacements, significantly reduces the risk of system failure. It helps maintain optimal airflow, prevents premature wear and tear on components, and minimizes the occurrence of unexpected breakdowns. This translates into reduced downtime and improved operational efficiency.
| Problem | Solution |
|---|---|
| Leaking filter housing | Check for cracks, inspect gasket, ensure proper seal, reassemble carefully. |
| Reduced airflow | Inspect filter for debris, ensure unobstructed airflow path, check for blockages. |
| Unusual noises | Inspect filter assembly for loose parts, verify filter is securely seated, check for rubbing, isolate the sound source. |
Last Point: Sam 2017009911 How To Replace Filter
So, there you have it—a complete guide on replacing the filter in your SAM 2017009911. By following these steps carefully, you can ensure a smooth replacement process and maintain optimal performance. Remember safety first! Now you’re all set to keep your SAM 2017009911 running like a charm. Good luck, and happy filtering!
FAQ Compilation
What kind of filter does the SAM 2017009911 use?
The specific filter type is not mentioned in the provided Artikel. You’ll need to consult your unit’s manual or a parts diagram to find the correct filter.
How often should I replace the filter?
The frequency of filter replacement depends on the usage and operating conditions of your unit. Refer to the user manual for specific guidelines.
What are the potential risks if I don’t replace the filter?
Failure to replace the filter regularly can lead to decreased efficiency, overheating, and potential damage to the unit’s internal components.
What are some common tools I’ll need for this replacement?
Common tools needed include screwdrivers, wrenches, and possibly pliers, depending on the specific design of your SAM 2017009911 unit. Check your user manual for the precise tools required.
